

One reason why I really enjoy programming using the SwiftUI framework is that it makes so easy to animate view changes. In particular, the introduction of the matchedGeometryEffect modifier, introduced in iOS 14, further simplifies the implementation of view animations. With matchedGeometryEffect, all you need is describe the appearance of two views. The modifier will then compute the difference between those two views and automatically animates the size/position changes.
We have written a detailed tutorial on matchedGeometryEffect. I highly recommend you to check it out if this is the very first time you come across this modifier. In this tutorial, we will make use of matchedGeometryEffect to develop an animated navigation menu like the one shown below.

Editor’s Note: To dive deeper into SwiftUI animation and learn more about the SwiftUI framework, you can check out the book here.
Creating the Navigation Menu
Before we create the animated menu, let’s start by creating the static version. As an example, the navigation menu only displays three menu items.
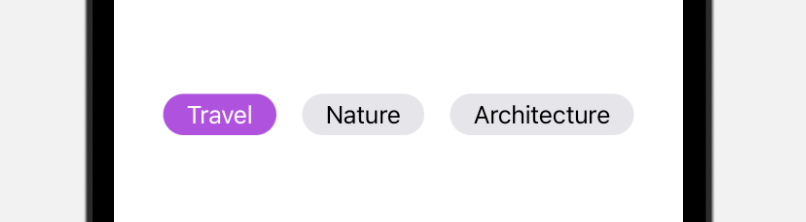
To layout three text views horizontally with equal spacing, we use the HStack view and Spacer to arrange the views. Here is the code sample:
struct NavigationMenu: View {

    let menuItems = [ "Travel", "Nature", "Architecture" ]

    var body: some View {
        HStack {
            Spacer()

            Text(menuItems[0])
                .padding(.horizontal)
                .padding(.vertical, 4)
                .background(Capsule().foregroundColor(Color.purple))
                .foregroundColor(.white)

            Spacer()

            Text(menuItems[1])
                .padding(.horizontal)
                .padding(.vertical, 4)
                .background(Capsule().foregroundColor(Color(uiColor: .systemGray5)))

            Spacer()

            Text(menuItems[2])
                .padding(.horizontal)
                .padding(.vertical, 4)
                .background(Capsule().foregroundColor(Color(uiColor: .systemGray5)))

            Spacer()
        }
        .frame(minWidth: 0, maxWidth: .infinity)
        .padding()
    }
}
As you can see from the code above, it contains quite a lot of duplications. It can be further simplified with ForEach:
struct NavigationMenu: View {
    @State var selectedIndex = 0
    var menuItems = [ "Travel", "Nature", "Architecture" ]

    var body: some View {
        HStack {
            Spacer()

            ForEach(menuItems.indices) { index in

                if index == selectedIndex {
                    Text(menuItems[index])
                        .padding(.horizontal)
                        .padding(.vertical, 4)
                        .background(Capsule().foregroundColor(Color.purple))
                        .foregroundColor(.white)
                } else {
                    Text(menuItems[index])
                        .padding(.horizontal)
                        .padding(.vertical, 4)
                        .background(Capsule().foregroundColor(Color(uiColor: .systemGray5)))
                        .onTapGesture {
                            selectedIndex = index
                        }
                }

                Spacer()
            }

        }
        .frame(minWidth: 0, maxWidth: .infinity)
        .padding()
    }
}
We added a state variable named selectedIndex to keep track of the selected menu item. When the menu item is selected, we highlight it in purple. Otherwise, its background color is set to light gray.
To detect users’ touch, we attached the .onTapGesture modifier to the text view. When it’s tapped, we update the value of selectedIndex to highlight the selected text view.
Animating the Navigation Menu
Now that we’ve implemented the navigation menu, however, it misses the required animation. To animating the view change whenever a menu item is selected, all we need to do is create a namespace variable and attach the matchedGeometryEffect modifier to the text view in purple:
struct NavigationMenu: View {
    @Namespace private var menuItemTransition

    .
    .
    .

    var body: some View {
        HStack {
            Spacer()

            ForEach(menuItems.indices) { index in

                if index == selectedIndex {
                    Text(menuItems[index])
                        .padding(.horizontal)
                        .padding(.vertical, 4)
                        .background(Capsule().foregroundColor(Color.purple))
                        .foregroundColor(.white)
                        .matchedGeometryEffect(id: "menuItem", in: menuItemTransition)
                } else {
                    .
                    .
                    .
                }

                Spacer()
            }

        }
        .frame(minWidth: 0, maxWidth: .infinity)
        .padding()
        .animation(.easeInOut, value: selectedIndex)
    }
}
The ID and namespace are used for identifying which views are part of the same transition. We also need to attach the .animation modifier to the HStack view to enable the view animation. Note that this project is built using Xcode 13. The animation modifier is updated in the new version of iOS. You have to provide the value to monitor for changes. Here, it’s the selectedIndex.
Once you made the changes, you can test the NavigationMenu view in a simulator. Tap a menu item and you will see a nice animation when the item is transited from one state to another.

Using the Animated Navigation Menu View
To apply this animated navigation menu to your project, you can modify the NavigationMenu view to accept a binding to the selected index:
@Binding var selectedIndex: IntFor example, you have created a page-based tab view like this:
struct ContentView: View {
    @State var selectedTabIndex = 0
    let menuItems = [ "Travel", "Film", "Food & Drink" ]

    var body: some View {
        TabView(selection: $selectedTabIndex) {

            ForEach(menuItems.indices) { index in
                Text(menuItems[index])
                    .frame(minWidth: 0, maxWidth: .infinity, minHeight: 0, maxHeight: .infinity)
                    .background(Color.green)
                    .foregroundColor(.white)
                    .font(.system(size: 50, weight: .heavy, design: .rounded))
                    .tag(index)
            }
        }
        .tabViewStyle(.page(indexDisplayMode: .never))
        .ignoresSafeArea()
        .overlay(alignment: .bottom) {
            NavigationMenu(selectedIndex: $selectedTabIndex, menuItems: menuItems)
        }
    }
}
You can add the NavigationMenu view as an overlay and use your own menu items.


