iOS 9 is out and it’s already become a massive hit. Only mere weeks after its launch, the new system has been installed on over half of all iOS devices. That makes it the fastest adoption rate for any version of iOS ever – surpassing iOS 7’s record in 2013.
Following up on my recent post on Search APIs and SFSafariViewController in iOS 9, today we will be working with App Thinning, another exciting feature in iOS 9. In this tutorial, we’ll explore app thinning, why it is important, and how to take advantage of this exciting new feature in your own apps.
Announced at WWDC, App Thinning is an exciting new technology that will change the entire download process. With users saying big bucks for cellular data contracts, limited storage on iOS devices, and faster downloads, App Thinning is a crucial new feature to learn. Further, because app thinning has been delayed (more on this later), it’s never been a better time to learn about this exciting new technology.
Prerequisites
For this tutorial, I assume you have a working knowledge of Xcode and how to navigate the IDE. If this seems foreign to you, or you are not sure what an IDE is, you might want to take a look at our excellent free course.
I also assume you understand how to distribute apps to the App Store as well as use TestFlight, Apple’s app beta testing service. I won’t go into specifics on how to work with TestFlight, so if you are unfamiliar with TestFlight or the app distribution process in general, I would recommend first taking a look at this AppCoda article. Other than that, there are no major prerequisites – just the willingness to learn!
With that in mind, let’s get started.
Introducing App Thinning
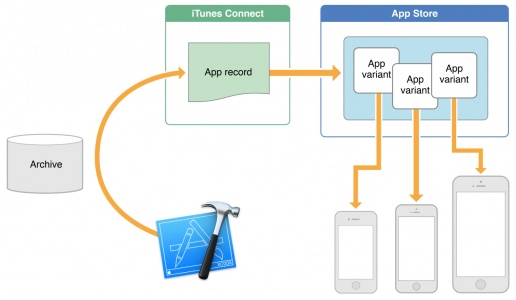
With so many iOS devices on the market currently and a plethora of screen sizes and resolutions available, making an app look great across multiple screens requires optimizing assets (i.e. pngs, jpegs, and vector PDFs) for each screen size. Worse, this results in a massive download for users (previous version of iOS forced users to download the entire app file, including the images they would never use such as iPad images even if they’re using an iPhone). 16 Gigabyte iPhones still a very real reality (and likely not going away any time soon), so making your app lean and a quick-to-download ensures that users have enough space as well as optimizes the entire experience. App thinning makes this possible.
Today, apps are made of much more than just code and images. Modern apps include not just executable code, but 32, 64 bit versions (optimized for various architectures such as arm64, arm7s, and arm7), 3D graphics technologies (i.e. OpenGL, Metal, etc.), audio, among other files. In short, the caliber of apps today are incredibly complex. That’s where app thinning comes to the rescue!
App thinning automatically detects the user’s device type (i.e. model name) and only downloads relevant content for the specific device. In other words, if you’re using an iPad Mini 1 (which does not have a retina display but rather a 1x resolution), then only your 1x files (more on this in a moment) will be downloaded. The assets for more powerful and sharper iPads (such as the iPad Mini 3 or 4) will not be available for download). Because the user needs only download the content that targets his/her specific device, this speeds up the download process and saves space on the device.
While this might sound complex at first, we will dive into the specifics. Luckily, Xcode and the App Store handle the majority of this work, making our lives as developers easier. As such, there won’t be much code in this tutorial but rather a deep focus on understanding the app thinning process and the the technologies which make it a reality.
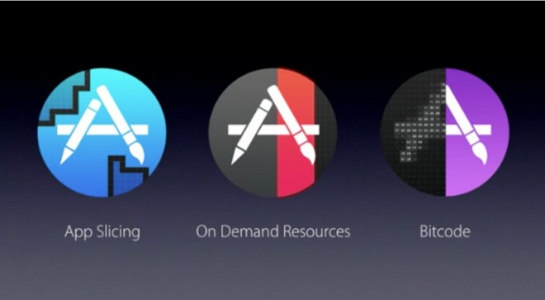
There are three main aspects of App Thinning: App Slicing, Bitcode, and On Demand Resources. In this tutorial, we’ll explore each one of these.
App Slicing
The first aspect of App Thinning we will discuss is slicing. According to Apple,
“Slicing is the process of creating and delivering variants of the app bundle for different target devices.
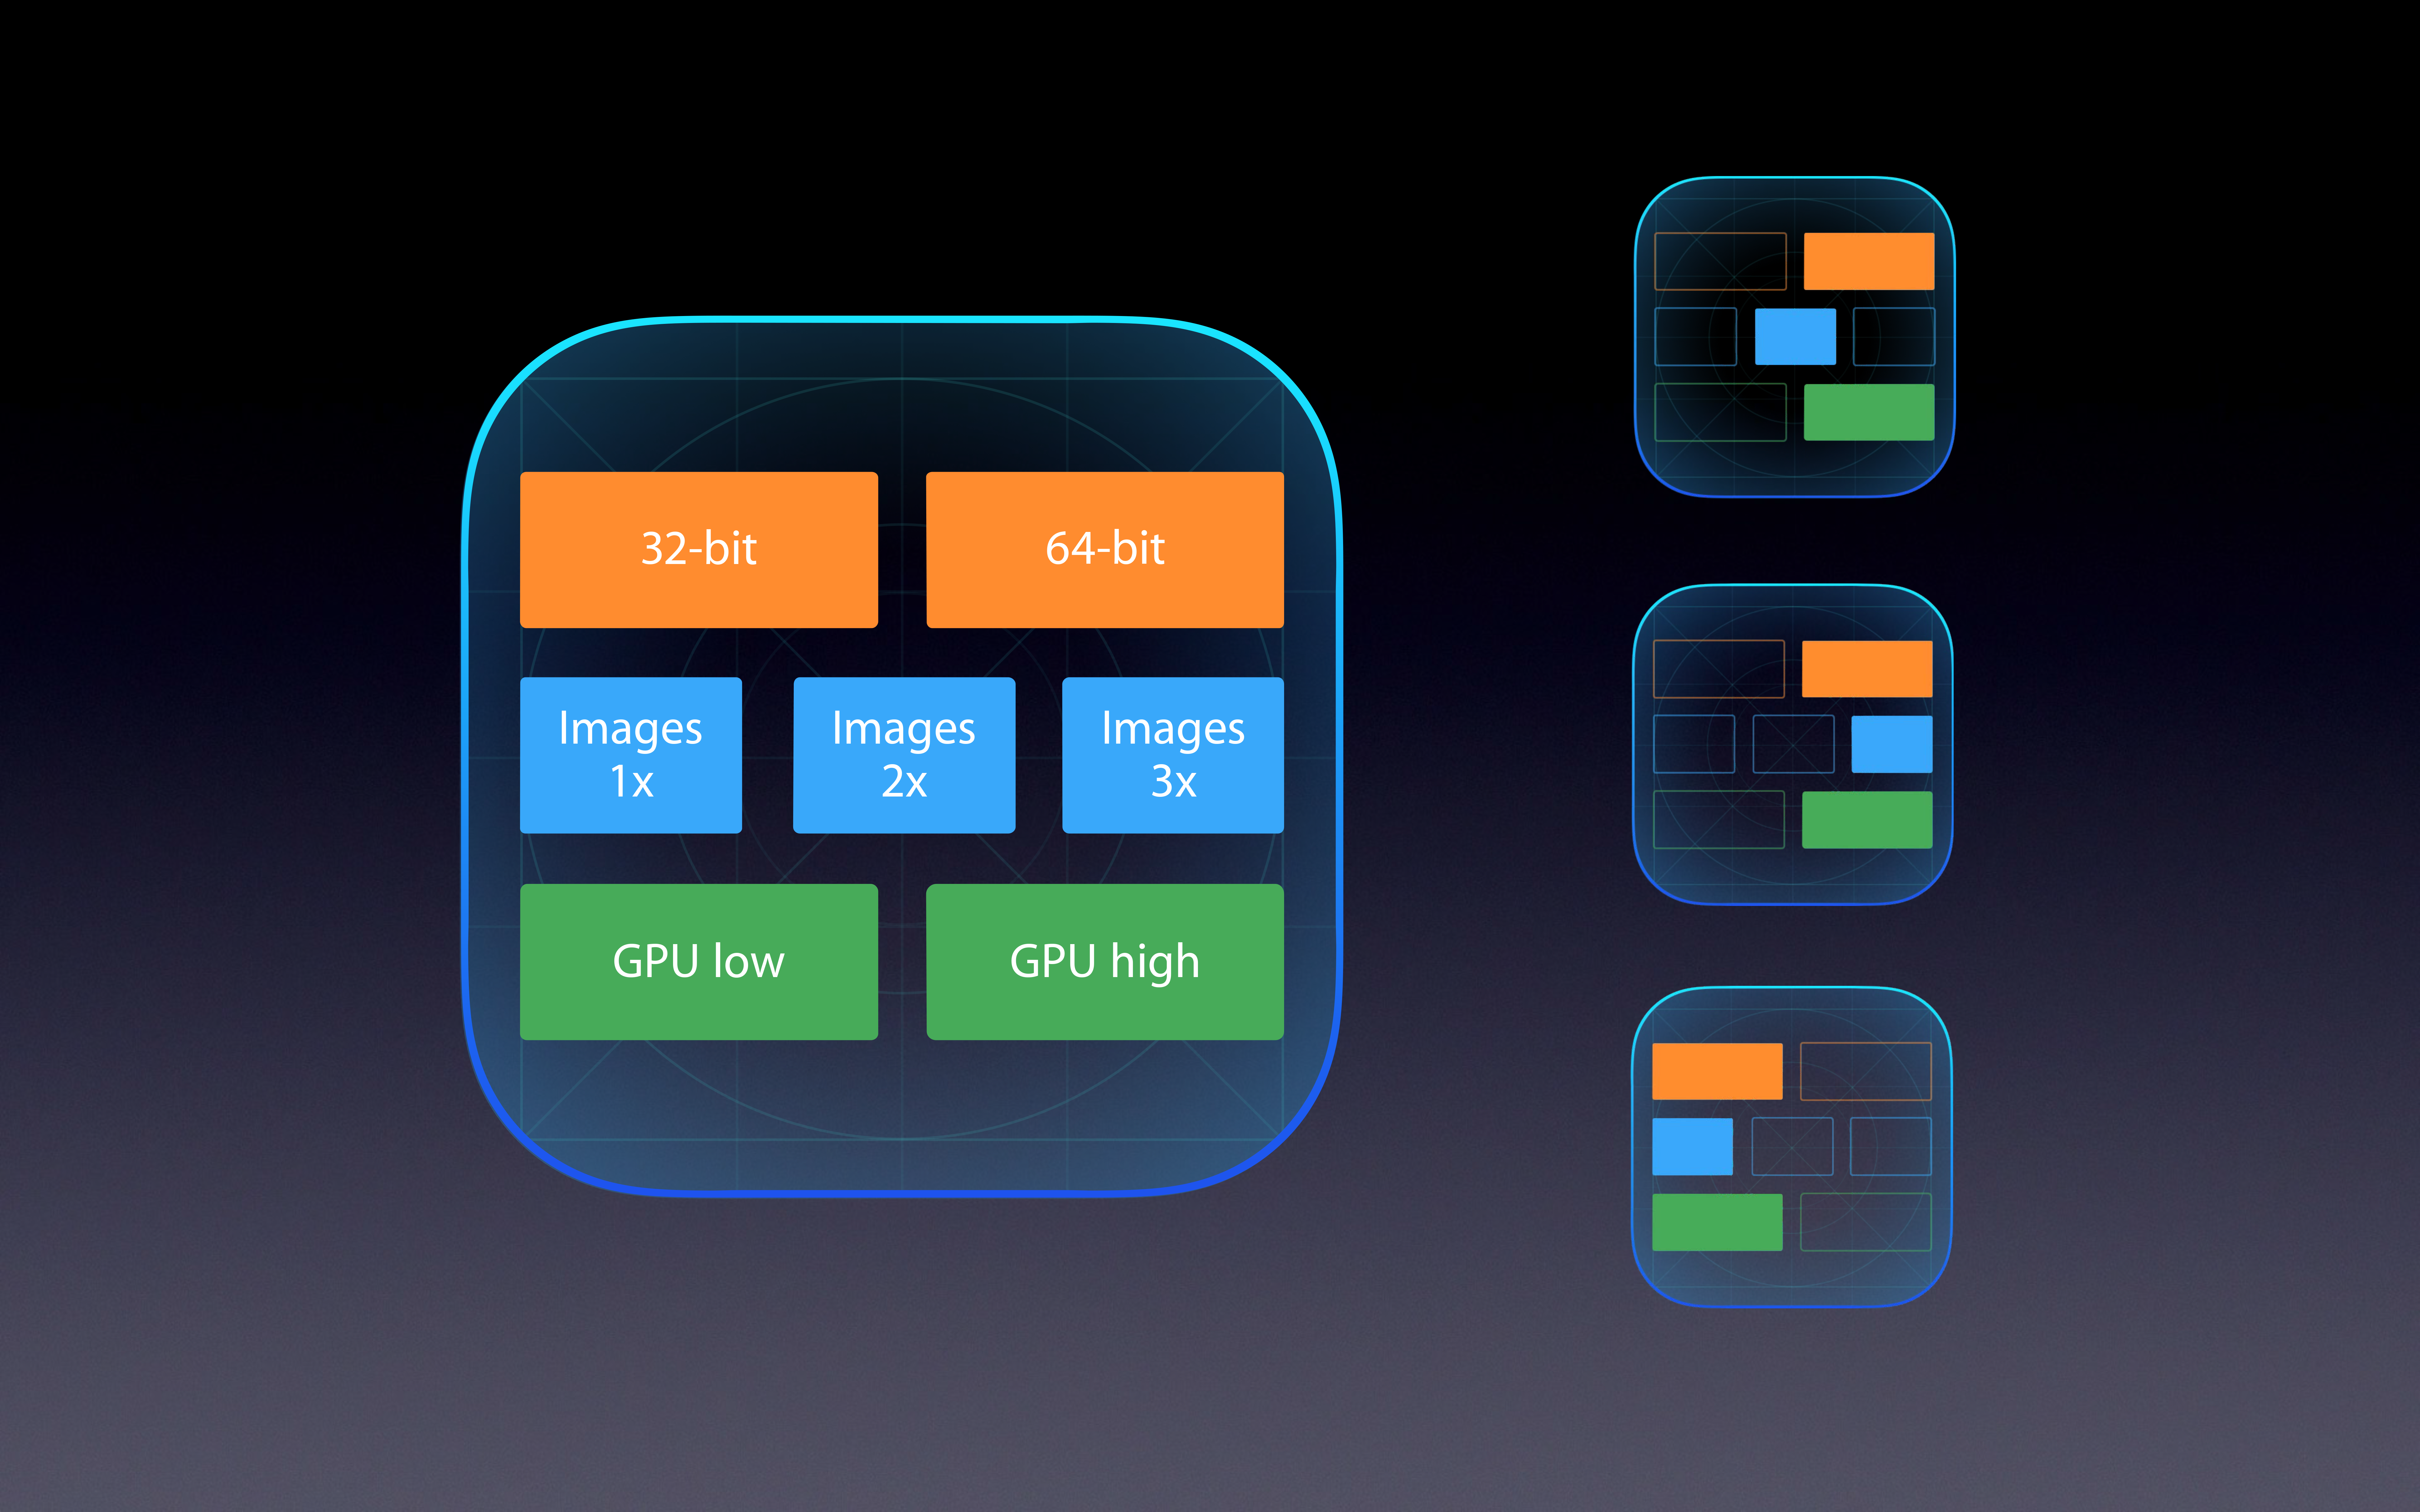
A variant contains only the executable architecture and resources that are needed for the target device.” In other words, App Slicing delivers only relevant assets to each device (depending on screen resolution, architecture, etc.) In fact, app slicing handles the majority of the app thinning process.
When you’re ready to submit the app, you upload the .IPA or .App file to iTunes Connect, as you typically would (but must use Xcode 7 as it contains the iOS 9 SDK with support for app thinning). The App Store then slices the app, creating specific variants that are distributed to each device depending on its capabilities.
On Demand Resources
To fully comprehend and app thinning, it is imperative that you also understand On Demand Resources (ODR). On demand resources are files that can be downloaded after the app’s first installation. For example, specific levels of a game (and these levels’ associated content) could be downloaded only when the player has unlocked them. Further, earlier levels that the player has not engaged with after a certain set time can be removed to save storage on the device.
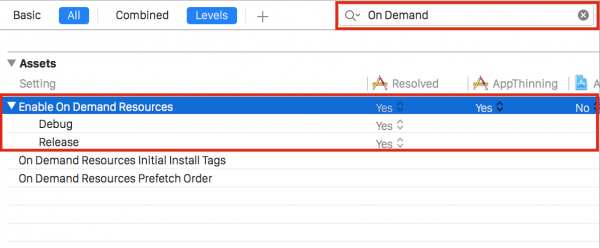
Enabling on demand resources involves changing the “Enable On Demand Resources” boolean to “Yes” in Xcode settings (under Build Settings).
Bitcode
The third and final aspect of App Thinning is bitcode. Bitcode is somewhat abstract, but in essence, it is Apple’s new way of optimizing apps before they’re downloaded. Bitcode makes apps as fast and efficient as possible on whatever device they’re running. Bitcode automatically compiles the app for the most recent compiler and optimizes it for specific architectures (i.e. arm64 for 64 bit processors such as the iPhone 6s and iPad Air 2).
Bitcode makes downloads smaller by eliminating optimizations that are made for different architectures and rather downloads only the relevant optimizations and works hand in hand with the above mentioned app thinning technologies.
Bitcode is a newer feature to iOS, and needs to be turned on for newer projects. This can be done via the the project settings under Build Settings and selecting bitcode to YES.

App Thinning in Your Own Projects
Although Xcode and the App Store handles the majority of the App Thinning process, there are certain precautions you must take to make sure your app works with this new technology. First and foremost, you must use asset catalogs. Asset catalogs are the default in most apps at this point. If you haven’t already adopted Asset Catalogs, much of your existing content can be transferred over to a catalog by pressing the “Use Asset Catalog” button under Xcode’s project settings as seen below.

New to Xcode 7 are Sprite Atlases. Sprite Atlases are essentially a combination of asset catalogs and the power of SpriteKit (Xcode’s technology for creating 2D games). As such, if you’re using SpriteKit, this is a must for app thinning.
Testing with App Thinning
As you have seen from the above paragraphs, Xcode and Apple’s App Sore handle much of the app thinning process, making it relatively easy to adopt this technology into your own apps. But what if you want to test you app and ensure it is ready for app thinning? Luckily, Apple’s TestFlight offers the perfect solution. In addition to the App Store’s thinning technologies, TestFlight users can share in the experience.
In this second half of the tutorial, we will explore how to work with App Thinning in TestFlight.
To get started, download this (nearly) blank project, unzip it, and run it in Xcode. You will notice there is essentially nothing in the project except several images in the Asset Catalog (but not a lot of code). The Asset Catalog conains 1x, 2x, and 3x versions of the app icon as well.

First, run the app on the simulator or a device. Open the settings app, click “Storage & iCloud Usage” (or just “Storage” on non iOS 9 devices) and select “Manage Storage”. Scroll down to the app we just compiled and tap it. You’ll notice it is roughly 17.0 MB in size (this size may vary slightly when uploaded to iTunes Connect).
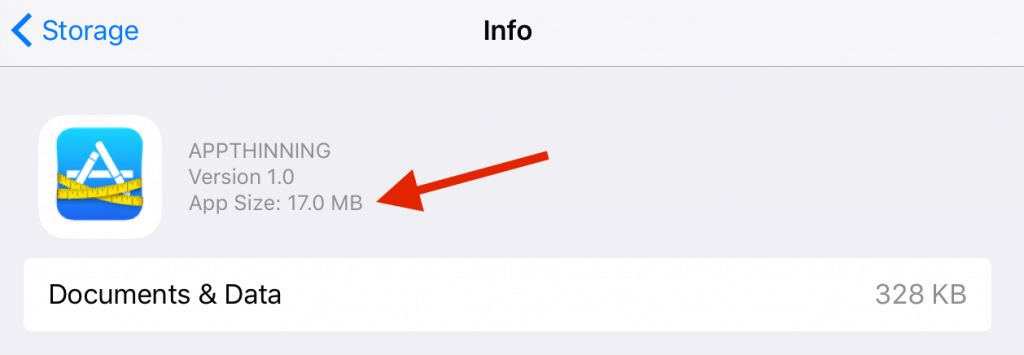
When you build and run an app using Xcode, Xcode does not automatically handle app variants and app thinning. As such, the entire app file is currently on your device.
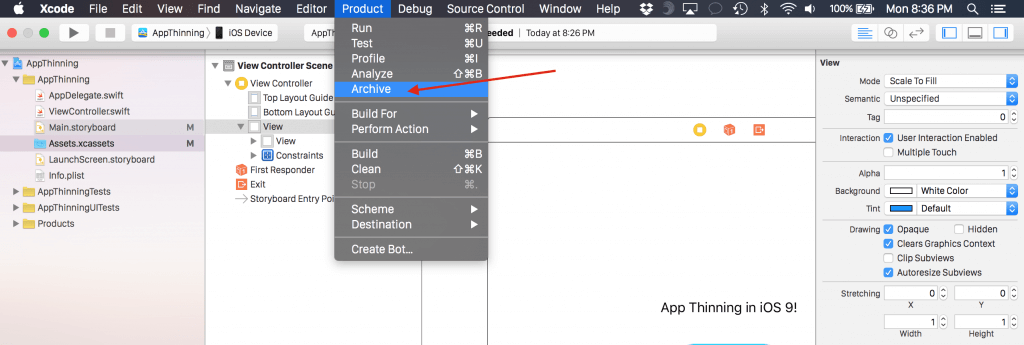
Next, click the Product tab from Xcode and select Archive.
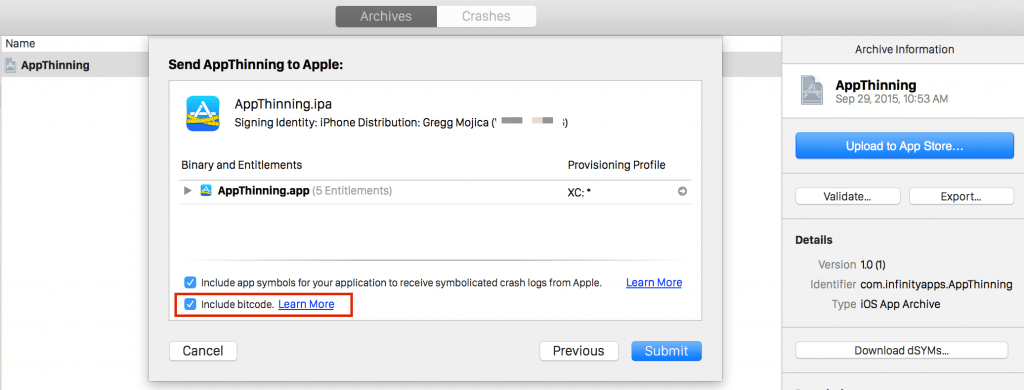
Make sure you select “Include bitcode” before pressing “Submit”. If everything goes well, you’ll see a green checkmark informing you the build has been uploaded.
Now sign in to iTunes Connect here, make a new app (include the proper bundle ID, app name, etc.). If you’re unsure how to do this, please refer back to the AppCoda TestFlight tutorial.
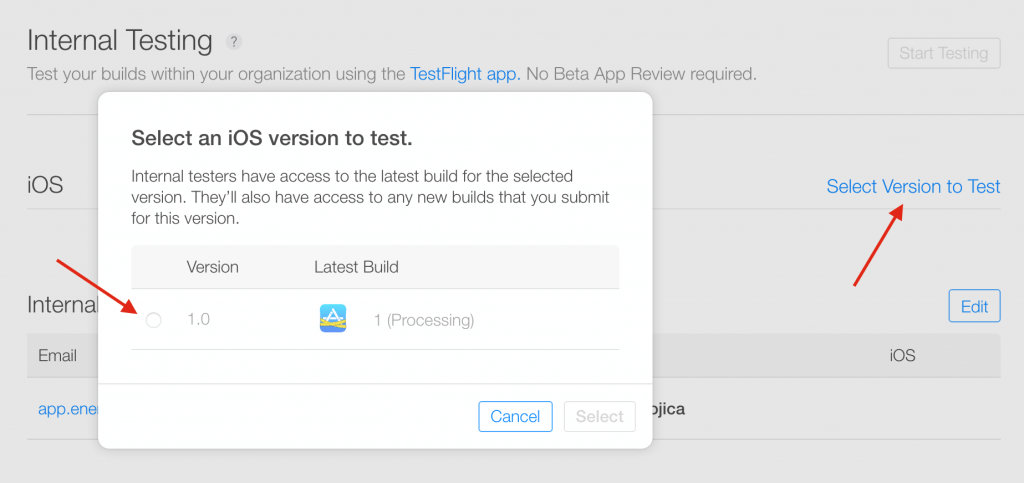
Add yourself as an internal tester. Be aware that it’s not uncommon to have a build in the “Processing” state for several hours. Once the app is no longer processing, select it and press the “Start Testing” button.
An email will be sent to the address you included. Make sure you are on the proper iOS device you want to test on and accept the email. You’ll be brought to the TestFlight app.
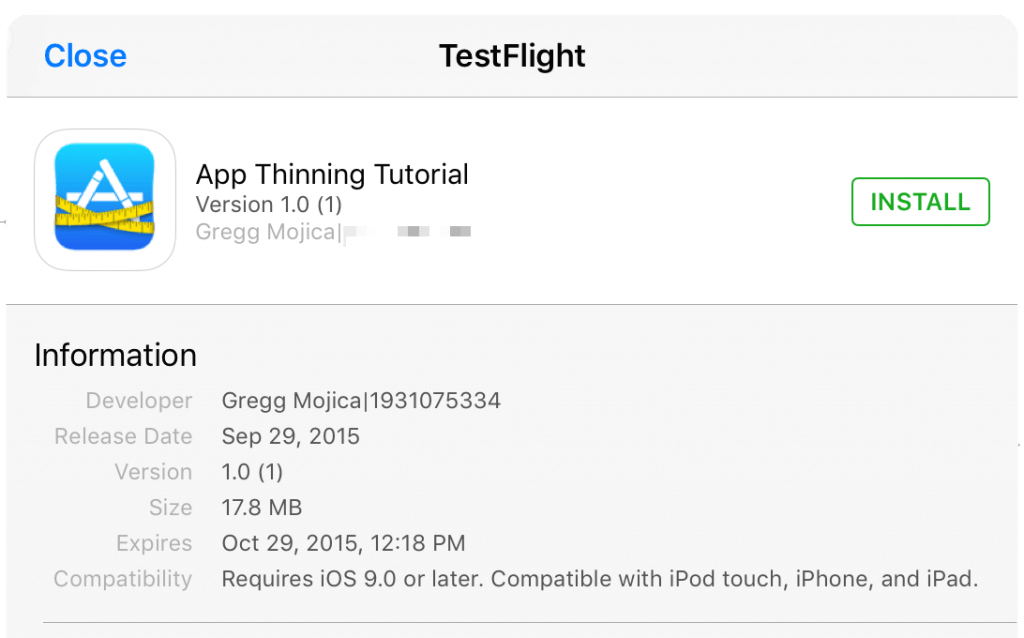
Install this build. Once it is installed, return to the settings app, navigate to storage, and find the app as we did before. Notice that the app is now a mere 5.4 MB. That’s App Thinning at its prime!

Wow! You just shaved off 12.4 MB from your app – and this was a very basic app. Apps that contain multiple different assets will see a even more dramatic change in app size!
Summary
In this tutorial, we took a look at the power of app thinning. In so doing, we discussed the three main aspects of app thinning: app slicing, on demand resources, and bitcode.
Unfortunately, as of September 24 2015, Apple announced on its developer portal that App Thinning has been delayed and is not included in the iOS 9 (or 9.0.1) public launch:
“App slicing is currently unavailable for iOS 9 apps due to an issue affecting iCloud backups created from iOS 9 where some apps from the App Store would only restore to the same model of iOS device.
When a customer downloads your iOS 9 app, they will get the Universal version of your app, rather than the variant specific for their device type. TestFlight will continue to deliver variants for your internal testers. App slicing will be reenabled with a future software update. No action is needed by you at this time.”
However, as I’ve included at the beginning of the article, app thinning has been fixed and is ready for all devices running iOS 9.0.2. App thinning is an incredible tool that will speed the way apps are downloaded forever!


