Augmented reality has the power to amplify the world in ways never possible before. The way in which we interact with our world may never be the same again. With the release of iPhone X, the world is ready to embrace AR now more than ever before. We are at a special time in history and just at the beginning of something huge. The potential of AR is endless.
Prerequisites
This tutorial builds on top of knowledge from previous ARKit tutorials. If you haven’t already, you can check out the previous tutorial. It would also be great if you can find a flat surface for your app.
What we are going to learn
In this tutorial, our focus is on horizontal plane in ARKit. We are going to first create an ocean (horizontal plane). Then place a nice ship on top (3D object).
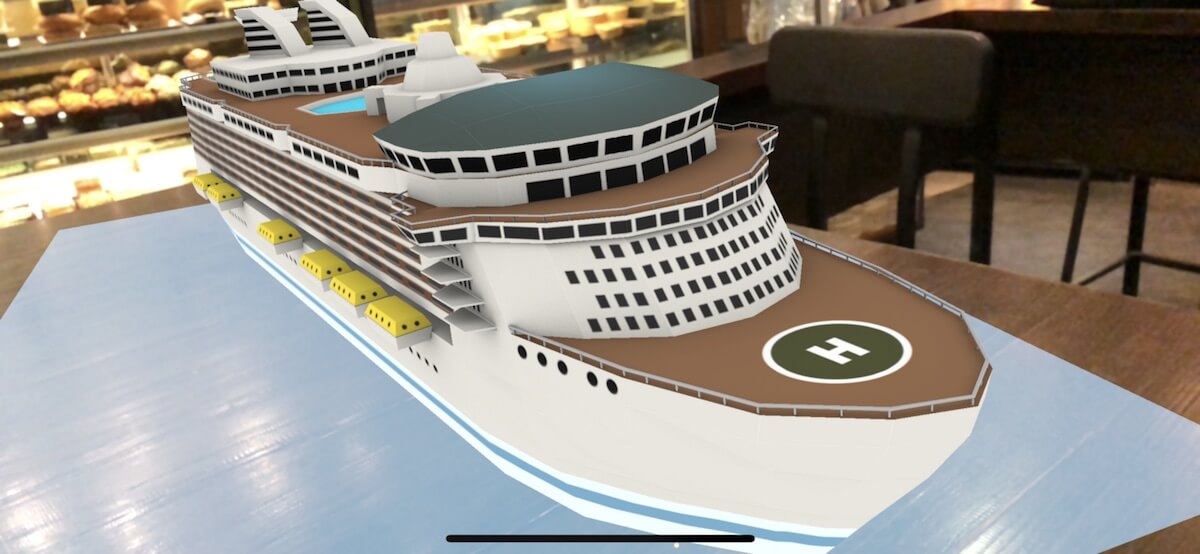
Or create a fleet of ships with lighting!
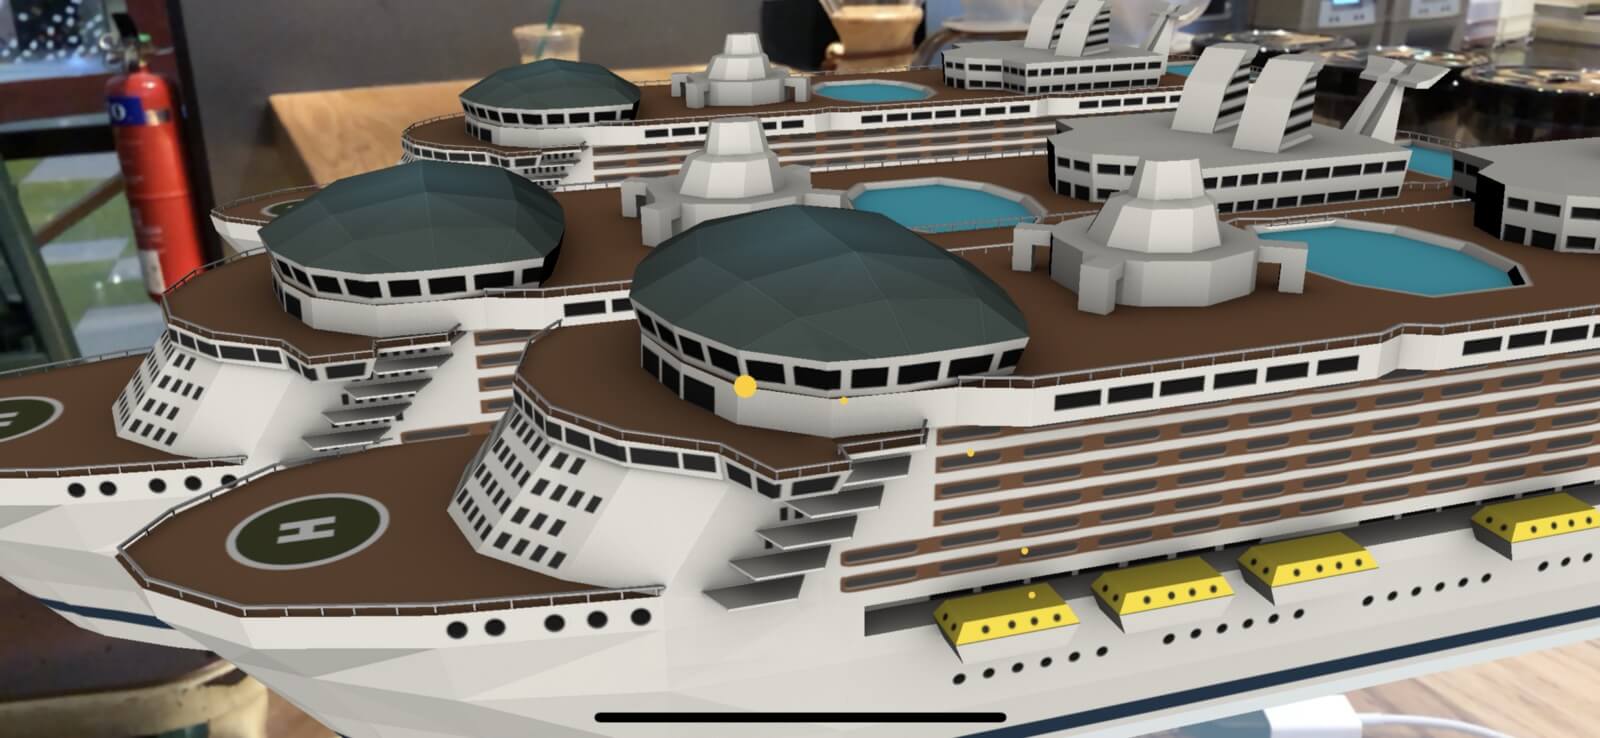
Along the way, you will learn about horizontal plane in ARKit. It is my hope that by the end of this tutorial, you will feel more comfortable utilizing horizontal plane when working on your ARKit project.
What’s a Horizontal Plane
So what exactly are we talking about when we talk about horizontal plane in ARKit? When we detect a horizontal plane in ARKit — we technically detect an ARPlaneAnchor. So what is an ARPlaneAnchor? An ARPlaneAnchor is basically an object containing information about the detected horizontal plane.
Here is a more formal description of ARPlaneAnchor from Apple:
Information about the position and orientation of a real-world flat surface detected in a world-tracking AR session.
- Apple’s Documentation
Let’s begin to build the app
We will begin with a starter project, so we can focus on the implementation of ARKit. Open the starter project in Xcode to take a look. I have already created the ARSCNView in the storyboard.
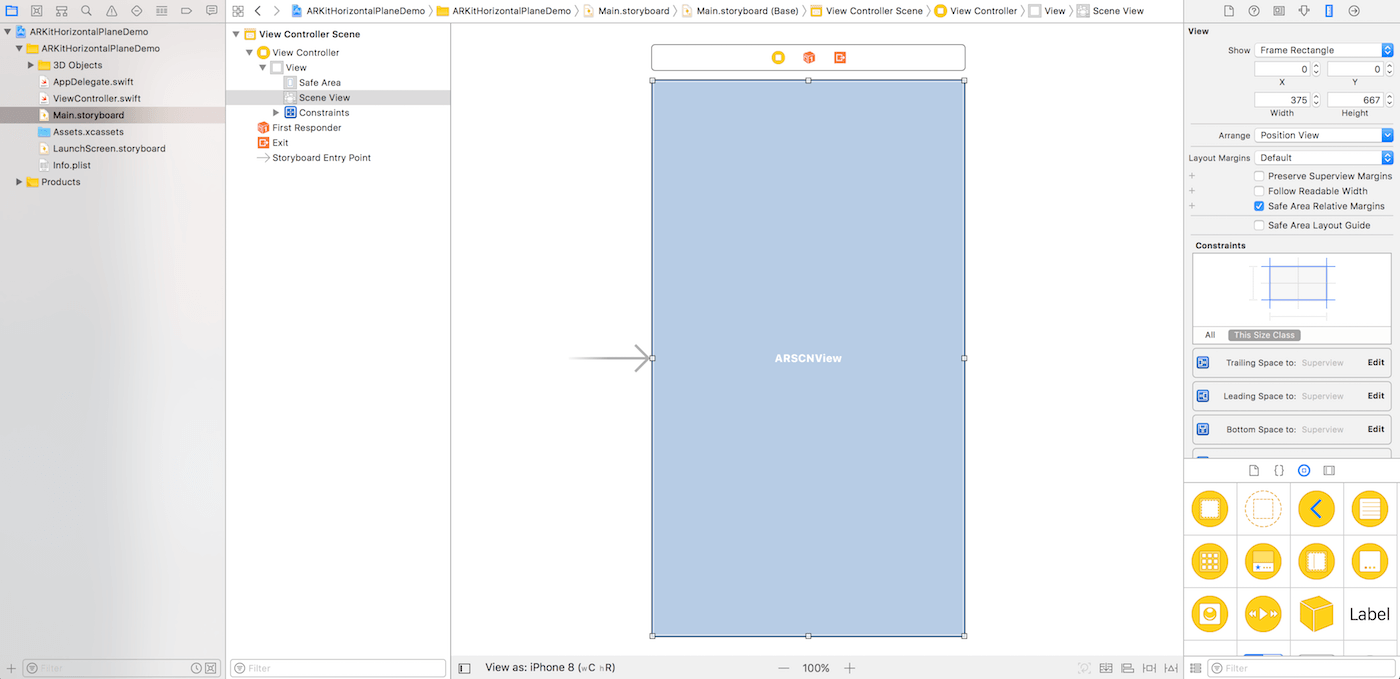
Build and run the starter project to have a quick test. You should see the following on your iOS device:

Make sure you should tap OK to grant the access to the camera. You should then see your camera’s view.
Horizontal Planes Detection
Detecting a horizontal plane is simple. Thanks to the “appley” Apple Engineers.
Simply add the following inside the setUpSceneView() method of ViewController:
configuration.planeDetection = .horizontal
By setting the planeDetection property of ARWorldTrackingConfiguration to .horizontal, this tells ARKit to look for any horizontal plane. Once ARKit detects a horizontal plane, that horizontal plane will be added into sceneView’s session.
In order to detect the horizontal plane, we have to adopt the ARSCNViewDelegate protocol. Below the ViewController class, create a ViewController class extension to implement the protocol:
extension ViewController: ARSCNViewDelegate {

}
Now inside of the class extension, implement the renderer(_:didAdd:for:) method:
func renderer(_ renderer: SCNSceneRenderer, didAdd node: SCNNode, for anchor: ARAnchor) {

}
This protocol method gets called every time the scene view’s session has a new ARAnchor added. An ARAnchor is an object that represents a physical location and orientation in 3D space. We will use the ARAnchor later for detecting a horizontal plane.
Next, head back to setUpSceneView(). Assign the sceneView’s delegate to your ViewController inside of setUpSceneView().
If you’d like, you can also set sceneView’s debug options to show feature points in the world. This could help you find a place with enough feature points to detect a horizontal plane. A horizontal plane is made up of many feature points. Once enough feature points has been detected to recognize a horizontal surface, renderer(_:didAdd:for:) will be called.
Your setUpSceneView() method should now look like this:
func setUpSceneView() {
    let configuration = ARWorldTrackingConfiguration()
    configuration.planeDetection = .horizontal

    sceneView.session.run(configuration)

    sceneView.delegate = self
    sceneView.debugOptions = [ARSCNDebugOptions.showFeaturePoints]
}
Horizontal Planes Visualization
Now that the app gets notified every time a new ARAnchor is being added onto sceneView, we may be interested in seeing what that newly added ARAnchor looks like.
Hence, update the renderer(_:didAdd:for:) method like this:
func renderer(_ renderer: SCNSceneRenderer, didAdd node: SCNNode, for anchor: ARAnchor) {
    // 1
    guard let planeAnchor = anchor as? ARPlaneAnchor else { return }

    // 2
    let width = CGFloat(planeAnchor.extent.x)
    let height = CGFloat(planeAnchor.extent.z)
    let plane = SCNPlane(width: width, height: height)

    // 3
    plane.materials.first?.diffuse.contents = UIColor.transparentLightBlue

    // 4
    let planeNode = SCNNode(geometry: plane)

    // 5
    let x = CGFloat(planeAnchor.center.x)
    let y = CGFloat(planeAnchor.center.y)
    let z = CGFloat(planeAnchor.center.z)
    planeNode.position = SCNVector3(x,y,z)
    planeNode.eulerAngles.x = -.pi / 2

    // 6
    node.addChildNode(planeNode)
}
Let’s me walk you through the code line by line:
- We safely unwrap the anchor argument as an ARPlaneAnchor to make sure that we have information about a detected real world flat surface at hand.
- Here, we create an SCNPlane to visualize the ARPlaneAnchor. A SCNPlane is a rectangular “one-sided” plane geometry. We take the unwrapped ARPlaneAnchor extent’s x and z properties and use them to create an SCNPlane. An ARPlaneAnchor extent is the estimated size of the detected plane in the world. We extract the extent’s x and z for the height and width of our SCNPlane. Then we give the plane a transparent light blue color to simulate a body of water.
- We initialize a SCNNode with the SCNPlane geometry we just created.
- We initialize
x,y, andzconstants to represent theplaneAnchor’s center x, y, and z position. This is for ourplaneNode’s position. We rotate theplaneNode’s x euler angle by 90 degrees in the counter-clockerwise direction, else theplaneNodewill sit up perpendicular to the table. And if you rotate it clockwise, David Blaine will perform a magic illusion because SceneKit renders the SCNPlane surface using the material from one side by default. - Finally, we add the
planeNodeas the child node onto the newly added SceneKit node.
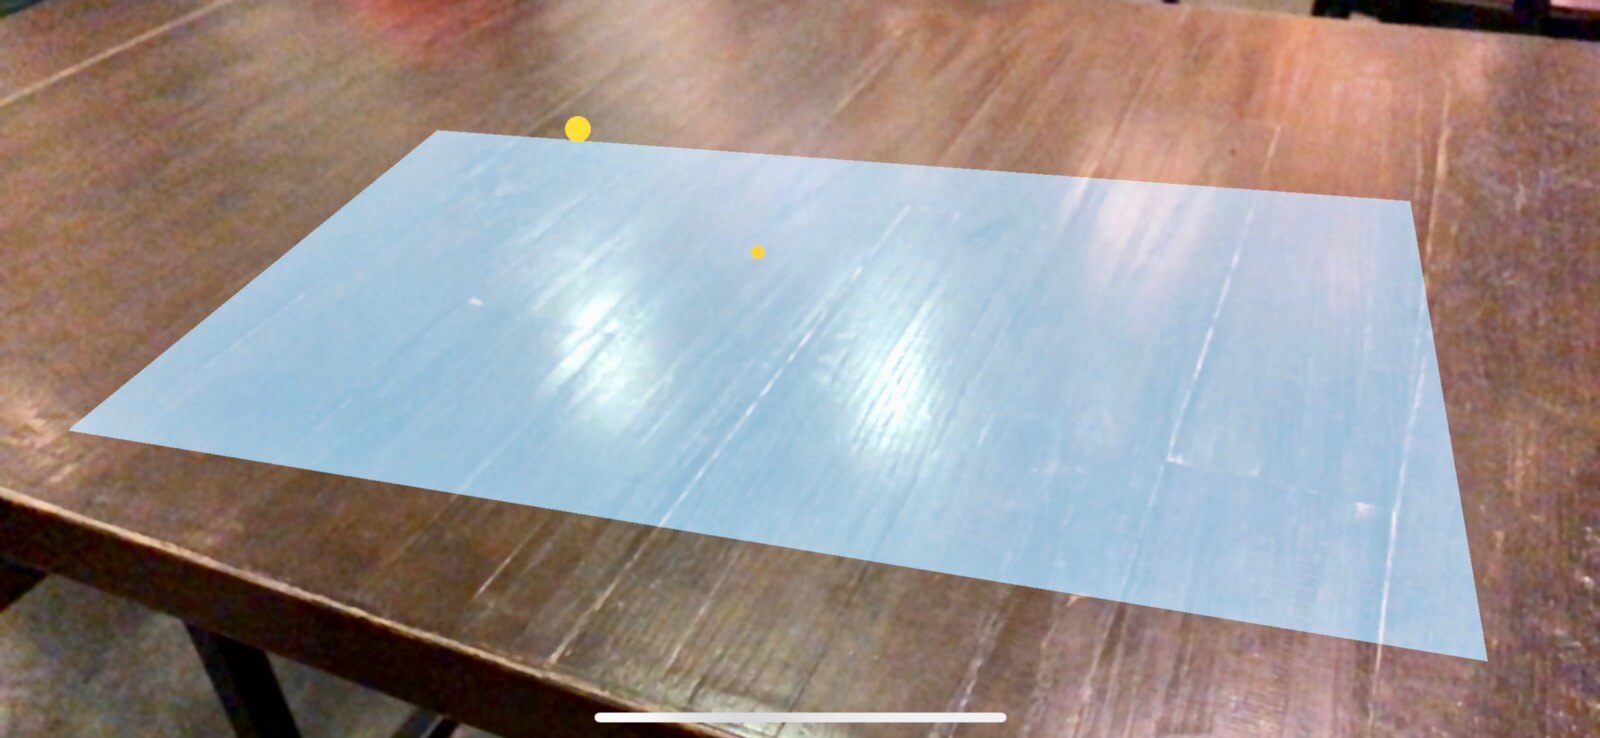
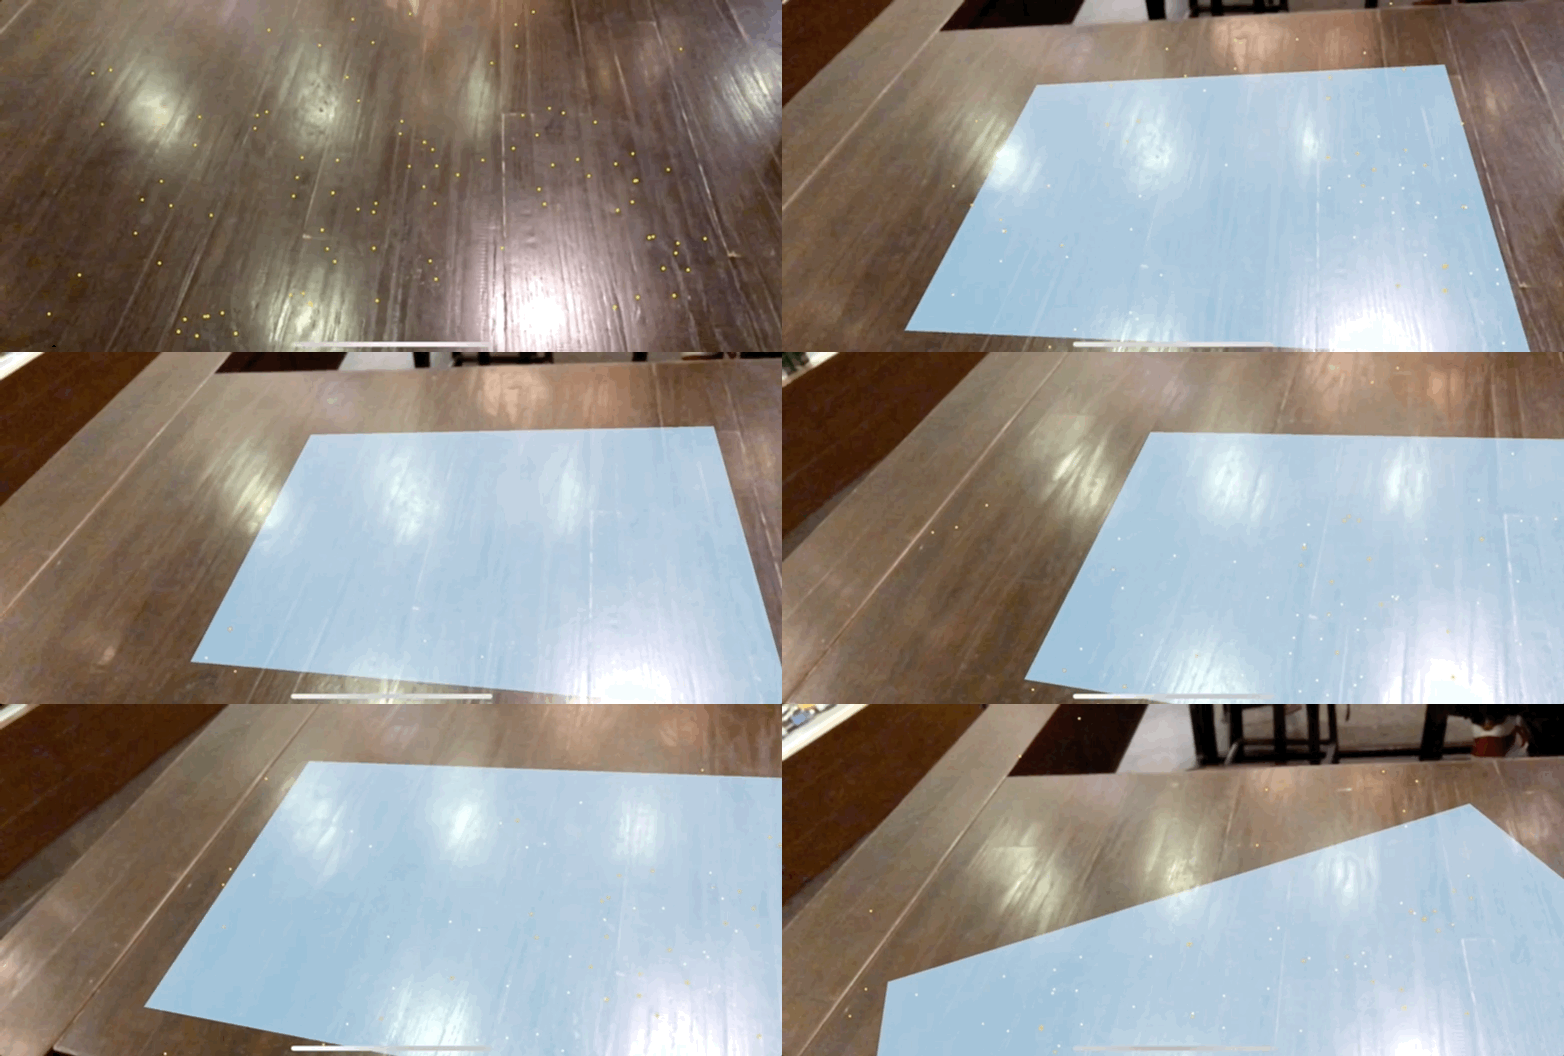
Build and run the project. You should now be able to detect and visualize the detected horizontal plane.
Horizontal Planes Expansion
With ARKit receiving additional information about our environment, we may want to expand our previously detected horizontal plane(s) to make use of a larger surface or have a more accurate representation with the new information.
Hence, implement renderer(_:didUpdate:for:):
func renderer(_ renderer: SCNSceneRenderer, didUpdate node: SCNNode, for anchor: ARAnchor) {

}
This method gets called every time a SceneKit node’s properties have been updated to match its corresponding anchor. This is where ARKit refines its estimation of the horizontal plane’s position and extent.
The node argument gives us the updated position of the anchor. The anchor argument gives us the anchor’s updated width and height. With these two arguments, we can update the previously implemented SCNPlane to reflect the updated position with the updated width and height.
Next, add the following code inside renderer(_:didUpdate:for:):
// 1
guard let planeAnchor = anchor as?  ARPlaneAnchor,
    let planeNode = node.childNodes.first,
    let plane = planeNode.geometry as? SCNPlane
    else { return }

// 2
let width = CGFloat(planeAnchor.extent.x)
let height = CGFloat(planeAnchor.extent.z)
plane.width = width
plane.height = height

// 3
let x = CGFloat(planeAnchor.center.x)
let y = CGFloat(planeAnchor.center.y)
let z = CGFloat(planeAnchor.center.z)
planeNode.position = SCNVector3(x, y, z)
Again, let’s me go through the code above with you:
- First, we safely unwrap the
anchorargument asARPlaneAnchor. Next, we safely unwrap thenode’s first child node. Lastly, we safely unwrap theplaneNode’s geometry asSCNPlane. We are simply extracting the previously implementedARPlaneAnchor,SCNNode, andSCNplaneand updating its properties with the corresponding arguments. - Here we update the
plane’s width and height using theplaneAnchorextent’s x and z properties. - At last, we update the
planeNode’s position to theplaneAnchor’s center x, y, and z coordinates.
Build and run to check out expanding horizontal plane implementation.
Adding Objects on Horizontal Planes
Now let’s add a ship on top of the horizontal plane. Inside of the starter project, I have already bundled a 3D ship object for you to use.
Insert the following method in the ViewController class to place a ship on top of the horizontal plane:
@objc func addShipToSceneView(withGestureRecognizer recognizer: UIGestureRecognizer) {
    let tapLocation = recognizer.location(in: sceneView)
    let hitTestResults = sceneView.hitTest(tapLocation, types: .existingPlaneUsingExtent)

    guard let hitTestResult = hitTestResults.first else { return }
    let translation = hitTestResult.worldTransform.translation
    let x = translation.x
    let y = translation.y
    let z = translation.z

    guard let shipScene = SCNScene(named: "ship.scn"),
        let shipNode = shipScene.rootNode.childNode(withName: "ship", recursively: false)
        else { return }


    shipNode.position = SCNVector3(x,y,z)
    sceneView.scene.rootNode.addChildNode(shipNode)
}
There are many familiar faces here as explained in the previous tutorial, so I will not go through the code line by line. If you want to learn more about that, check out the previous tutorial. The only difference now is that we pass in a different argument in the types parameter to detect an existing plane anchor in the sceneView.
Before the cherry on top, add the following code:
func addTapGestureToSceneView() {
    let tapGestureRecognizer = UITapGestureRecognizer(target: self, action: #selector(ViewController.addShipToSceneView(withGestureRecognizer:)))
    sceneView.addGestureRecognizer(tapGestureRecognizer)
}
This method will add a tap gesture recognizer to sceneView.
For the cherry on top, call the following method inside of viewDidLoad() to add a tap gesture recognizer to sceneView:
addTapGestureToSceneView()
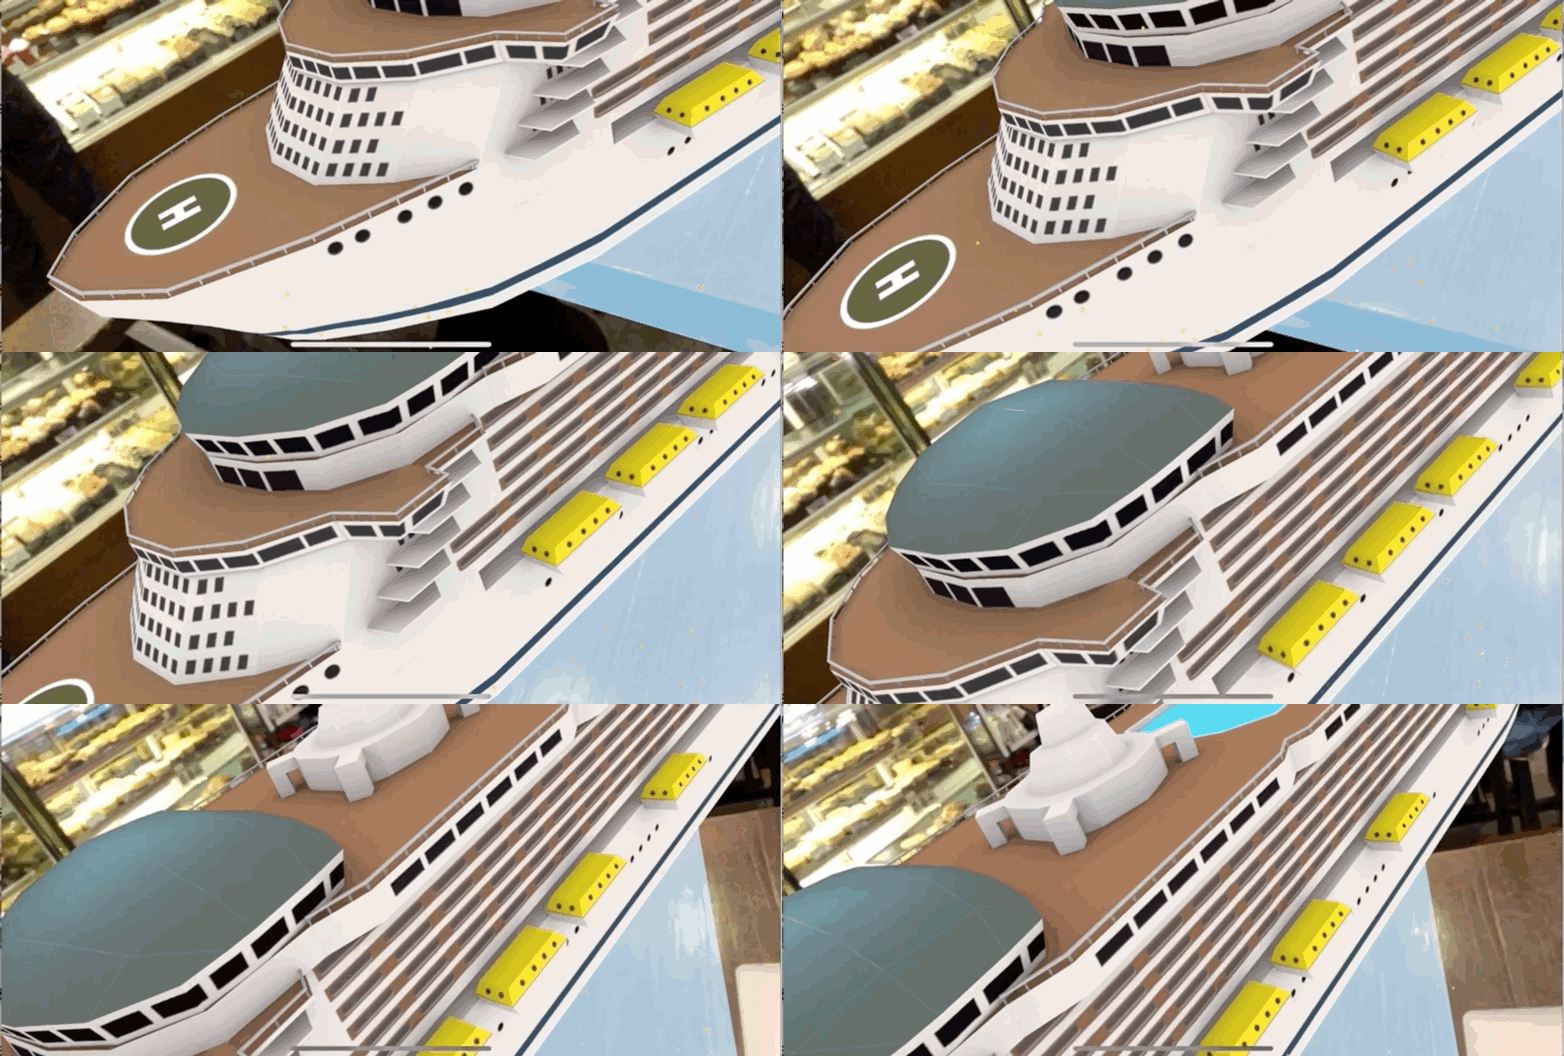
Now if you build and run, you should be able to detect a horizontal plane, visualize it, and place an insanely cool ship on top.
Or a fleet of ships (with lighting).
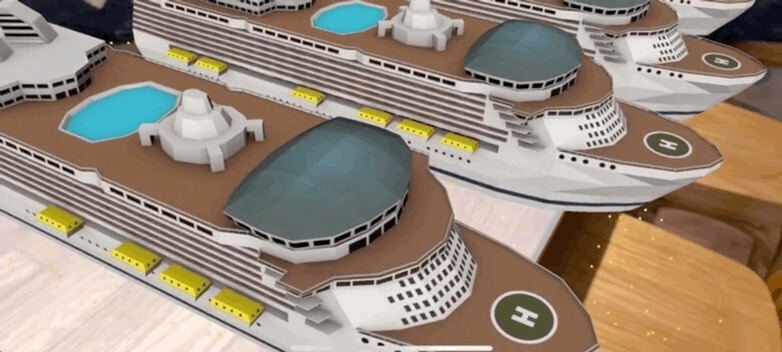
You can enable lighting by uncommenting configureLighting() inside of viewDidLoad(). The function is very simple with two lines of code to enable lighting:
sceneView.autoenablesDefaultLighting = true
sceneView.automaticallyUpdatesLighting = true
Summary
I hope you have enjoyed and learned something valuable from this tutorial. If you have, please let me know by sharing this tutorial. Lastly if you have any comment, question, or recommendation, feel free to drop them below.
I’m not sure if a single person would do this, but you can comment with an image. I’d love to know where you guys are placing your ship!
For your reference, you can download the final project on GitHub.


