CocoaPods is a dependency manager for Xcode projects. It is an extremely useful service to add libraries and frameworks to your project.
Sometimes one makes a library so game-changing and revolutionary that it is impossible not to let the world have it. Long story short, you need to know how to publish your own CocoaPod!
Prerequisites
In this tutorial, I will be using Xcode 8 along with Swift 3. To learn more about the changes to Swift 3, read this helpful tutorial.
Currently, CocoaPods has a pre-release intended for Swift 3 and Xcode 8. To compile a Swift 3 project, you need to use this version. To install it, run the following command in your Terminal:
sudo gem install cocoapods --pre
You must also have some experience using CocoaPods. Check out this truly amazing tutorial by Gregg Mojica to learn more about it.
On to the tutorial!
Making Something Pod-Worthy
Let’s make something groundbreaking that’s worthy of a pod. I think I want a UIView that slowly changes its color. I believe this might be useful for backgrounds.
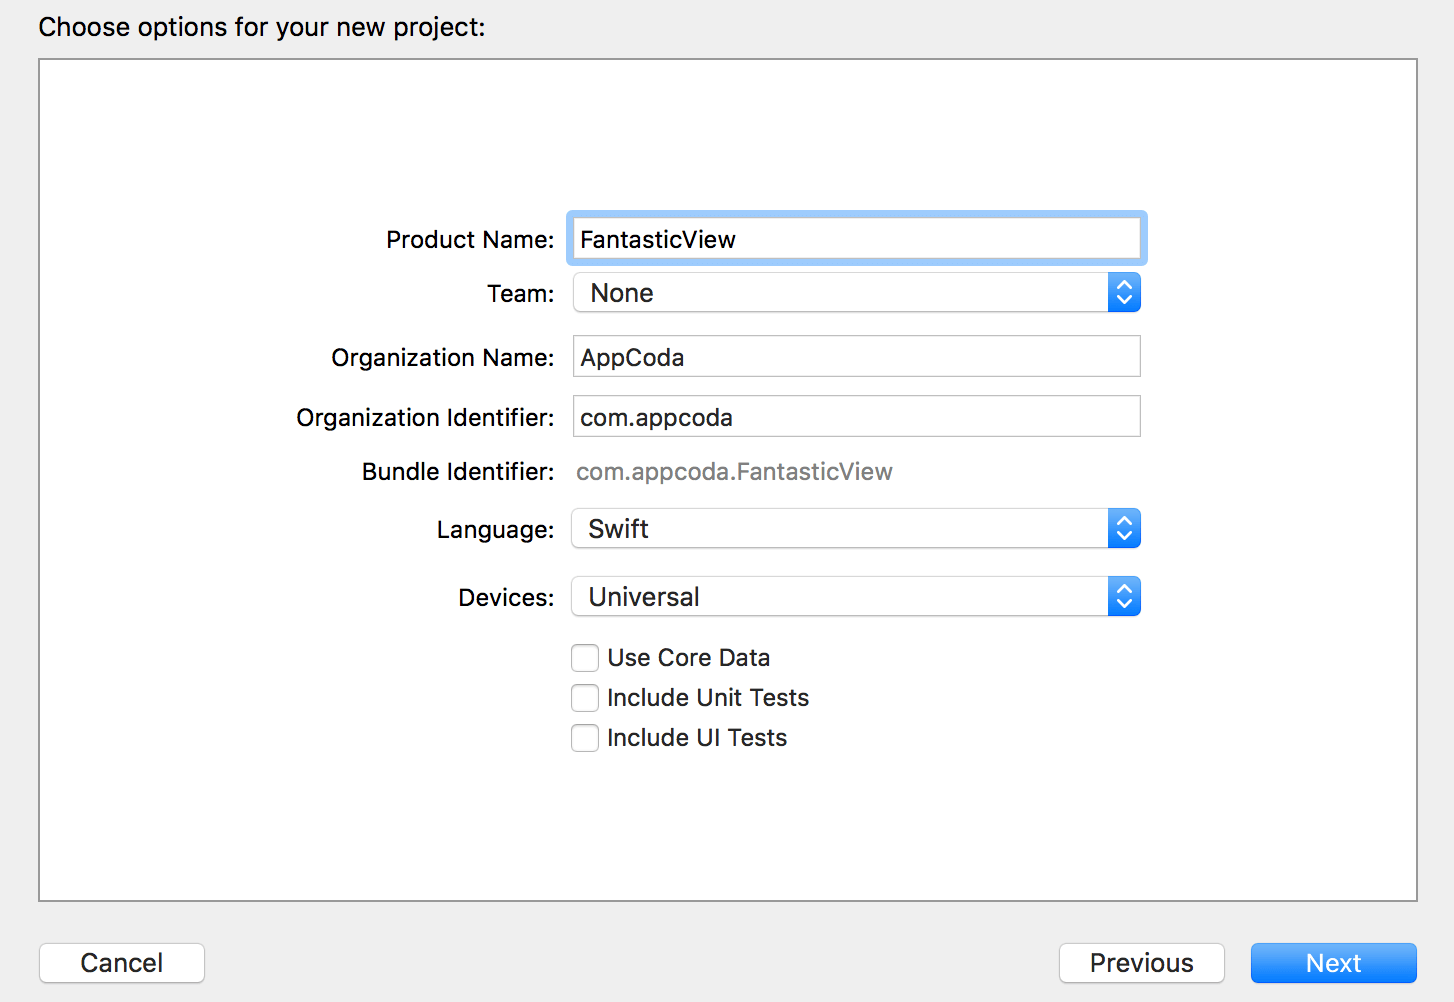
Okay, let’s begin with the basic stuff. First, create a new Xcode project and select to use the single view template. Name the project FantasticView. Once the project is created, add a new Swift file named FantasticView.swift.
Now that you have added FantasticView.swift, define a class called FantasticView and inherit UIView:
import UIKit

class FantasticView : UIView {

}
Defining the initializers
Next, add two initializers for the class:
override init(frame: CGRect) {
    super.init(frame: frame)

    // The Main Stuff
}

required init?(coder aDecoder: NSCoder) {
    super.init(coder: aDecoder)

    // You don't need to implement this
}
The first initializer is the init(frame: CGRect) method. This method will be called when a frame is passed to the constructor of FantasticView. We will call our color changing function here.
The Majestic Colors
Next, define an array called colors where we contain UIColors. In our main code, we will “loop” through this array and changed the background color of the UIView.
let colors : [UIColor] = [.red, .orange, .yellow, .green, .blue, .purple]
You should also add a counter object that will count each time the color has changed:
var colorCounter = 0
But why do I need a counter? Aren’t we looping through the colors?
Notice how I said “loop” 🙂
The Magic Sauce
Now I’m going to tell you how I dealt the problem of looping through the colors.
You might think one way could be to set a bunch of colors in a UIView animation block. However, this won’t work because the final color will always be the one that takes effect.
One way would be to create a for-loop and run an animation block in it. This will also encounter the former problem. To fix this, you could use GCD to wait for the animation block to finish running.
But I believe there is a simpler way. You could use an NSTimer!
In your init(frame: CGRect) method, add the following code:
let scheduledColorChanged = Timer.scheduledTimer(withTimeInterval: 2.0, repeats: true) { (timer) in  //1
    UIView.animate(withDuration: 2.0) {  //2
        self.layer.backgroundColor = self.colors[self.colorCounter % 6].cgColor  //3
        self.colorCounter+=1  //4
    }
}

scheduledColorChanged.fire()  //5
Let’s go through the above code line by line:
- Create a
Timerobject, formerlyNSTimer. Schedule a timer with an interval and tell it to repeat the actions. After the set time interval, ourTimerwill run a code block. - Call the good old
animate(withDuration)function. -
Set the
UIView.layer.backgroundColor. Note that I didn’t animate theUIView.backgroundColorbecause thelayerproperty is animatable, not theUIViewproperty. -
Add 1 to our counter.
-
Fire up the timer.
Let’s see what I did in #3. By subscripting colors you will get a UIColor. The colorCounter should only be a number between 0 and 5 because that is the range of our colors array. I used the % or the mod operator to get the remainder of our colorCounter when divided by 6. So if our colorCounter is 10, the output will be 4, therefore selecting the 4th option on our colors array.
Using the Fantastic View
Now it’s time to use our Fantastic View in our main View Controller. I want the background of my View Controller to be Fantastic, so insert the following code in the viewDidLoad method of ViewController.swift:
let fantasticView = FantasticView(frame: self.view.bounds)

self.view.addSubview(fantasticView)
Here we define a FantasticView and let the frame be the ViewController‘s view bounds. Then add the fantasticView as a subview to the main view.
It’s time to run the app in the simulator. You’ll see the background color changes over time.

Pushing to GitHub
I’m sure you are asking: “Why isn’t this fantastic view out in the public? People should know about this!”
Yes, that’s right. Let’s create the Pod so people could use it! But before that, we need to push this to GitHub.
CocoaPods needs a source for the Pod. In most cases, developers use GitHub for this. I will quickly go through the necessary steps to push your project to GitHub. To learn more about the basics of Git, check out this great tutorial.
In brief, here is what you need to do:
- Create a repository on Github. Call it
FantasticView. -
Copy the URL to your repo.
-
In Terminal, navigate to your project.
-
Initialize Git:
git init -
Add the changes:
git add . -
Commit the changes:
git commit -m "init" -
Add a remote origin:
git remote add origin <paste your URL here> -
Push your commit:
git push -u origin master
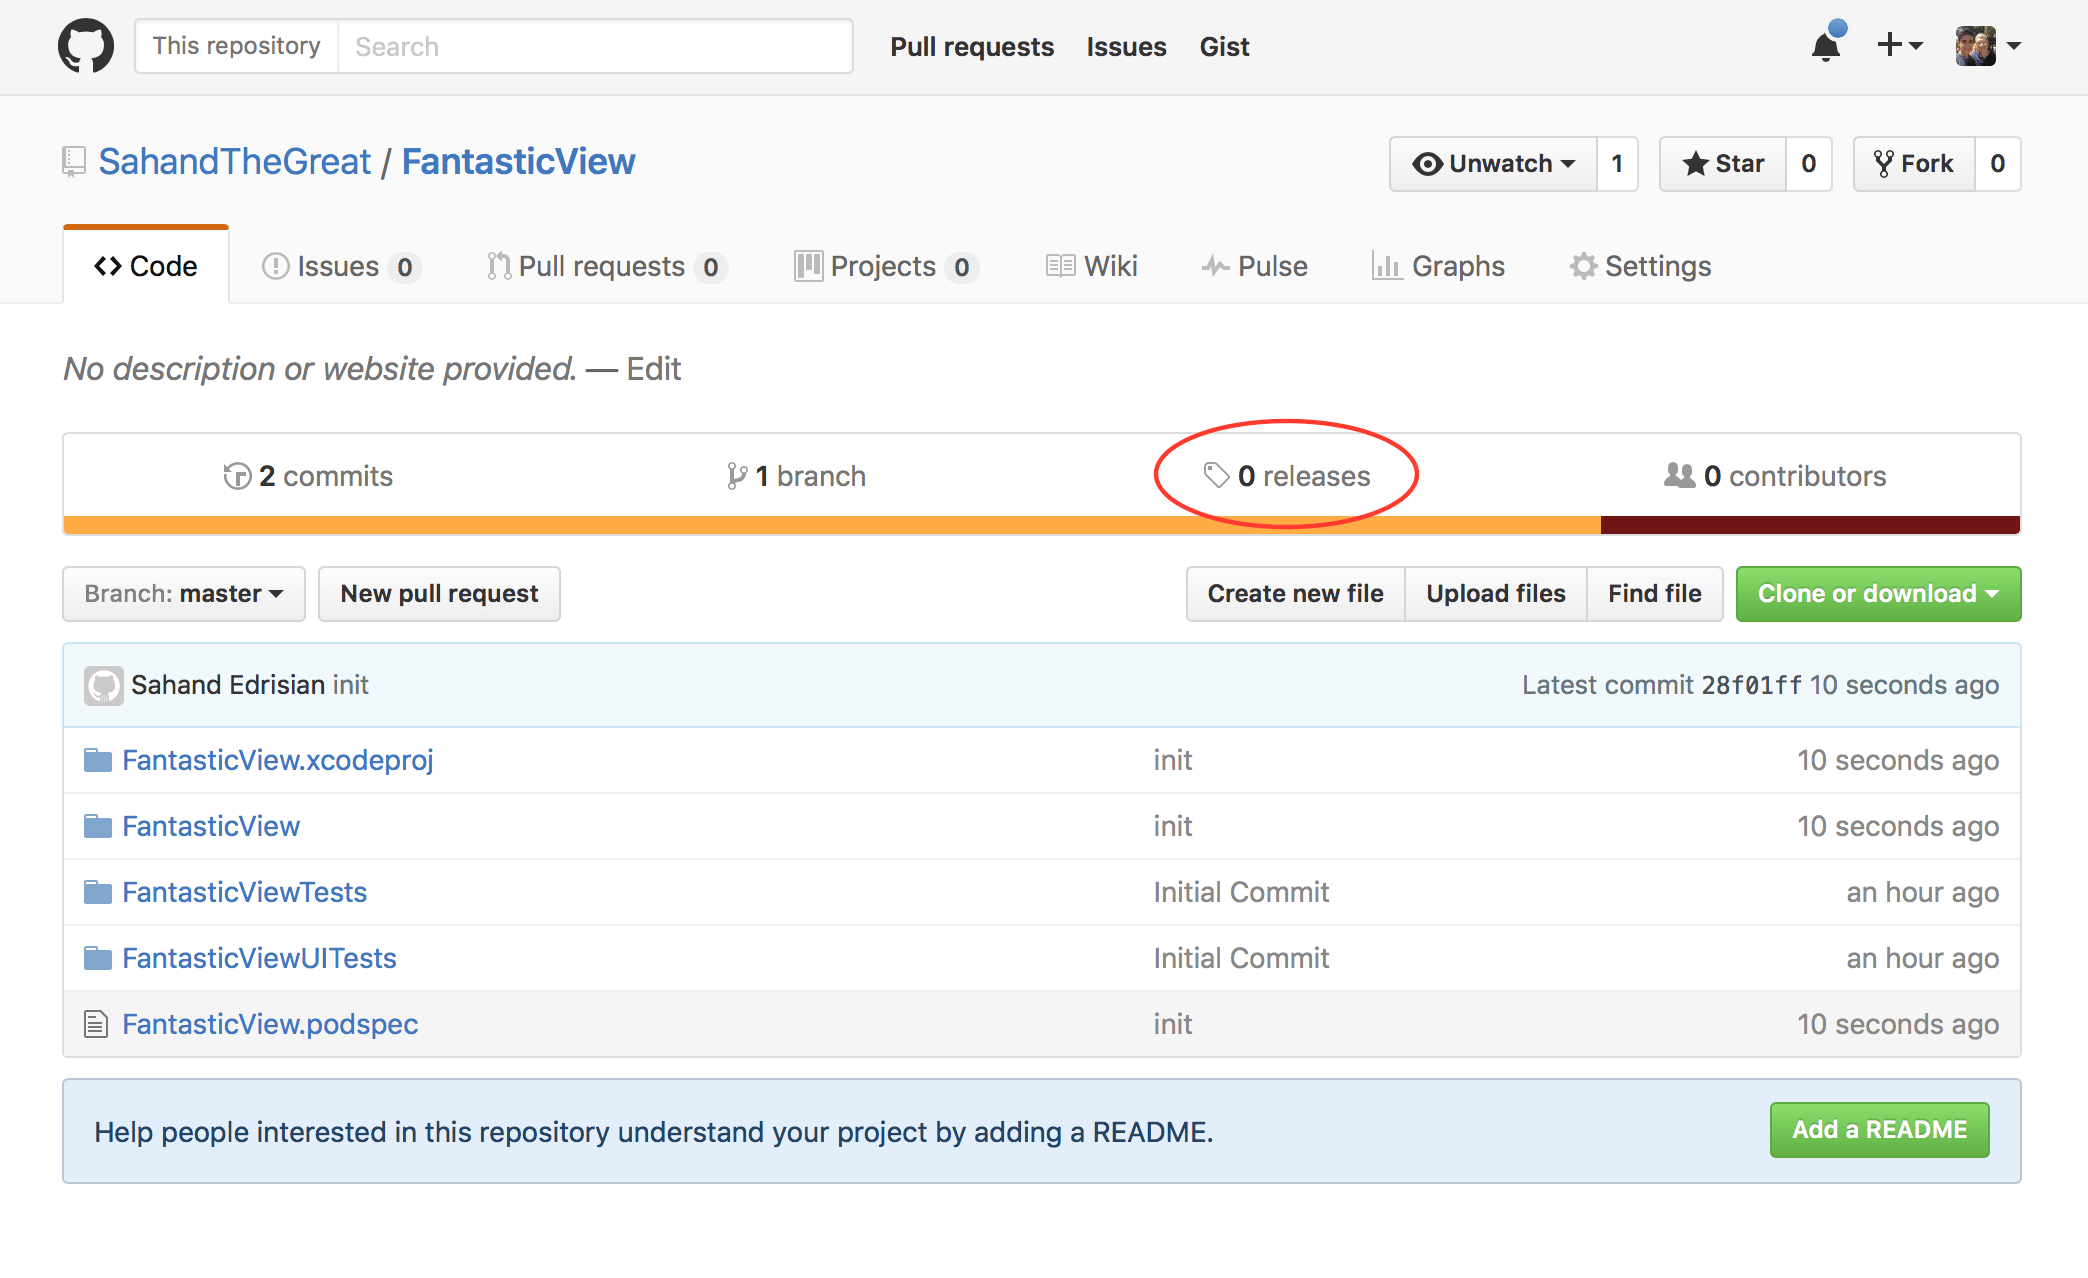
Now you must create a release for your repository. A release is a new version of your product. You can create one in your GitHub dashboard. Navigate to your repository on GitHub.
- Click the `releases` button.
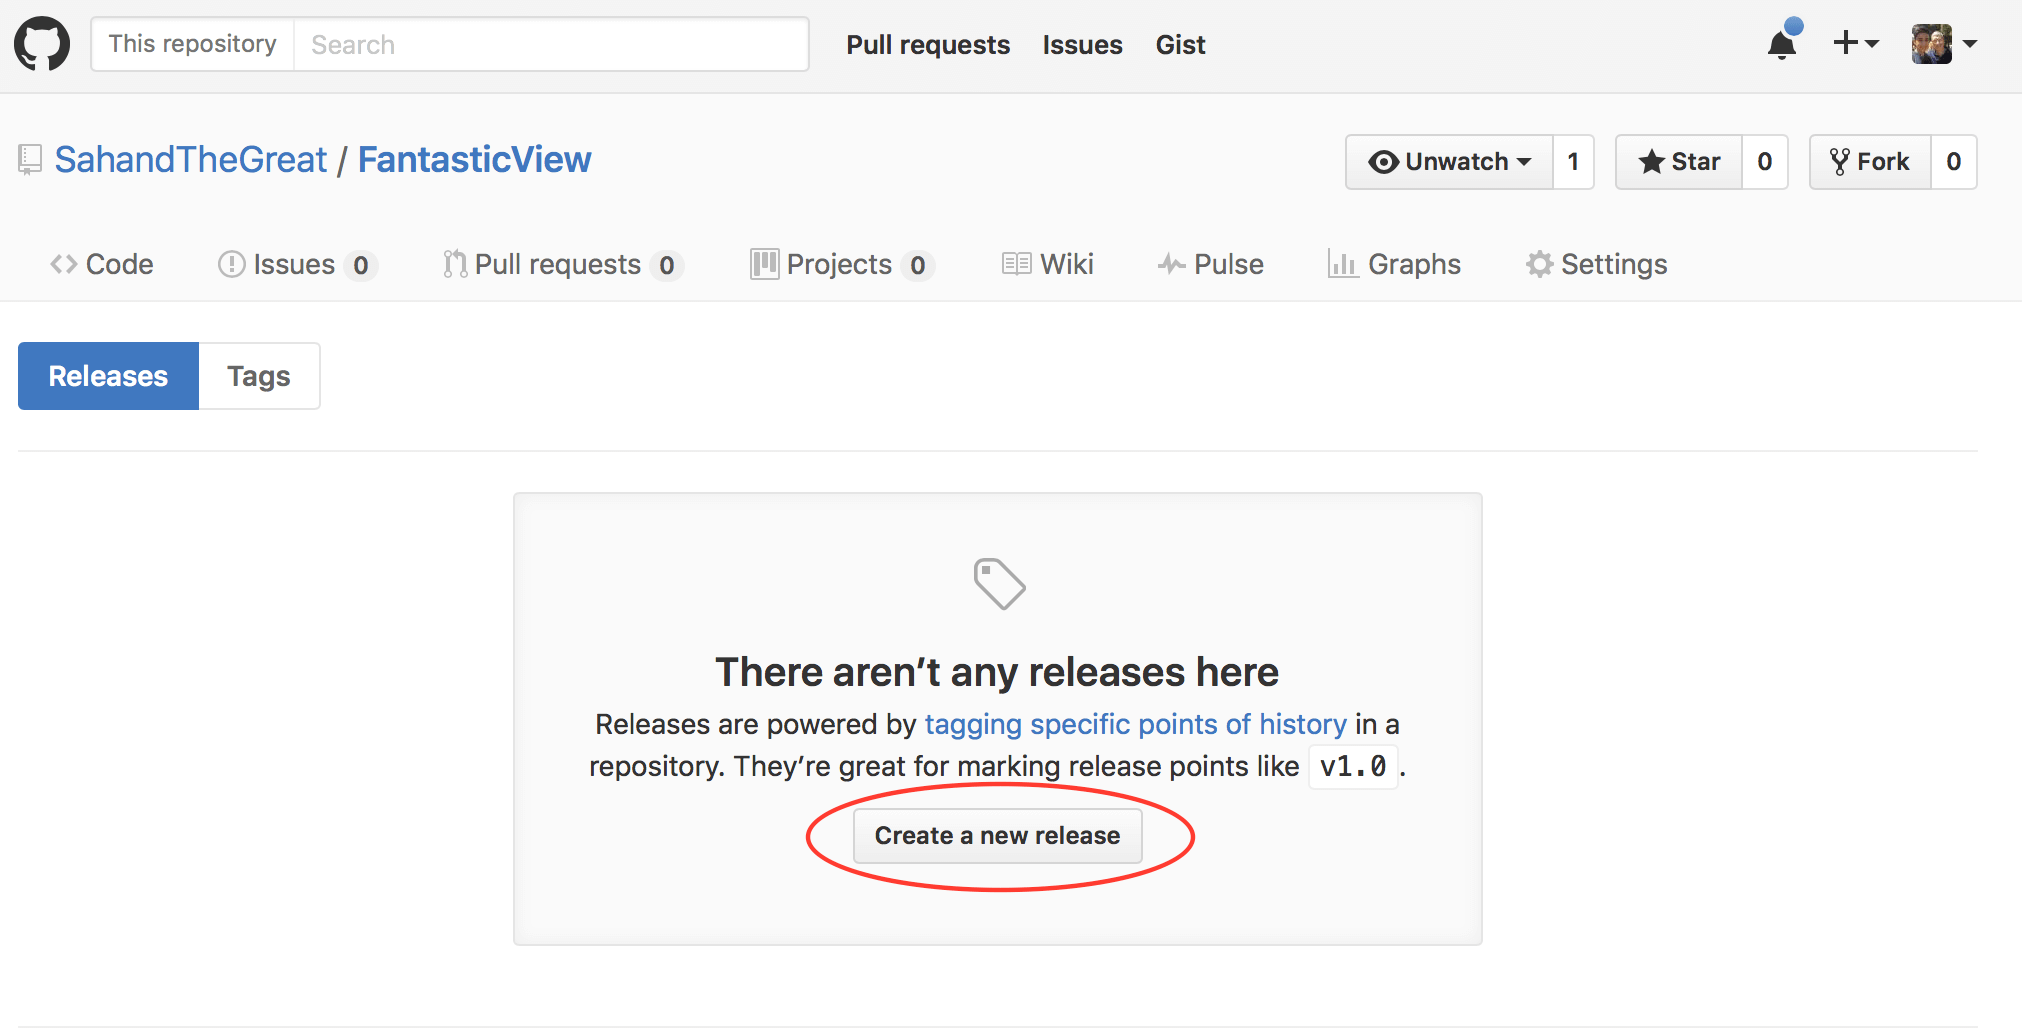
- Click `Create a new release`.
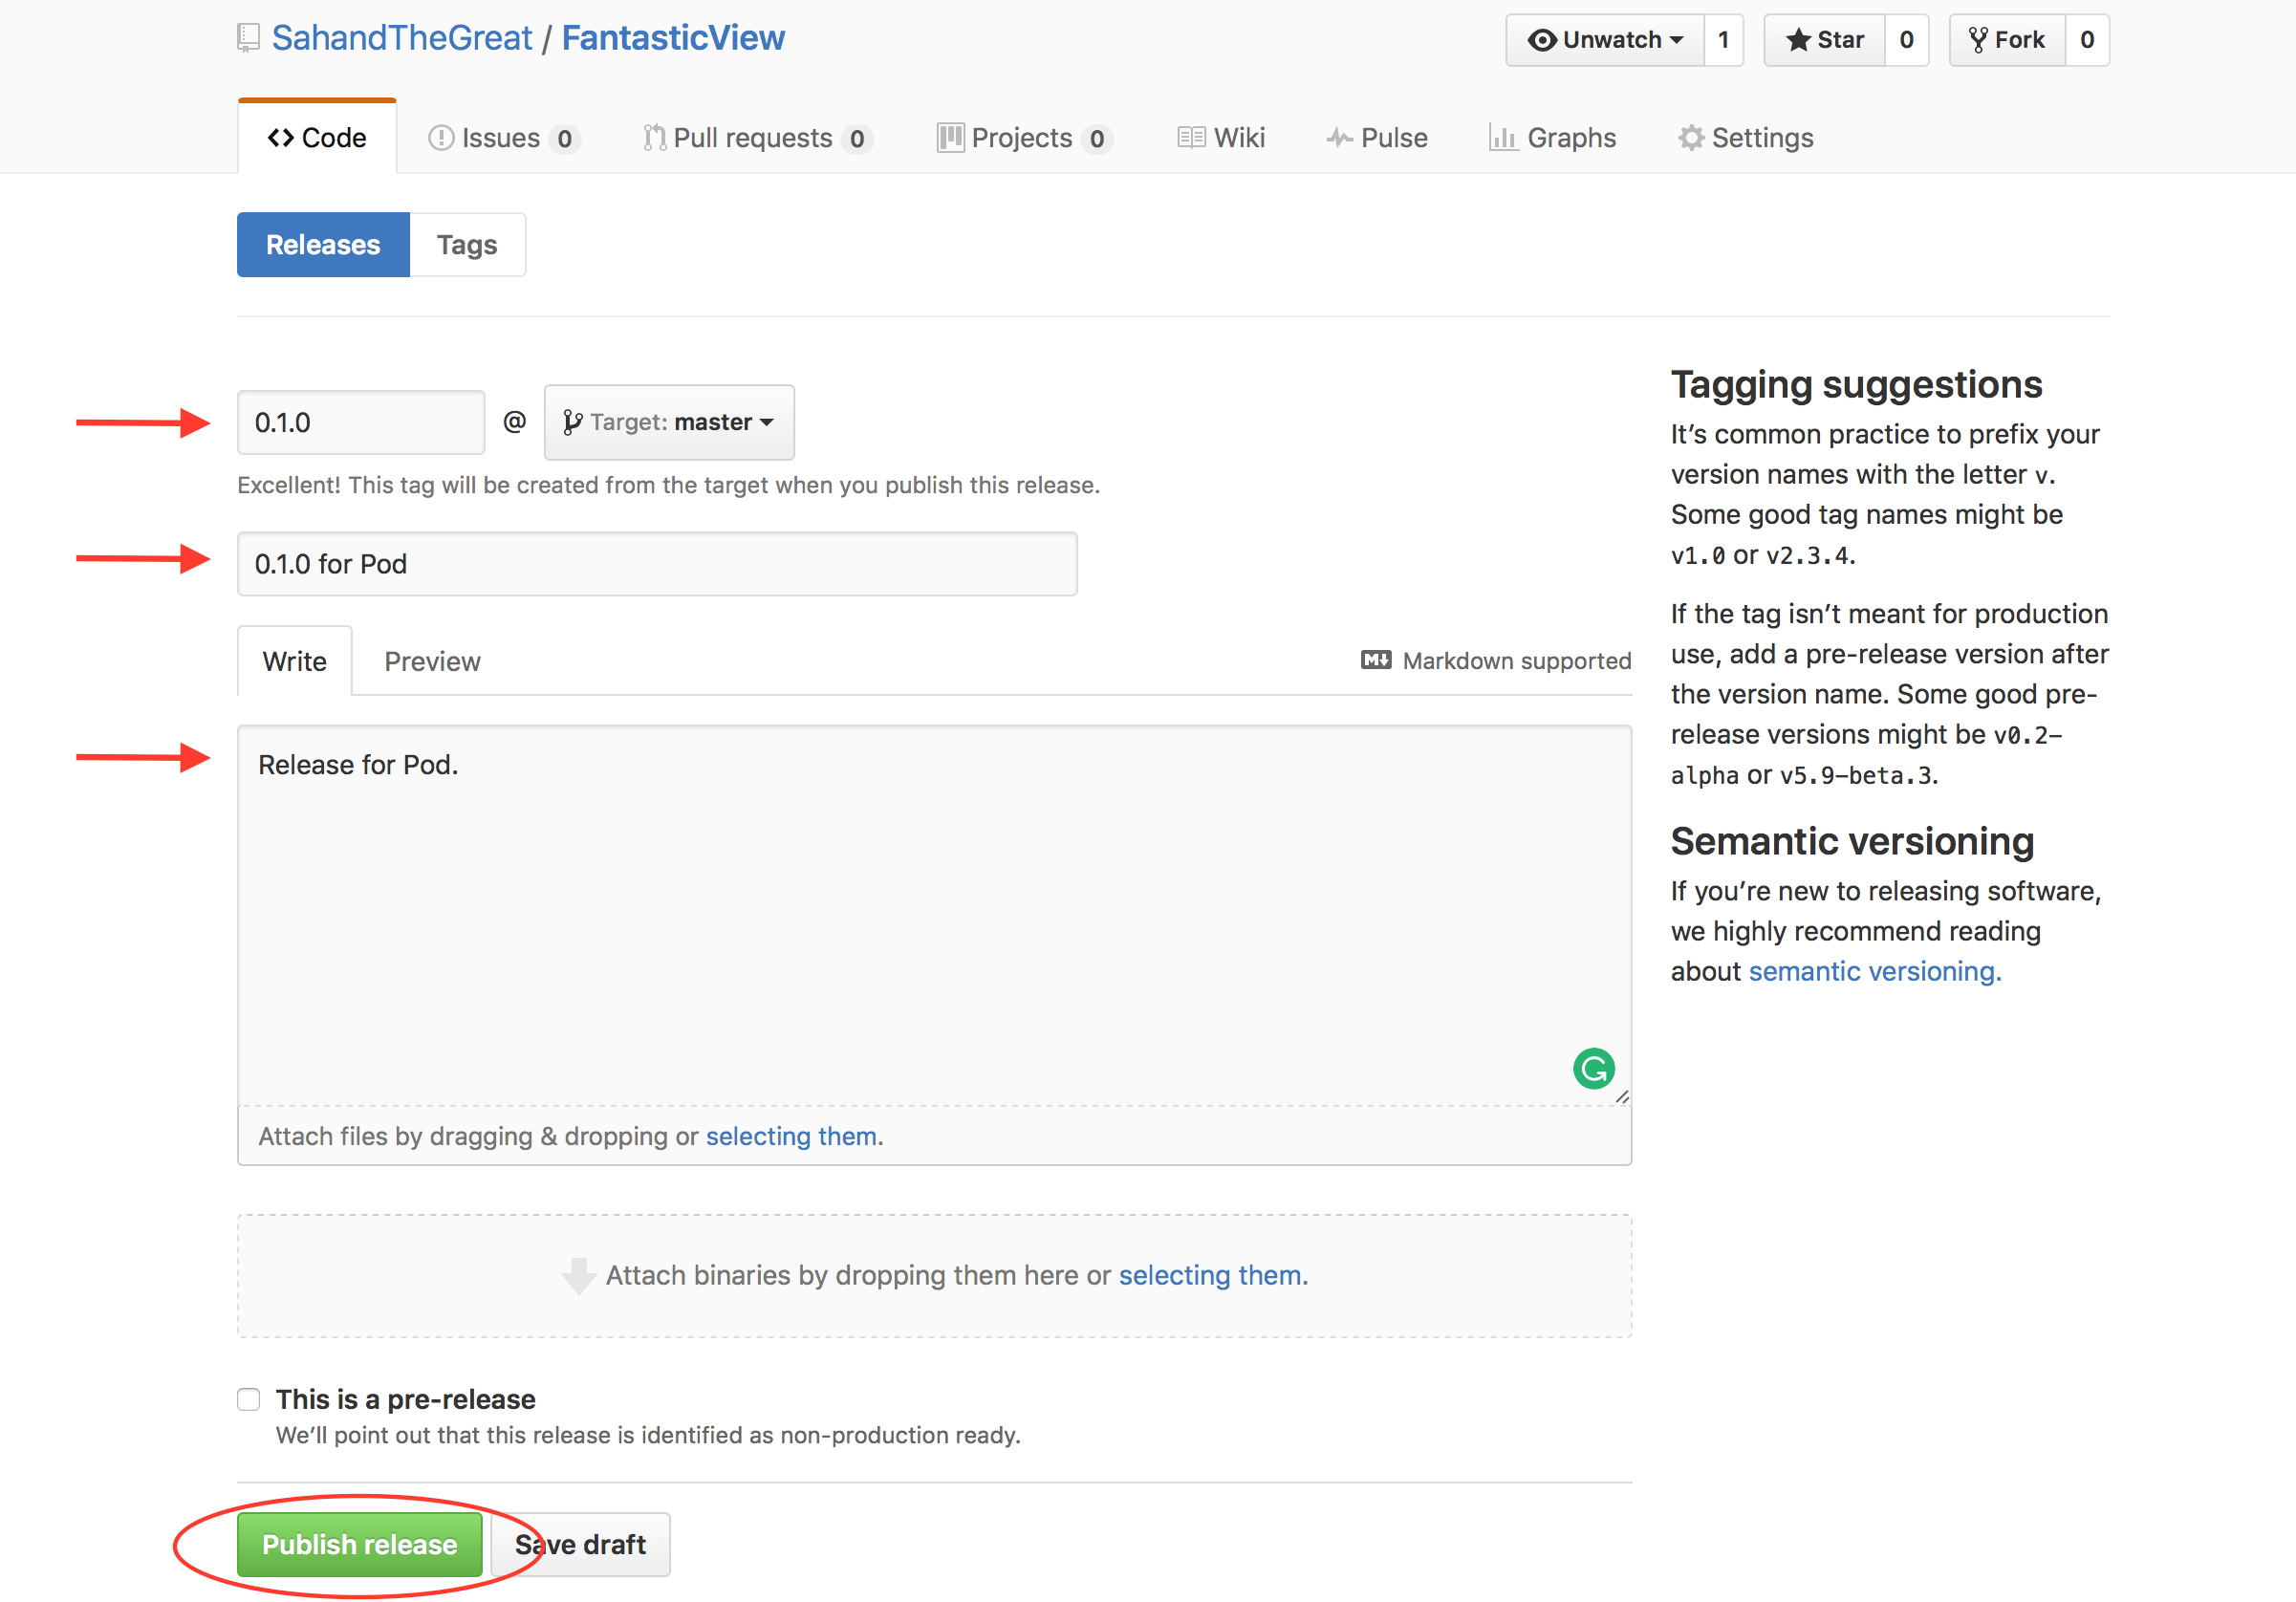
- Set the version number to `0.1.0`, then set a title and description for the release.
- Click `Publish release` and you should get something like this:
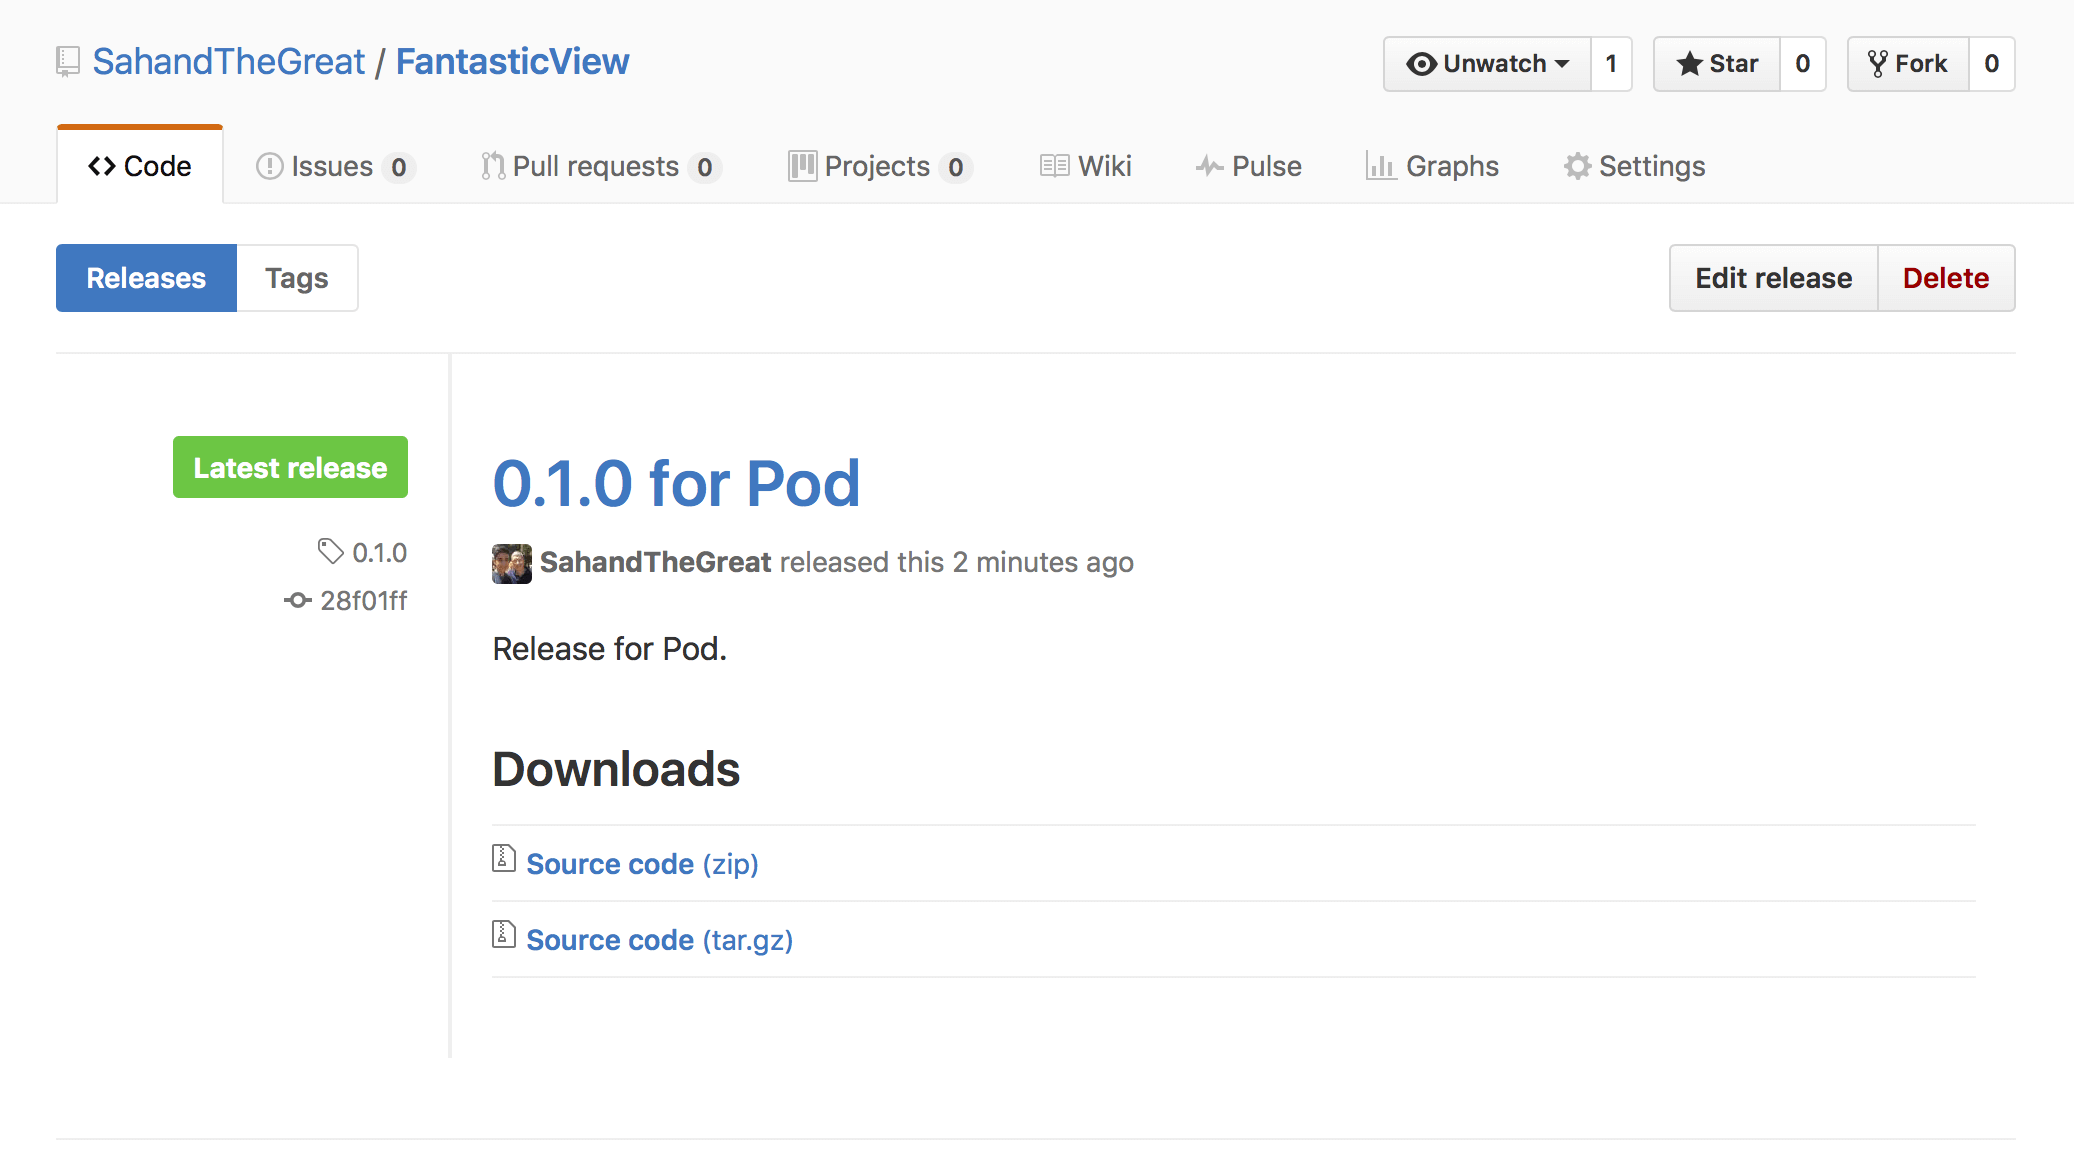
That’s it with GitHub, let’s create the Pod itself!
Creating the Pod
First, we need to make sure that you have CocoaPods installed and ready to use in your Terminal. Open your Terminal and run the following command:
sudo gem install cocoapods --pre
Now that CocoaPods is installed, you should be set to create your own Pod.
Creating a Podspec
All Pods have a podspec file. A podspec, as its name suggests, defines the specifications of the Pod! Now let’s make one:
- To create a Podspec, navigate to your project file in the Terminal.
-
Run the following command to create the file:
touch FantasticView.podspec. -
Now open the file using an editor.
-
Paste the following code inside the Podspec:
Pod::Spec.new do |s|
  s.name             = 'FantasticView'
  s.version          = '0.1.0'
  s.summary          = 'By far the most fantastic view I have seen in my entire life. No joke.'

  s.description      = <<-DESC
This fantastic view changes its color gradually makes your app look fantastic!
                       DESC

  s.homepage         = 'https://github.com//FantasticView'
  s.license          = { :type => 'MIT', :file => 'LICENSE' }
  s.author           = { '' => '' }
  s.source           = { :git => 'https://github.com//FantasticView.git', :tag => s.version.to_s }

  s.ios.deployment_target = '10.0'
  s.source_files = 'FantasticView/FantasticView.swift'

end
These variables that come after the s are all required by CocoaPods and supply the necessary information such as the name, version, summary, description, source, source files, etc.
Some important variables that require attention:
s.name– This one is obvious. It is the name that others can use to add the Pod to their project.-
s.version– This is the version of your Pod. Notice that this is equal to the version number of our GitHub release. If this version number doesn’t match the GitHub release, you will encounter an error. -
s.summaryands.description– These two will be displayed on the CocoaPods website. Make sure that thedescriptionis longer than thesummaryotherwise you will encounter a warning. -
s.homepage– it is the source URL for the Pod. Make sure to replaceYOUR GITHUB USERNAMEwith your username. -
s.author– this is where the developer’s info goes. Replace the corresponding placeholders. -
s.source_files– This is the most important parameter. It tells CocoaPods which files you need to clone. I want myFantasticView.swiftfile to be cloned, and the directory for that file isFantasticView/FantasticView.swift. There are ways to add more than one file as a source. Let’s look at an example:
├── FantasticView.xcodeproj
└── FantasticView
    ├── ViewController.swift
    ├── Info.plist
    ├── FantasticView.swift
    └── FantasticerView.swift
In this example, I want to include all the .swift files. To do this I will assign the following to the source_files variable:
'FantasticView/*.swift'
The asterisk * indicates that any file should be used. When the asterisk is placed before a file type, it will include all the files with that file type.
Say you want all the files in /FantasticView to be included when the Pod is installed. To accomplish that, just put an asterisk instead of the file name and type:
'FantasticView/*'
This will include everything, even other directories. To limit the file types, you can also use the following syntax:
'FantasticView/*.{swift,plist}'
In this instance, all the swift and plist files will be included.
Linting The Project
CocoaPods needs to verify that nothing is wrong with a project. This spans from limitations and requirements to errors and even suspicious code. CocoaPods requires you to lint your project.
Linting a project is extremely easy, but could be incredibly annoying! To lint your project run the following in your project directory:
pod lib lint
You may get the following warnings:
 -> FantasticView (0.1.0)
    - WARN  | description: The description is shorter than the summary.
    - WARN  | url: There was a problem validating the URL https://github.com//FantasticView.
Warnings are pretty straight forward. In this example, you should increase your description length and submit a valid URL for your source. CocoaPods will fail the lint if it encounters an error or even a warning.
Now let’s look at an error that you might encounter:
 -> FantasticView (0.1.0)
    - ERROR | [iOS] xcodebuild: Returned an unsuccessful exit code. You can use --verbose for more information.
    - ERROR | [iOS] xcodebuild:  /Users/sahandedrisian/Desktop/FantasticView/FantasticView/FantasticView.swift:13:32: error: type 'UIColor' has no member 'red'
    - ERROR | [iOS] xcodebuild:  /Users/sahandedrisian/Desktop/FantasticView/FantasticView/FantasticView.swift:20:37: error: use of unresolved identifier 'Timer'
When you get an error, try to read it completely and analyse what may have gone wrong. In this example, you will see the following message:
type UIColor has no member red.
But why can’t it realize that UIColor does, in fact, have a member called red?
A smart guess would be that UIColor.redColor() has been changed to UIColor.red in Swift 3.0. One could speculate that CocoaPods, or specifically, xcodebuild is compiling the project using Swift 2.2 or 2.3. The second error also confirms our speculation since NSTimer has converted to Timer.
So how can you fix this problem? CocoaPods released a fix for this. You must specify the Swift version when linting. To do this, you must create a new file called .swift-version and add the compiler version. Simply print the following command:
echo "3.0" >> .swift-version
Now run pod lib lint and you should get a validation message:
-> FantasticView (0.1.0)

FantasticView passed validation.
Woohoo! You have passed the most challenging part of this process.
Publishing Your Pod
It’s time to publish your Fantastic View to CocoaPods. Every developer should have a CocoaPods account to be able to publish to CocoaPods.
Now you might think the name of your CocoaPods account should just be called a CocoaPods account, but no, it’s a Trunk account. Now I’m not judging CocoaPods, but this is a very weird decision and left me confused for a while. You might want to read their blog post on why they made Trunk.
Making a Trunk Account
Now Trunk isn’t exactly an account; it’s a session. So basically there is no need for a password, just an email.
The process is incredibly simple:
pod trunk register
You should quickly get an email from CocoaPods to verify your ‘session’. Verify your account by clicking the link provided in the email. CocoaPods will greet you with friendly message: ACE, YOU ARE SET UP!
Pushing Your Pod
All that is left is to push your podspec using Trunk to CocoaPods:
pod trunk push FantasticView.podspec
Since I’ve already taken credit of this truly amazing and Fantastic View, the name is not available. You should change the s.name in your podspec and also your podspec file name.
After doing the changes, lint your podspec as shown in the previous section and push your trunk again. You should get the following message after successfully pushing your Pod:
Updating spec repo `master`
Validating podspec
 -> FantasticView (0.1.0)

Updating spec repo `master`
  - Data URL: https://raw.githubusercontent.com/CocoaPods/Specs/06dcdf13dd11b8c2eb4fd522b25a652fa654b180/Specs/FantasticView/0.1.0/FantasticView.podspec.json
  - Log messages:
    - September 24th, 11:08: Push for 'FantasticView 0.1.0' initiated.
    - September 24th, 11:08: Push for 'FantasticView 0.1.0' has been pushed (0.500379641 s).
Congrats! It wasn’t that hard after all. Now you can add the Pod ‘FantasticView’ to your podfile.
Conclusion
There are a couple of different ways to push your Pod. You can create Pod projects using the CocoaPods template and house an example project, readme, license, etc. However, I found that to be slightly complicated, since it contains unnecessary steps, overhead, and confusion.
In this tutorial, I created a project, added a podspec, explained the different options of the podspec file, created a trunk account and pushed the Pod. If you ever encounter a problem, you could submit an issue on the CocoaPods GitHub repo. The community is friendly, awesome, and they will always respond quickly.
Hopefully, you enjoyed reading this tutorial! You can download the full project for your reference over here.


