

Welcome back! In the previous tutorial, you learned how to use the Network Framework to detect and monitor the network status. The framework seems to be working fine through the NetStatus class, so let’s go one step further and let’s create our own small, open-source framework that will be based on the NetStatus class. In this tutorial, we will make this framework easily distributable and integratable by creating a pod using CocoaPods and we will even push it to GitHub.
Reusing NetStatus that way in multiple projects is going to be just like a walk in the park. Moreover, the “recipe” that comes in the following parts can be followed many times for any custom framework you want to create in the future.
Note: If you haven’t checked the previous tutorial, I highly recommend you to take a look first. In case that you only want to learn how to create a pod, please download this project first.
Creating The Framework
Okay, let’s get started to create a distributable library.
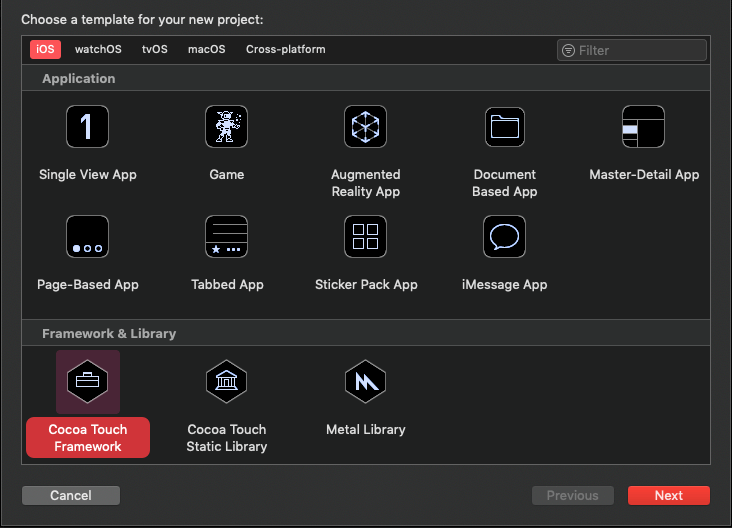
To begin, open File > New > Project… in Xcode to start creating a new project. In the first step, choose the Cocoa Touch Framework as your template option:
Next, set the proper Team, Organization Name, and Organization Identifier values, and as a product name use the name of our class: NetStatus.
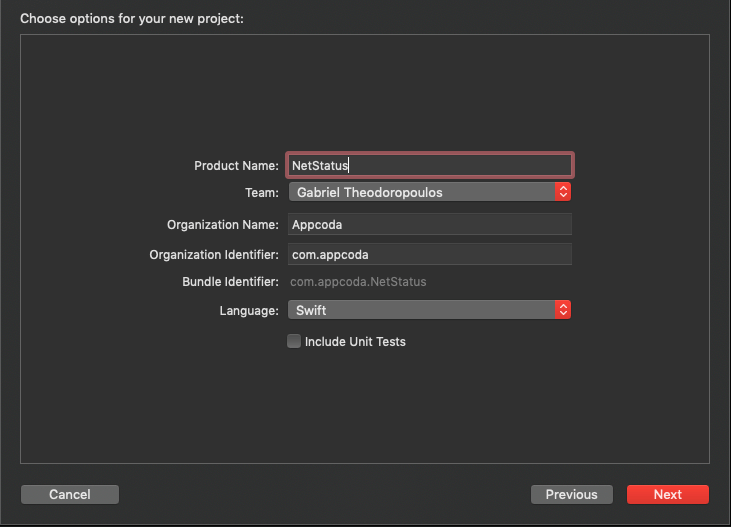
Note: You are free to set any product name for the framework we are about to create. I’ll be using NetStatus, and from now on NetStatus means the custom framework we’re creating, not the class unless it’s explicitly mentioned.
Finally, find a folder to save the new project. I would recommend to create a subfolder called NetStatus in the same root folder where NetStatusDemo project exists and save it there.
Once the project is created you will notice that not many files are contained in it. Most of the times you won’t have to do any modifications, except maybe for changing the version number or the deployment target:
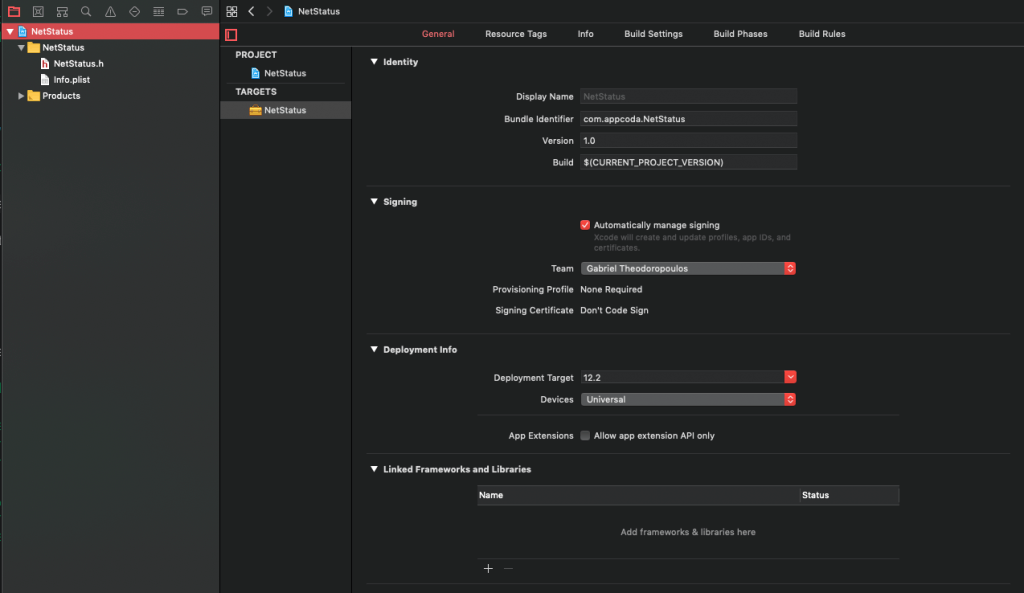
Speaking of that, change the Deployment Target to 12.0, so we can use this framework on devices running iOS 12.0 and above.
Generally, it’s considered to be a good idea to create a group for adding the source files and separate them from the rest project contents. Therefore, right click on the NetStatus root group and create a new one called Source.
Now switch back to the NetStatusDemo project, and right click on the NetStatus.swift file. From the context menu select the option Show in Finder.
Once the NetStatus.swift file shows up on Finder, bring the NetStatus Xcode project in front again and drag-and-drop NetStatus.swift in the Source group in Xcode. After dragging, make sure to select the Copy items if needed checkbox and that the NetStatus target is selected too.
Is the Framework Working?
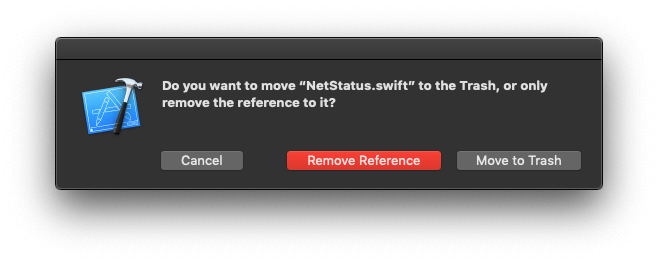
All steps above are what we needed for creating our own small framework based on the NetStatus class. But is it actually working? We will verify that, so at first close the NetStatus project we just created. Then, in the NetStatusDemo project select and delete the NetStatus.swift file from the Project Navigator. When you’ll be asked, move it to trash.
Now, go to Finder and find the NetStatus Xcode project (NetStatus.xcodeproj container). Drag and drop it to NetStatusDemo.
Note: Once again, make sure that you’ve closed NetStatus project before you drag it into the NetStatusDemo.
Keep in mind that if you want to delete the project you just dragged from the NetStatusDemo project you should remove the references only. Do not move to trash, otherwise you’ll delete the NetStatus framework files.
Open the NetStatusDemo target and go to General tab. Click the plus (+) button in the Embedded Binaries and select the NetStatus.framework from the dialog that appears. The selected framework will also show up in the Linked Frameworks and Binaries.
Build the project once by pressing Cmd + B in your keyboard, or through the Product > Build menu in Xcode. Once building is finished, open the ViewController.swift file and import the NetStatus framework.
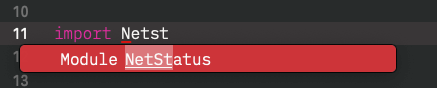
Build again. You’ll see that an error is appearing multiple times! Why’s that happening?

It all has to do with the access control and default access levels that modules have in Swift! NetStatus class has the internal access level set by default, which makes it visible only inside its own module, the NetStatus framework. NetStatusDemo is not capable of “seeing” it right now so let’s fix that.
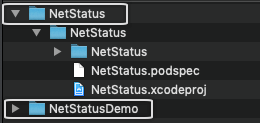
Expand the NetStatus.xcodeproj container and then expand the NetStatus and Source groups subsequently. You will find the NetStatus.swift file there. As a side note, the recommended way to implement a custom framework is by embedding it into a demo project and discovering such kind of problems as you go. As an additional tip, changes made to embedded projects are not instantly visible to other modules, so build each time you want to make any changes visible to the demo project.
Now, open the NetStatus.swift file and update the class definition as follows:
public class NetStatus {
    ...
}
Build again and open the ViewController.swift file. We still have errors, but this time the message is different:

The error is more clear this time, and once again we are facing access level restrictions. The shared instance cannot be accessed as it’s set as internal by default. To make that a bit more clear, in the NetStatus.swift file we define the shared instance as follows:
static let shared = NetStatus()This is equal to this:
static internal let shared = NetStatus()Internal level is inferred, and it’s not necessary to explicitly write it. Now, if we want to make the shared instance visible to NetStatusDemo all we have to do is to change the above to this:
static public let shared = NetStatus()Build again and you’ll see that now it’s not the same error being repeated many times, but multiple errors of the same kind that appear. The default access level is preventing NetStatusDemo from accessing the properties and methods we implemented in the NetStatus class.

Let’s fix everything at once now, so add the public keyword to all properties except for the monitor:
public var isMonitoring = false

public var isConnected: Bool {
    ...
}

public var interfaceType: NWInterface.InterfaceType? {
    ...
}

public var availableInterfacesTypes: [NWInterface.InterfaceType]? {
    ...
}

public var isExpensive: Bool {
    ...
}

public var netStatusChangeHandler: (() -> Void)?

public var didStartMonitoringHandler: (() -> Void)?

public var didStopMonitoringHandler: (() -> Void)?
Do the same for the startMonitoring() and stopMonitoring() methods too:
public func startMonitoring() {
    ...
}

public func stopMonitoring() {
    ...
}Note: It just happened to make almost all properties public as we need them to be visible from the NetStatusDemo module. Generally, make public only those properties you need to be visible out of their own module.
Build again. This time there are no errors! Congrats 👏 !
Creating a Pod
It’s a common scenario to add third-party libraries when building iOS apps, and the best way to manage them is to use a Dependency Manager such as CocoaPods. We will use it to create our own pod and we’ll make installing NetStatus framework possible from a local pod at first, and then remotely from GitHub. If you haven’t installed CocoaPods already please follow the instructions on site to do it now.
Now open Terminal and navigate to the folder where the NetStatus framework resides. You can easily do that if you have the New Terminal at Folder service enabled. Just right click on the NetStatus folder and open the Services sub menu:
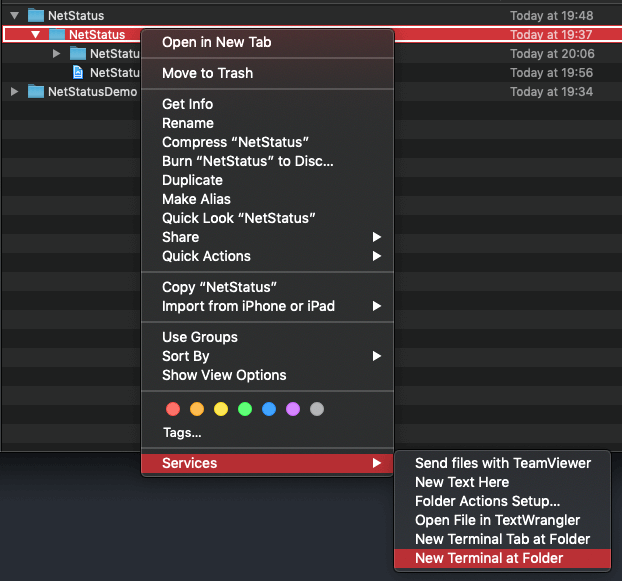
If you don’t see that service available on your mac, see how to enable it here.
On Terminal type the following:
pod spec create NetStatusYou should see a message saying “Specification created at NetStatus.podspec and a new file called NetStatus.podspec appearing in Finder.
Open that file in your favorite editor, or just in Xcode. Take a look at what the .podspec file contains if that’s your first time with such a file. At the end, either edit it or replace the contents with the following:
Pod::Spec.new do |spec|
  spec.name         = "NetStatus"
  spec.version      = "1.0.0"
  spec.summary      = "A small framework to monitor network changes in Swift."
  spec.description  = <<-DESC
                    NetStatus is a small and lightweight Swift framework that allows to monitor and being notified for network status changes in a super-easy way!
                   DESC
  spec.homepage     = "https://appcoda.com"
  spec.license      = { :type => "MIT", :file => "LICENSE" }
  spec.author       = { "YOUR_NAME" => "YOUR_EMAIL" }
  spec.platform     = :ios, "12.0"
  spec.source       = { :http => 'file:' + __dir__ + "/" }
  # spec.source       = { :git => "https://github.com/YOUR_ACCOUNT/YOUR_REPO.git", :tag => "#{spec.version}" }
  spec.source_files = "NetStatus/Source/*.{swift}"
  spec.swift_version = "5.0"
end
Take your time to see the settings we kept here. The above consists of the minimum information we must provide to the pod spec file.
You are free to change the summary and the description of the pod. Description should always be longer than the summary, otherwise you’ll be getting warnings about that. Also, the home page is supposed to point to a website related to the framework that this pod regards, but since we don’t have such a page we’ll use AppCoda web address. Also, update the author’s details by providing your name and email accordingly.
Regarding the rest, spec.platform specifies the minimum required iOS version for the framework to be installed. spec.swift_version is defining the Swift version to be used for validating the framework’s code. spec.source_files “says” where the source files exist in the framework’s folder structure.
Notice this line:
spec.source = { :http => 'file:' + __dir__ + "/" }This is a workaround for specifying the current folder as the source of the framework. In earlier CocoaPods versions, there was a key called :path, but it’s not supported anymore. We keep that for now as the source because there’s no GitHub repository existing yet for the NetStatus framework.
Check if the pod is valid by running the following command on Terminal:
pod spec lintOptionally you can specify the file name:
pod spec lint NetStatus.podspecYou will have to wait for a few moments while the pod spec is being validated. Validation might fail if the path to the framework’s folder cannot be recognized properly, but that’s acceptable for now; we’ll change the source pretty soon.
Back to Xcode now, select the NetStatus.xcodeproj target, right click on it and delete it. Make sure to select Remove Reference and not Move to Trash, otherwise you’ll delete the original source files. After that, close the project.
Open a new Terminal window now (or a new tab in the existing Terminal) and navigate to the path where the demo project NetStatusDemo exists. Type the following to create a Podfile:
pod initOpen the created Podfile in your editor, and update it as shown next:
platform :ios, '12.0'
target 'NetStatusDemo' do
  use_frameworks!

  pod 'NetStatus', :path => '../NetStatus/NetStatus'

end
Here we specify the path where the pod spec file exists. Supposedly, the root folder of the NetStatus project is where the NetStatusDemo project folder is.
Save it, and back to terminal write:
pod installYou should see the NetStatus framework being installed based on the pod spec file we created right before. You can verify that even by looking at the contents of the demo project folders; the Pods subfolder exists after installing the pod with the previous line:
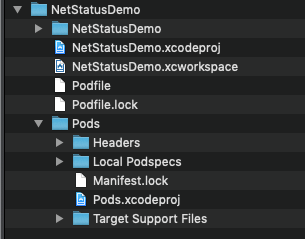
When using CocoaPods to install frameworks, a Xcode workspace is being created automatically during the pod installation process. This is what you should be using from now on, so double click to open the NetStatusDemo.xcworkspace instead of the NetStatusDemo.xcodeproj.
Once the workspace opens in Xcode, press Cmd + B to build the demo project again. If you’ve followed everything step by step up until this point, then building the project will be successful!
Note that when installing local pods in the way we did it here it’s still possible to edit the framework’s source files. Expand the Pods target, and then expand the Development Pods > NetStatus groups. You will find NetStatus.swift file being there. Just remember to build so any changes become visible to demo project.
Adding Framework To GitHub Repository
Usually pods are not being created to be kept and used locally. Most of the times what developers do is to create a repository on GitHub and put the framework along with the pod there. If the repository is public then installing the framework using CocoaPods is accessible to anyone; if not, only people who know about the private GitHub repository can install the framework through the pod.
To follow the steps described in this part require from you to have a GitHub account. A Bitbucket account would work too, but I won’t go into details using Bitbucket here. To get started, get connected to your GitHub account in your favorite browser. Then click the plus (+) button on the top right to create a new repository.
The first step is to provide a valid name for the repository. NetStatus would be just fine. Then, provide a short description optionally. Next, mark the repository as Private, enable the option to initialize with a Readme file, add a .gitignore file for Swift and select MIT license. Read what each license type is for and feel free to pick another one if you want.
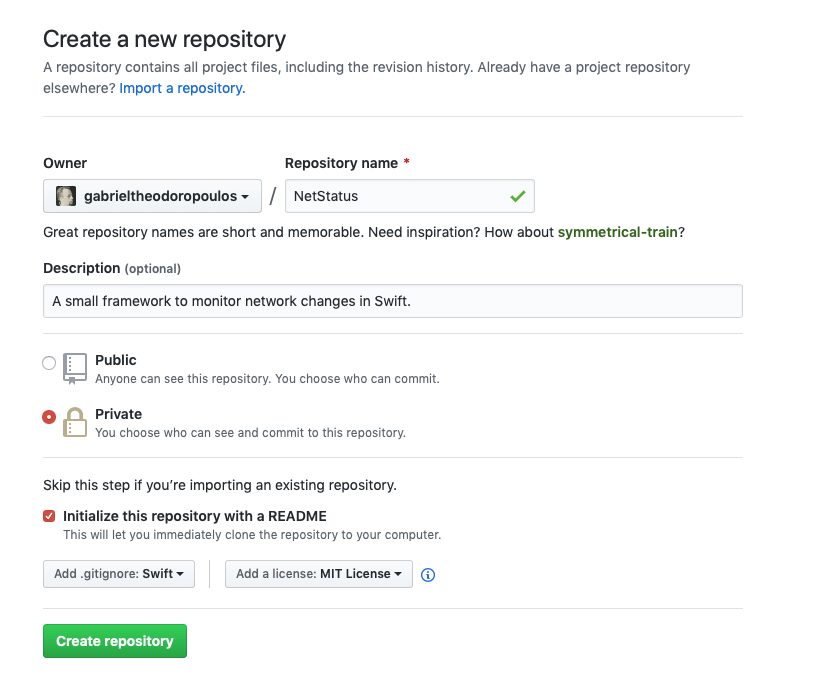
Finally, click on the Create repository button to have the new repository being created.
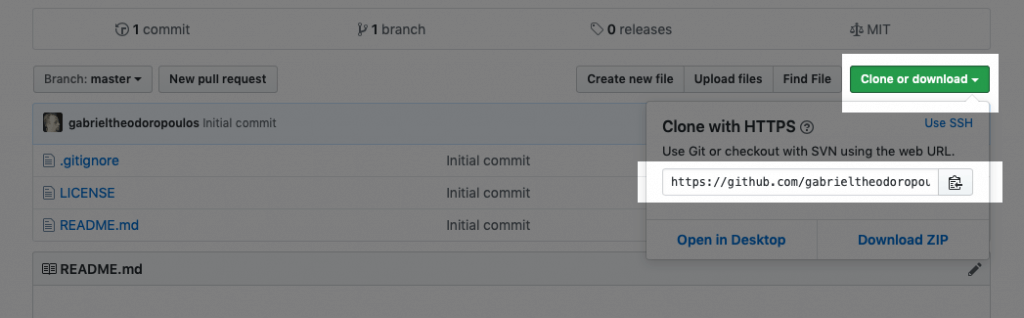
Once you’ll be taken to the main page of the repository, click on the Clone or download green button and copy the URL to the repository.
Go now to the root folder of both the framework and the demo project, and open a new Terminal window or tab. Type the following to create a new subdirectory and then to enter to it:
mkdir repo
cd repo
Now, clone the repository from GitHub. Type:
git clone URL_TO_YOUR_REPOSITORYPaste above the URL to your own repository as you copied it from the GitHub page previously. The above command for me looks like this:
git clone https://github.com/gabrieltheodoropoulos/NetStatus.gitThe repository will be cloned in the repo directory, under the NetStatus subdirectory.
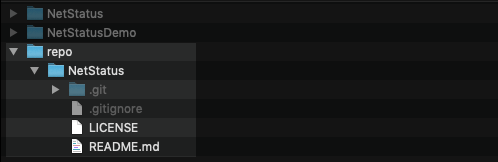
Navigate in Terminal into that directory:
cd NetStatusIn Finder now go to the directory where the framework exists, and copy all contents into the new directory created by cloning the repository. Get NetStatus.xcodeproj, NetStatus subdirectory and Netstatus.podspec and paste them into the /repo/NetStatus directory:
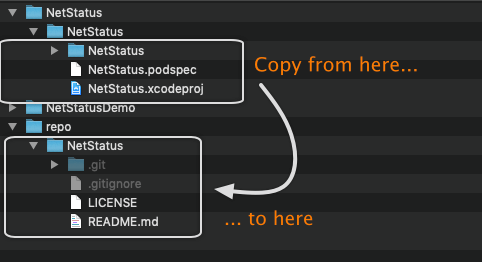
Alternatively, if you keep up with the directory structures I’m using in this post, you can do everything at once through terminal:
cp -r ../../NetStatus/NetStatus/. ./At this point, feel free to edit the Readme file and add any content you want.
Now, let’s update the .podspec file in the /repo/NetStatus directory. Delete the line where we specify the local path as the source, and uncomment the source pointing to GitHub repository.
 # spec.source       = { :http => 'file:' + __dir__ + "/" } # DELETE THIS LINE!
spec.source       = { :git => "https://github.com/YOUR_ACCOUNT/YOUR_REPO.git", :tag => "#{spec.version}" }
Make sure to provide above the URL to your own repository. For example, mine is this:
spec.source = { :git => "https://github.com/gabrieltheodoropoulos/NetStatus.git", :tag => "#{spec.version}" }Save the NetStatus.podspec file and go back to Terminal. It’s time to update the repository, and the first step is to add all new and edited files to git:
git add .Next, let’s commit the changes by providing a short description:
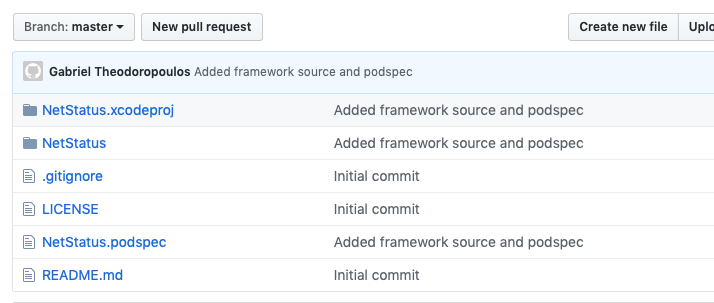
git commit -m "Added framework source and podspec"Finally, let’s push everything to GitHub again:
git push -u origin masterWhen the process is finished refresh your GitHub repository. You’ll see that all the above files have been pushed.
In addition to the above, we should tag the repository so it matches to the spec.version number in the .podspec file:
git tag 1.0.0
git push origin --tags
Remember to always update the tag numbering according to the spec.version value, so pod always points to the proper version of the repository.
Try now to validate the .podspec file again by typing:
pod spec lintThis time validation should be successful saying: “NetStatus.podspec passed validation.”
Let’s try now to install the framework from the GitHub repository. Go to the NetStatusDemo folder, and edit the Podfile as shown below:
platform :ios, '12.0'
target 'NetStatusDemo' do
  use_frameworks!

  pod 'NetStatus', :git => 'https://URL_TO_YOUR_REPOSITORY'

end
Replace the fake URL with the URL to your repository, and save the file. Then open a new Terminal at the location of the NetStatusDemo project, or if you have the previous one already open type:
pod installNote: Make sure that NetStatusDemo.xcworkspace is not open in Xcode before running the above command.

If you get the warnings shown above, just follow the instructions given on Terminal about the actions that should be taken on the NetStatusDemo project and you’ll be fine.
Now, open the NetStatusDemo.xcworkspace in Xcode again and build to verify that everything is okay. NetStatus framework has been installed from a remote source!
Pushing Pod To Public Trunk
There’s one last step which I’ll just describe here, and that is how to make your framework publicly available for everyone to use, exactly as you do with other people’s frameworks in your own projects. The first move is to make your repository on GitHub public, and you can achieve that by going to Settings > Make Public in the Danger Zone at the bottom of the page.
Original guidelines regarding the next steps can be found here. Initially you need to use your email address and sign up for an account. The account is connected to the device you’re signing up from:
pod trunk register YOUR_EMAIL 'YOUR NAME' --description="YOUR COMPUTER (eg. Macbook Pro)"Watch out to your emails because you’ll receive a confirmation email with a link which you have to click to. Once you do that, the next step is to push the pod to the public trunk:
pod trunk push PODNAME.podspecSet the proper name instead of “PODNAME” above and wait. If the everything is okay you’ll have a success message on your Terminal, otherwise you’ll get the reasons of the process failure. If you see just warnings and you want to get rid of them, suffix the above with: --allow-warnings:
pod trunk push PODNAME.podspec --allow-warningsNote that registering for an account doesn’t have to be done every time you have a pod to push.
Summary
Today we’ve gone through several different steps, and we’ve turned our attention to other stuff as well besides Xcode. Procedures shown above is what you need for publishing open source frameworks on GitHub and making them available for other people to use them too. I hope you enjoyed the today’s post content, and that there’s something new that you’ve learnt here. See you next time 👋 !


