Editor’s note: When Facebook released its Paper app, it generated a lot of buzz in the app world. If you’ve used Paper before, the visual news feed reader, you should be amazed by its beautiful and fluid user interface. The design and attention to detail on the app is unmatched. The app refrains from using buttons and menus, but was built to be gesture-driven, to a degree that was uncommonly found in iOS apps at the time of its release. It went beyond Core Animation. The team has built its own animation engine to support all the smooth animations and coordinate animations with touch inputs. When I first tried out the app, I was wondering how some of the animations were implemented. Honestly I didn’t know how. A couple months later, the company open-sourced Pop, the animation engine behind its iOS Paper app. As a Facebook’s engineer described, Pop drives the scrolling, bouncing, and unfolding effects that bring Paper to life. Thanks to Facebook team. With the Pop framework, this means you can create similar animations that were found on Paper in your own apps.
The Pop framework was first released in late April, 2014. So far we haven’t written any tutorials about the framework. Thanks to Hossam who is kind enough to share with us an introduction of POP and show us how to create a few simple animations.
Enter the Pop tutorial.
In this tutorial, we will talk about Facebook POP framework to make great and easy animations in your own iOS apps. Like any other tutorials on AppCoda, I will help you understand and master Pop by examples. We will create four simple animations together to explore the framework.
Pop is an extensible animation engine for both iOS and OS X. In addition to basic animations including Linear, Ease-In, Ease-Out, Ease-In-Ease-Out animations, it supports spring (at the time of its release, spring animation was not supported in iOS), decay and custom animations:
- Spring – dynamic animation that creates a nice bouncing effect.
- Decay – dynamic animation that brings a movement to a smooth halt.
- Custom – because the engine is designed to be extensible, you can create your own custom animations.
The fundamental animation type of Pop is a POPAnimation. You can think of it as the abstract or base class of all POP animations. The Pop interface is implemented as an addition of category on NSObject. This allows any object to be animated.
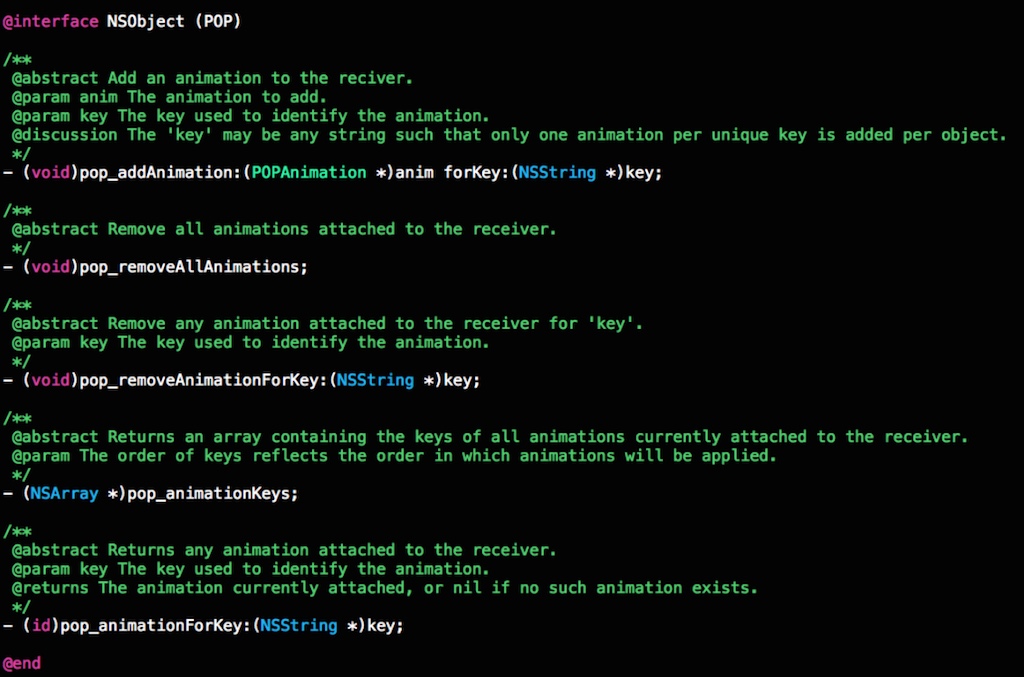
The Pop API is very developer friendly that lets you easily build some realistic, physics-based interactions. For instance, here is the code snippet for creating a spring animation on a text label:
POPSpringAnimation *sprintAnimation = [POPSpringAnimation animationWithPropertyNamed:kPOPViewScaleXY];
sprintAnimation.toValue = [NSValue valueWithCGPoint:CGPointMake(0.9, 0.9)];
sprintAnimation.velocity = [NSValue valueWithCGPoint:CGPointMake(2, 2)];
sprintAnimation.springBounciness = 20.f;
[self.textLabel pop_addAnimation:sprintAnimation forKey:@"springAnimation"];
Easy, right? Let’s get started and create the demo app. I’m sure you’ll have a better understanding of Pop after going through the project.
Using Pop Framework
If you use CocoaPods, you can just add the following to your project Podfile:
pod ‘pop’, ‘~> 1.0’
For non-CocoaPods project, you can download the Pop framework here and add the “pop” folder to your workspace. Go to your project and ensure the “Other Linker Flags” option is added with -lc++ under Build Settings.
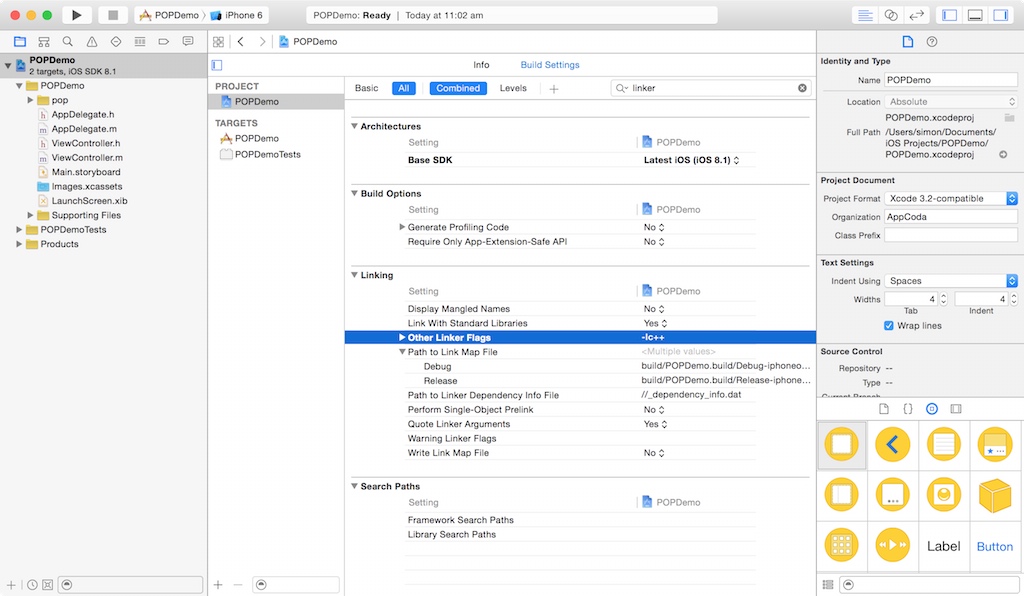
Also set the Header Search Path to the correct folder. For instance, I used to put the “pop” framework under a “Library” folder. You can set the Header Search Path to “$(SRCROOT)/Library”. To use the framework, you can just add the following import statement in your source code:
#import
Once you added the framework, create a simple table view like below. It’s just a simple table displaying three rows:
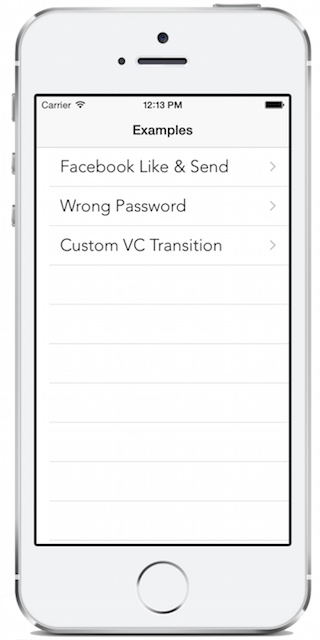
If you don’t want to start from scratch, you can download the starter project here.
Example #1: UITableViewCell Animation
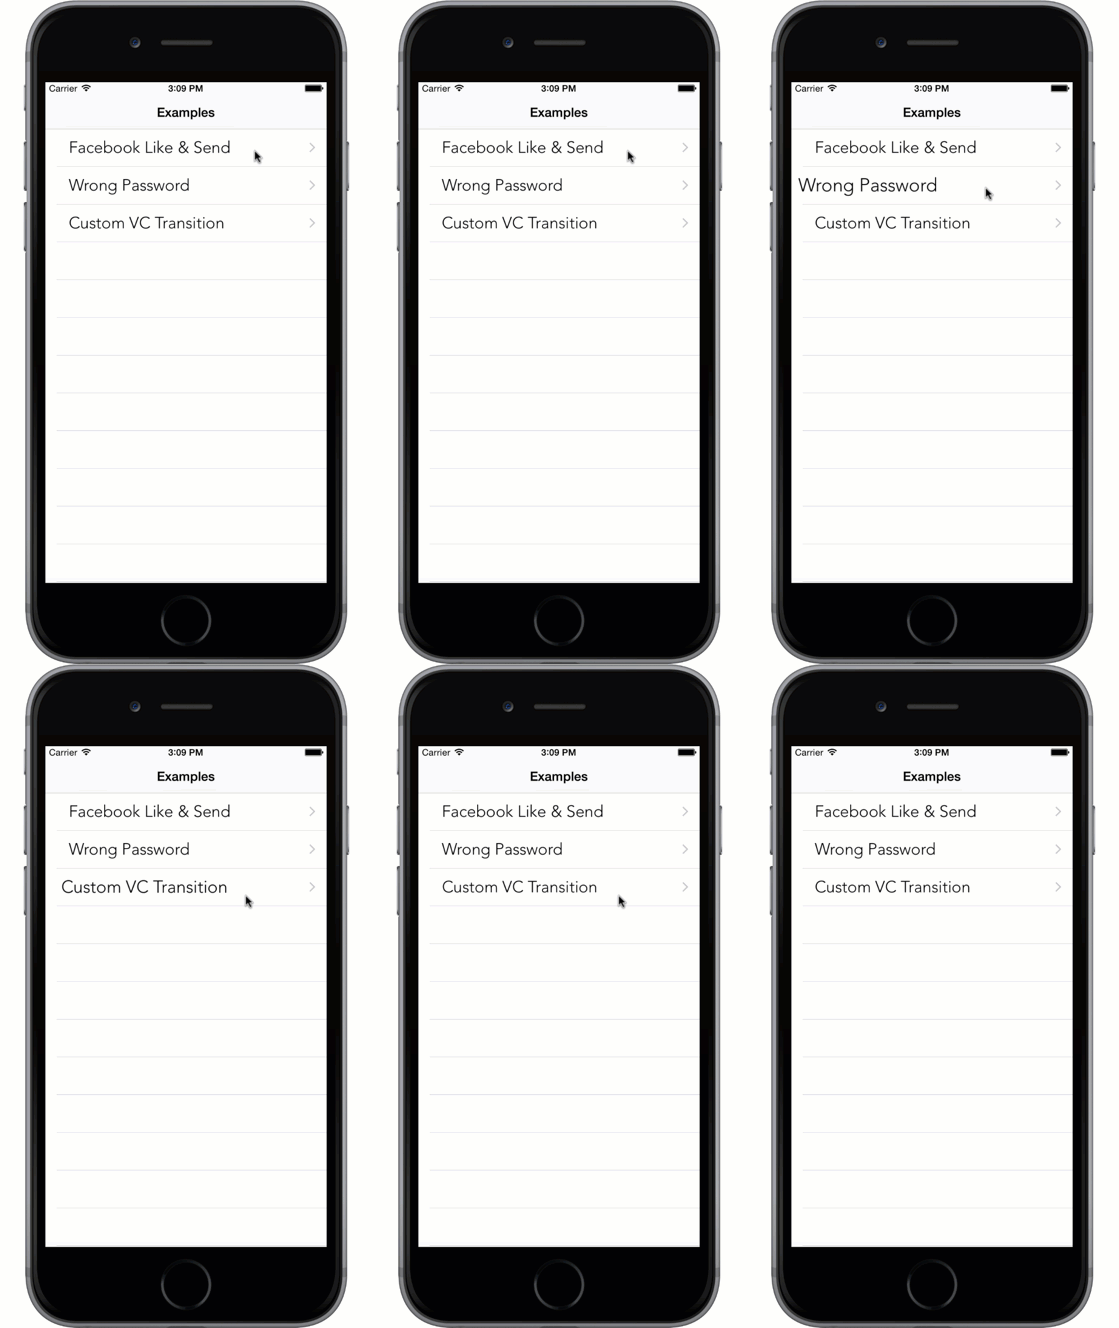
For the first example, we will create animations on the table view cells. We will add a basic scale up animation when a user highlights a cell. When releasing, we will scale it back using spring animation.
Go to ExampleCell.m and override the setHighlighted: method using the code snippet below:
- (void)setHighlighted:(BOOL)highlighted animated:(BOOL)animated
{
    [super setHighlighted:highlighted animated:animated];
    if (self.highlighted) {
        POPBasicAnimation *scaleAnimation = [POPBasicAnimation animationWithPropertyNamed:kPOPViewScaleXY];
        scaleAnimation.duration = 0.1;
        scaleAnimation.toValue = [NSValue valueWithCGPoint:CGPointMake(1, 1)];
        [self.textLabel pop_addAnimation:scaleAnimation forKey:@"scalingUp"];


    } else {
        POPSpringAnimation *sprintAnimation = [POPSpringAnimation animationWithPropertyNamed:kPOPViewScaleXY];
        sprintAnimation.toValue = [NSValue valueWithCGPoint:CGPointMake(0.9, 0.9)];
        sprintAnimation.velocity = [NSValue valueWithCGPoint:CGPointMake(2, 2)];
        sprintAnimation.springBounciness = 20.f;
        [self.textLabel pop_addAnimation:sprintAnimation forKey:@"springAnimation"];
    }
}
It is pretty straightforward to use Pop. You first choose a particular type of animation. Like the above example, we pick the POPBasicAnimation when the cell is highlighted and POPSpringAnimation when the user lifts up his/her finger. Once you select the type of animation, the second thing is to provide the animation properties. For both animations, we specify the kPOPViewScaleXY property for scaling the label. Next, we specify toValue which describes your desired end state of the animation. In the above, we set to CGPointMake(1, 1) that scales the object with a value of one. Depending on the type of animation you’re creating, you’ll have to configure addition settings like springBounciness in spring animations that controls the bouncing effect. Lastly, we add the animation to the text label and give it a name (e.g. springAnimation).
Now build and run the app. Highlight any cell and release it to test the animation.
Example #2: Animating a Like Button
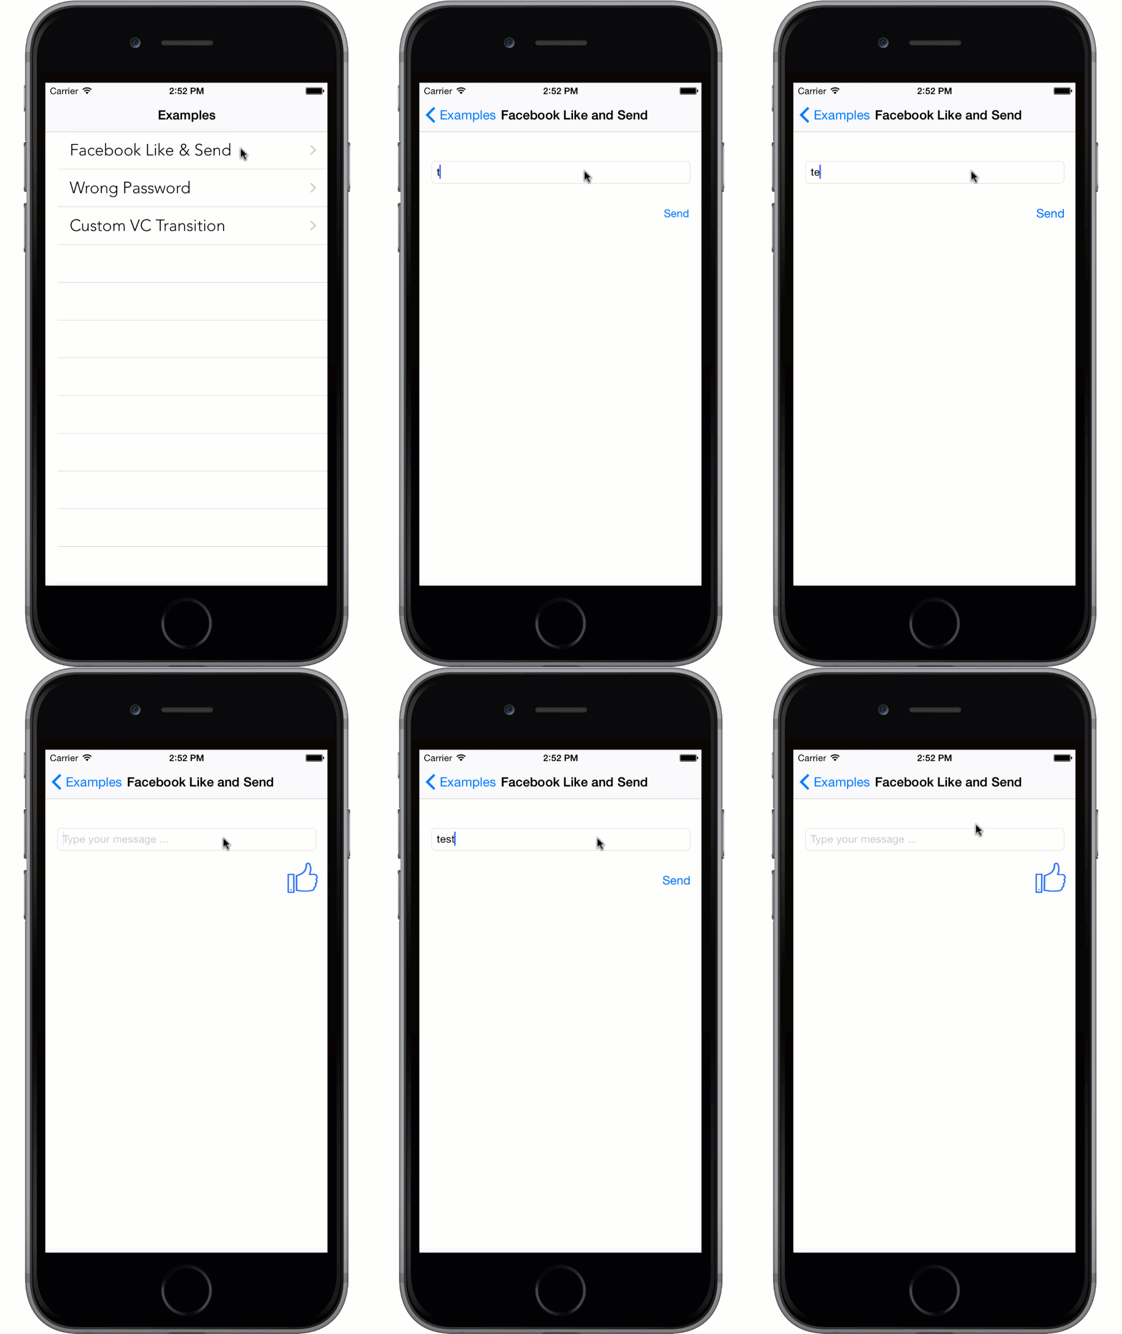
Have you used the Facebook Messenger app? I really like the animation of the Send/Like button when you start to type message to a friend. I decided to use Pop to create a similar animation.
First, create a new view controller in the storyboard. In the view controller, create a text field for comments. Then add a Send and Like buttons. You can download the Like button image here and import it to the image asset. Just place the Like button over the Send button. Later we will write some code to display one of the buttons at a time. By default, the Like button will be displayed. When a user keys in a comment, we will hide the Like button and display the Send button with an animation.
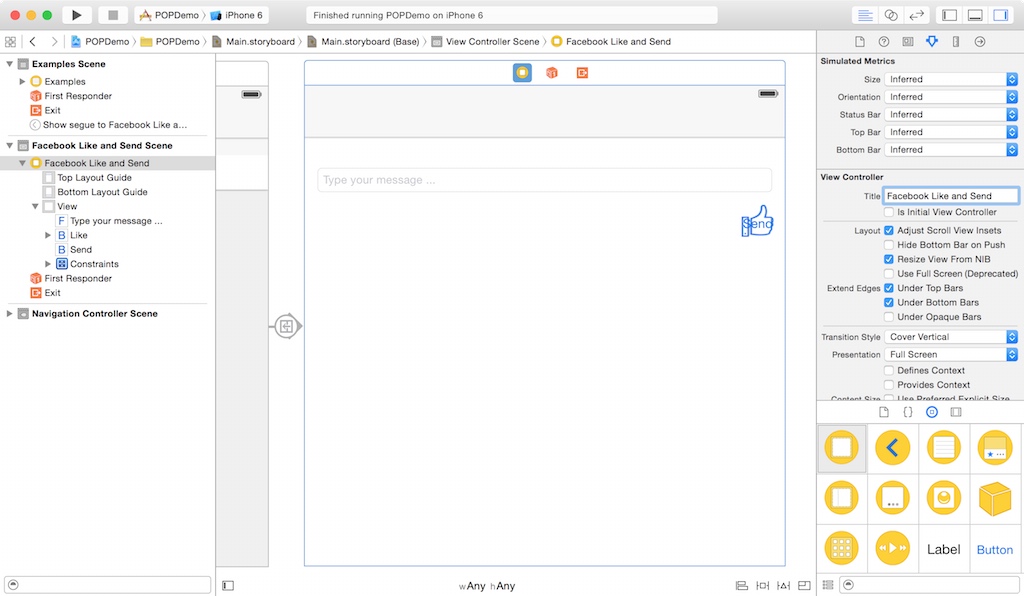
Lastly, connect the example list view controller with Facebook Like view controller by using a manual segue. Set the identifier of the segue as “openFB”. Later we’ll use code to trigger the segue.
Once you designed the user interface, create a new class called FacebookButtonAnimationViewController and set it as the custom class of the view controller.
Next, create the outlet variables for both Like and Send buttons, as well as, the text field. Your outlet variable should look like this:
@interface FacebookButtonAnimationViewController ()
@property (weak, nonatomic) IBOutlet UIButton *likeButton;
@property (weak, nonatomic) IBOutlet UIButton *sendButton;
@property (weak, nonatomic) IBOutlet UITextField *msgTextField;

@end
In FacebookButtonAnimationViewController.h, import POP.h and implement the UITextFieldDelegate:
#import
#import

@interface FacebookButtonAnimationViewController : UIViewController

@end
In the viewDidLoad method of FacebookButtonAnimationViewController.m, insert the following line of code to set the delegate of text field and hide the Send button:
self.msgTextField.delegate = self;
self.sendButton.hidden = YES;
Now we will implement the methods for handling the text field. Insert these methods in the same file:
- (BOOL)textField:(UITextField *)textField shouldChangeCharactersInRange:(NSRange)range replacementString:(NSString *)string {

    NSString *comment;

    if (range.length == 0) {
        comment = [NSString stringWithFormat:@"%@%@", textField.text, string];
    } else {
        comment = [textField.text substringToIndex:textField.text.length - range.length];
    }

    if (comment.length == 0) {
        // Show Like
        [self showLikeButton];
    } else  {
        // Show Send
        [self showSendButton];
    }

    return YES;
}
The shouldChangeCharactersInRange method is called every time when whenever the user types a new character or delete a character in the text field. If the text field is empty, we display the Like button. On the other hand, if the text field contains any characters, we display the Send button.
Next, we implement both showLikeButton and showSendButton methods:
- (void)showSendButton {
    if (self.sendButton.isHidden) {
        self.likeButton.hidden = YES;
        self.sendButton.hidden = NO;

        POPSpringAnimation *sprintAnimation = [POPSpringAnimation animationWithPropertyNamed:kPOPViewScaleXY];

        sprintAnimation.velocity = [NSValue valueWithCGPoint:CGPointMake(8, 8)];
        sprintAnimation.springBounciness = 20.f;
        [self.sendButton pop_addAnimation:sprintAnimation forKey:@"sendAnimation"];
    }
}

-(void)showLikeButton {
    self.likeButton.hidden = NO;
    self.sendButton.hidden = YES;

    POPSpringAnimation *spin = [POPSpringAnimation animationWithPropertyNamed:kPOPLayerRotation];

    spin.fromValue = @(M_PI / 4);
    spin.toValue = @(0);
    spin.springBounciness = 20;
    spin.velocity = @(10);
    [self.likeButton.layer pop_addAnimation:spin forKey:@"likeAnimation"];
}
In the showSendButton method, we hide the Like button and show the Send button, and then apply a spring animation with the kPOPViewScaleXY property on the Send button.
The same technique is used for the Like button but we apply a rotation animation instead. We first create an instance of POPSpringAnimation and then set the “from” and “to” values. The Like button is rotated from 45 degrees (i.e. M_PI/4) to 0 degree with bounciness set to 20.
Lastly, insert the following method in ExamplesListViewController.m to trigger the segue:
-(void)tableView:(UITableView *)tableView didSelectRowAtIndexPath:(NSIndexPath *)indexPath
{
    switch (indexPath.row) {
        case 0:
            [self performSegueWithIdentifier:@"openFB" sender:self];
            break;
        case 1:
            [self performSegueWithIdentifier:@"openWrongPass" sender:self];
            break;
        case 2:
            [self performSegueWithIdentifier:@"openCustomTransition" sender:self];
            break;

        default:
            break;
    }
}
Now it is ready to test the app. Hit the Run button and key in a character in the text field to test the animation.
Example #3: Wrong Password Animation
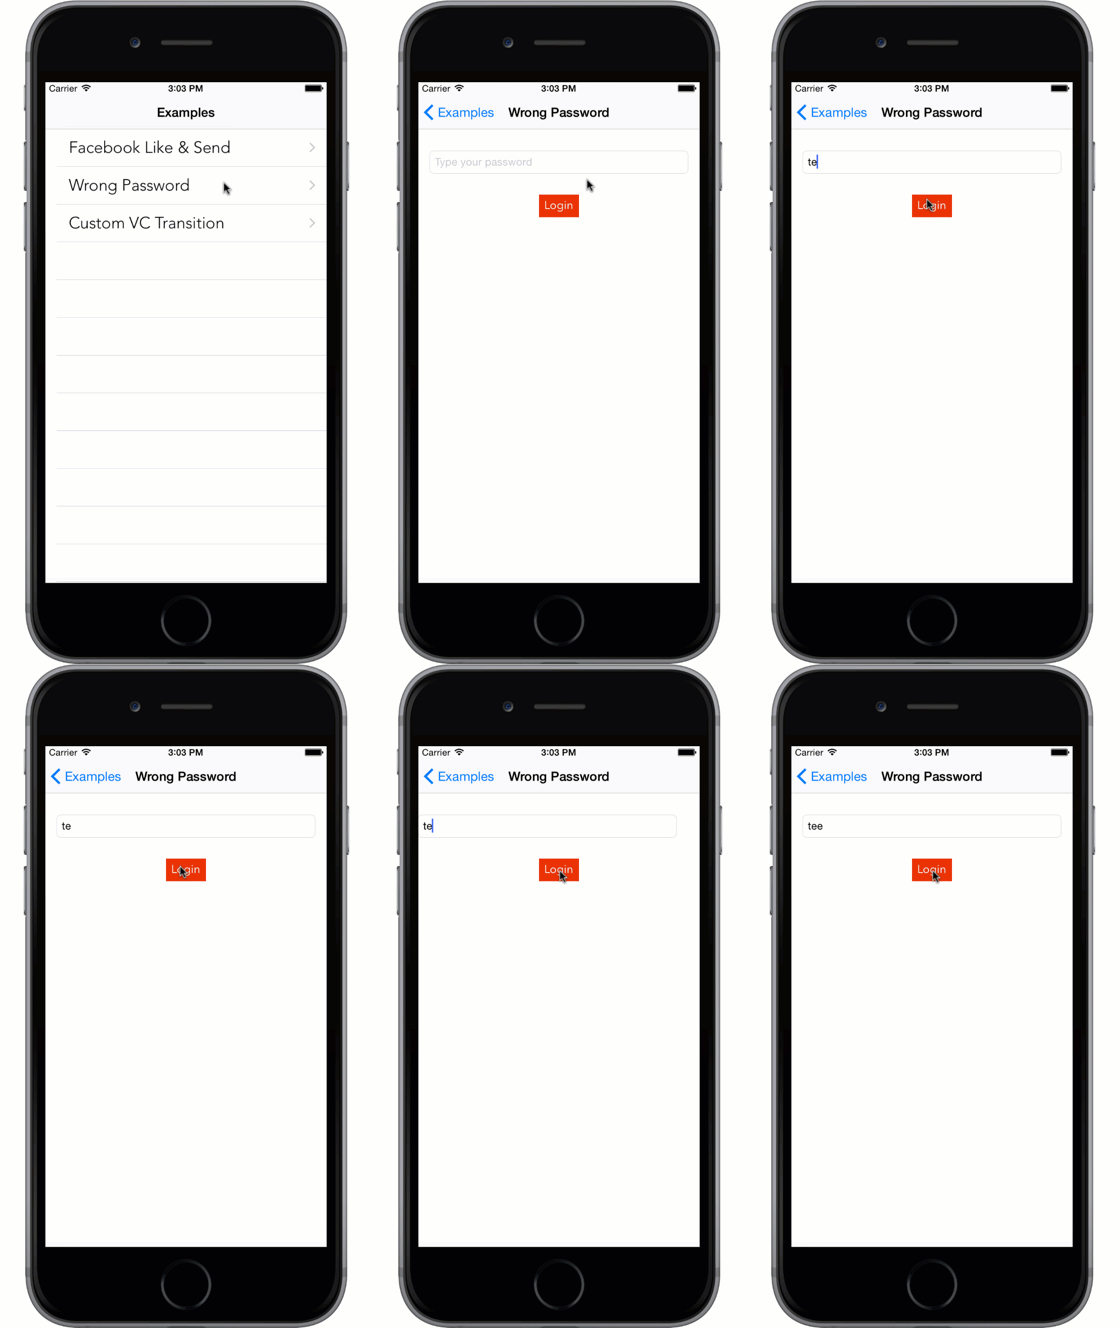
As a Mac user, you should be very familiar with the password field in Mac OS X. When you type a wrong password during login, the text field shakes. In this example, we’ll use Pop to replicate the animation.
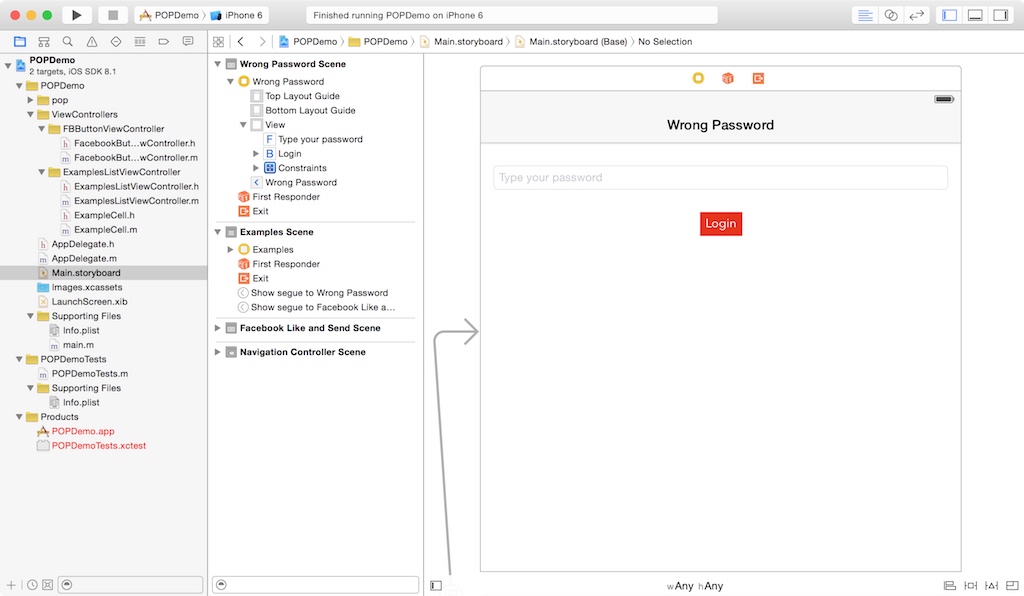
First, go to Interface Builder and add a new view controller. Then add a text field and a Login button. Again, create a manual segue between the Example List View Controller and the new view controller. Set the segue’s identifier to “openWrongPass”. Your user interface should be similar to this:
Next, create a new class called WrongPasswordViewController and set it as the custom class of the new view controller. Create an outlet variable for the text field and name it passwordTextField.
@interface WrongPasswordViewController ()
@property (weak, nonatomic) IBOutlet UITextField *passwordTextField;

@end
Then we create an action method named “login” for the Login button.
As said before, we will apply a “shake” animation on the text field to indicate a wrong password. For demo purpose, we will not verify the password. We will just show the animation whenever the user clicks the Login button.
Implement the login method like this:
- (IBAction)login:(id)sender {

    POPSpringAnimation *shake = [POPSpringAnimation animationWithPropertyNamed:kPOPLayerPositionX];

    shake.springBounciness = 20;
    shake.velocity = @(3000);

    [self.passwordTextField.layer pop_addAnimation:shake forKey:@"shakePassword"];

}
The above code is pretty straightforward. We create the POPSpringAnimation with the kPOPLayerPositionX property. This property simply moves the text field along the X axis.
Lastly, remember to import the POP.h at the beginning of the WrongPasswordViewController.m:
#import
Cool! Compile and run the app to test the animation.
Example #4: Custom View Controller Transition
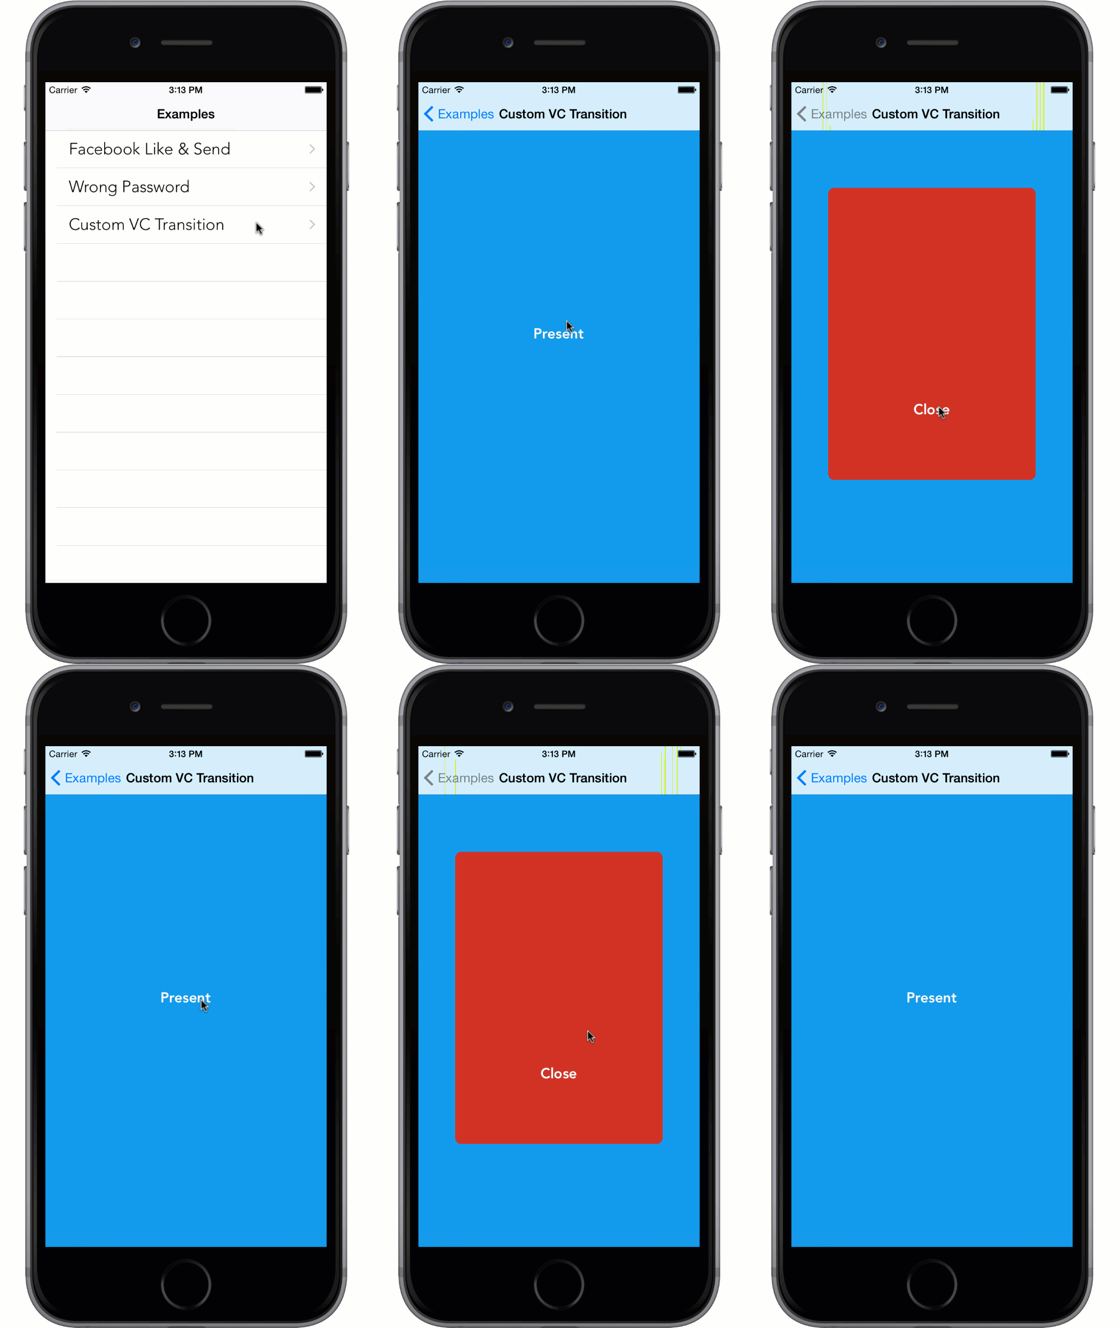
In the last example, I will show you how to present a view controller with a custom animation. We will a view controller with a single button “Present”. When a user taps the button, the app presents another view controller modally with a custom animation. Since iOS 7, you can customise the view transition by using the transitioningDelegate of UIViewController. The delegate, which should conform to UIViewControllerAnimatedTransitioning, provides the transition animator that animates the transition of view controllers.
First, create two view controllers in the storyboard and two new classes. Name one class “CustomVCTransitionViewController” and the other “CustomModalViewController”. Set these classes as the custom class of the controllers. For the modal view controller (in red), set the storyboard ID to “customModal”. Further, connect the Example List View Controller with the CustomVCTransitionViewController using a manual segue. Set the identifier of the segue to “openCustomTransition”.
Your UI design should look like this:
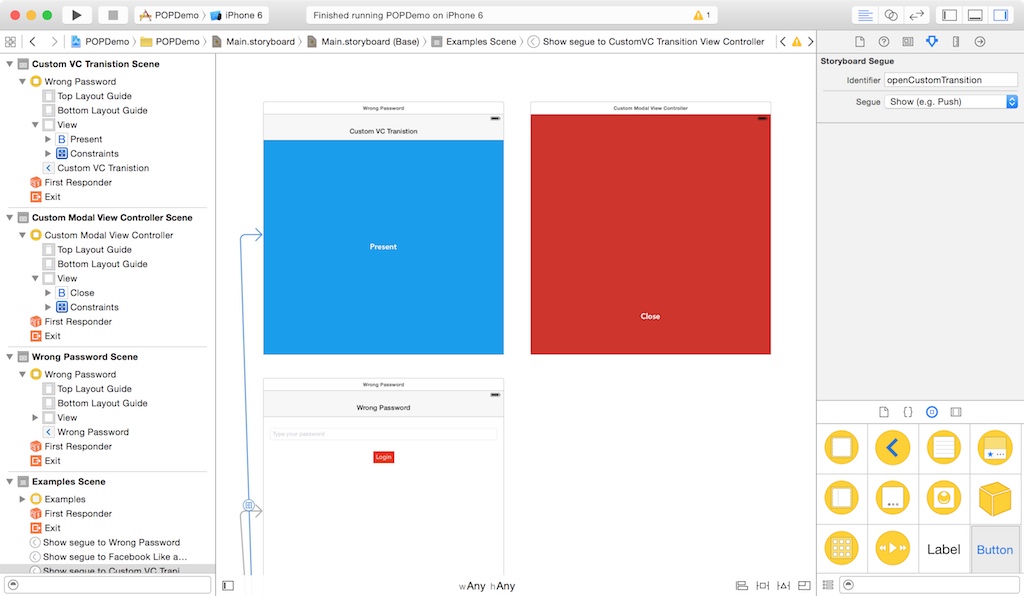
You can have a quick test of the app. When you select Custom VC Transition, the CustomVCTransitionController should appear.
Now we’ll implement the CustomVCTransitionViewController to handle the Present button. Insert the following line of code in CustomVCTransitionViewController.h to adopt the UIViewControllerTransitioningDelegate protocol:
@interface CustomVCTransitionViewController : UIViewController
In CustomVCTransitionViewController.m, add the following lines of code to import the header files:
#import "CustomModalViewController.h"
#import "PresentingAnimationController.h"
#import "DismissingAnimationController.h"
#import
Then insert the following methods to implement the action method of the Present button and the required methods of the protocol:
- (IBAction)didClickOnPresent:(id)sender {

    CustomModalViewController *modalVC = [self.storyboard instantiateViewControllerWithIdentifier:@"customModal"];


    modalVC.transitioningDelegate = self;

    modalVC.modalPresentationStyle = UIModalPresentationCustom;

    [self.navigationController presentViewController:modalVC animated:YES completion:nil];
}

#pragma mark - UIViewControllerTransitionDelegate -

- (id )animationControllerForPresentedController:(UIViewController *)presented presentingController:(UIViewController *)presenting sourceController:(UIViewController *)source
{
    return [[PresentingAnimationController alloc] init];
}

- (id )animationControllerForDismissedController:(UIViewController *)dismissed
{
    return [[DismissingAnimationController alloc] init];
}
When the button is tapped, the didClickOnPresent method will be invoked. Here we instantiate the modal view controller and set the transitioning delegate to the current view controller. We also set the modal presentation style to custom. (With the action method, remember to establish a connection between the Present button and the method in storyboard.)
As the class adopts the UIViewControllerTransitioningDelegate protocol, we implement the two required methods. The animationControllerForPresentedController: method returns the transition animator object to use when presenting the modal view controller. Conversely, the animationControllerForDismissedController: method provides the animator object for dismissing a view controller.
We haven’t created both animator classes yet. Now create a new class called PresentingAnimationController, set it as a subclass of NSObject and adopt the UIViewControllerAnimatedTransitioning protocol:
#import
#import "POP.h"

@interface PresentingAnimationController : NSObject
In PresentingAnimationController.m, add the following methods:
- (NSTimeInterval)transitionDuration:(id )transitionContext {
    return 0.5f;
}

- (void)animateTransition:(id )transitionContext {

    UIView *fromView = [transitionContext viewControllerForKey:UITransitionContextFromViewControllerKey].view;
    fromView.tintAdjustmentMode = UIViewTintAdjustmentModeDimmed;
    fromView.userInteractionEnabled = NO;

    UIView *toView = [transitionContext viewControllerForKey:UITransitionContextToViewControllerKey].view;
    toView.frame = CGRectMake(0,
                              0,
                              CGRectGetWidth(transitionContext.containerView.bounds) - 100.f,
                              CGRectGetHeight(transitionContext.containerView.bounds) - 280.f);
    CGPoint p = CGPointMake(transitionContext.containerView.center.x, -transitionContext.containerView.center.y);
    toView.center = p;

    [transitionContext.containerView addSubview:toView];

    POPSpringAnimation *positionAnimation = [POPSpringAnimation animationWithPropertyNamed:kPOPLayerPositionY];
    positionAnimation.toValue = @(transitionContext.containerView.center.y);
    positionAnimation.springBounciness = 10;
    [positionAnimation setCompletionBlock:^(POPAnimation *anim, BOOL finished) {
        [transitionContext completeTransition:YES];
    }];

    POPSpringAnimation *scaleAnimation = [POPSpringAnimation animationWithPropertyNamed:kPOPLayerScaleXY];
    scaleAnimation.springBounciness = 20;
    scaleAnimation.fromValue = [NSValue valueWithCGPoint:CGPointMake(1.2, 1.4)];

    [toView.layer pop_addAnimation:positionAnimation forKey:@"positionAnimation"];
    [toView.layer pop_addAnimation:scaleAnimation forKey:@"scaleAnimation"];

}
The first method defines the transition duration (i.e. 0.5 seconds). To animate the transition, we implement the animateTransition: method. Here we define how the transition animations are performed. We first retrieve the “fromView” involved in the transition using the viewControllerForKey: method of the transitionContext. Next, we retrieve the “toView”. Once you have these two views, you can apply any animations during the view transition. Here we apply two animations – position animation and scale animation. The position animation slides the view from the top of the screen to the center. The scale animation scales up the view a bit and then scales it back to the normal values.
Next, create a new class named DismissingAnimationController and adopt the UIViewControllerAnimatedTransitioning protocol:
#import
#import
#import

@interface DismissingAnimationController : NSObject

@end
Similarly, we create the dismissing animation by implementing the required method of the UIViewControllerAnimatedTransitioning protocol:
- (NSTimeInterval)transitionDuration:(id )transitionContext {
    return 0.5f;
}

- (void)animateTransition:(id )transitionContext {

    UIView *toView = [transitionContext viewControllerForKey:UITransitionContextToViewControllerKey].view;
    toView.tintAdjustmentMode = UIViewTintAdjustmentModeNormal;
    toView.userInteractionEnabled = YES;

    UIView *fromView = [transitionContext viewControllerForKey:UITransitionContextFromViewControllerKey].view;


    POPBasicAnimation *closeAnimation = [POPBasicAnimation animationWithPropertyNamed:kPOPLayerPositionY];
    closeAnimation.toValue = @(-fromView.layer.position.y);
    [closeAnimation setCompletionBlock:^(POPAnimation *anim, BOOL finished) {
        [transitionContext completeTransition:YES];
    }];

    POPSpringAnimation *scaleDownAnimation = [POPSpringAnimation animationWithPropertyNamed:kPOPLayerScaleXY];
    scaleDownAnimation.springBounciness = 20;
    scaleDownAnimation.toValue = [NSValue valueWithCGPoint:CGPointMake(0, 0)];

    [fromView.layer pop_addAnimation:closeAnimation forKey:@"closeAnimation"];
    [fromView.layer pop_addAnimation:scaleDownAnimation forKey:@"scaleDown"];

}
When dismissing the modal view, we apply two animations – close animation and scale down animation. By combining both animations, we make the modal view disappear or move off screen.
Go back to the CustomModalViewController.m, update the viewDidLoad method and implement the didClickOnClose method:
- (void)viewDidLoad {
    [super viewDidLoad];

    // Round corner
    self.view.layer.cornerRadius = 8.f;
}

- (IBAction)didClickOnClose:(id)sender {
    [self dismissViewControllerAnimated:YES completion:nil];
}
Finally, establish a connection between the Close button with the didClickOnClose method in InterfaceBuilder.
Cool! It’s ready to test the app. Run it and test the view transition.
Summary
In this tutorial, I gave you an introduction of Facebook’s Pop framework. As you can see, the animation engine is pretty easy to use. If you understand the animation techniques covered in the tutorial, you should be able to create your own animation in your apps.
For your reference, you can download the complete Xcode project here. Or you can check out the project on Github.
What do you think about the tutorial? Leave me comment and share your thought.


