
Since Parse has started closing down there have been a couple of databases that have tried to replace Parse for Mobile Apps such as Firebase and Realm. Firebase is the one that is currently becoming the most popular because of the ease of use and speed. It also works with Android and Web as well as iOS which means that it is very useful for big projects because the database can be connected across all major devices. Firebase is owned by Google which means that the servers are very reliable and have great help on hand if needed. Firebase is also used by some very big tech companies like PicCollage, Shazam, Wattpad, Skyscanner and other big start-ups so you can see how reliable Firebase is.
With the recent updates to Firebase it has become stronger and more powerful than ever. You can make money on the platform by using AdMob or keep user retention by using notifications or use cloud messaging and storage to make a very powerful app. Firebase is definitely here to stay.
In this tutorial we are going to look at a key aspect of this which is Login and Sign Up. We will also be looking at resetting the user’s password. We will be using the latest version of Firebase and XCode and also Swift 3. For this tutorial you need a basic to good understanding of Swift and XCode.
Designing the User Interface
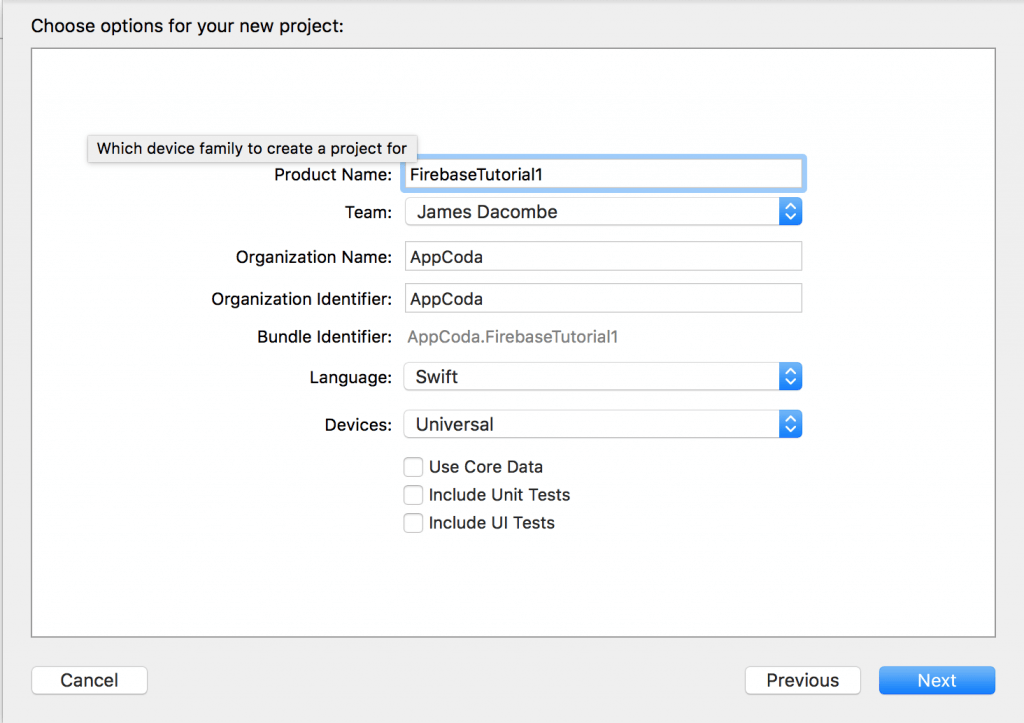
The first thing we need to do is to start a new XCode Project, I am going to use a Single View Application but this concept will work on any style from Tab-Bar application to Master-Detail application. You can call this project whatever you want but for this tutorial I am going to call it FirebaseTutorial1. Set the Language to Swift and the device doesn’t matter so you can keep that universal.
Then you need to go to the Main.storyboard and create the interface like this:
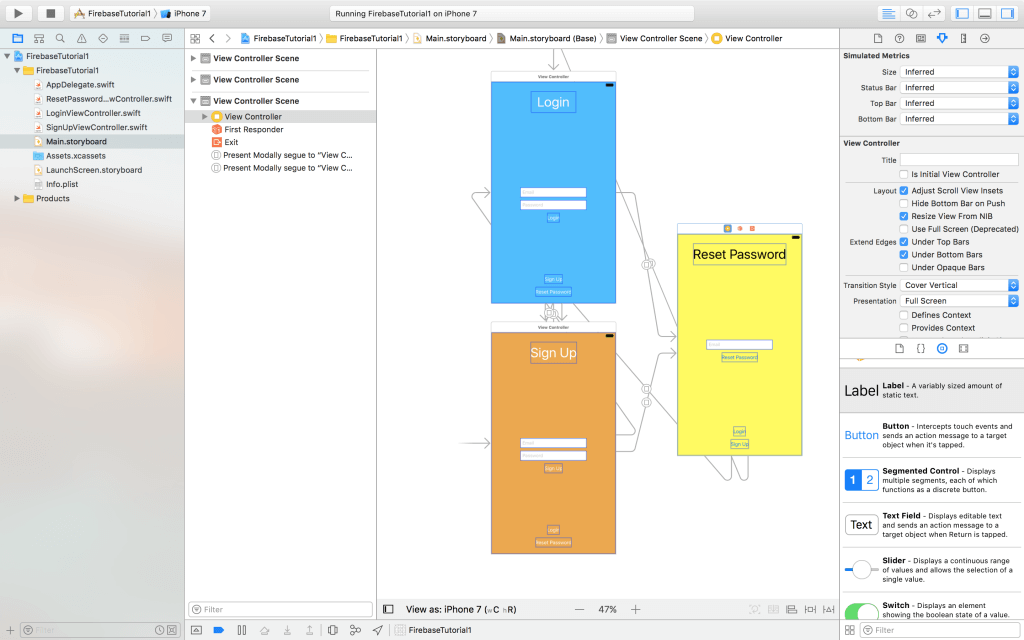
But to save you time and keep you focus on learning Firebase, you can download the starter project here, and when the storyboard is complete it should look like this and also this is what the files should look like.
Side note: Creating the UI from Scratch
In case you want to build the project from the ground up, this is the view controllers and procedures you have to follow:
1. First, drag three view controllers into the Storyboard and then add two buttons to each view controller. These two button is used to navigate between different view controllers. Say, when you are on the login page, you can navigate to the reset password page or the signup page.
2. In two of the view controllers, add two text fields and a button. These text fields are used for the Email and the Password fields. The button is used for Login or Sign Up. In the placeholder, put either email or password where you want the users to enter the email and password. Then you can change the colour of the background to make it look a little bit nicer and then add a Label at the top.
3. In the third view controller (Reset Password), add three buttons, one text field and one label. The text field is for users to input the email for password reset.
4. When you finish designing the UI, the rest of the procedures is to connect the buttons with the other view controllers so that users can transit between the views. Here, I recommend that you use “present modally” for the segues.
Working with Firebase
Now that the user interface is ready, we’re now going to integrate the project with Firebase. To do this you first need to go to https://firebase.google.com/ and set up the project in Firebase.
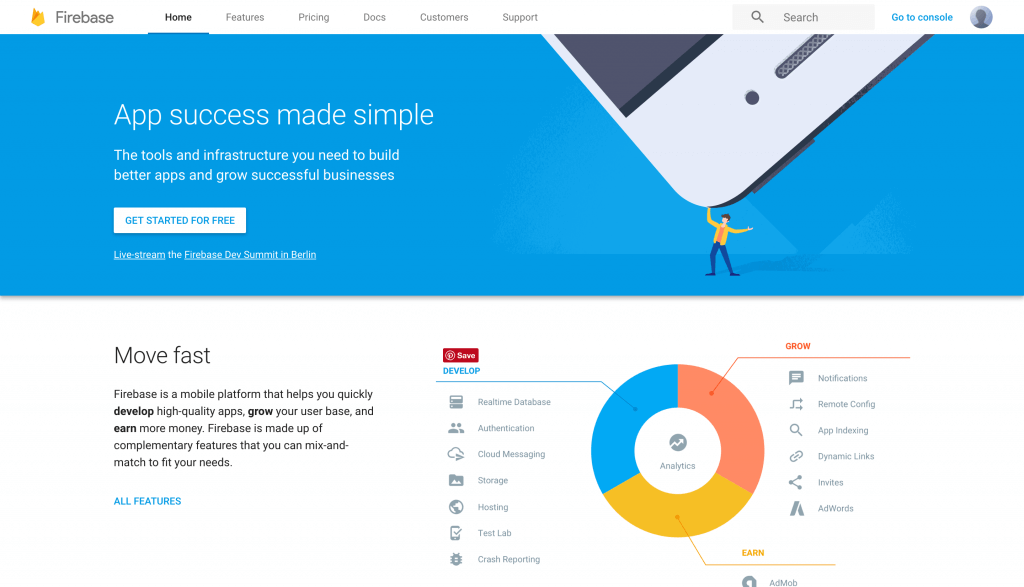
Assuming you’ve logged into Firebase with your Google account, click ‘Get started for free’ and select ‘Create new project’. It will take you to a screen where you name your project. Name your project whatever you want and then pick where you are based.

Once Firebase created the new project for you, it will take you to the overview. This is where you can select your app platform, whether it is Web, Android or in this case iOS. You can also find documentation here and on the side access the authentication, storage, database and much more.
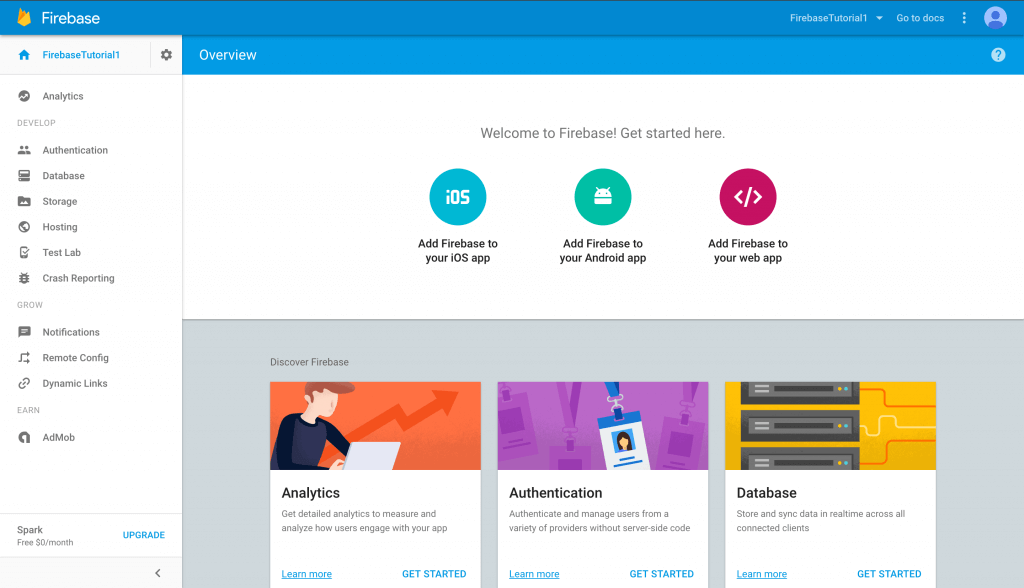
Now select ‘Add Firebase to your iOS app’, you’ll then be prompted for the iOS Bundle ID. This is the bundle identifier of your Xcode project (note that your bundle ID may be different from mine).
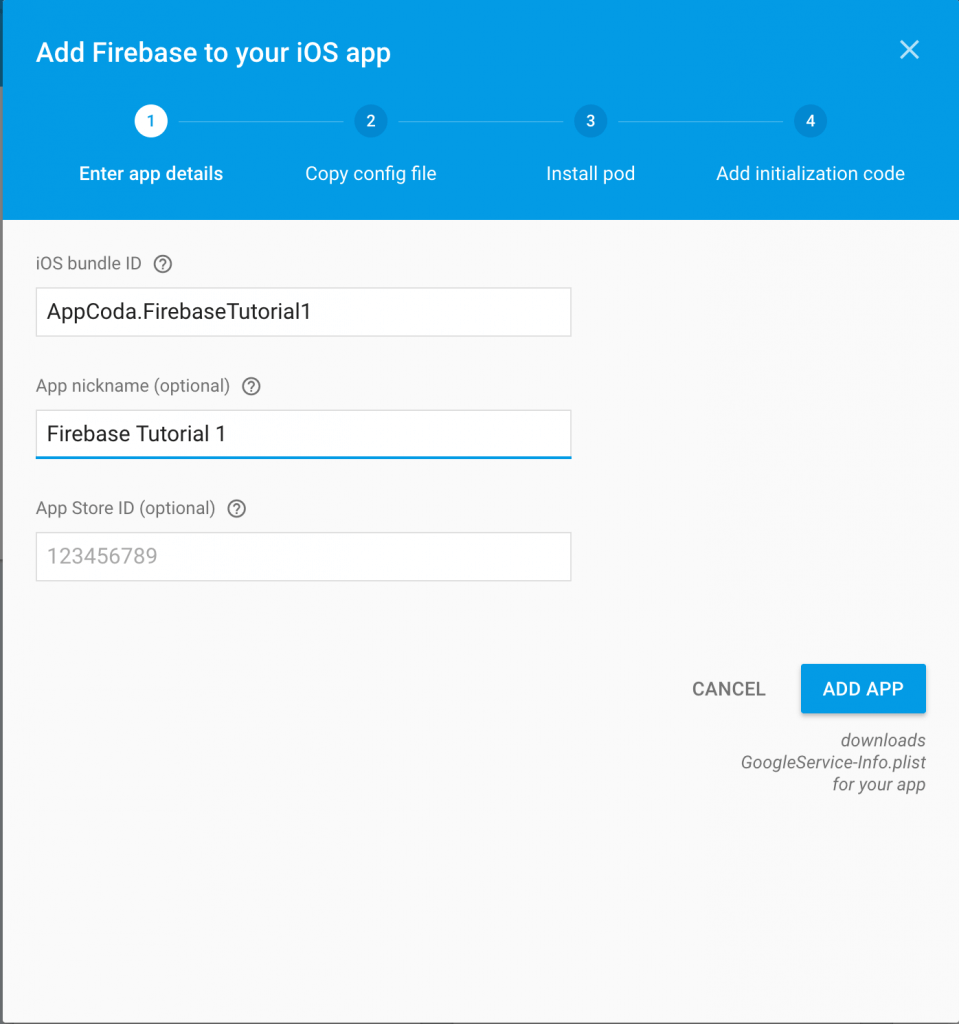
Make sure you enter the bundle ID correctly and, optionally you can choose a nickname for your App. If your app is already live on the App Store, then add your App Store ID. But for this demo, you don’t have to do this. When you finish, click ‘Add App’ to proceed and Firebase will generate a file named GoogleService-Info.plist for you. It should be automatically downloaded to your Mac computer.
This will take you to the next stage. Follow the instructions to drag GoogleService-Info.plist into the root folder of your Xcode project.
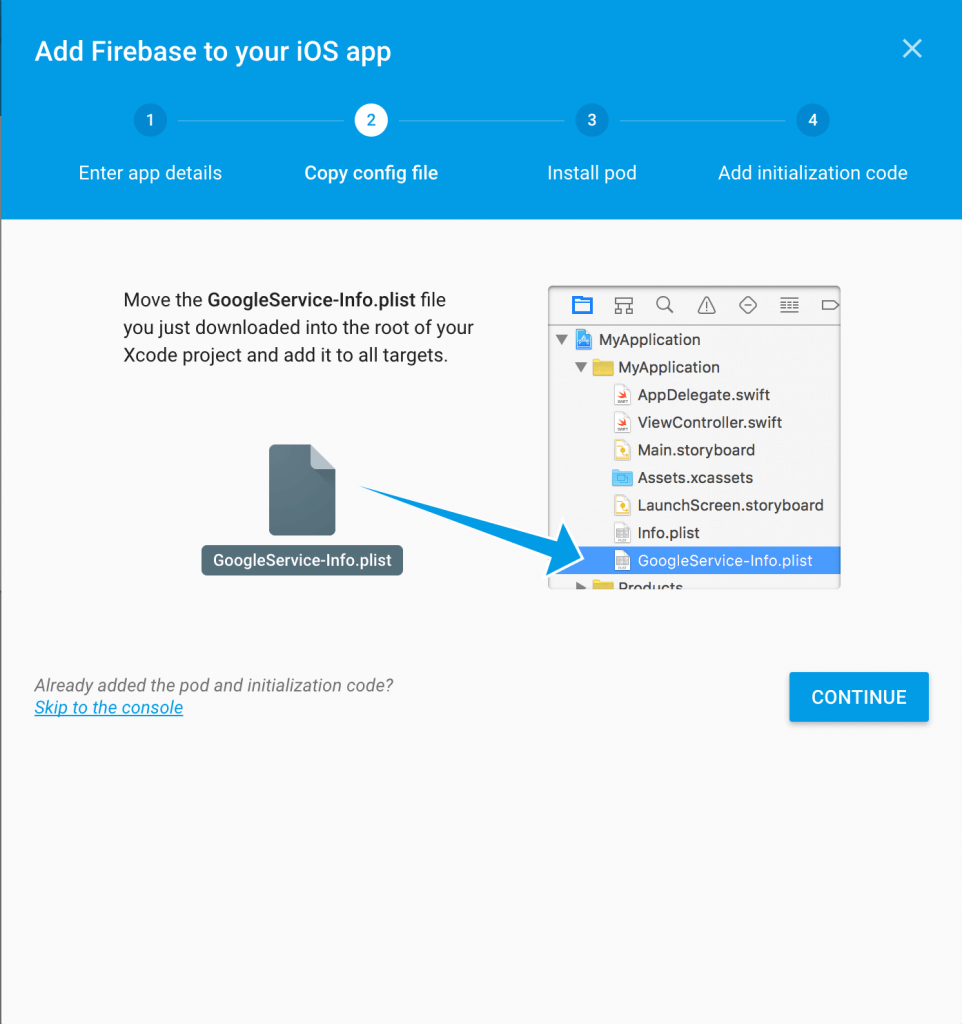
Next, press continue to proceed to the next step.
As described by Firebase, Google services uses CocoaPods to install and manage dependencies. You’ll need to use CocoaPods to install the Firebase libraries. If you don’t have Cocoapods, please follow this tutorial to install it.
Next, make sure you close the XCode project before installing the pod file. And then open Terminal and change to the Xcode project folder. Key in the following command to create a Podfile:
pod init
Once the file is created, edit it and add two dependencies:
# Uncomment the next line to define a global platform for your project
# platform :ios, '9.0'

target 'FirebaseTutorial1' do
  # Comment the next line if you're not using Swift and don't want to use dynamic frameworks
  use_frameworks!

  # Pods for FirebaseTutorial1
  pod 'Firebase/Core'
  pod 'Firebase/Auth'
end
This is all that you need for login and sign up. If you were going to make an app like Instagram you would use Firebase Storage and Database and others.
Save the Podfile and then type the following command in Terminal:
pod install
CocoaPods will start to install the dependencies and pods into the project.
When the pods are installed, you will find a new workspace file named FirebaseTutorial1.xcworkspace. Make sure you open the workspace file instead of the FirebaseTutorial1.xcodeproj file.
Implementing Login and Sign Up Using Firebase
Now that we have configured our project with the Firebase library, it is time to write some code. In the project navigator, go to AppDelegate.swift. To utilize the APIs of Firebase, first we have to import Firebase. At the beginning of the file, insert the following line of code:
import Firebase
Next, update the application(_:didFinishLaunchingWithOptions:) method like this:
func application(_ application: UIApplication, didFinishLaunchingWithOptions launchOptions: [UIApplicationLaunchOptionsKey: Any]?) -> Bool {
    // Override point for customization after application launch.
    FIRApp.configure()

    return true
}
Here we call FIRApp.configure() to initialize and configure Firebase. This line of code helps you connect Firebase when your app starts up.
The Sign Up Implementation
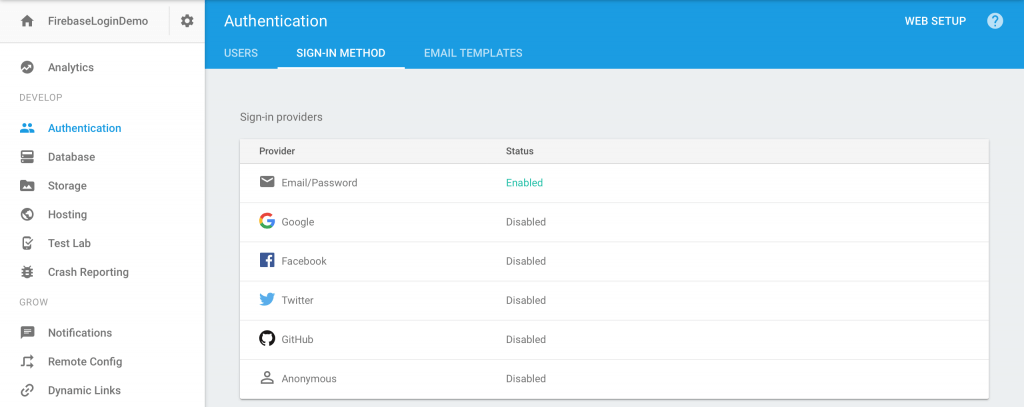
Now we’re ready to do implement the Sign Up feature using Firebase. First things first, you have to go back to the Firebase console before writing code. In the console, select Authentication and then Sign-In Method. By default, the Email/Password option is disable. Click the option and switch it to ON to enable it. Here you can also enable Facebook, Twitter and Google sign up, but this is out of the scope.
Once this is enabled, you’re now ready to implement the sign up and authentication feature. Similar to AppDelegate.swift, add the following import statement in the SignUpViewController.swift file:
import Firebase
import FirebaseAuth
If you use our starter project, it has already connected both email and password text fields to the following outlets:
@IBOutlet weak var emailTextField: UITextField!
@IBOutlet weak var passwordTextField: UITextField!
In the Sign Up screen, when the user taps the Sign Up, it will call up the action method createAccountAction. I have already connected the Sign Up button with the action method for you. So what you need to do is update the action method like this:
@IBAction func createAccountAction(_ sender: AnyObject) {

    if emailTextField.text == "" {
        let alertController = UIAlertController(title: "Error", message: "Please enter your email and password", preferredStyle: .alert)

        let defaultAction = UIAlertAction(title: "OK", style: .cancel, handler: nil)
        alertController.addAction(defaultAction)

        present(alertController, animated: true, completion: nil)

    } else {
        FIRAuth.auth()?.createUser(withEmail: emailTextField.text!, password: passwordTextField.text!) { (user, error) in

            if error == nil {
                print("You have successfully signed up")
                //Goes to the Setup page which lets the user take a photo for their profile picture and also chose a username

                let vc = self.storyboard?.instantiateViewController(withIdentifier: "Home")
                self.present(vc!, animated: true, completion: nil)

            } else {
                let alertController = UIAlertController(title: "Error", message: error?.localizedDescription, preferredStyle: .alert)

                let defaultAction = UIAlertAction(title: "OK", style: .cancel, handler: nil)
                alertController.addAction(defaultAction)

                self.present(alertController, animated: true, completion: nil)
            }
        }
    }
}
Let’s go through the above code line by line. We first check if the user has filled in the email address. If he/she leaves it blank, we display an alert message.
In case the user fills in the email field, we get the default auth object by calling FIRAuth.auth(), and then call the createUser method to create a user account in Firebase. When the sign up operation completes, the completion block will be called. In the block, we check if there is any sign up error. If everything is okay, we instruct the app to navigate back to the home screen. Otherwise, we display an error alert.
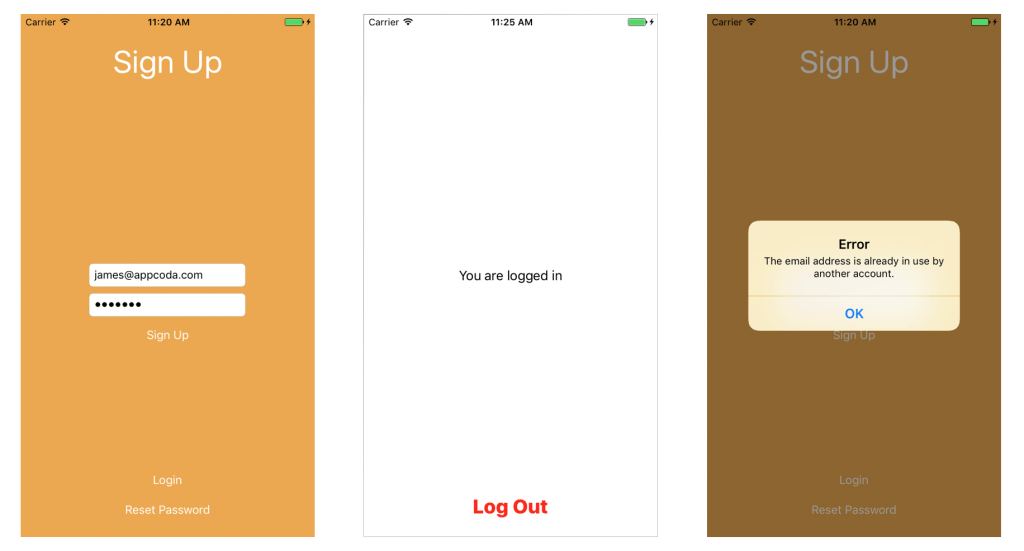
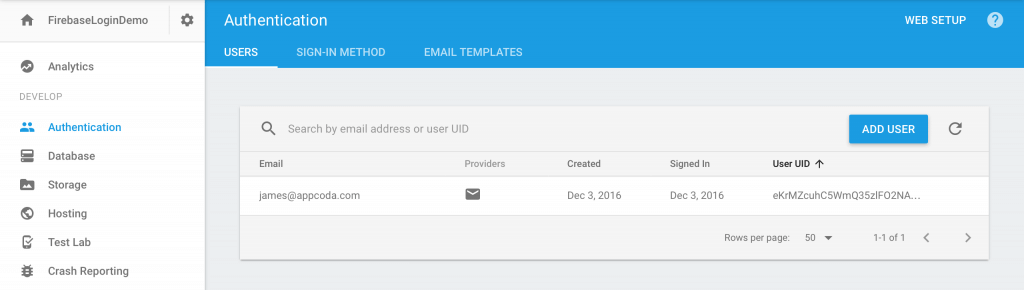
Now you’re ready to have a quick test for the sign up function. The app should work well. After you sign up with your email address and password, you’ll be directed to the home screen and your account is added in Firebase. If you try to sign up with the same account again, Firebase returns you with an error message because the email address is duplicated.
If you go back to the Firebase console, you will find the user ID in the Users tab under the Authentication section.
Implementing the Login Function
The sign up is now working but what about the Login feature? This is what we’re going to implement in this section.
Now open LoginViewController.swift. Again you need to import Firebase and FirebaseAuth before using the APIs. So add the following lines of code at the very beginning of the file:
import Firebase
import FirebaseAuth
I have already established a connection between the login button and the loginAction method. When the user taps the button, the loginAction method will be called. But the current implementation is empty. To make it work, update the method like this:
@IBAction func loginAction(_ sender: AnyObject) {

    if self.emailTextField.text == "" || self.passwordTextField.text == "" {

        //Alert to tell the user that there was an error because they didn't fill anything in the textfields because they didn't fill anything in

        let alertController = UIAlertController(title: "Error", message: "Please enter an email and password.", preferredStyle: .alert)

        let defaultAction = UIAlertAction(title: "OK", style: .cancel, handler: nil)
        alertController.addAction(defaultAction)

        self.present(alertController, animated: true, completion: nil)

    } else {

        FIRAuth.auth()?.signIn(withEmail: self.emailTextField.text!, password: self.passwordTextField.text!) { (user, error) in

            if error == nil {

                //Print into the console if successfully logged in
                print("You have successfully logged in")

                //Go to the HomeViewController if the login is sucessful
                let vc = self.storyboard?.instantiateViewController(withIdentifier: "Home")
                self.present(vc!, animated: true, completion: nil)

            } else {

                //Tells the user that there is an error and then gets firebase to tell them the error
                let alertController = UIAlertController(title: "Error", message: error?.localizedDescription, preferredStyle: .alert)

                let defaultAction = UIAlertAction(title: "OK", style: .cancel, handler: nil)
                alertController.addAction(defaultAction)

                self.present(alertController, animated: true, completion: nil)
            }
        }
    }
}
The above code is very straightforward. Similar to what we have done in sign up, we verify if the user has filled in all the necessary fields. If both email and password are valid, we call the signIn method of the Firebase API with the specified email address and password. That’s it. Firebase will handle the authentication and return us the result by calling the completion handler.
Now run the app and login with the same account as you registered earlier. Depending on your account information, it will log you into the app or display you an error.

Implementing the Log Out Function
Now that you’re able to sign into the app, but the log out feature is not ready yet. For this, open HomeViewController.swift and import the required modules:
import Firebase
import FirebaseAuth
Again, if you use the starter project, the log out button has been linked with the logOutAction method. To sign out an account, Firebase provides an API called signOut(). All you need is to get the current auth object and invoke the method. So update the logOutAction method like this:
@IBAction func logOutAction(sender: AnyObject) {
    if FIRAuth.auth()?.currentUser != nil {
        do {
            try FIRAuth.auth()?.signOut()
            let vc = UIStoryboard(name: "Main", bundle: nil).instantiateViewController(withIdentifier: "SignUp")
            present(vc, animated: true, completion: nil)

        } catch let error as NSError {
            print(error.localizedDescription)
        }
    }
}
In the starter project, I have set the storyboard ID of the Sign up view controller to SignUp. After signing out, we redirect the user back to the Sign up screen by specifying its identifier.
If you run the app and sign into the app, it takes you back to the sign up view controller when you tap Log out.
Implementing the Password Reset Function
Lastly, let’s finish the app by implementing the password reset function. Open the ResetPasswordViewController.swift file and add the following import statements:
import Firebase
import FirebaseAuth
Firebase makes it really easy to reset a password for a specific account. All you need to do is call the sendPasswordReset method with the specified email address. So, update the submitAction method like this:
@IBAction func submitAction(_ sender: AnyObject) {

    if self.emailTextField.text == "" {
        let alertController = UIAlertController(title: "Oops!", message: "Please enter an email.", preferredStyle: .alert)

        let defaultAction = UIAlertAction(title: "OK", style: .cancel, handler: nil)
        alertController.addAction(defaultAction)

        present(alertController, animated: true, completion: nil)

    } else {
        FIRAuth.auth()?.sendPasswordReset(withEmail: self.emailTextField.text!, completion: { (error) in

            var title = ""
            var message = ""

            if error != nil {
                title = "Error!"
                message = (error?.localizedDescription)!
            } else {
                title = "Success!"
                message = "Password reset email sent."
                self.emailTextField.text = ""
            }

            let alertController = UIAlertController(title: title, message: message, preferredStyle: .alert)

            let defaultAction = UIAlertAction(title: "OK", style: .cancel, handler: nil)
            alertController.addAction(defaultAction)

            self.present(alertController, animated: true, completion: nil)
        })
    }
}
When the call is executed correctly, Firebase will send a password reset email to the specified email address. The user can then follow the link to reset the password.
Conclusion
In this tutorial, I have given you a quick overview of Firebase. Now I believe you understand how to implement sign up, login, password reset and logout using Firebase. Thanks for reading this tutorial. If you have any questions or comments, please leave me a message below.
For reference, you can download the Xcode project on GitHub.


