If you’ve followed the iOS programming tutorials, I believe you should manage to create a simple Table View app with custom table cell. So far we focus on displaying data in the table view. But how do we know when someone taps on the table row? This is what we’ll cover in this post and show you how to handle row selection.
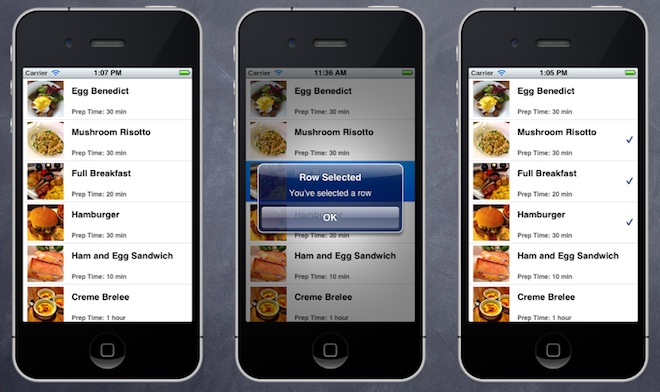
First, let’s revisit our app and see what we’ll add to it.

There are a couple of changes we’ll try it out in this tutorial:
- Display an alert message when user taps a row
- Display a check mark when user selects a row
Understanding UITableViewDelegate
When you first built the Simple Table View app, you’ve declared two delegates (UITableViewDelegate, UITableViewDataSource) in the SimpleTableController.h:
#import

@interface SimpleTableViewController : UIViewController

@end
As explained in the earlier tutorial, both delegates are known as protocol in Objective-C. You have to conform with the requirements defined in these protocols in order to build a UITableView.
It’s very common to come across various delegates in iOS programming. Each delegate is responsible for a specific role or task to keep the system simple and clean. Whenever an object needs to perform certain task, it depends on another object to handle it. This is usually known as separation of concern in system design.
When you look at the UITableView class, it also applies this design concept. The two delegates are catered for different purpose. The UITableViewDataSource delegate, that we’ve implemented, defines methods that are used for displaying table data. On the other hand, the UITableViewDelegate deals with the appearance of the UITableView, as well as, handles the row selection.
It’s obvious we’ll make use of the UITableViewDelegate and implement the required method for handling row selection.
Handling Table Row Selection
Before we change the code, you may wonder:
How do we know which methods in UITableViewDelegate need to implement?
You can always refer to the Apple’s iOS programming reference. There are two ways to access the documentation. You can access the API document on Apple’s website. Or simply look it up inside Xcode. For example, you can bring up the API document of UITableViewDelegate, just place the cursor over the class name and press “control-command-?”. You’ll see the following popup:

Shortcut to Access API Doc
Click the UITableViewDelegate Protocol Reference to display the API document:

UITableViewDelegate Protocol Reference
If you’ve read through the document, you’ll find these methods that are used for managing row selection:
– tableView:willSelectRowAtIndexPath:
– tableView:didSelectRowAtIndexPath:
Both of the methods are used for row selection. The only difference is that “willSelectRowAtIndexPath” is called when a specified row is about to be selected. Usually you make use of this method to prevent selection of a particular cell from taking place. Typically, you use “didSelectRowAtIndexPath” method, which is invoked after user selects a row, to handle the row selection and this is where you add code to specify the action when the row is selected. In this tutorial, we’ll add a couple of actions to handle row selection:
- Display an alert message
- Display a check mark to indicate the row is selected
Let’s Code
Okay, that’s enough for the explanation. Let’s move onto the interesting part – code, code, code!
In Xcode, open the “SimpleTableViewController.m” and add the following method before “@end”.
- (void)tableView:(UITableView *)tableView didSelectRowAtIndexPath:(NSIndexPath *)indexPath
{
    UIAlertView *messageAlert = [[UIAlertView alloc]
                                    initWithTitle:@"Row Selected" message:@"You've selected a row" delegate:nil cancelButtonTitle:@"OK" otherButtonTitles:nil];

    // Display Alert Message
    [messageAlert show];

}
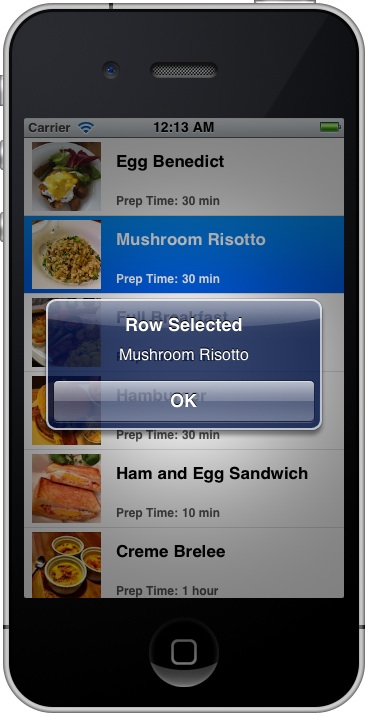
The code is very easy to understand. When a row is selected, the app creates an UIAlertView and shows an alert message. Try to run the app and this is what the app looks like when you tap a row:

When a row is selected, an alert message is displayed
Your Exercise
For now, we just display a generic message when a row is selected. It’s always better to display an informational message like below:

Think about how you can alter the code (hint: the indexPath parameter contains the row number of the selected row) and display the message like the screenshot shown above. It’s not difficult to do so if you’ve followed the previous tutorial.
Easy, right? With the use of delegate, it’s very straightforward to detect row selection. Next, we’ll add a few lines of code to display a tick for the selected item. Before that, let me take a look at the default content of a table cell:

Default Structure of a UITableViewCell
A table cell can be broken into three parts:
- Image – the left part is reserved for displaying thumbnail just like what we’ve done in the Simple Table App tutorial
- Content – the main part is used for displaying text label and detailed text
- Accessory view – the right part is reserved for accessory view. There are three types of default accessory view including disclosure indicator, detail disclosure button and check mark. The below figure shows you how these indicators look like.

UITableViewCell Accessory View
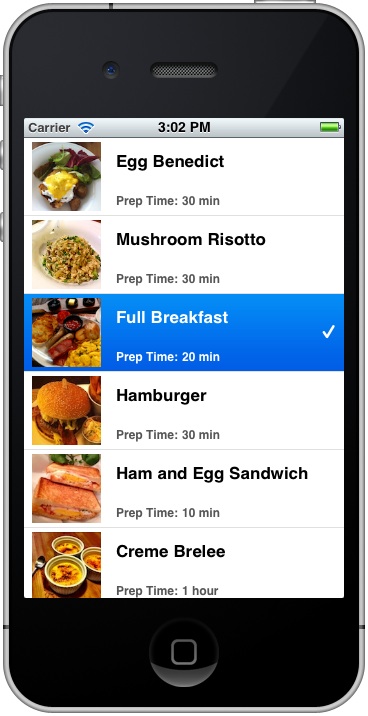
To display a check mark when a row is selected, you just need to add two lines of code after the “[messageAlert show]”:
    UITableViewCell *cell = [tableView cellForRowAtIndexPath:indexPath];
    cell.accessoryType = UITableViewCellAccessoryCheckmark;
The first line retrieves the selected table cell by using the indexPath. The second link updates the accessory view of the cell with a check mark.
Compile and run the app. After you tap a row, it’ll show you a check mark.

For now, when you select a row, that row will be highlighted in blue color. If you don’t like it, try to add the following code to deselect the row.
[tableView deselectRowAtIndexPath:indexPath animated:YES];
What’s Upcoming Next?
What do you think about the series of Table View tutorials? I hope you’ve learnt a ton! By now, you should have a better understanding about how to create table view, customize table cells and handle table row selection. Make sure you understand the information presented in the tutorials as UITableView is one of the common UI elements in iOS. If you have any questions, head to our forum and share with us.
There are still lots of stuffs to learn in iOS programming. In coming tutorials, we’ll see how you can replace the recipe array with a file and explore Navigation Controller, as well as, Storyboard to build a more complex application.
Update: You can now download the full source code of the Xcode project.


