A month ago, we covered how to use Core Location framework to retrieve the user’s location. We also showed you how to convert the GPS coordinate into an address. However, the best way to show a location is to pin it on map. Thanks to the MapKit API. It lets programmers easily work with the built-in Maps and pin a location.
The Map Kit framework provides an interface for embedding maps directly into your own windows and views. This framework also provides support for annotating the map, adding overlays, and performing reverse-geocoding lookups to determine placemark information for a given map coordinate.
– iOS Developer Reference
MapKit is a neat API, comes with the iOS SDK, that allows you to display maps, navigate through maps, add annotations for specific locations, add overlays on existing maps, etc. In this tutorial, we’ll walk you though the basics of the API and show you how to place a pin on the map. As usual, rather than going through the theory, we’ll work on a simple app. Through the practice, we hope you’ll get a better idea about MapKit.
Let’s get started.
Create the Project and Design the Interface
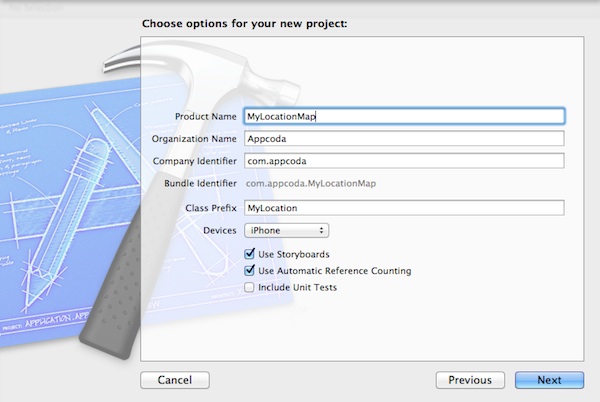
First, create a new Xcode project using the Single View Template. Let’s name the project as “MyLocationMap” and set the project with the following parameters:

MyLocationMap Xcode Project
Once you successfully created your project, go to the Storyboard and design the user interface. We want to embed the view controller in a navigation controller. First, select the view controller and select “Editor” -> “Embed in” -> “Navigation Controller”.

Embed View Controller in Navigation Controller
Optionally, you can set the title of the navigation bar. Say, let’s name it as “My Maps”. Finally, drag a Map View from Object Library to the view controller. In the Attribute Inspector of Map View, check the “Show User Location” option. By enabling user location, the map automatically shows the current location of the user.

Add Map View to View Controller
As the app makes use of the Core Location and MapKit frameworks, add these two frameworks to our project. Select “MyLocationMap” in the Project Navigator, followed by the “MyLocationMap” under Targets. Then select “Build Phases” and expand “Link Binary with Libraries”. Click the “+” button to add both “CoreLocation” and “MapKit” frameworks.

Add CoreLocation and MapKit Frameworks
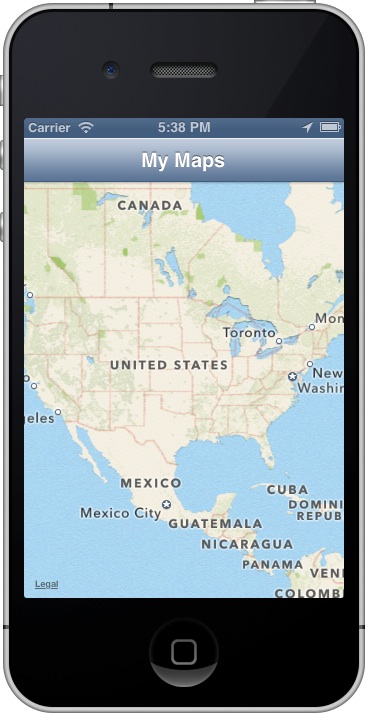
Till now, we haven’t written a line of code. Before moving on, let’s run the app and see how it looks like.
As soon as the app launches, it prompts you to access the location service. Just tap “OK” to permit it to use the current location. You’ve already built a Maps app.

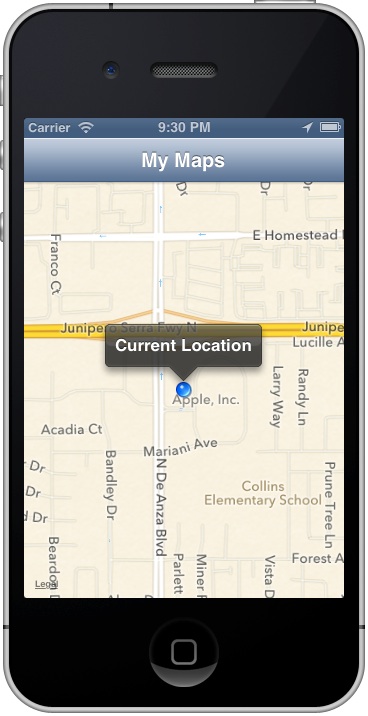
Do you still remember how to test a location aware app using the iOS Simulator? Recalled that the iOS Simulator lets you fake a location, you can select “Debug” -> “Location” in the menu bar. Change the location from “None” to “Apple”. You’ll then see a blue dot that indicates the current location on map.

Test Current Location with Fake Location
Cool, right? We haven’t covered the coding part. What we’ve done so far is simply drag & drop of the UI component and we’ve displayed the current location on map.
Zoom Into the Current Location
Does our tutorial end here? Of course not. We still got a lot to discuss. One thing is the scale of the map. It’s now showing the entire world. Normally you don’t want to display the current location in such scale, but zoom into the particular area.
Okay, let’s get back to code.
First, we create an outlet in “MyLocationViewController.h” and establish a connection with the Map View. In “MyLocationViewController.h”, declares the “mapView” property and implements the MKMapViewDelegate protocol. Your code should look like below:
#import
#import

@interface MyLocationViewController : UIViewController

@property (nonatomic, strong) IBOutlet MKMapView *mapView;

@end
Let’s forget about the MKMapViewDelegate, for which we’ll look into later. Next, go to the “MyLocationViewController.m” file and add the synthesis statement:
@interface MyLocationViewController ()

@end

@implementation MyLocationViewController
@synthesize mapView;

.
.
.
Lastly, go back to the Storyboard and connect the mapView variable with the Map View component. (Press and hold the Control key on your keyboard, click the “File Owner” icon and drag to the Map View)

Establish Connection with Map View
Now, let’s get back to the MKMapViewDelegate protocol. What’s it for? Why do we need to use it? Technically, the MKMapViewDelegate protocol defines a set of optional methods that you can use to receive map-related update messages. For example, you go for a run with your iPhone. Your location keeps changing during your run. To receive the location change/update, you can implement the protocol. The mapView:didUpdateUserLocation method is called whenever a new location update is received by the map view.
This is one of the examples you’ll implement the MKMapViewDelegate protocol. You can also make use of it to change the annotation view that we’ll demonstrate in later tutorials.
Go back to the “MyLocationViewController.m” and update the “viewDidLoad” method to assign the delegate of mapView:
- (void)viewDidLoad
{
    [super viewDidLoad];
    self.mapView.delegate = self;
}
Also, add the didUpdateUserLocation method:
- (void)mapView:(MKMapView *)mapView didUpdateUserLocation:(MKUserLocation *)userLocation
{
    MKCoordinateRegion region = MKCoordinateRegionMakeWithDistance(userLocation.coordinate, 800, 800);
    [self.mapView setRegion:[self.mapView regionThatFits:region] animated:YES];
}
The above lines of code instructs the map view to zoom into a region that is 800 by 800 meters around the user’s location.
Run the app again, set the location to Apple’s headquarter. Now the map automatically updates to our preferred scale:

Adding an Annotation to Map
As you can see from the above screenshots, the current user’s location is indicated as a blue dot. We want to change it and place a pin onto the map.
According to iOS developer guide, in order to display an annotation on a map, your app must provide two distinct objects:
- An object that conforms to the MKAnnotation protocol and manages the data for the annotation. (This object is the annotation object.)
- A view (derived from the MKAnnotationView class) used to draw the visual representation of the annotation on the map surface. (This is the annotation view.)
The iOS comes with a built-in annotation object – MKPointAnnotation. This object already provides concrete implementation of the MKAnnotation protocol. You can make use of this simple objects, rather than define your own, whenever you want to associate a point on the map with a title.
In this tutorial, we keep thing simple and utilize the MKPointAnnotation object to associate with the user’s location. Update the “didUpdateUserLocation” method to the following:
- (void)mapView:(MKMapView *)mapView didUpdateUserLocation:(MKUserLocation *)userLocation
{
    MKCoordinateRegion region = MKCoordinateRegionMakeWithDistance(userLocation.coordinate, 800, 800);
    [self.mapView setRegion:[self.mapView regionThatFits:region] animated:YES];

    // Add an annotation
    MKPointAnnotation *point = [[MKPointAnnotation alloc] init];
    point.coordinate = userLocation.coordinate;
    point.title = @"Where am I?";
    point.subtitle = @"I'm here!!!";

    [self.mapView addAnnotation:point];
}
To place a pin in the correct location on map, we first create a MKPointAnnotation object and assign it with the coordinate of user’s location. We also assign the title and subtitle for the call-out that appears when you tap on the pin. Lastly, we call the addAnnotation: method to add the annotation object to the map view.
Test the App Again
As you run the app again, it places a pin over the current location. Tapping on the pin brings up the call-out showing “Where am I?” and “I’m here!!!”.
While running the app, try to change to other locations by using the arrow button in the top bar of the debug area.

Simulate Other Locations
As soon as the location is changed, your app instantly updates the user’s location.

MyLocationMap – Switch Your User's Location
Summary
In this tutorial, we introduce the basics of MapKit API and walked you through how to show user’s location on the map. You also learnt how to put a pin (i.e. annotation) to indicate a location.
What do you think about this tutorial? As always, we love to hear your feedback.


