Before we dive into the local notification tutorial, let’s first talk about the history.
Way back in iOS 3.0, Apple introduced the Push Notification Service (APNS) to bring the multitasking support to its mobile operating system. At that time, due to the nature of iOS, only one application is allowed to run in the foreground. Push notification changes the game by allowing applications to receive updates even it’s not actively running. When a notification comes in, iOS displays the notification in the form of on-screen alerts or sounds and it’s up to the user to decide whether to launch the application.
Push notification provides an effective way to support multitasking. The catch is it only works if the device is connected to the Internet. And I forgot to mention you have to develop some server programs to interact with APNS. Considered you’re developing a To-Do app, the app notifies users about a to-do item at a specific time. In order to push out such notification, you have to build a server program to talk with APNS and host it somewhere. This is too complicated for most developers particularly for those without server side programming experience.
Since the release of iOS 4, Apple introduced a new type of notification called Local Notification. This makes pushing a notification much simpler. No more server side programming. No more Internet connection is required. You can schedule a notification with simple API and it’ll be fired up at a proper time.

Okay, that’s enough for the history and background. Let’s move onto the implementation and build a simple To-Do app with Local Notifications.
The To-Do App with Notifications
To demonstrate the usage of local notification, we’ll build a simple To-Do app together. The app lets users put in any to-do items and preset a reminder. At a specific time, the app fires up a notification and reminds users about the to-do item.

Local Notification Demo App
Creating Xcode Project and Design the UI
Okay, let’s begin. First, launch Xcode and create a new project using the Single View Template. Name the project as ToDoApp (or whatever you like). In the Storyboard, design the user interface similar to the below:

Local Notification Demo – Storyboard
The focus of this tutorial is on the implementation of local notifications. So to save your time from setting up the project and user interface, you can download this project template to start with.
Local Notification at a Glance
In general, to setup a location notification, all you need is just a few lines of code:
UILocalNotification* localNotification = [[UILocalNotificationalloc] init];
localNotification.fireDate = [NSDate dateWithTimeIntervalSinceNow:60];
localNotification.alertBody = @"Your alert message";
localNotification.timeZone = [NSTimeZone defaultTimeZone];
[[UIApplication sharedApplication] scheduleLocalNotification:localNotification];
When you create a local notification, you must specify when the system should deliver the notification. That is the fireDate property. Optionally, you can set the time zone. The notification can be displayed as an alert message which is assigned by using the “alertBody” property. Once you configure the instance of UILocalNotification, you schedule it by using the scheduleLocalNotification: of UIApplicationsharedApplication class.
Let’s go back to the app implementation. We’ll first implement the “AddToDoViewController.m” to schedule a notification. The “Add To-Do Item” view allows user to add a to-do item and set the time of the reminder using a data picker. When the “save” button is tapped, the “save:” method of AddToDoViewController will be invoked. Add the following code in the “save:” method:
    [self.itemText resignFirstResponder];

    // Get the current date
    NSDate *pickerDate = [self.datePicker date];

    // Schedule the notification
    UILocalNotification* localNotification = [[UILocalNotification alloc] init];
    localNotification.fireDate = pickerDate;
    localNotification.alertBody = self.itemText.text;
    localNotification.alertAction = @"Show me the item";
    localNotification.timeZone = [NSTimeZone defaultTimeZone];
    localNotification.applicationIconBadgeNumber = [[UIApplication sharedApplication] applicationIconBadgeNumber] + 1;

    [[UIApplication sharedApplication] scheduleLocalNotification:localNotification];

    // Request to reload table view data
    [[NSNotificationCenter defaultCenter] postNotificationName:@"reloadData" object:self];

    // Dismiss the view controller
    [self dismissViewControllerAnimated:YES completion:nil];
The above code is very straightforward. We first hide the on-screen keyboard and get the preset date from the date picker. Next, we create the local notification with the date we just retrieve from the date picker. We also set the alert body by using the to-do item text. Lastly, we increase the existing icon badge number by 1. With everything configured, we fire up “scheduleLocalNotification:” method to schedule the local notification.
Before we end the method, we notify the ToDoListViewController to refresh the table data.
Displaying a List of Local Notification
In the main screen of the app, we display a list of local notifications that are scheduled in the table view. It’s pretty easy to retrieve the current scheduled local notification. Simply make the following call and you’ll get an array of local notifications:
[[UIApplication sharedApplication] scheduledLocalNotifications];
Select the “ToDoListViewController.m” and change the code for
- (NSInteger)numberOfSectionsInTableView:(UITableView *)tableView
{
    // Return the number of sections.
    return 1;
}

- (NSInteger)tableView:(UITableView *)tableView numberOfRowsInSection:(NSInteger)section
{
    // Return the number of rows in the section.
    return [[[UIApplication sharedApplication] scheduledLocalNotifications] count];
}

- (UITableViewCell *)tableView:(UITableView *)tableView cellForRowAtIndexPath:(NSIndexPath *)indexPath
{
    static NSString *CellIdentifier = @"Cell";
    UITableViewCell *cell = [tableView dequeueReusableCellWithIdentifier:CellIdentifier forIndexPath:indexPath];

    // Get list of local notifications
    NSArray *localNotifications = [[UIApplication sharedApplication] scheduledLocalNotifications];
    UILocalNotification *localNotification = [localNotifications objectAtIndex:indexPath.row];

    // Display notification info
    [cell.textLabel setText:localNotification.alertBody];
    [cell.detailTextLabel setText:[localNotification.fireDate description]];

    return cell;
}
I’ll not go into the details of the code. You should be very familiar with them if you have an understanding to UITableView implementation.
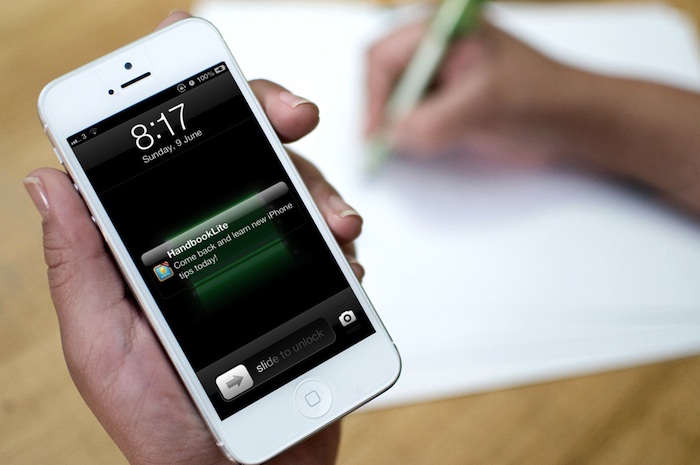
Okay, let’s compile and run the app. Tap the “+” button in the navigation bar and add a to-do item. Set the date to a future date. Once done, tap “save” button to schedule the notification. As soon as you go back to the table view, you’ll find the notification just added. Go back to home screen. Wait for a couple of minutes (depending on your preset schedule), you should see a notification banner. Or if you’re in lock screen, you’ll see a notification alert.

Local Notification Demo
Handling Notifications
So far we just create and schedule the notification. But how can we handle the notification when it’s fired up?
When a notification is fired up, your app may be either running in the foreground or background. In the worst case, the app is not running at all. You’ll have to handle these situatios and let’s talk about them one by one.
Application is NOT Running
 When the app is not running, users see notifications in the following ways, depending on the notification settings:
- Displaying an alert or banner
- Badging the app icon
- Playing a sound
By tapping on action button of the notification, users will launch the app. In this case, the application:didFinishLaunchingWithOptions: method of the application delegate is called.
Change the method to the following code:
- (BOOL)application:(UIApplication *)application didFinishLaunchingWithOptions:(NSDictionary *)launchOptions
{
    // Override point for customization after application launch.

    // Handle launching from a notification
    UILocalNotification *locationNotification = [launchOptions objectForKey:UIApplicationLaunchOptionsLocalNotificationKey];
    if (locationNotification) {
        // Set icon badge number to zero
        application.applicationIconBadgeNumber = 0;
    }

    return YES;
}
In the above code, we use the launchOptions dictionary and see if it contains a local notification object. For the sake of simplicity, we just reset the icon badge number when there is a local notification.
Applicaton is Running in Foreground
If the app is running while the notification is delivered, there is no alert displayed on screen. The application automatically calls its delegate’s application:didReceiveLocalNotification: method.
In the AppDelegate.m, add the following method:
- (void)application:(UIApplication *)application didReceiveLocalNotification:(UILocalNotification *)notification
{
    UIApplicationState state = [application applicationState];
    if (state == UIApplicationStateActive) {
        UIAlertView *alert = [[UIAlertView alloc] initWithTitle:@"Reminder"
                                                        message:notification.alertBody
                                                       delegate:self cancelButtonTitle:@"OK"
                                                        otherButtonTitles:nil];
        [alert show];
    }

    // Request to reload table view data
    [[NSNotificationCenter defaultCenter] postNotificationName:@"reloadData" object:self];

    // Set icon badge number to zero
    application.applicationIconBadgeNumber = 0;
}
As we’ll discuss in the following section, the “didReceiveLocalNotification:” method will also be called when application is running in background. Here we first determine the application state and only display an alert when application is running foreground. We also inform the view controller to reload the table date and reset the application’s icon badge number.

Display an alert while application is running
Application is Running in Background
The app has been launched before but users switch to another app. When the notification is fired, users normally see an alert banner at the top of the screen. When it’s tapped, the app will be brought to the foreground. Similar to the case that the app is running in foreground, the application automatically calls its delegate’s application:didReceiveLocalNotification: method.

Display a location notification as banner
Summary
In this tutorial, we give you a basic idea about local notifications. It’s much simpler than remote notification. If you are developing an app, try to add some local notification features. One common application of local notification is to remind users to check out your app. Say, your app can display a local notification if users haven’t launched it for more 3 days. It is one of the techniques commonly used in most of the apps.
I hope you enjoy the tutorial. For your complete reference, you can download the full Xcode project here. As always, leave us comment and share your thought about the tutorial. We love to hear your feedback.


