

This is the second part of the Cloud Backend tutorial. In the first part of the tutorial series, we gave you an introduction of Backend as a Service (BaaS for short) and transformed the Recipe app. Instead of storing the recipes locally, we’ve migrated the recipes to the Parse backend. The Recipe app now connects to Parse and download the recipes from the cloud.
If you’ve worked through Part 1, you should have a basic idea about the Parse SDK. In part 1, you’ve learnt how to retrieve objects from Parse. In this part, we’ll show you how to save new recipe to the Parse backend. Of course, you’ll learn how to delete the recipe, as well.
We will build on the Xcode project that you’ve done in Part 1. So if you haven’t gone through the project and exercise, it’s highly recommended to check out the first part of the series.
Let’s get started.
Getting Started
Before moving to the coding part, let’s have a quick look at the new features. Previously, we’ve built a Recipe app to retrieve recipes from Parse and display them using PFQueryTableViewController. In this part, we’ll add two new features:
- Create new recipe and save it to the cloud
- Swipe to delete existing recipe from the cloud

Save and remove recipe to/from the Parse cloud
Designing the User Interface
The main user interface is pretty much unchanged. However, in order to let users add new recipe, we’ll add a new view controller. The “New Recipe” view controller is triggered by tapping the “+” button of the main interface. Through the new screen, user can fill in the recipe information including name, preparation time, ingredients and photo.

Adding a New Recipe view controller
We’ll not show you how to build the interface as this is not the focus of this tutorial. The “New Recipe” view controller is a subclass of UITableViewController and created using static table view. You’re encouraged to build the interface but to save your time, you can download the Xcode project from here (tested on Xcode 4.6.3). Unzip it and try it out. The rest of the tutorial will be built on this code template.
Before proceeding, remember to change the application ID and client key to your own Parse IDs in the RecipeBookAppDelegate.m:
- (BOOL)application:(UIApplication *)application didFinishLaunchingWithOptions:(NSDictionary *)launchOptions
{
    // Override point for customization after application launch.
    [Parse setApplicationId:@""
                  clientKey:@""];

    return YES;
}
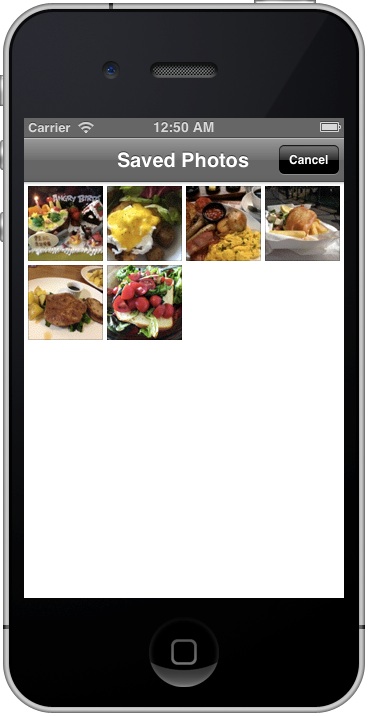
Picking Recipe Photo From Photo Library
We’ll first implement the “Add Photo” function of the New Recipe view controller. When user taps on the “Add Photo” image, the app will bring up the photo library for picking the recipe photo. The iOS SDK provides the class UIImagePickerController to capture image from camera and access the photo library. Let’s see how to bring up the media browser.
Creating a Media Browser
The KUTTypeImage definition that we’ll use later is defined in the MobileCoreServices framework. So add the framework to the Xcode project and add the following import statement at the very beginning of NewRecipeViewController.m:
#import
Next, add the following code to create the “showPhotoLibrary:” method:
- (void)showPhotoLibary
{
    if (([UIImagePickerController isSourceTypeAvailable:
          UIImagePickerControllerSourceTypeSavedPhotosAlbum] == NO)) {
        return;
    }

    UIImagePickerController *mediaUI = [[UIImagePickerController alloc] init];
    mediaUI.sourceType = UIImagePickerControllerSourceTypePhotoLibrary;

    // Displays saved pictures from the Camera Roll album.
    mediaUI.mediaTypes = @[(NSString*)kUTTypeImage];

    // Hides the controls for moving & scaling pictures
    mediaUI.allowsEditing = NO;

    mediaUI.delegate = self;

    [self.navigationController presentModalViewController: mediaUI animated: YES];
}
In the above code, we first configure the image picker and set the source type to UIImagePickerControllerSourceTypePhotoLibrary. This will present a media browser that provides access to all the photo albums on the device, including the camera roll. By default, the photo library includes both saved photos and videos. In this case, the Recipe app only allows user to select recipe photo from library. So we limit the media type to kUTTypeImage. The rest of the code is self explanatory.
When user taps “Add Photo”, that is the first row of the static table view, we’ll call up the “showPhotoLibrary:” method to display the media browser. Therefore, add the following code in the same implementation file:
- (void)tableView:(UITableView *)tableView didSelectRowAtIndexPath:(NSIndexPath *)indexPath
{
    if (indexPath.row == 0) {
        [self showPhotoLibary];
    }
}
If you run the app and try to add a new recipe, the app will show you the photos from selection. However, the app will not respond to your selection as we haven’t implemented the UIImagePickerControllerDelegate protocol.
Configuring the UIImagePickerController Delegate
To respond to the user’s selection, we have to implement a delegate that conforms to UIImagePickerControllerDelegate and UINavigationControllerDelegate protocols. Obviously, the NewRecipeViewController is set as the delegate object. In the NewRecipeViewController.h, change the interface to the following:
@interface NewRecipeViewController : UITableViewController
Open the NewRecipeViewController.m and add the following code:
- (void) imagePickerController: (UIImagePickerController *) picker didFinishPickingMediaWithInfo: (NSDictionary *) info {

    UIImage *originalImage = (UIImage *) [info objectForKey:UIImagePickerControllerOriginalImage];
    self.recipeImageView.image = originalImage;

    [picker dismissViewControllerAnimated:YES completion:nil];
}
When user selects a photo from the album, the didFinishPickingMediaWithInfo method of the delegate is called and passed an NSDictionary object containing the media (image or video) and associated data. With editing disabled, we can obtain the selected image from the info dictionary by using the UIImagePickerControllerOriginalImage key. The selected image is then assigned to the image view of the new recipe.
If you run the app again, you should be able to select the recipe photo.
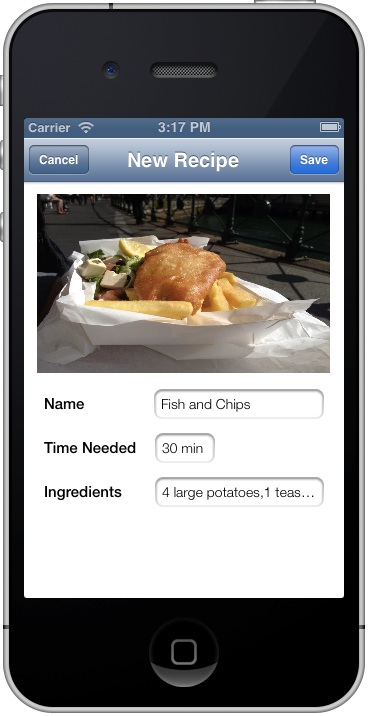
Handling Text Field
If you’re using the source code template, we’ve pre-built the text fields and associate them with the code for you. The text fields are used for collecting recipe information including recipe name, preparation time and ingredients from user. The ingredients field takes in a comma-delimited string with each ingredient separated by comma. To keep the demo app simple, there is no validation for the input.
We also implemented the UITextFieldDelegate in the project template. The UITextField object messages the appropriate UITextFieldDelegate method when certain events occur. In our case, we’d like to hide the keyboard when user hits the return key. This can be easily done by implementing the textFieldShouldReturn: method, which is called when the user presses the return key on the keyboard.
- (BOOL)textFieldShouldReturn:(UITextField *)textField
{
    [textField resignFirstResponder];
    return YES;
}
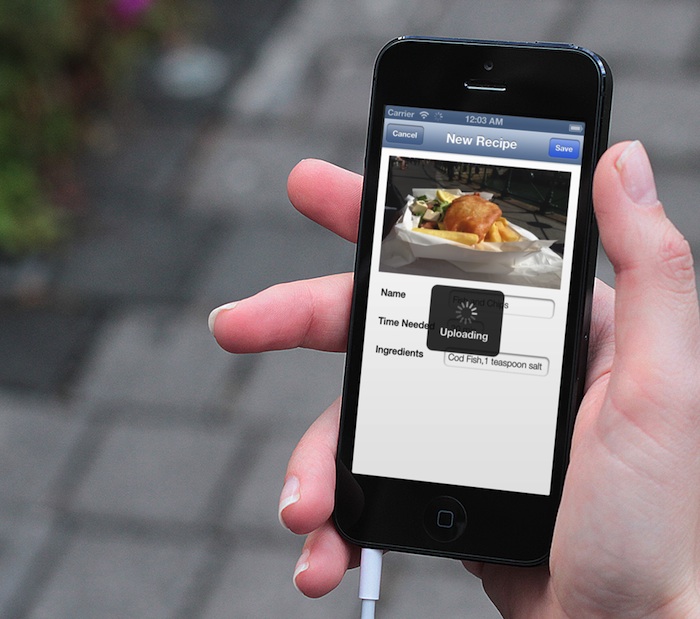
Uploading Recipe to Parse Cloud
With the basic setup of the user interface, let’s move onto the core part of the tutorial. Once user hits the “Save” button, the app will call up the “save:” method and upload the new recipe including the recipe image to the Parse cloud. The Parse SDK provides an easy way to upload data. Storing data on Parse is built around the PFObject. As mentioned previously, each PFObject contains key-value pairs of JSON-compatible data.
In the “NewRecipeViewController.m”, implement the “save:” method with the following code:
- (IBAction)save:(id)sender {
    // Create PFObject with recipe information
    PFObject *recipe = [PFObject objectWithClassName:@"Recipe"];
    [recipe setObject:_nameTextField.text forKey:@"name"];
    [recipe setObject:_prepTimeTextField.text forKey:@"prepTime"];

    NSArray *ingredients = [_ingredientsTextField.text componentsSeparatedByString: @","];
    [recipe setObject:ingredients forKey:@"ingredients"];

    // Recipe image
    NSData *imageData = UIImageJPEGRepresentation(_recipeImageView.image, 0.8);
    NSString *filename = [NSString stringWithFormat:@"%@.png", _nameTextField.text];
    PFFile *imageFile = [PFFile fileWithName:filename data:imageData];
    [recipe setObject:imageFile forKey:@"imageFile"];

    // Show progress
    MBProgressHUD *hud = [MBProgressHUD showHUDAddedTo:self.view animated:YES];
    hud.mode = MBProgressHUDModeIndeterminate;
    hud.labelText = @"Uploading";
    [hud show:YES];

    // Upload recipe to Parse
    [recipe saveInBackgroundWithBlock:^(BOOL succeeded, NSError *error) {
        [hud hide:YES];

        if (!error) {
            // Show success message
            UIAlertView *alert = [[UIAlertView alloc] initWithTitle:@"Upload Complete" message:@"Successfully saved the recipe" delegate:self cancelButtonTitle:@"OK" otherButtonTitles:nil, nil];
            [alert show];

            // Notify table view to reload the recipes from Parse cloud
            [[NSNotificationCenter defaultCenter] postNotificationName:@"refreshTable" object:self];

            // Dismiss the controller
            [self dismissViewControllerAnimated:YES completion:nil];

        } else {
            UIAlertView *alert = [[UIAlertView alloc] initWithTitle:@"Upload Failure" message:[error localizedDescription] delegate:self cancelButtonTitle:@"OK" otherButtonTitles:nil, nil];
            [alert show];

        }

    }];
}
To save the Recipe object to the cloud, we first create a PFObject using the “Recipe” class name. The PFObject works pretty much like the NSMutableDictionary, as you can see from the above code (line 3-8).
For the recipe image, you can easily store it by converting it to NSData and then using PFFile. Here we turn the original image into JPEG data using UIImageJPEGRepresentation. Once you configure the PFObject, you can invoke the “saveInBackground:” method to save the recipe. This method will automatically upload the image and save the recipe in background. But to better handle the upload, we use an alternative method called “saveInBackgroundWithBlock:”. You can provide additional logic that will execute after the save completes. In our demo, we will display an alert to indicate the completion, followed by notifying the main view controller to reload the recipes.
Displaying Upload Indicator with MBProgressHUB
Now you should have a better idea of how object saving works. But what are those lines of code (i.e. line 16-20) that come after the PFobject? As you know, it takes time to upload the recipe image. It’s always good to let user know something is in progress. The iOS SDK provides developers with UIActivityIndicatorView for displaying a spinner. But today let us introduce an awesome class developed by Matej Bukovinski. MBProgressHUD is an open source class that displays a translucent HUD with an indicator. You can download the class for free from Github. If you still wonder what the class does, just take a look at the following screens provided by the developer:

MBProgressHUD Samples
The MBProgressHUD class is very simple to use. Just add both MBProgressHUD.h and MBProgressHUD.m to your Xcode project, and you’re ready to go. For your convenience, we’ve bundled both classes in the project template. It only takes a few lines of code to set up the HUD. First, import the MBProgressHUD header file:
#import "MBProgressHUD.h"
Then initialize the HUD with the current view. The MBProgressHUD class provides different HUD modes. We just use the MBProgressHUDModeInDeterminate mode and change the label to “Uploading”. The last line tells the HUD to show as it is hidden by default.
MBProgressHUD *hud = [MBProgressHUD showHUDAddedTo:self.view animated:YES];
hud.mode = MBProgressHUDModeInDeterminate;
hud.labelText = @"Uploading";
[hud show:YES];
To hide the HUD, you can call the following code:
[hud hide:YES];
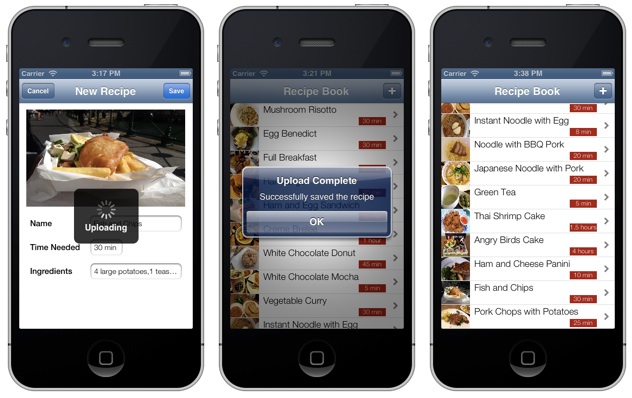
Testing the App
This is how we use MBProgressHUD while saving the recipe to the Parse cloud. Okay, it’s time to build and run the app. Try add a new recipe and save it to the Parse cloud. During the recipe upload, you should see the HUD indicating the upload is in progress. Once complete, the table view of Recipe Book view controller will refresh and load the new recipe from Parse.
Deleting Recipe from Parse Cloud
You should know how to delete a row from table view if you’ve followed the UITableView tutorial. Simply implement the “commitEditingStyle:” method with the following code:
- (void)tableView:(UITableView *)tableView commitEditingStyle:(UITableViewCellEditingStyle)editingStyle forRowAtIndexPath:(NSIndexPath *)indexPath
{
    // Remove the row from data model
    PFObject *object = [self.objects objectAtIndex:indexPath.row];
    [object deleteInBackgroundWithBlock:^(BOOL succeeded, NSError *error) {
        [self refreshTable:nil];
    }];
}
Like saving data to the Parse cloud, PFObject provides various methods for object deletion. The “deleteInBackground:” method lets you delete the object from the cloud in background. Here we use an alternative method called “deleteInBackgroundWithBlock:” that allows to run a callback when deletion completes.
Summary
Through this tutorial series, hopefully you can see how easy it is to save data to the cloud by using the Parse SDK. If you think it’s too hard and complex to connect your app to the cloud, think again. Parse, as well as, other BaaS providers (e.g. StackMob) simplify the whole development of a backend. We hope this tutorial inspires you to add a backend for your iOS app and serves as a starting point to explore other BaaS solutions. We’re looking forward to seeing your cloud app!
For your complete reference, you can download the full source code from here. As always, leave us comment and share your thought about the tutorial. We want to hear your feedback and keep improving.


