

At WWDC 2017, Apple announced MusicKit, a framework to help developers build apps that allow users to play Apple Music and their local music library. Unlike most frameworks like ARKit or CoreML, MusicKit cannot be added to your code with a simple import function. Rather, it’s a combination of the Apple Music API, the StoreKit framework, the MediaPlayer framework, and some other web-based technologies.
You may be wondering why is this framework so difficult to integrate into your applications compared to other API and frameworks. This is because MusicKit was not only built to work on iOS devices, but Android and Web applications as well. Just like CloudKit or Sign in with Apple, you can access a user’s Apple Music account through Android and Web apps. However, for the purpose of this tutorial, we will simply focus on building a music player for iOS using SwiftUI.
Editor’s note: This is a two part series of our MusicKit tutorials. This is the first part and the second one will come next week. If you are new to SwiftUI, you can check out this tutorial and this sample chapter of our Mastering SwiftUI book.
The MusicKit Demo App
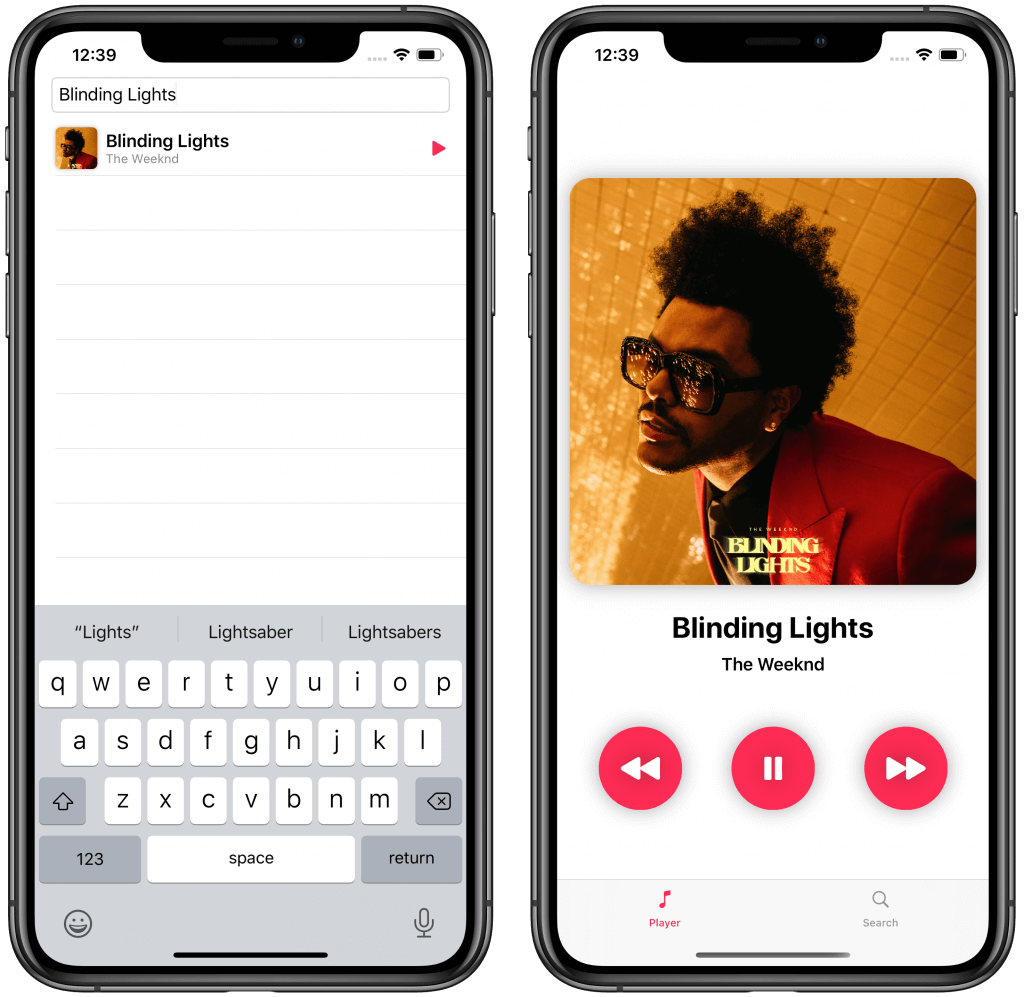
In this tutorial series, we’ll be building a very simple music player that searches using the Apple Music API for a song, grabs the relevant details of the song like artist name and album cover, and plays it on the device with the help of MediaPlayer’s MPMusicPlayerController. We’ll also see how to use the MediaPlayer framework to play, rewind, and skip songs.
Before we can do this, we need to first communicate with the Apple Music service to see if a user has a valid Apple Music subscription. This requires us to create a MusicKit identifier and private key to sign your developer tokens using Certificates, Identifiers & Profiles in our Apple Developer Program account. Since this can be very daunting for a lot of iOS developers, a majority of this tutorial will focus on creating these keys and identifiers. The next part of this tutorial will focus more on the MediaPlayer framework.
Our final app will look like this:
This tutorial was made using Xcode 11.3 and Swift 5.1. An active Apple Music subscription will be needed in order to test the app out. You may also need an active Apple Developer account in order to create some of the required identifiers and keys. You will also need to run your app on a real device because as of this time, the Simulator does not support Apple Music playback. We will also be running some Python code in order to generate private keys for us. If you don’t have pip installed, don’t worry, I will explain how to later in the tutorial.
Creating a MusicKit Identifier
The first step in communicating with the Apple Music API is to have a valid MusicKit identifier in your Apple Developer account. This identifier will be linked to our app and will let the Apple Music service know that our app is valid to access its services. Since our identifier is linked to our app’s Bundle Identifier, let’s quickly create the Xcode project first.
Open Xcode and click on Create a new Xcode Project. Under iOS, make sure that Tabbed App is the option selected before clicking on the Next button.
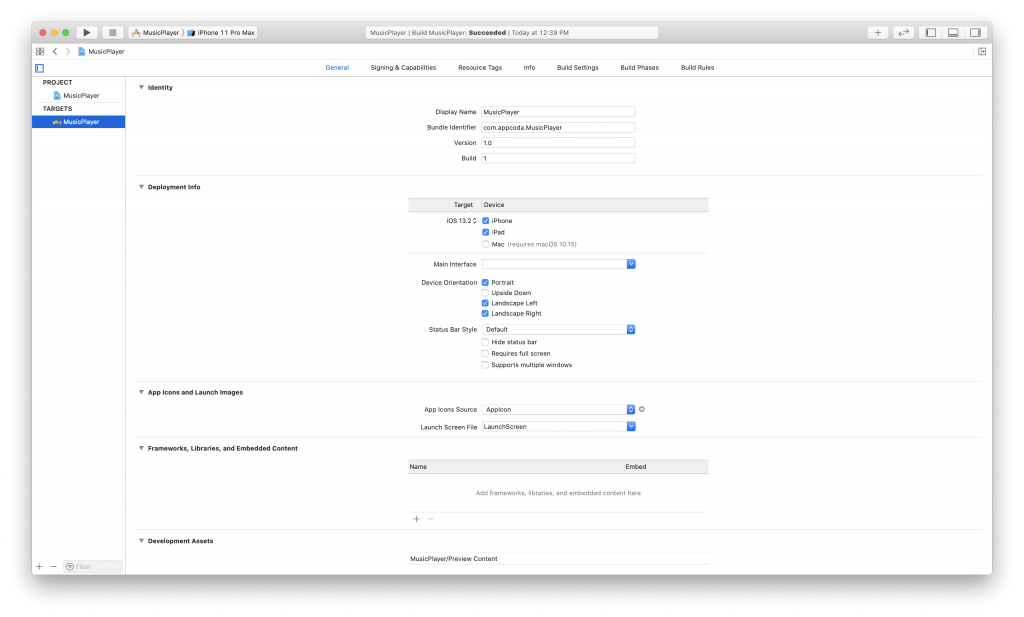
Next, name the project to MusicPlayer but feel free to change it if you like. Make sure that your User Interface is set to SwiftUI. Finally, take note of the Bundle Identifier as displayed below. For example, my bundle identifier is “com.appcoda.MusicPlayer”. But you should use your own.
Click on Next and choose where you would like to save your project. That’s it! You’ve created the project and just for reference, you should see your Bundle Identifier again on your Project Dashboard.
Now we can create our MusicKit Identifier. Head to your Apple Developer account. Once you login, you should be greeted with a screen that looks like this. Make sure you click on Certificates, Identifiers, & Profiles.
Once the page loads, click on Identifiers on the left side of the page. You’ll get a list of all the App IDs your Apple Developer account is associated with.
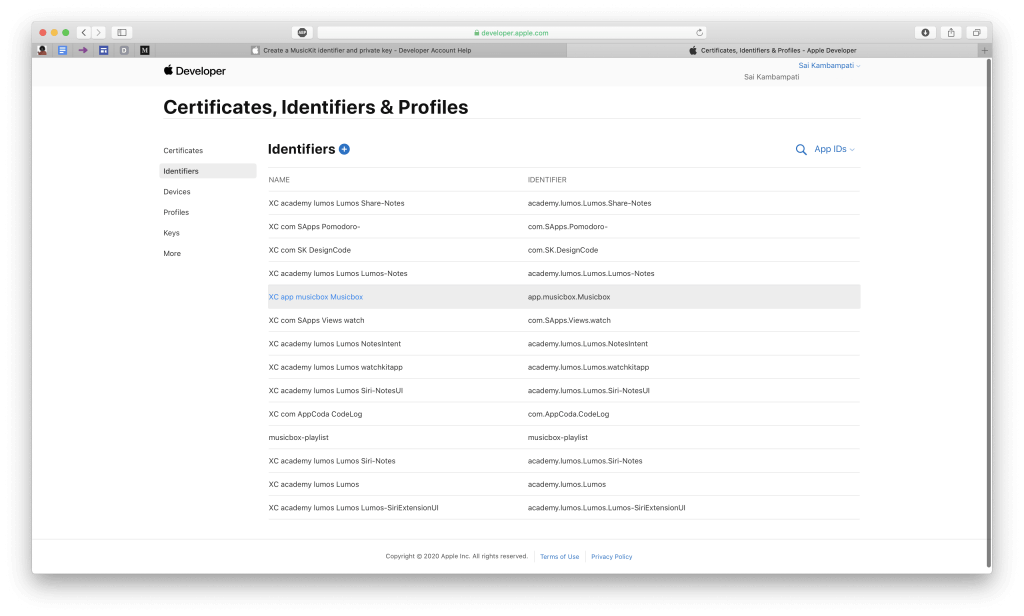
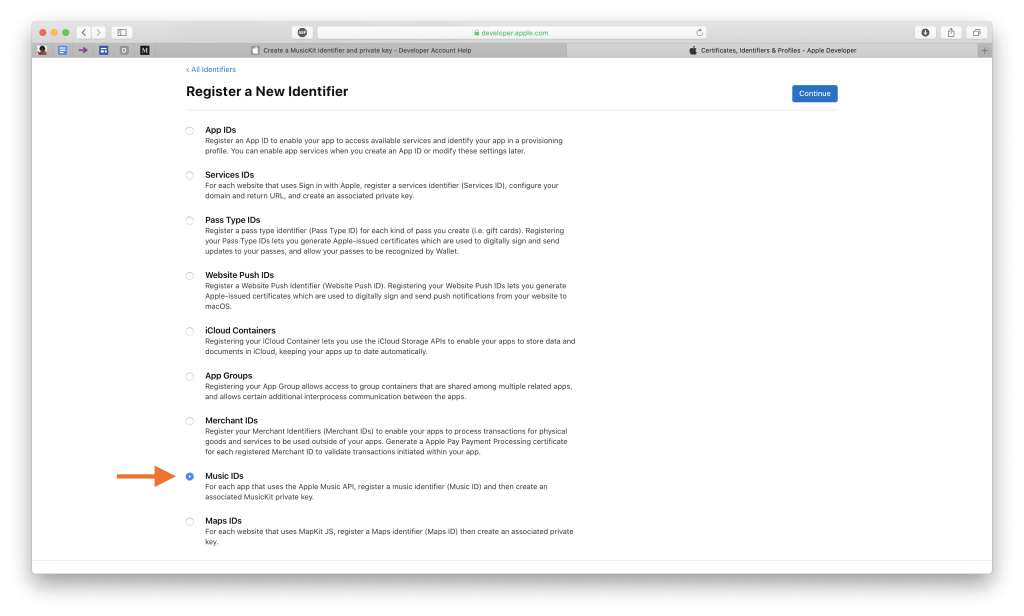
Now, let’s create a new MusicKit Identifier. Click on the blue plus button next to the Identifiers title. A new page will load titled Register a New Identifier. Make sure that you select the Music IDs option before pressing Continue.
Next, you’ll be asked to quickly fill out a description and identifier for your Music ID. You can see what I filled out below. For your identifier, make sure that it is in the following format- music.<YOUR-BUNDLE-ID>.

Click Continue and make sure all your details are correct, click on Register.
That’s it! If all worked out, you should see a list of all your Music IDs and one of them being the one you just created!
Next, we’ll create a private key that is associated with the identifier we just created. This key can be used to sign a secret developer token that allows us to communicate with MusicKit.
Creating a Private Key
Generally speaking, private keys are important because they allow you to access and authenticate communication with some app services — such as Push Notifications, MusicKit, and DeviceCheck. We’ll need to create a private key in order to sign something called a developer token. This token will be used when sending requests to the Apple Music API in order to let them know that this request is coming from a verified developer. You’ll use the private key to create the token in the form of a JSON web token (JWT). You can learn more about JWT here.
Still in the Certificates, Identifiers, and Profiles page, click on the Keys tab to the left side of the page. You’ll see a list of all the keys associated with your developer account. If you’ve ever used Push Notifications in your apps, you’ll find the key you used for that service.
Let’s create a new key for our app. Just like before, click on the plus button next to Keys. Name your key (I’m using “AppCoda MusicPlayer”) and select MusicKit from the list of capabilities shown below.
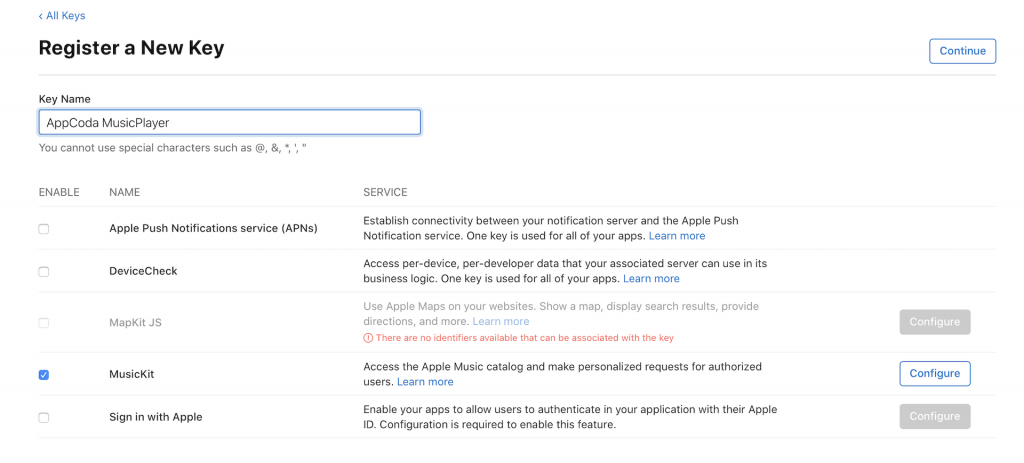
Before you select Continue, we’ll need to configure this capability. Click on Configure and you’ll be shown a page where you can associate this private key with the MusicKit Identifier we created earlier. Select the Music ID you created and then click Save.
You’ll go to the previous page where you can finally click on Continue. After a quick checkup to make sure everything has been entered correctly, click on Register.
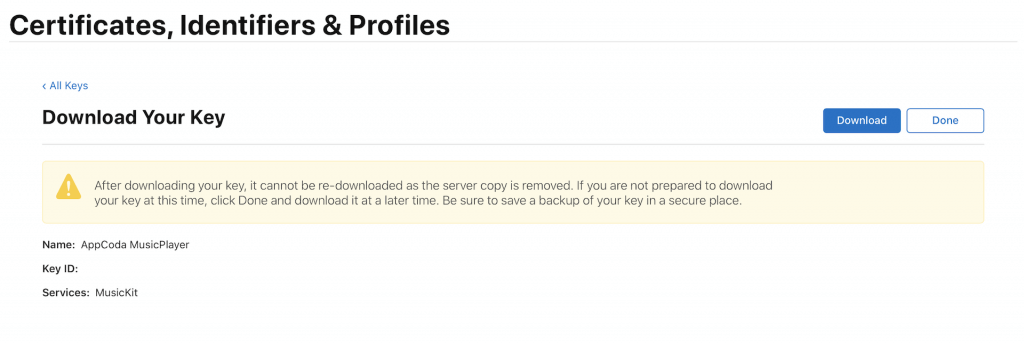
If all goes well, you’ll see a page like the one above asking you to download your key. Make sure you download the key and save it in a safe place as you will not be able to download your key again. Also, make sure you take note of your Key ID as we’ll need it soon.
Now that we have the private key downloaded, we’ll need to use it to create the developer token in the JWT format. However, if you look at the file you downloaded, you’ll see that it’s in a .p8 file format and you probably can’t open the file. Luckily, there’s a way to view the private key from this file.
Open a new tab in your browser and head to https://filext.com/file-extension/P8. This website will read your .p8 file and display the private key to you. Drop your file into the placeholder and wait for a couple seconds.
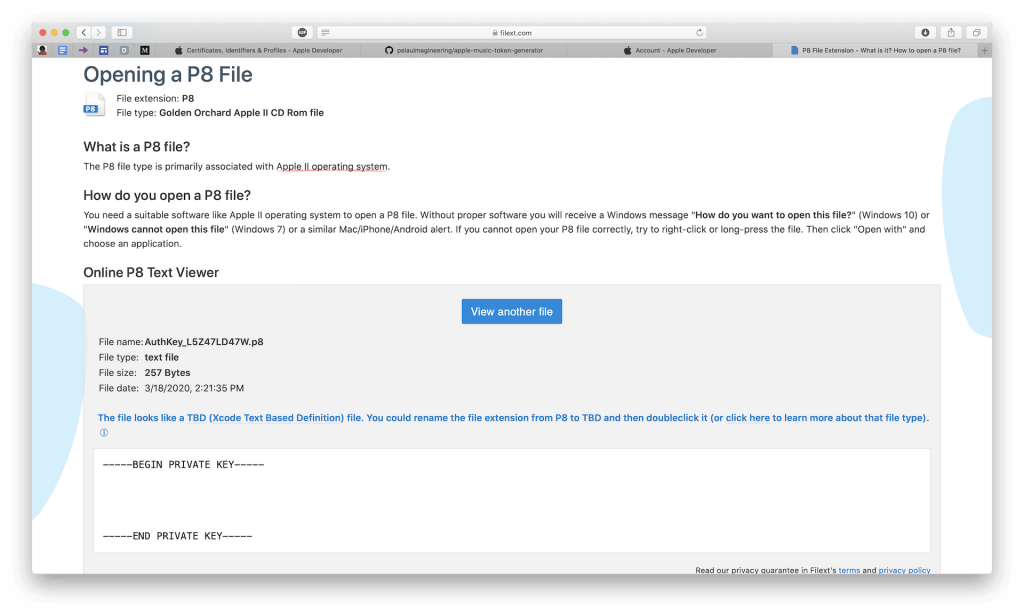
You can see that the private key is given to you. I’ve hidden it from my screenshot above. You should also strive to keep this key as much of a secret since this is directly linked to your developer account. Copy the private key and save it. We’ll also need this in a bit.
Python Script
Now it comes to the fun part, but slightly complicated. You’ll need to create the developer token using a Python script. So, first download the script file here. In order for the script to work, you’ll need to install some Python packages. MacOS already comes with Python installed, so you don’t have to do any extra work to install Python. All you need to do is install those Python packages.
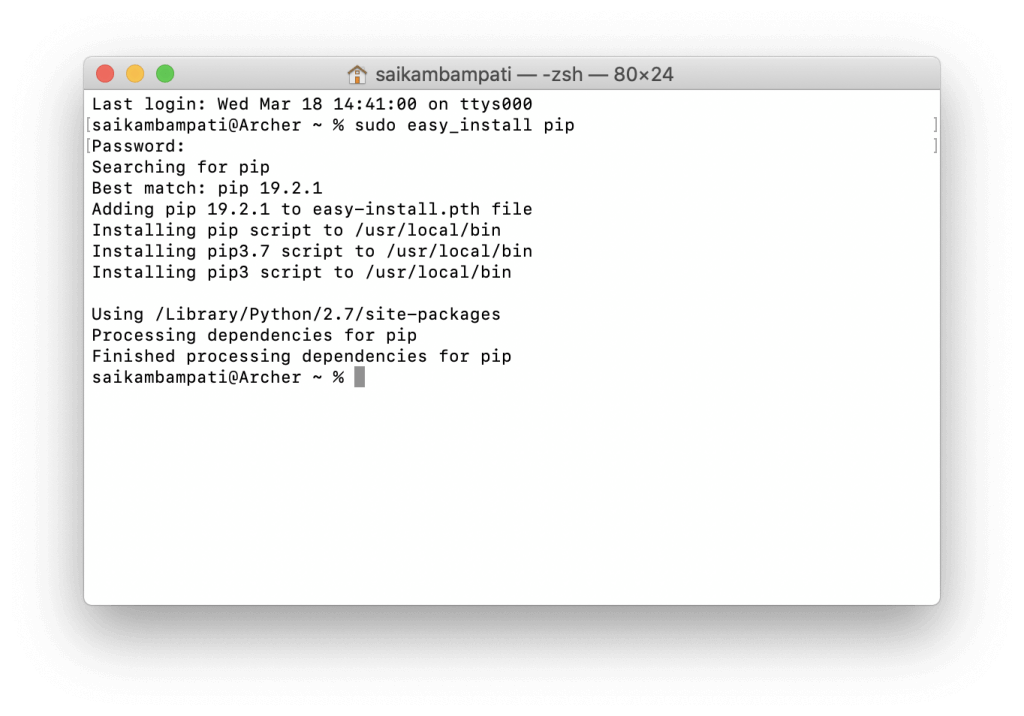
First, let’s download pip. If you’re not familiar with Python, pip is a very simple and easy-to-use package management system used to install and manage software packages written in Python. You can think of it as CocoaPods or Carthage for Python. Open Terminal. Type the following command:
sudo easy_install pipAfter entering your password, pip will be installed. If you have pip installed already, you’ll probably see the following screen which means we can move to the next party.
Now we need two packages in order for our script to work: pyjwt and cryptography. Both are used to encrypt all the sensitive information and transform it into the JWT format. Just like before enter the following two commands in terminal:
sudo pip install pyjwt
sudo pip install cryptography
As long as you don’t get any errors (usually in red text), you should be in the clear. We’re almost done. Now we need to edit the script in order to populate it with 3 pieces of information.
- The MusicKit private key (copied from the website which displayed our
.p8file) - The Key ID from the private key we created in the Apple Developer website
- Your Apple ID Team ID
You can find your Team ID by going to https://developer.apple.com/account and clicking on the Membership tab to the left.
Now, open the script you downloaded earlier. You’ll be able to see where to enter your own details in the script.
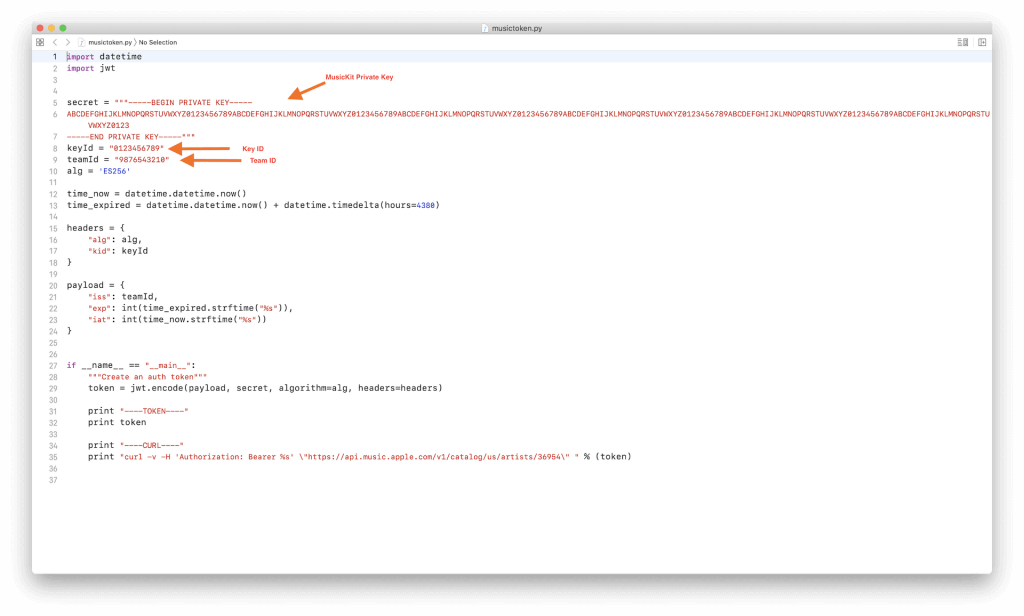
Some notes about modifying the script:
- Copy and paste your MusicKit private key exactly as it’s displayed. This means there should be 4 lines in between the BEGIN PRIVATE KEY and END PRIVATE KEY (which should also be included).
- In case you get confused in all the strings we’ve seen, your Key ID is an alphanumeric 10 character string.
When you’re done entering all your information, save the script and head back to Terminal. Type the following command:
cd PATH/TO/WHERE/MUSICTOKEN.PY/IS/LOCATEDNow, for the magic. Type the command into Terminal:
python musictoken.pyIf you’ve done everything right, you’ll see your token and a sample CURL request. Your Terminal screen will look like mine below.
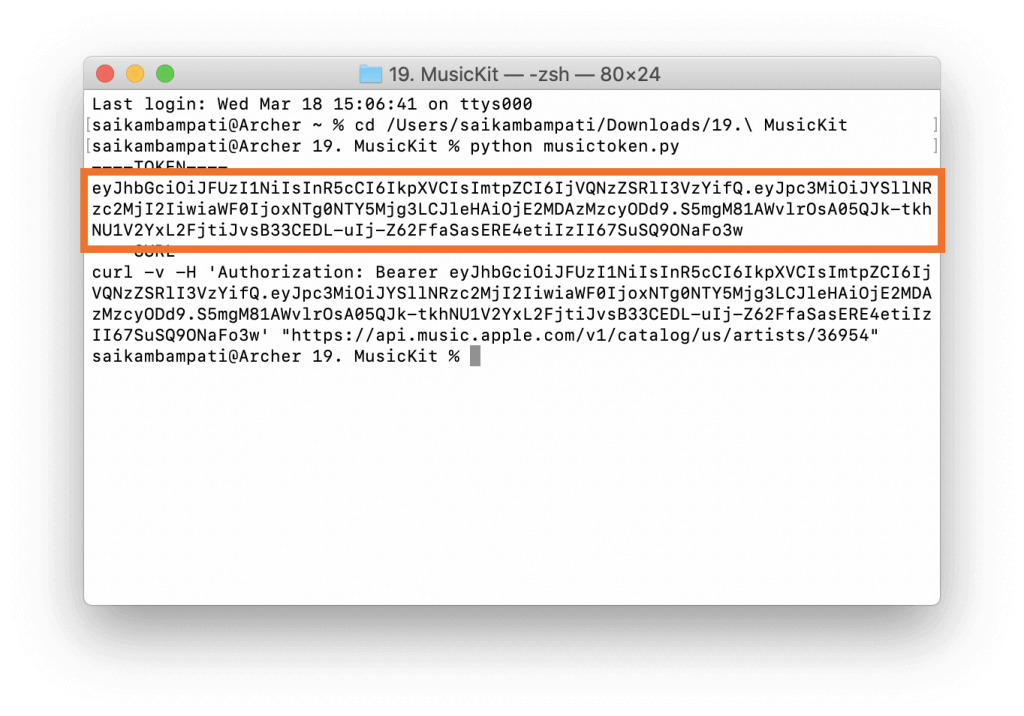
If you face any errors, make sure you go back and see if you edited the script correctly. You may also want to make sure that you have the right Key ID, MusicKit private key, and Team ID. If none of these work, leave a comment below and I’ll be happy to help.
If your Terminal screen looks like mine, congratulations! You’ve successfully completed the hardest party of this tutorial. Copy your developer token and save it as we’ll be using it in the next part of the tutorial. For the rest of the tutorial, let’s go back to Swift and build the base layout of our app.
Creating the UI of the Music Player app
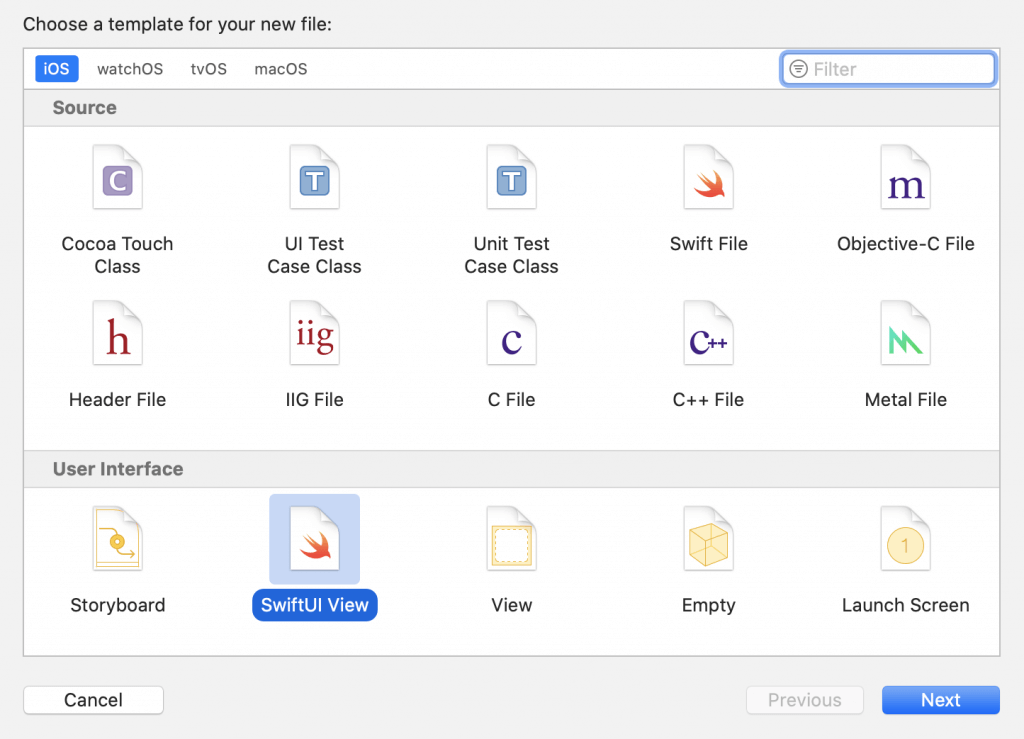
Open the Xcode project we created earlier in the tutorial. You can see that we already have our Tab View created for us in ContentView.swift. Let’s create a new SwiftUI view for our player view. Go to File > New > File and make sure you have SwiftUI View selected as your preset.
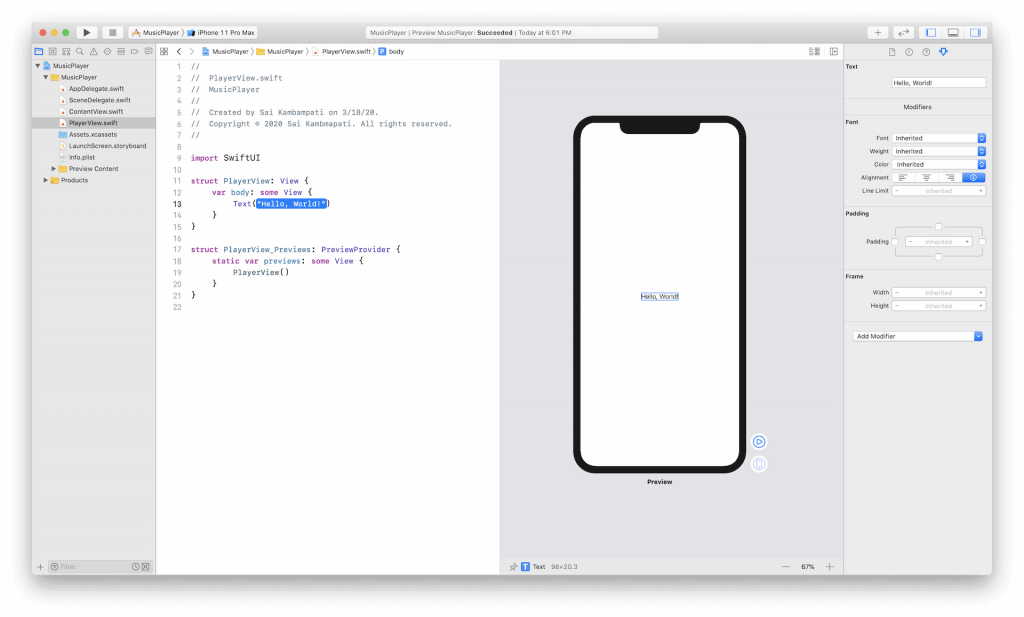
Save this file as PlayerView.swift. And, you should see the very basic SwiftUI View.
Let’s change this up. Command-click on the Text view and choose Embed in VStack. This will be the view that displays our song’s title. Let’s add another Text view inside the VStack. This can be the view that displays the artist’s name. Change the values of both Text structs to reflect the change.
VStack {
    Text("Song Title")
    Text("Artist Name")
}
In order to offer a clearer distinction between both Text views, I’ll change the font and add some spacing between both views. This is for a purely design-based purpose. You can modify these values to whatever you see fit. Here is the code:
VStack(spacing: 8) {
Text("Song Title")
.font(Font.system(.title).bold())
Text("Artist Name")
.font(.system(.headline))
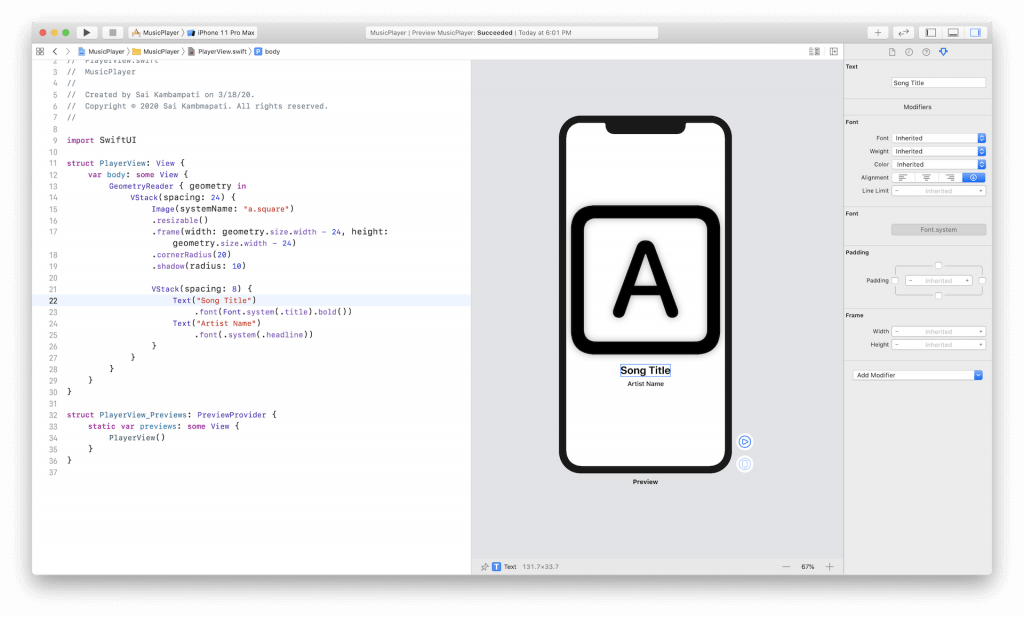
}That’s much better! The users of our app can clearly distinguish between our song’s title and its artist. Now let’s add an Image view so we can show the album cover to our users! Before we do that, let’s copy all the code we have so far and paste it into a GeometryReader. This is a container view that defines its content as a function of its own size and coordinate space. It helps with resizing views for different device sizes.
Click on the Plus button in the top right corner of Xcode and search for Geometry Reader.

Select this and drag it to paste the code about where we declare our VStack. Now copy the VStack struct and paste it inside the GeometryReader’s placeholder. While our preview will still look the same, our code should now look like this.
GeometryReader { geometry in
    VStack(spacing: 8) {
        Text("Song Title")
            .font(Font.system(.title).bold())
        Text("Artist Name")
            .font(.system(.headline))
    }
}
Now we can add an Image view that will function as a place where we can display the album cover. Modify your code to look like this.
GeometryReader { geometry in
    // 1
    VStack(spacing: 24) {
        // 2
        Image(systemName: "a.square")
            .resizable() // 3
            .frame(width: geometry.size.width - 24, height: geometry.size.width - 24) // 4
            .cornerRadius(20)
            .shadow(radius: 10)

        VStack(spacing: 8) {
            Text("Song Title")
                .font(Font.system(.title).bold())
            Text("Artist Name")
                .font(.system(.headline))
        }
    }
}- First, I take the existing
VStackand wrap it inside anotherVStack. This offers some spacing in between theImageview and theTextviews. - Next, I created the
Imageview. Since the app has no data right now, I’m using an SF Symbol as a placeholder image. - In order to resize the
Image, it’s important to add the.resizable()function. - Finally, I define the frame of my
Imageview.geometry.size.widthis the width of the device. You can think of it like a SwiftUI version ofself.view.frame.size.width. I also subtract 24 in order to create some margins.
Your preview should look a little like this now.
Now we need to create our play, rewind, and skip buttons. Click on the plus button like before and drag a button right below the VStack where we define our song’s information.

Let’s modify this button so it functions as our rewind button. Change the Button view code to look like this.
Button(action: {
    // 1
    print("Rewind")
}) {
    // 2
    ZStack {
        // 3
        Circle()
            .frame(width: 80, height: 80)
            .accentColor(.pink)
            .shadow(radius: 10)
        Image(systemName: "backward.fill")
            .foregroundColor(.white)
            .font(.system(.title))
    }
}- Currently since we don’t have access to the
MediaPlayerframework, we’ll just print a statement when the button is tapped. - Next we define the look of our button. I decided to use a
ZStackso we can use an SF Symbol as an image and use theCircleview as its background. - I create the
Circleview first and give it its frame, color, and shadow for design purposes. I then use an SF Symbol to provide an image for the button.
We need two more of these buttons next to each other. Command and click on the Button view and click on Embed in HStack. Copy the button code and paste it inside the HStack struct two more times.
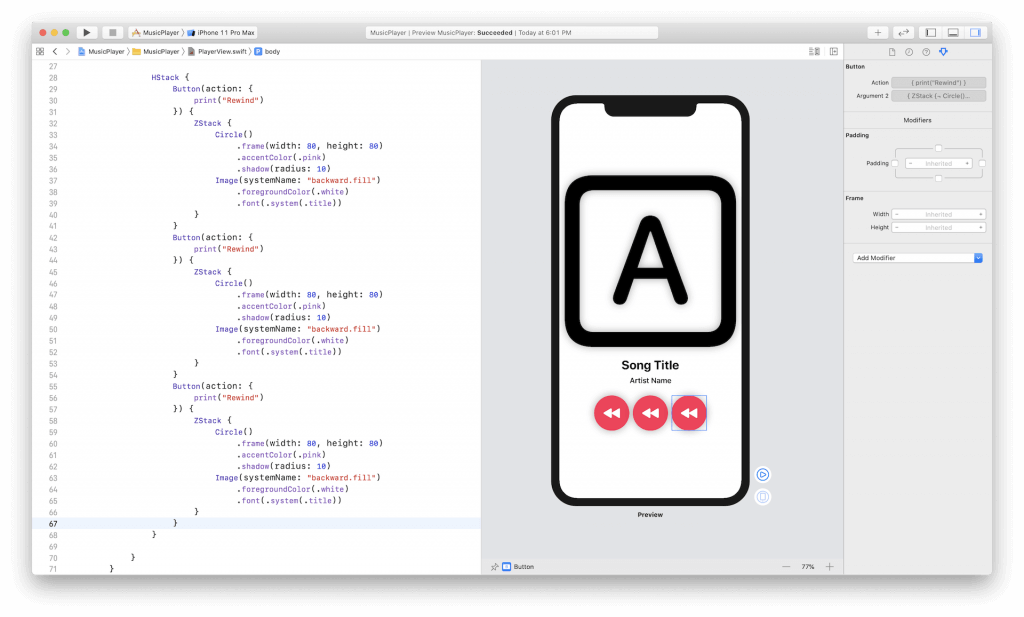
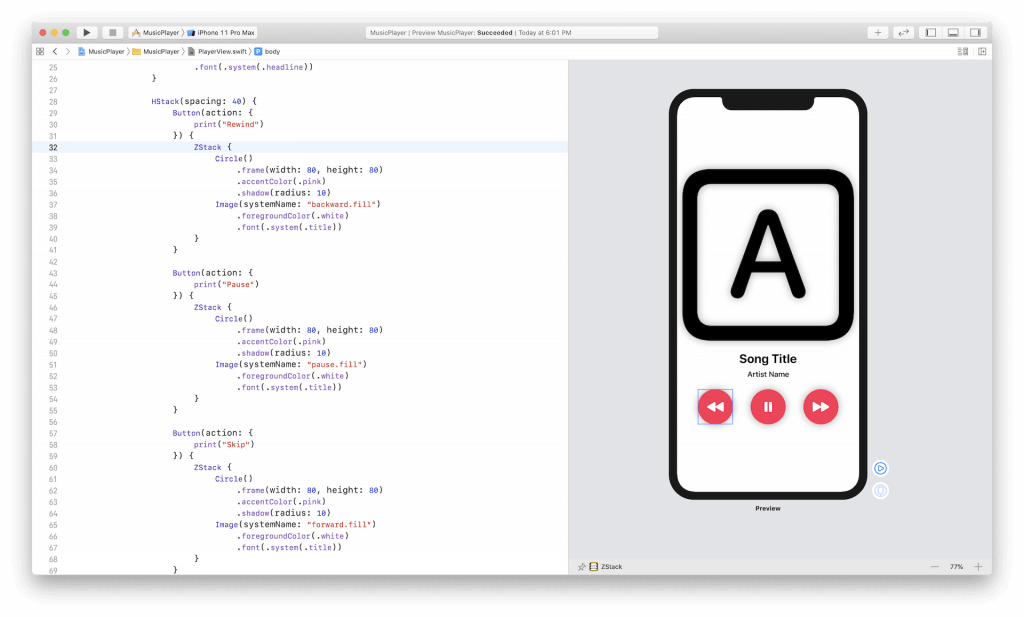
Obviously we don’t want our player to look like this so let’s modify the HStack code.
HStack(spacing: 40) {
    Button(action: {
        print("Rewind")
    }) {
        ZStack {
            Circle()
                .frame(width: 80, height: 80)
                .accentColor(.pink)
                .shadow(radius: 10)
            Image(systemName: "backward.fill")
                .foregroundColor(.white)
                .font(.system(.title))
        }
    }

    Button(action: {
        print("Pause")
    }) {
        ZStack {
            Circle()
                .frame(width: 80, height: 80)
                .accentColor(.pink)
                .shadow(radius: 10)
            Image(systemName: "pause.fill")
                .foregroundColor(.white)
                .font(.system(.title))
        }
    }

    Button(action: {
        print("Skip")
    }) {
        ZStack {
            Circle()
                .frame(width: 80, height: 80)
                .accentColor(.pink)
                .shadow(radius: 10)
            Image(systemName: "forward.fill")
                .foregroundColor(.white)
                .font(.system(.title))
        }
    }
}
In the code above, I’m simply adding a spacing of 40 between my buttons. All of them are similar to the button’s I’ve created earlier. The only difference is that each button prints a different statement regarding its function and has a different image.
Your player view should look like this now:
Next, let’s build the Search View.
Search View
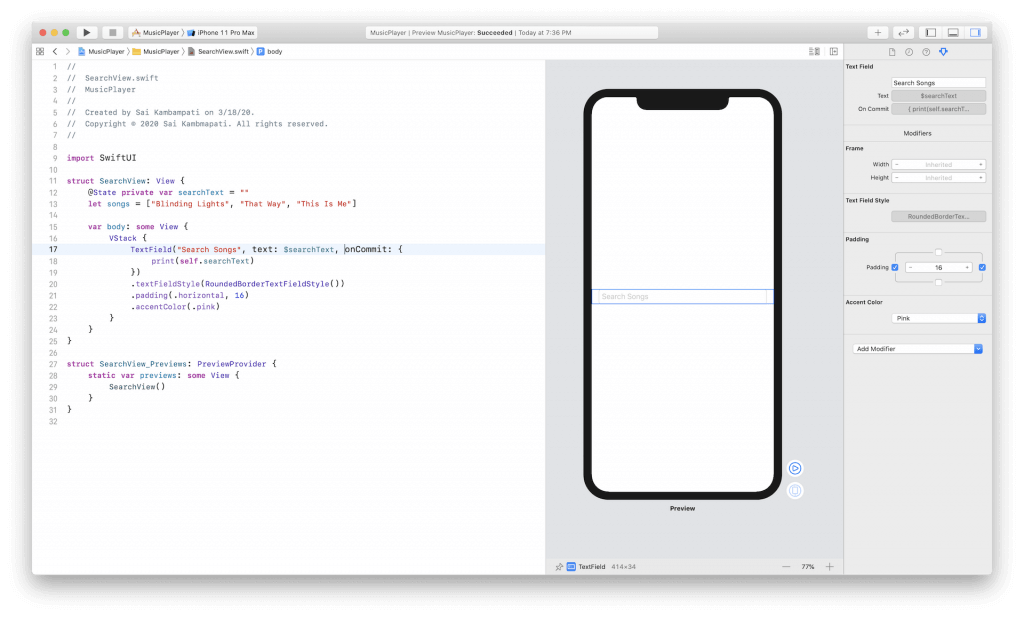
Just like before, create a new SwiftUI view and name this file SearchView.swift. You’ll be greeted with the familiar template view.
Our search view will be very simple. It just needs a TextField view for searching songs and a List view for displaying the results. Meanwhile, we also need to populate some fake data since the app hasn’t connected with the Apple Music API. At the top of the file, right before you declare body, type the following:
@State private var searchText = ""
let songs = ["Blinding Lights", "That Way", "This Is Me"]

var body: some View {
    Text("Hello, World!")
}
The searchText variable is the binding variable we’ll use to connect our TextField view with. We define the songs array to populate our list with some temporary data.
Let’s build the TextField view first. Remove the Text view and replace it with the following code:
VStack {
    TextField("Search Songs", text: $searchText, onCommit: {
        print(self.searchText)
    })
    .textFieldStyle(RoundedBorderTextFieldStyle())
    .padding(.horizontal, 16)
    .accentColor(.pink)
}
I’ve created the TextField view with a placeholder text of “Search Songs” and attached any text type into this View to the searchText variable. The onCommit method is called when the user pressed Return on their keyboard. In the next part of the tutorial, we’ll implement our search functionality within this method.
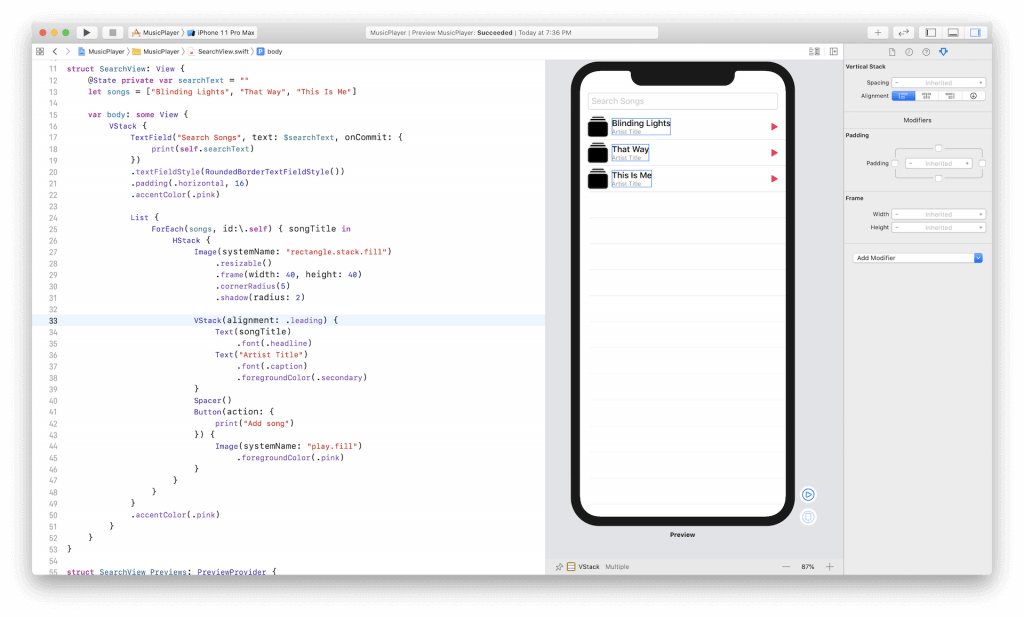
Next, I’ll create the List view and populate it with the data from above. Underneath the TextField, paste the following code.
List {
    // 1
    ForEach(songs, id:\.self) { songTitle in
        // 2
        HStack {
            // 3
            Image(systemName: "rectangle.stack.fill")
                .resizable()
                .frame(width: 40, height: 40)
                .cornerRadius(5)
                .shadow(radius: 2)

            // 4
            VStack(alignment: .leading) {
                Text(songTitle)
                    .font(.headline)
                Text("Artist Name")
                    .font(.caption)
                    .foregroundColor(.secondary)
            }
            Spacer()
            // 5
            Button(action: {
                print("Playing \(songTitle)")
            }) {
                Image(systemName: "play.fill")
                    .foregroundColor(.pink)
            }
        }
    }
}
.accentColor(.pink)
If you’ve worked with the List view or the ForEach structure before, this should look familiar. If not, I’ll walk you through the code.
- Inside my
Listview, I initialize theForEachstructure. This makes it easy to create multiple copies of views that I won’t have to explicitly code. As my data, I pass thesongsarray we created earlier. I also pass each element in that array as a variable calledsongTitle. This is so we can easily populate our cells without having to worry about array indexes. - Next, to emulate the look of a
UITableViewCell, I create anHStack. I’ll be placing the album cover, song title, song artist, and add button within each cell inside theHStack. - Next is the
Imageview. As before, I’m using an SF Symbol as a placeholder image. - Next comes our
Textviews. I place them inside aVStackto conserve space and display multipleTextviews in the same place. You’ll notice that the string value of our firstTextview is thesongTitlevariable we created earlier. - Finally, I add a
Playbutton which indicates to the user that our music player will play this song. Currently, it only prints to the console. In the next part of the tutorial, we’ll manage adding songs to the queue inside this method.
That’s all! Take a look at your Canvas and make sure it looks something like this:
Putting it all together
We’re almost done! All that’s left is going back to ContentView.swift and modifying the inside of our TabView to make sure it displays the two views we have created. Delete all the code inside TabView and replace it with the following.
TabView(selection: $selection) {
    PlayerView()
        .tag(0)
        .tabItem {
            VStack {
                Image(systemName: "music.note")
                Text("Player")
            }
        }
    SearchView()
        .tag(1)
        .tabItem {
            VStack {
                Image(systemName: "magnifyingglass")
                Text("Search")
            }
        }
}
.accentColor(.pink)
In the above code, I’m calling both PlayerView() and SearchView() as the two views in our TabView. As such, we’ll only have two tabs. I’ve also created the look of those tabs with a simple Image and Text.
By now you must have noticed that I’ve been using Color.pink inside all my buttons and .accentColors. This provides the app with a unique, music-themed design. You’re free to change the colors, fonts, and shapes to however you wish.

What’s Next
Congratulations! You’ve done a lot in this tutorial by venturing out of Swift and into further technologies like Python, Web Token, Encryption, and API handling. This was a lot but if you’ve made it to the end, congrats! The hardest part about using MusicKit is generating your keys and developer tokens. You can download the final project here.
In the next part of this tutorial series, we’ll complete our app. I’ll show you how to access the Apple Music API and make web requests to the API. Furthermore, I’ll teach you how to use MediaPlayer to play music and control playback from your device. If you have any doubts, feel free to leave a comment. Stay tuned!


