

In iOS development, navigation view is definitely one of the most commonly used components. When SwiftUI was first released, it came with a view called NavigationView for developers to build navigation-based user interfaces. With the release of iOS 16, Apple has deprecated the old navigation view and introduced a new view known as NavigationStack to present a stack of views. Most importantly, developers can make use of this new view to build data driven navigation.
The Old Way of Navigation Views
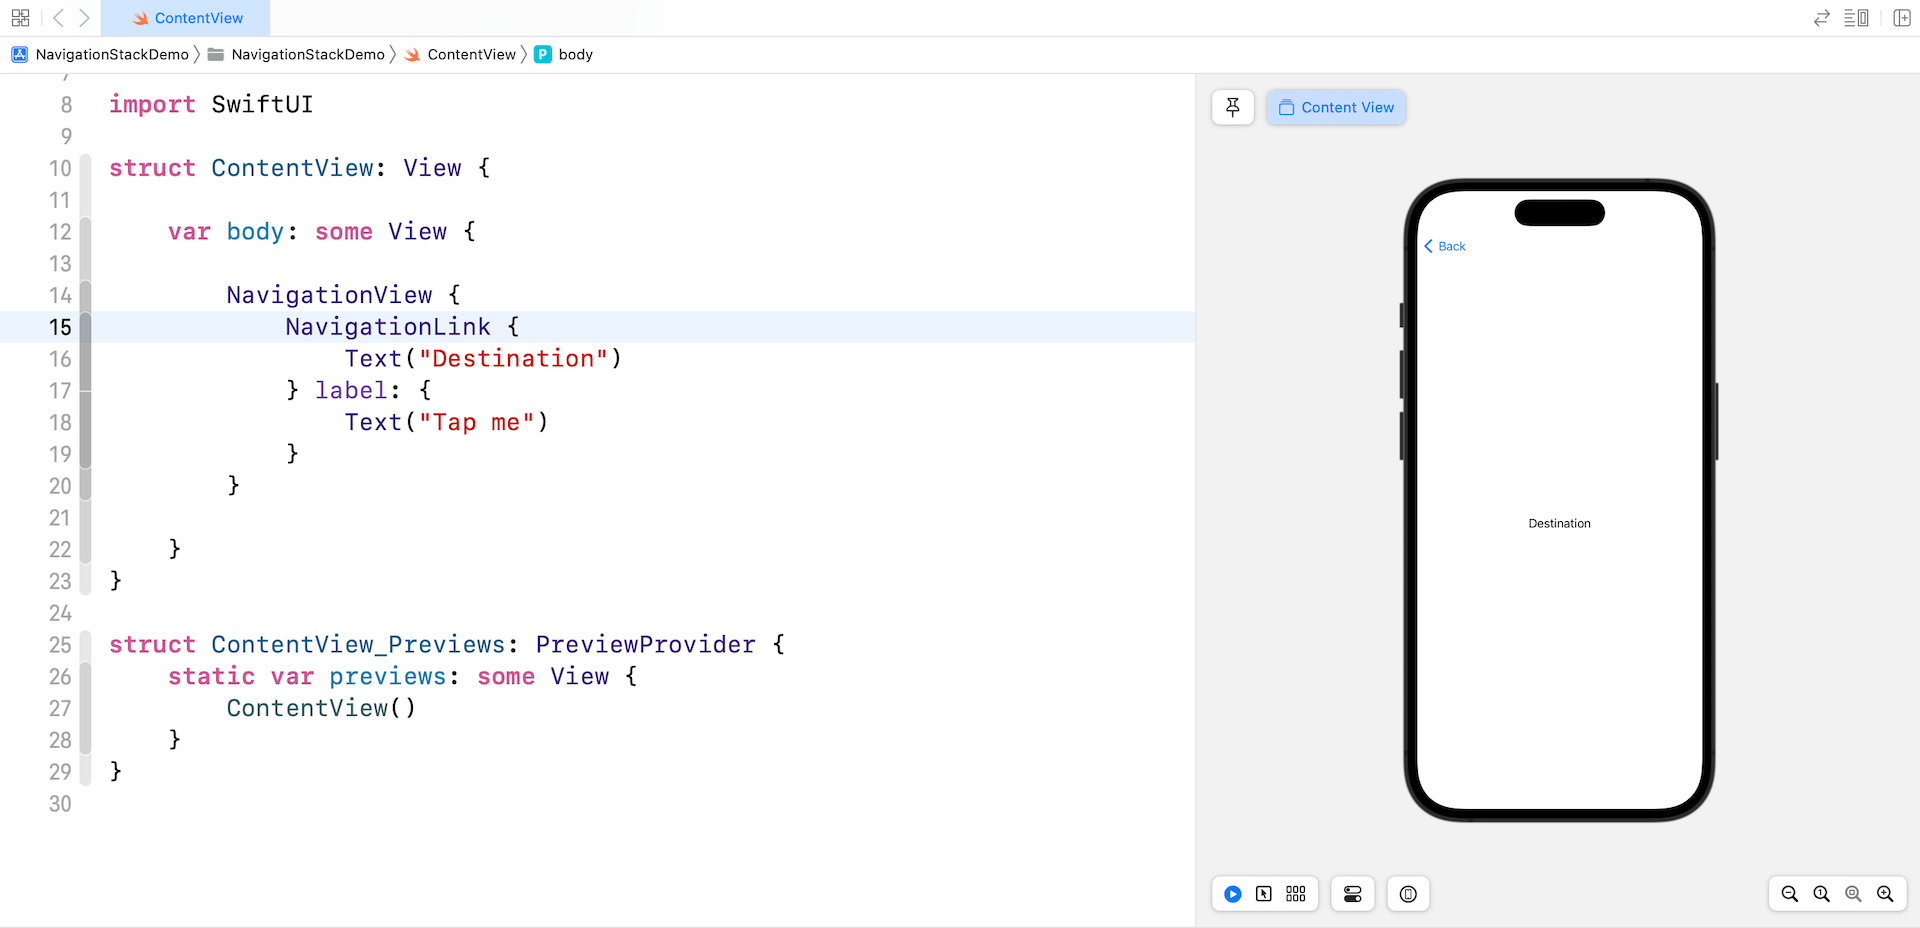
Prior to iOS 16, you create a navigation interface using NavigationView and NavigationLink like this:
NavigationView {
    NavigationLink {
        Text("Destination")
    } label: {
        Text("Tap me")
    }
}
This creates a basic navigation based interface with a Tap me button. When tapped, the app navigates one level down to display the destination view.
Working with NavigationStack
Starting from iOS 16, you replace NavigationView with the new NavigationStack. You can keep the NavigationLink intact and achieve the same result.
NavigationStack {
    NavigationLink {
        Text("Destination")
    } label: {
        Text("Tap me")
    }
}
The same piece of the code can also be written like this:
NavigationStack {
    NavigationLink("Tap me") {
        Text("Destination")
    }
}
We usually use navigation views to build a master-detail flow for a list of data items. Here is an example:
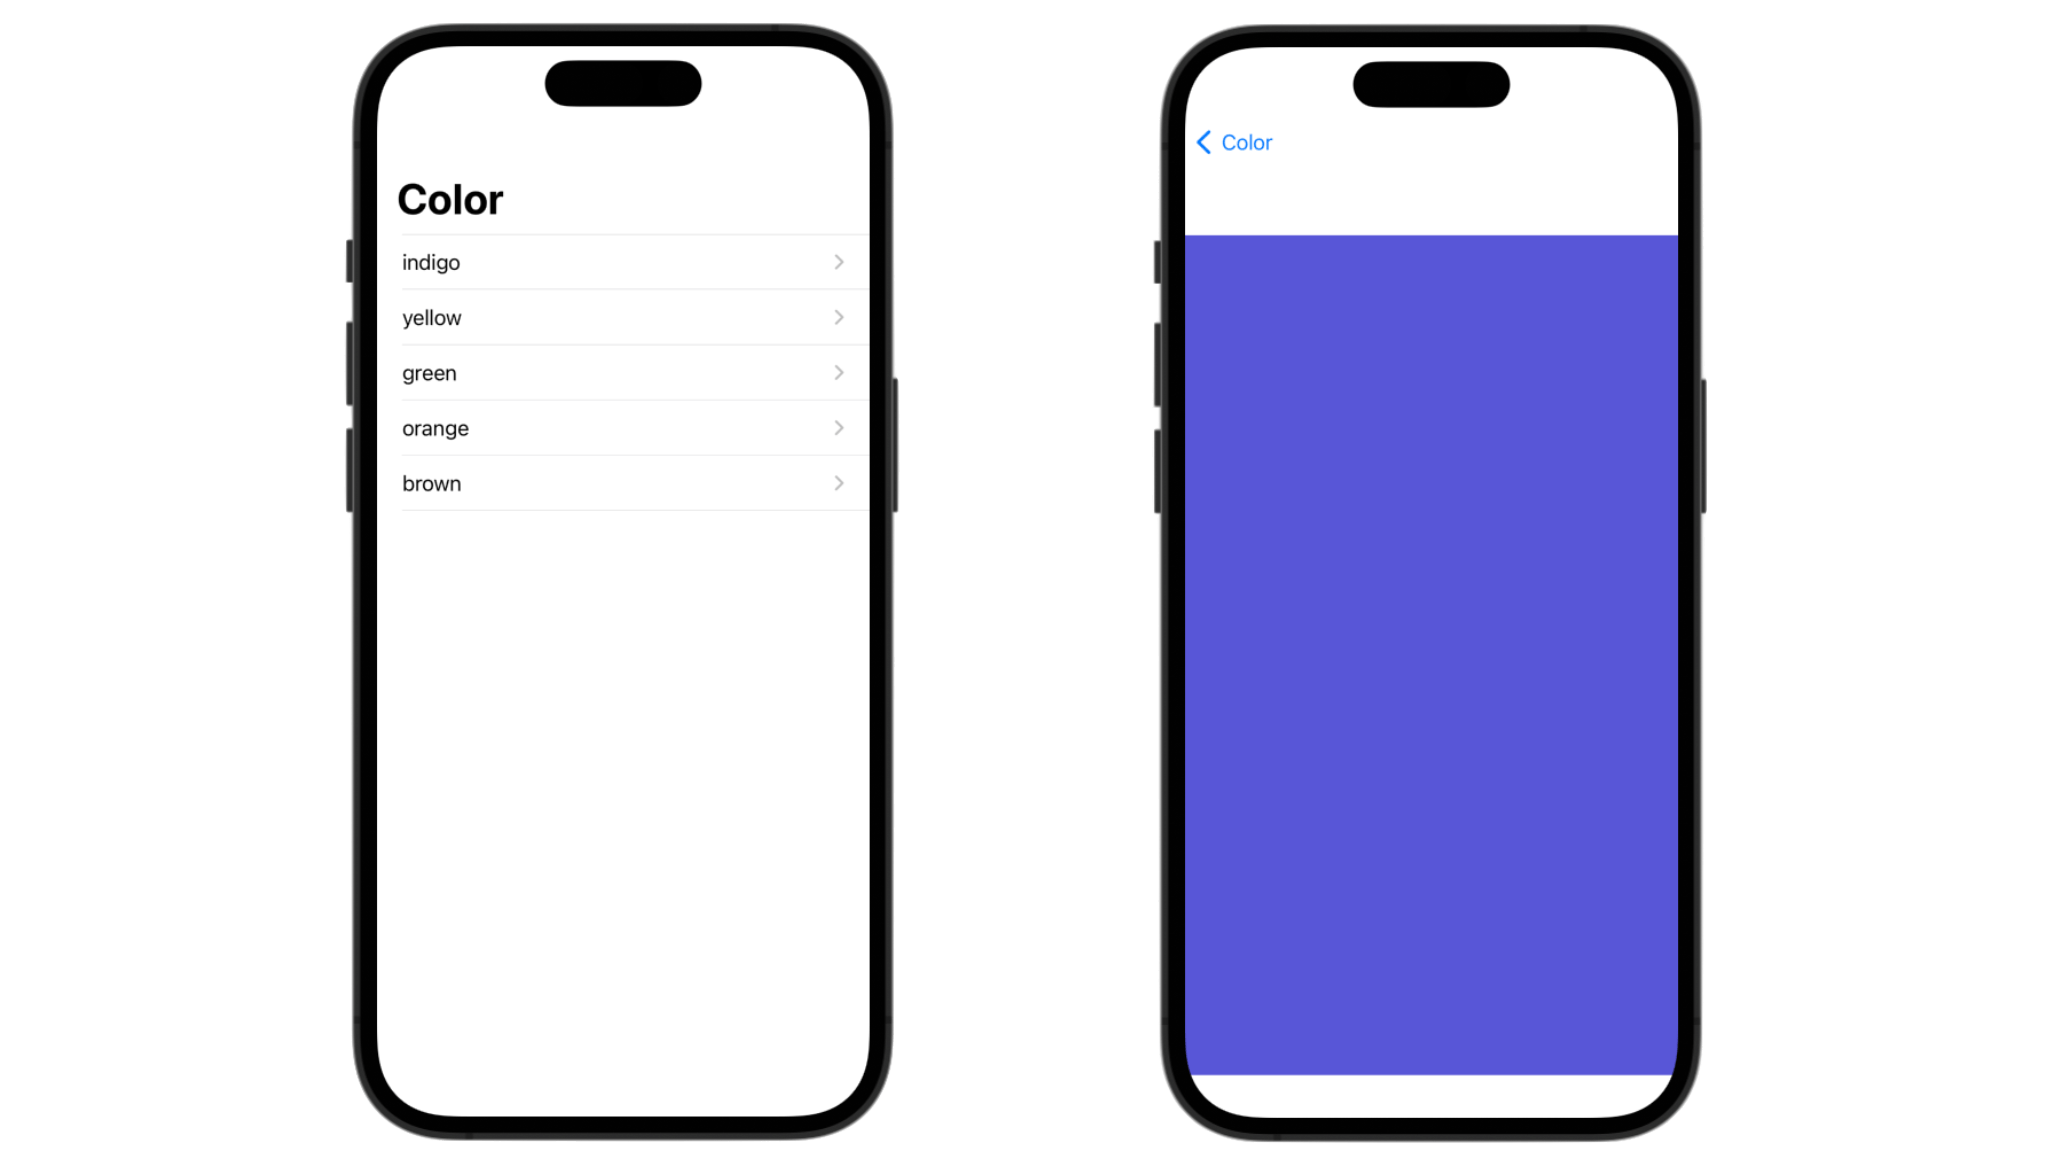
struct ContentView: View {
    private var bgColors: [Color] = [ .indigo, .yellow, .green, .orange, .brown ]

    var body: some View {

        NavigationStack {
            List(bgColors, id: \.self) { bgColor in
                NavigationLink {
                    bgColor
                        .frame(maxWidth: .infinity, maxHeight: .infinity)
                } label: {
                    Text(bgColor.description)
                }

            }
            .listStyle(.plain)

            .navigationTitle("Color")
        }

    }
}
This creates a navigation view to display a list of color items. When an item is selected, the app navigates to the detail view and shows the color view.
Value-based Navigation Links
NavigationStack introduces a new modifier called navigationDestination that associates a destination view with a presented data type. The same piece of code in the previous section can be rewritten like this:
NavigationStack {
    List(bgColors, id: \.self) { bgColor in

        NavigationLink(value: bgColor) {
            Text(bgColor.description)
        }

    }
    .listStyle(.plain)

    .navigationDestination(for: Color.self) { color in
        color
            .frame(maxWidth: .infinity, maxHeight: .infinity)
    }

    .navigationTitle("Color")
}
You still use NavigationLinks to present the list of data and implement the navigation feature. What’s difference is that each NavigationLink associates with a value. On top of that, we added the new navigationDestination modifier to capture the value change. When a user selects a particular link, the navigationDestination modifier presents the corresponding destination view for navigation links that present data of type Color.
If you test the app in the preview, it works exactly the same as before. However, the internal implementation already makes use of the new navigationDestination modifier.
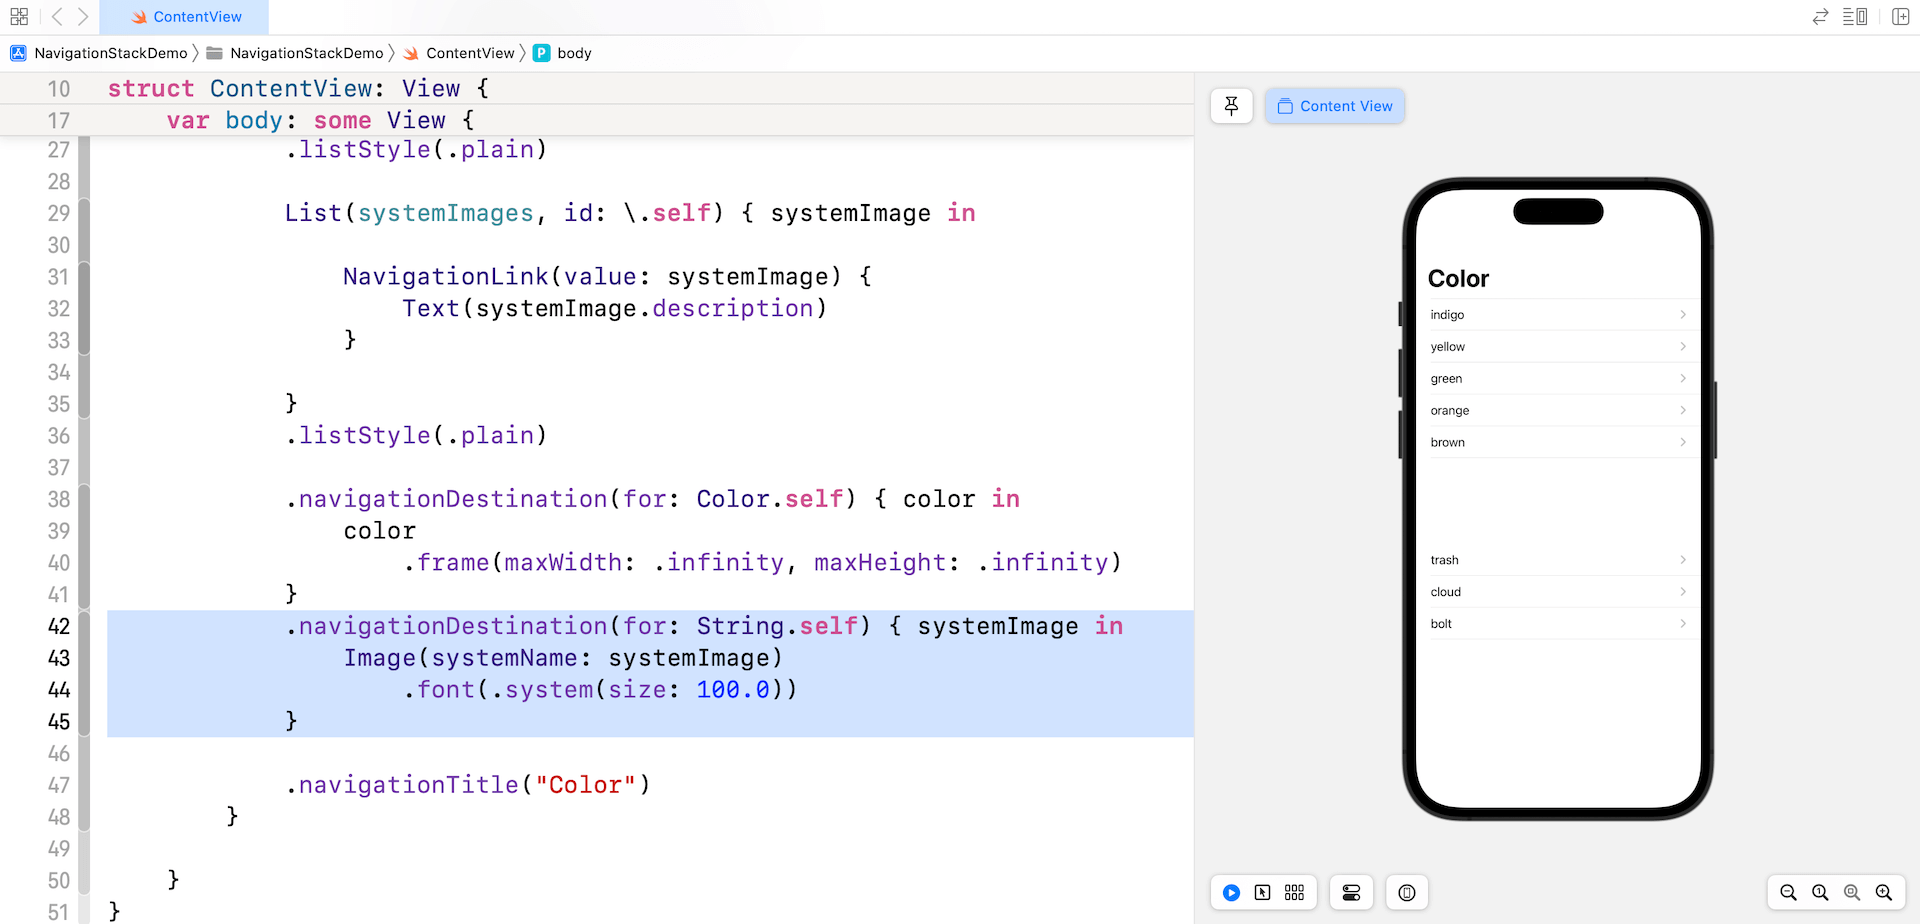
Multiple Navigation Destination Modifiers
You are allowed to define more than one navigationDestination modifier for handling different types of the navigation links. In the previous example, we had a single navigationDestination modifier for the Color type. Let’s say, we have another set of navigation links for the String type like this:
List(systemImages, id: \.self) { systemImage in

    NavigationLink(value: systemImage) {
        Text(systemImage.description)
    }

}
.listStyle(.plain)
The systemImages variable stores an array of the system image names.
private var systemImages: [String] = [ "trash", "cloud", "bolt" ]In this case, we have two types of navigation links. One is for the Color type, the other is the String type. To handle the navigation of the String type, we can embed another navigationDestination modifier to the stack like this:
.navigationDestination(for: String.self) { systemImage in
    Image(systemName: systemImage)
        .font(.system(size: 100.0))
}
Now if the user taps one of the system image names, it navigates to another view that displays the system image.
Working with Navigation States
Unlike the old NavigationView, the new NavigationStack allows you to easily keep track of the navigation state. The NavigationStack view has another initialization method that takes in a path parameter, which is a binding to the navigation state for the stack:
init(
    path: Binding<Data>,
    root: () -> Root
) where Data : MutableCollection, Data : RandomAccessCollection, Data : RangeReplaceableCollection, Data.Element : Hashable
If you want to store or manage the navigation state, you can create a state variable. Here is a code sample:
struct ContentView: View {
    private var bgColors: [Color] = [ .indigo, .yellow, .green, .orange, .brown ]

    @State private var path: [Color] = []

    var body: some View {

        NavigationStack(path: $path) {
            List(bgColors, id: \.self) { bgColor in

                NavigationLink(value: bgColor) {
                    Text(bgColor.description)
                }

            }
            .listStyle(.plain)

            .navigationDestination(for: Color.self) { color in
                VStack {
                    Text("\(path.count), \(path.description)")
                        .font(.headline)

                    HStack {
                        ForEach(path, id: \.self) { color in
                            color
                                .frame(maxWidth: .infinity, maxHeight: .infinity)
                        }

                    }

                    List(bgColors, id: \.self) { bgColor in

                        NavigationLink(value: bgColor) {
                            Text(bgColor.description)
                        }

                    }
                    .listStyle(.plain)

                }
            }

            .navigationTitle("Color")

        }

    }
}
The code is similar to the previous example. We added a state variable named path, which is an array of Color, to store the navigation state. During the initialization of NavigationStack, we pass its binding for managing the stack. The value of the path variable will be automatically updated when the navigation stack’s state changes.
I made a minor change for the navigation destination. It displays the user’s selected colors and shows another list of colors for further selection.
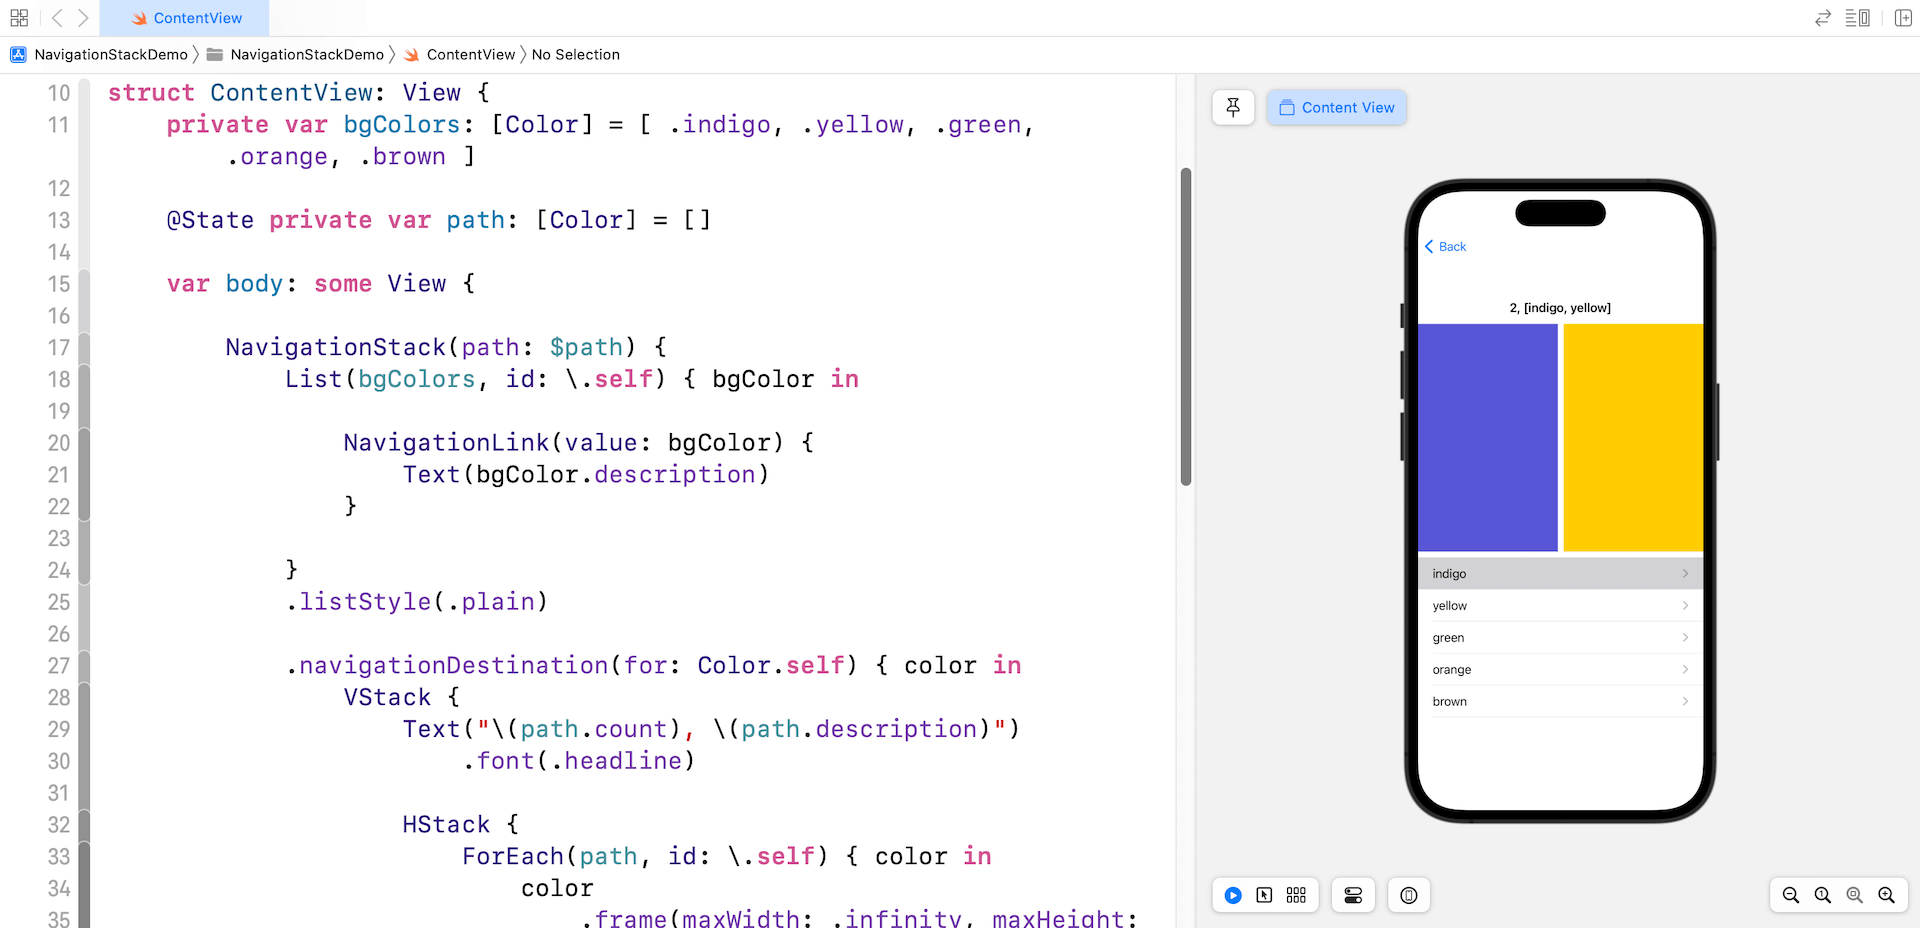
In the code above, we have this line of code to display the path content:
Text("\(path.count), \(path.description)")The count property gives you the number of levels of the stack, while the description presents the current color. Say, for example, you first select the color indigo and then further selects yellow. The value of count is 2, which means the navigation stack has two levels.
With this path variable, you can programmatically control the navigation of the stack. Let’s say, we can add a button for users to jump directly to the root level of the stack. Here is the sample code:
Button {
    path = .init()
} label: {
    Text("Back to Main")
}
.buttonStyle(.borderedProminent)
.controlSize(.large)
By resetting the value of the path variable, we can instruct the navigation stack to go back to the root level.
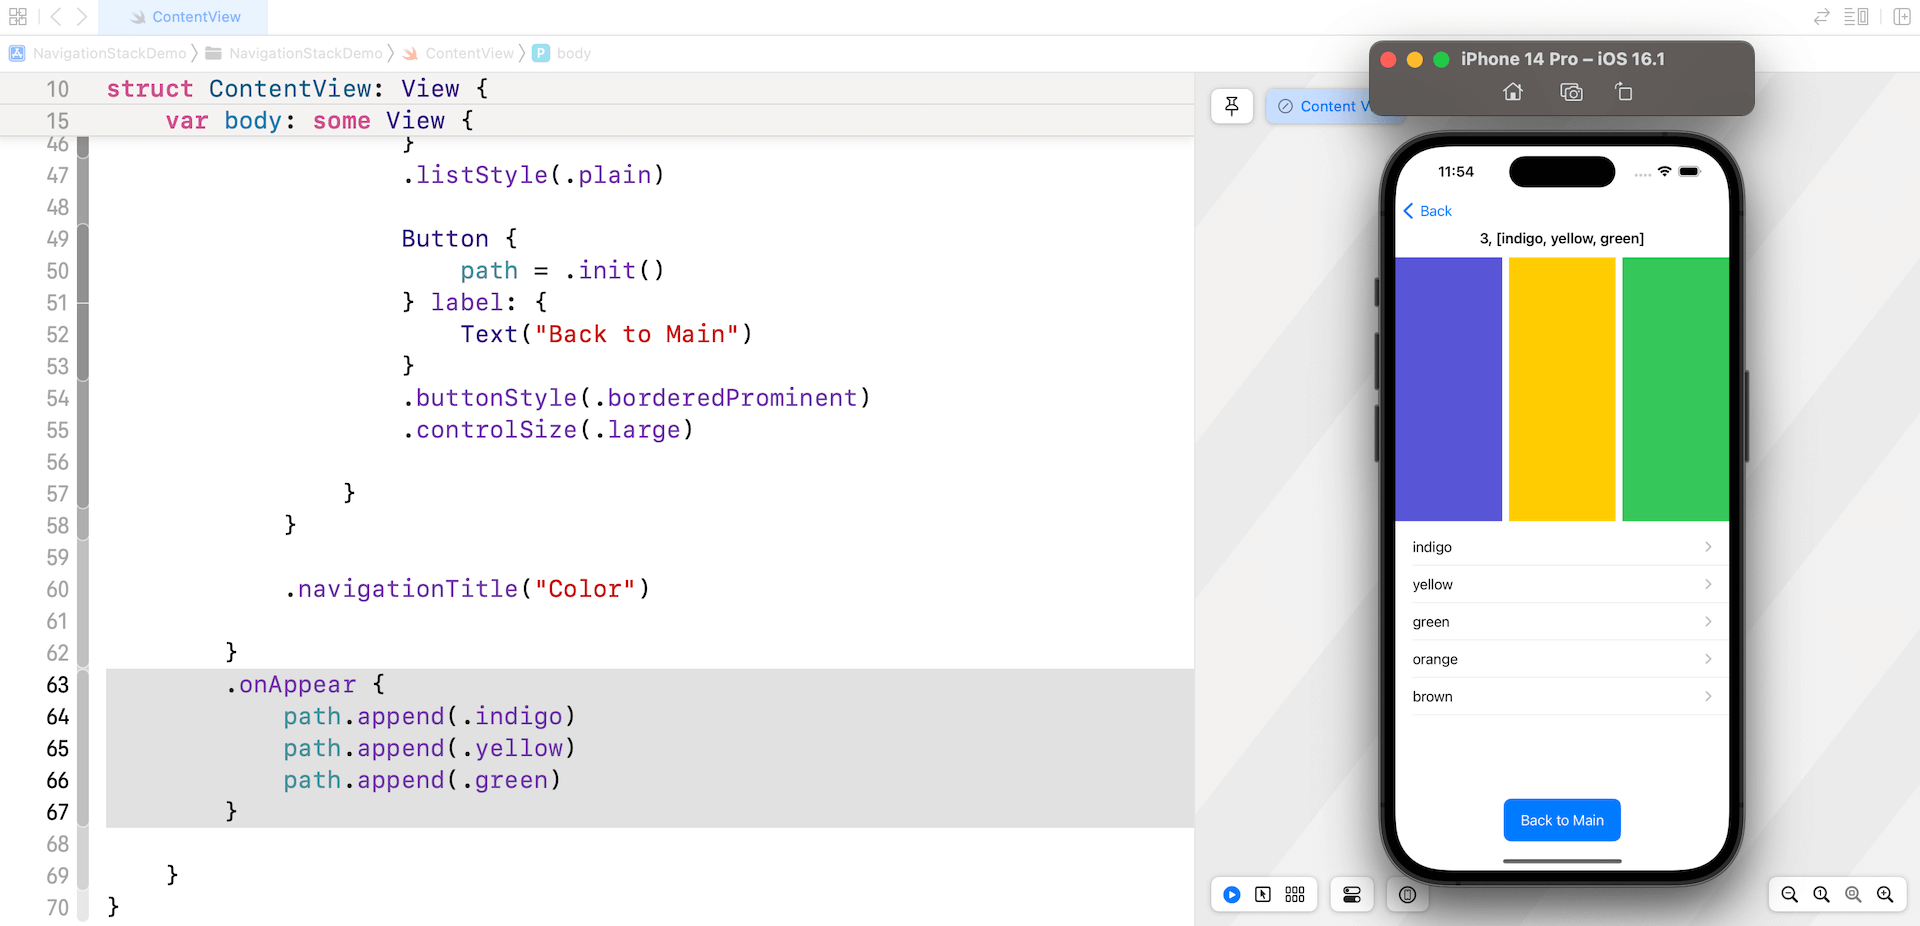
As you may already aware, we can manipulate the value of the path variable to control the state of the navigation stack. For example, when the ContentView appears, the app can automatically navigate down three levels by adding three colors to the path variable like this:
NavigationStack(path: $path) {
  .
  .
  .
}
.onAppear {
    path.append(.indigo)
    path.append(.yellow)
    path.append(.green)
}
When you launch the app, it automatically navigates down three levels. This is how you can control the navigation state programmatically and a great way to handle deep linking.
Summary
The new NavigationStack, introduced in iOS 16, allows developers to easily build data-driven navigation UI. If your app doesn’t need to support older versions of iOS, you can take advantage of this new component to handle deep linking and complex user flows.


