One of the most common operations macOS users perform and they are quite familiar with is drag and drop. On a daily basis we all drag things around when working on our Macs. We drag files, text, images, and many, many more. Dragging is a kind of action that users expect to find pretty much in every app on macOS, so supporting it in our apps is something we should seriously consider.
A drag operation starts somewhere, so it has a source, and it ends somewhere, so there is a destination. Dragging source and destination can be either within the same app, or in different apps. For example, when dragging to move a file in Finder from one directory to another the source and destination are the same; the Finder app. On the other hand, when dragging files to a web browser for uploading to a server, source and destination are different apps; Finder app and the browser app (Safari, Chrome, etc).
Drag and drop would be impossible without the existence of pasteboard, the mechanism that keeps copied or cut data in memory. When dragging, dragged data is copied to memory and it becomes available to be used by the destination application through the pasteboard. Pasteboard is represented programmatically by the NSPasteboard class.
So, in this tutorial we are going to learn how to implement drag and drop functionalities in our own macOS apps. We’ll learn how to accept drag operations on a single view and a table view, as well as how to trigger a new drag session from our own app. If all that sounds interesting to you, then just keep on reading! There are a lot of new interesting things coming next!
About The Demo App
We are going to explore how drag and drop operations are being implemented using, as usually, a demo application. Before you continue, please download the starter pack from here where you will find two things in the zip file you’ll get: A starter project to open in Xcode, and a folder with some sample files.
The demo application is a sort of an avatar maker, where we’ll make it possible through drag and drop operations to:
- Add an avatar image
- Add a favorite color
- Add a favorite quote text

We will also allow to drag and drop image and text files for the avatar image and quote respectively; that’s what sample files in the starter pack are for.
The above will let us go through the steps required to accept drag operations. Once we finish with it, we’ll see how to initiate drag operations from our app and drop either within the same app, or another app. In the first case where drag source and destination are in the same app (the demo app), drop operation will take place in an auxiliary window that contains a table view. Dragged avatar image, color and quote text will be shown in columns in the table view.
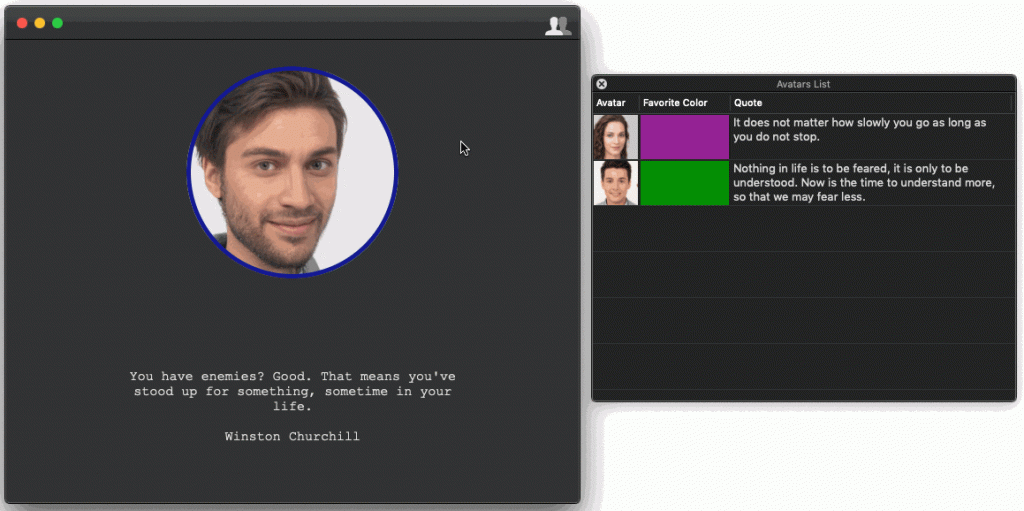
The starter Xcode project implements all that parts of the app that are irrelative to drag and drop but necessary to make it work. Go through it, and when you’re ready keep reading to learn how to support drag and drop in macOS apps!
The Dragging Destination View
We are going to start by making our app a drag operation destination capable of handling dragged data. The first thing you should have in mind is that any class that we want to be a dragging destination must conform to a specific protocol, called NSDraggingDestination. This protocol provides collection of methods through which we have full control over the drag operation.
There are Cocoa classes that already adopt the NSDraggingDestination protocol, and classes that do not. If you want for example a view controller to be a drag destination and handle the drag operation, then you should explicitly conform to NSDraggingDestination. If however you want a custom view (a NSView subclass) to be the drag destination, there is no need to manually conform to NSDraggingDestination protocol; it already does. Besides all that, drag destinations are usually views or windows (NSView and NSWindow instances).
In the demo application of this tutorial we are going to use a custom view as the dragging destination. It is the AvatarView in the starter project that you have downloaded. Right now it contains a minimum implementation, but we’ll be adding more code to it as we move on.
Note: AvatarView has been set as the class of the view controller’s default view in the Main.storyboard file. You can see that by opening the storyboard, selecting the view controller’s view in the Document Outline and displaying the Identity inspector. In addition, the image view and the quote label have been connected to IBOutlet properties already defined in the AvatarView. You can see the connections by opening the Connections inspector.
Registering for Dragged Types
Various kinds of data can be dragged in a drag and drop operation, and of course not all of them are interesting to an app. Apps must specify the desired dragged types, also called pasteboard types that want to accept and handle. These types can be found here, and they include a variety of data types, such as colors, fonts, files, URLs, images, PDF data and more.
So, the first step when enabling drag and drop is to specify the dragged types that the app will accept. We will make our demo application here capable of handling the following kind of data:
- tiff for images
- color for color data (NSColor objects).
- string for plain text (no Rich Text Format – RTF).
- fileURL for dragged files.
Open the AvatarView.swift file, and declare the following property:
class TestView: NSView {
    let supportedTypes: [NSPasteboard.PasteboardType] = [.tiff, .color, .string, .fileURL]

    ...
}
Each element in the supportedTypes array is a NSPasteboard.PasteboardType value. It’s easy to see all available options simply by trying to add a new item to the array; add the dot “.” and Xcode’s autocompletion will show all values.
The above declaration does nothing at all however. What has to be done is to register the current view as a dragging destination and include the specified types that will accept.
Go to the awakeFromNib() method and add the next statement:
override func awakeFromNib() {
    ...

    self.registerForDraggedTypes(supportedTypes)
}
registerForDraggedTypes(_:) is a method of the NSView class. It registers the current view as a dragging destination that can accept the provided pasteboard types. With the above in place, let’s go to start handling dragging itself.
Handling Start Of Dragging
There is a number of methods in the NSDraggingDestination protocol that should be overridden and implemented in order to properly handle dragging. Not all of them are required; but some others, as the one we’ll meet here, are necessary when implementing dragging support.
So, after having registered the view and the supported pasteboard types, our next move is to detect when dragged items enter the area of the destination view. That’s an important step for two reasons:
- First, we must check if the dragged items are indeed of the data types we want to handle or not. In case they are, then we will “tell” pasteboard to copy them in memory, otherwise we just disregard them.
- Second, the destination view must be visually highlighted somehow to indicate that it’s an area where dragged items can be dropped. That’s not a mandatory action, but it helps a lot to user experience.
With the above said, go to AvatarView class and add the following method:
override func draggingEntered(_ sender: NSDraggingInfo) -> NSDragOperation {

}
In its body we’ll call an instance method of the NSPasteboard class called canReadObject(forClasses:options:). It returns a true or false value depending on whether the class types that we will provide as the first argument match to the data types of the dragged items, or to some of them at least. If the returned value is false, then dragged items are not of any interest for our app.
Add the following in the above method:
let canReadPasteboardObjects = sender.draggingPasteboard.canReadObject(forClasses: [NSImage.self, NSColor.self, NSString.self, NSURL.self], options: nil)What we are interested about here is:
- images (NSImage objects),
- colors (NSColor objects),
- string (text) (NSString objects),
- URLs (NSURL objects),
so, these are the class types we pass as the first argument in the canReadObject(forClasses:options:) method in the form of an array. For now we set the options parameter value to nil. We’ll come back to that in a while. For a list of available classes that can be given in the above method have a look at this documentation page.
Besides all that, also notice that we access the dragging pasteboard (or in other words, the dragged items in memory) through the draggingPasteboard property of the sender method’s argument. According to documentation, draggingPasteboard:
Returns the pasteboard object that holds the data being dragged.
More details about the NSDraggingInfo protocol can be found here.
Depending on the canReadPasteboardObjects value now, we will return a proper NSDragOperation value from the method. In case it’s true and dragged items match to the class types we specified, we’ll return the copy value. This will indicate that the dragged items can be copied to pasteboard. If not, then we’ll just initialize a NSDragOperation object without a specific value.
if canReadPasteboardObjects {
    return .copy
}

return NSDragOperation()
Here’s the entire method right now:
override func draggingEntered(_ sender: NSDraggingInfo) -> NSDragOperation {
    let canReadPasteboardObjects = sender.draggingPasteboard.canReadObject(forClasses: [NSImage.self, NSColor.self, NSString.self, NSURL.self], options: nil)

    if canReadPasteboardObjects {
        return .copy
    }

    return NSDragOperation()
}
We’ll revisit this method a couple of times again to update it as needed. For now it’s good enough to let us proceed to the next steps.
Highlighting Visually The Destination View
In order to increase user experience it’s always a good idea to visually highlight the destination view of the drag operation. There’s no recipe on how to do that however. It’s up to you and your imagination to decide how you will indicate that the destination view can accept the dragged items.
For example, you can have a semi-transparent overlay view on top of the destination view, maybe coloured, along with a custom message. Or you can show an image when drag can be accepted. Or, just show a simple coloured border around the view as we’ll do here.
In the AvatarView implement the following method:
func highlight() {
    self.layer?.borderColor = NSColor.controlAccentColor.cgColor
    self.layer?.borderWidth = 2.0
}
This method does two things: The first is to set a border colour to the view’s layer (the controlAccentColor system color). Notice that since we’re talking about the view’s layer, the colour must be given as a CGColor and not as a NSColor. The second thing is that it sets the border width to 2.0px.
Back to the draggingEntered(_:) method again, update the following if statement as shown next and call the highlight() method we just added here:
override func draggingEntered(_ sender: NSDraggingInfo) -> NSDragOperation {
    ...

    if canReadPasteboardObjects {
        highlight()
        return .copy
    }

    ...
}
For first time now you can test the app and the progress we’ve done so far. Try to drag an image, some text, a color object or any file from the Finder to the app’s window (more specifically to the AvatarView destination view). Two observations:
- You can bring up the Colors panel by going to the Format > Font > Show Colors menu, or just press
Cmd+Shift+Cin your keyboard. From there you can drag colours to the app. - I just mentioned above that you can drag any file from the Finder. That’s not something we desire here, as we want to allow only image and text files. But don’t worry, we’ll fix it soon.
What you’ll see by running the app is the view that gets highlighted when valid items are being dragged to it. To see how the app reacts to non-desired types, try to remove any of the allowed supported types in the supportedTypes array, and also remove the respective class in the canReadObject(forClasses:options) method call. Note that once the view shows the highlight border it will remain like that, but that’s just temporary, it’ll be fixed later.
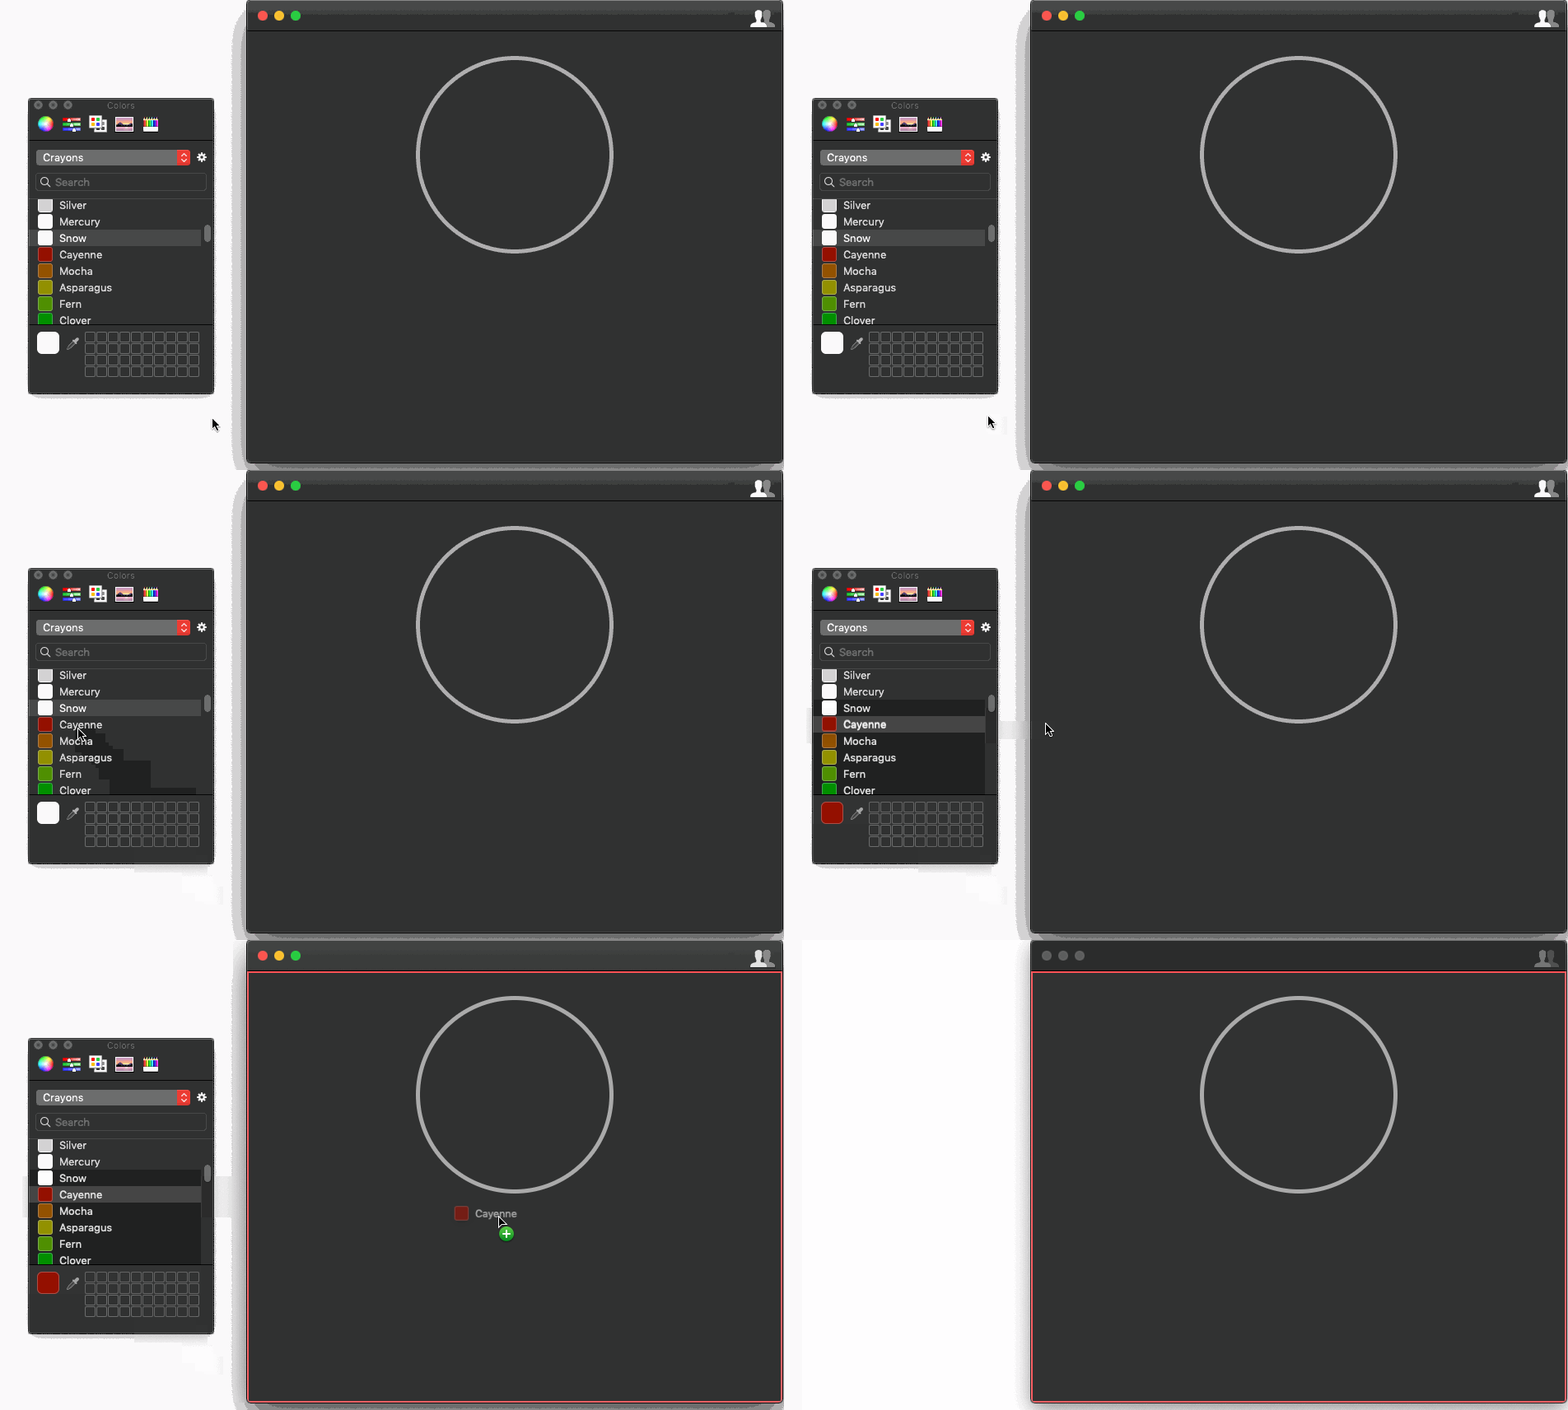
The AvatarInfo Class
In the starter project and in the AvatarInfo.swift file you will find a class named AvatarInfo. This is a custom type that contains three properties matching to the avatar image, favourite colour and quote text respectively:
var imageData: Data?
var colorData: Data?
var quote: String?
imageData and colorData are both of Data type so it’s possible to encode instances of the AvatarInfo class as JSON objects. We’ll need to do that later. NSImage and NSColor classes do not conform to Codable protocol so encoding such objects wouldn’t be possible.
In addition, a few convenient methods are implemented in the class. All they do is to simply convert NSImage and NSColor objects to Data and storing them in the respective properties, as well as the exact opposing thing; returning NSImage and NSColor objects from the respective Data properties.
An instance of this class that is declared already in the AvatarView is going to keep the data matching to the dragged items. We are going to use it right next, and as you will see, that instance will help us update the UI and display dragged item data to the proper controls.
Note: Later we are going to add more and quite interesting stuff in the AvatarInfo class. What you get in the starter project is just an initial implementation that consists of what we need just to keep going here.
An Optional Step Before Performing The Drag Operation
Previously we met the draggingEntered(_:) method that gets called when dragged items enter the area of the destination view. Although this is the place where the app decides whether dragged items are wanted or not, there is one more optional method you can use in order to accept or reject dragging in case you have any special conditions or limitations that are met:
override func prepareForDragOperation(_ sender: NSDraggingInfo) -> Bool {
    return true
}
By returning true in the above method the dragging operation is being accepted by the app and handled by the method we’ll see in the next part.
If you return false, the dragged items will be rejected even if their types match to the supported by the app pasteboard types. Return false if only you have specific conditions under which dragging should be cancelled. Otherwise just return true, or even better, do not implement this method at all!
Performing The Drag Operation
So, it’s time to handle the dragged items! In a similar fashion to using the canReadObject(forClasses:options:), we are going to use another method which will let us get the dragged objects from the dragging pasteboard.
First, though, it’s necessary to implement the following method:
override func performDragOperation(_ sender: NSDraggingInfo) -> Bool {

}
In its body we will get the pasteboard objects by calling the readObjects(forClasses:options:) method of the dragging pasteboard property, available through the sender parameter object. This method returns an optional array of Any elements ([Any]?), so we’ll unwrap its results using a guard statement. In addition, we’ll make sure that there are indeed dragged items in the same guard statement:
guard let pasteboardObjects = sender.draggingPasteboard.readObjects(forClasses: [NSImage.self, NSColor.self, NSString.self, NSURL.self], options: nil), pasteboardObjects.count > 0 else { return false }As you can see, the first argument provided above is the same array of classes that we also provided in the canReadObject(forClasses:options:) method earlier. If for some reason there are no objects in the pasteboard so the return value of the above method is nil, or the number of items is zero, we just return false from the method.
Now, we’ll go through the elements of the pasteboardObjects array:
pasteboardObjects.forEach { (object) in

}
The object parameter in the forEach function above is an Any value. Using a series of simple if-let statements we’ll cast object to the types of interest (NSImage, NSColor, NSString, NSURL), and depending on the cast we’ll update the avatarInfo instance accordingly. Here it is:
if let image = object as? NSImage {
    avatarInfo.setImageData(using: image)
}

if let color = object as? NSColor {
    avatarInfo.setColorData(using: color)
}

if let quote = object as? NSString {
    avatarInfo.quote = quote as String
}

if let url = object as? NSURL {
    self.handleFileURLObject(url as URL)
}
In “order of appearance”:
- If
objectcan be casted to a NSImage object, then we use it as argument to thesetImageData(using:)method of theAvatarInfoclass and we keep the image data in theimageDataproperty of theavatarInfoinstance. - If
objectcan be casted to a NSColor object, then we pass the color object as an argument to thesetColorData(using:)method of theAvatarInfoclass in order to keep the color data. - If
objectcan be casted to a NSString object, then we use assign it to thequoteproperty of theavatarInfoinstance. Casting to the SwiftStringtype is necessary asquoteis a NSString object, notString. - If
objectcan be casted to a NSURL object, then we call thehandleFileURLObject(_:)method to handle further the URL. We’ll implement this method soon. Similarly as in the previous case, casting to SwiftURLtype from NSURL is necessary.
Finally, two more things remain to be done. The first isn’t always necessary to do, but we’ll add it for greater user experience. In case you drag files from Finder to the app, the Finder window might remain above the app’s window. That’s fine here, but in real applications most probably you’ll want to bring your app’s window to the top, so the next line ensures that:
sender.draggingDestinationWindow?.orderFrontRegardless()Here’s another new thing; we access the window of the dragging destination through the sender parameter object.
Lastly, we need to return a Boolean value from the method. We’ll return true, given that if the execution made it up to the forEach function then the drag operation can be considered successful.
return trueHere’s our brand new method in one piece:
override func performDragOperation(_ sender: NSDraggingInfo) -> Bool {
    guard let pasteboardObjects = sender.draggingPasteboard.readObjects(forClasses: [NSImage.self, NSColor.self, NSString.self, NSURL.self], options: nil), pasteboardObjects.count > 0 else {
        return false
    }

    pasteboardObjects.forEach { (object) in
        if let image = object as? NSImage {
            avatarInfo.setImageData(using: image)
        }

        if let color = object as? NSColor {
            avatarInfo.setColorData(using: color)
        }

        if let quote = object as? NSString {
            avatarInfo.quote = quote as String
        }

        if let url = object as? NSURL {
            self.handleFileURLObject(url as URL)
        }
    }
}
Handling File URLs
In the implementation right above we call a method that is still not implemented; the handleFileURLObject(_:). Let’s deal with it now. But first, why do we need it?
As I said in the beginning, we’ll make it possible to add avatar images and quote texts to the app not only by dragging and dropping actual images and strings, but also by dragging image and text files. The problem we have right now is that when dragging files to the app, the respective objects in the dragging pasteboard are always of the same type; they are NSURL objects pointing to files. So, there’s not a straightforward way to be informed if we’re talking about an image file, a text file, or something else.
Here’s where handleFileURLObject(_:) gets into play. It will accept a URL object as a parameter value, and it will do two distinct things:
- Using the given URL, it will try to read the file contents and create a NSImage object with them. If that’s successful, then we’re talking about an image file, and it will keep the image data to the
avatarInfoproperty as we previously did. - If the above fails, then it will try to read the file contents and create a NSString object. If that’s successful, then we’ll use the loaded text as the quote that will be kept in the
avatarInfoproperty as before.
In any other case, nothing will happen. Here’s the implementation of the handleFileURLObject(_:) method:
func handleFileURLObject(_ url: URL) {
    if let image = NSImage(contentsOfFile: url.path) {
        avatarInfo.setImageData(using: image)
    } else {
        guard let text = try? NSString(contentsOf: url, encoding: String.Encoding.utf8.rawValue) else { return }
        avatarInfo.quote = text as String
    }
}
Updating The UI
When a drag operation is complete and the performDragOperation(_:) we implemented previously returns true, then another method is automatically invoked, called concludeDragOperation(_:). Implementing it is not necessary, especially if you update the UI of your app with the dragged items in the performDragOperation(_:). However, it’s recommended to use concludeDragOperation(_:) as the place to update the UI, and to perform any clean up actions if necessary.
In this demo application we are going to implement the concludeDragOperation(_:) method in order to update the user interface. In the performDragOperation(_:) we kept all data of the dragged items to the properties of the avatarInfo instance, so here we are going to use them.
As you can see right next, the simple implementation that follows speaks for itself. We populate previously kept data to proper controls by converting image and color data to NSImage and NSColor objects respectively using the already implemented helper methods of the AvatarInfo class, and getting the quote text if exists:
override func concludeDragOperation(_ sender: NSDraggingInfo?) {
    imageView.image = avatarInfo.getImage()
    imageView.layer?.borderColor = avatarInfo.getColor()?.cgColor
    quoteLabel.stringValue = avatarInfo.quote ?? ""
}
Handling End Of Dragging
If you tested the app at least once so far, then you’ve seen that the destination view (the AvatarView view) is highlighted and remains like that forever after the first dragging. What we must do in order to fix that is to change the view’s layer border color when:
- a dragging operation is finished,
- a dragging operation leaves the area of the destination view.
So, following the above order, we need to implement the following two methods:
override func draggingEnded(_ sender: NSDraggingInfo) {
    unhighlight()
}


override func draggingExited(_ sender: NSDraggingInfo?) {
    unhighlight()
}
The above methods are automatically called when one or the other case happens. The unhighlight() method that both call is the following, which also must be added to the AvatarView:
func unhighlight() {
    self.layer?.borderColor = NSColor.clear.cgColor
    self.layer?.borderWidth = 0.0
}
Even though there are still things to do in the demo application, accepting dragged items is almost ready and you can try it out! See that the destination view remains highlighted for as long as there are valid dragged items over it. After dropping them, or by exiting the destination view’s area, highlight is removed.
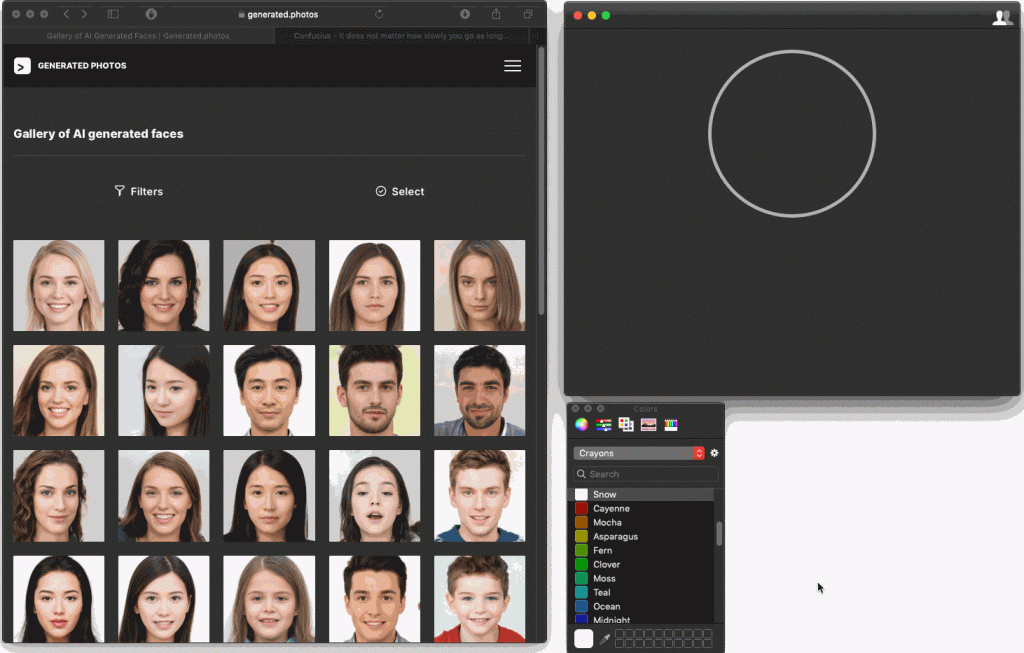
Note: For testing you can use one of the many websites that offer fake avatar images. You can do the same for the quotes. It’s the best way to drag and drop actual images and texts to the app. Of course, you can use the sample files provided in the starter project you downloaded. For my testing purposes, I chose to use this site of AI generated faces, and this website for quotes.
Filtering Dragged Files
Up to this point, if you drag one or more files of any type, not just image or text files, you’ll see that the destination view of our app is highlighted. That’s an indication that those files can be dropped to the app, but for irrelative file types dropping is not possible. So, we must filter somehow the accepted file types and avoid to mislead users about an action that cannot be done.
The way to filter the accepted file types is by using the options parameter value in the canReadObject(forClasses:options:) and readObjects(forClasses:options:) methods we met earlier. options expect a dictionary with NSPasteboard.ReadingOptionKey objects as keys and Any values.
According to documentation, NSPasteboard.ReadingOptionKey provides two options (two static properties):
urlReadingContentsConformToTypes: Option for reading URLs to restrict the results to URLs with contents that conform to any of the provided UTI types.urlReadingFileURLsOnly: Option for reading URLs to restrict the results to file URLs only.
What we care about here is the first option which gives us the ability to restrict the allowed file types. So, knowing that and using that option as the key for the dictionary, let’s see how to determine the file types we need.
If you take a look at the documentation of urlReadingContentsConformToTypes option, you will see that it states this:
The value for this key is an array of UTI type strings.
This means that we cannot provide an array of file extensions, such as [png, jpg, txt, ...]. We must provide an array of UTI type strings, such as [public.text, public.plain-text, public.jpeg, ...].
Read more about UTI types here.
But wait a minute. Does this mean that we have to manually search and find all available UTI types for the file types we are interested in?
The answer is… No! We don’t have to collect UTI types manually. There are programming ways to get them. Being specific:
- NSImage class provides them through the
imageTypesclass property. - NSString class provides them through the
readableTypeIdentifiersForItemProviderclass property.
Be aware though, especially about the text UTI types: Any file type that supports any of the UTIs returned by the above property will be able to be opened by our app, even… Swift files! You can fine tune the allowed types even further if you want by checking their extensions, but that’s not something we’ll do here.
Both the imageTypes and readableTypeIdentifiersForItemProvider properties mentioned above return arrays of strings with the available UTI types. All we need is to “merge” them in one array and make that array the value for the urlReadingContentsConformToTypes key.
Having said all the above, let’s implement the following method in the AvatarView class:
func acceptableUTITypes() -> [NSPasteboard.ReadingOptionKey : Any] {
    let types = [NSImage.imageTypes, NSString.readableTypeIdentifiersForItemProvider].flatMap { $0 }
    return [NSPasteboard.ReadingOptionKey.urlReadingContentsConformToTypes : types]
}
In the first line we create the array with all the desired UTI types. In the second line we create and return a [NSPasteboard.ReadingOptionKey : Any] dictionary which we’re going to use right away.
Go to the draggingEntered(_:) method and update the call of the canReadObject(forClasses:options:) so it uses the acceptableUTITypes() method we just implemented as shown right next:
override func draggingEntered(_ sender: NSDraggingInfo) -> NSDragOperation {

    let canReadPasteboardObjects = sender.draggingPasteboard.canReadObject(forClasses: [NSImage.self, NSColor.self, NSString.self, NSURL.self], options: acceptableUTITypes())

    ...
}
Next, go to performDragOperation(_:) method and update the readObjects(forClasses:options:) call in the guard statement as well, so it uses the result of the acceptableUTITypes() method in the options parameter value:
override func performDragOperation(_ sender: NSDraggingInfo) -> Bool {
    guard let pasteboardObjects = sender.draggingPasteboard.readObjects(forClasses: [NSImage.self, NSColor.self, NSString.self, NSURL.self], options: acceptableUTITypes()), pasteboardObjects.count > 0 else {
        return false
    }

    ...
}
Now, if you run the app and you try to drag an irrelevant file type (for example a movie file) you’ll see that the destination view is not highlighted any more.
See in categories all available UTI types you use programmatically.
Preparing To Start A New Drag Session
What we have seen and done so far regards only drag operations that our demo application can accept, and usually being able to handle incoming dragged items is sufficient for many apps. However, that’s just the one side of the coin when talking about drag and drop operations. The other side is to learn how to initiate a drag session straight from our application, and this is where we are going to focus from now on.
More specifically, we’ll make it possible to start a new drag session from our demo app by clicking and dragging on the AvatarView. We’ll cover two different cases; when the drop destination is within the demo app, and when it’s outside the app.
In both cases it’s necessary to create a pasteboard item (NSPasteboardItem object) that will be written to the dragging pasteboard. It will contain the available pasteboard types that the app will provide data for upon a successful drop operation.
We have already met pasteboard types when we registered for dragged types in the AvatarView class. Remember this?
let supportedTypes: [NSPasteboard.PasteboardType] = [.tiff, .color, .string, .fileURL]To showcase how to include multiple pasteboard types in a new drag session we will allow for the following:
tiffpasteboard type so we can drag and drop the avatar image to another application that supports it.stringpasteboard type so we can drag and drop the quote text to another application that supports it.- A custom pasteboard type that will be recognizable only within our demo application and it will be used to drag and drop the
avatarInfoinstance in theAvatarViewclass to another window.
The first thing that has to be done when preparing an app for initiating drag sessions is to make it capable of writing data to pasteboard. So, let’s start by allowing the AvararInfo class in the AvatarInfo.swift file to write to pasteboard. In order to do that, it’s necessary to conform to NSPasteboardWriting protocol and implement two required methods. Add the following extension to AvatarInfo.swift file:
extension AvatarInfo: NSPasteboardWriting {
    func writableTypes(for pasteboard: NSPasteboard) -> [NSPasteboard.PasteboardType] {

    }

    func pasteboardPropertyList(forType type: NSPasteboard.PasteboardType) -> Any? {

    }
}
In the first method we will return all the pasteboard types that the item we are going to write in the dragging pasteboard will contain. The second method can be used to return data as a property list for any of the pasteboard types returned in the first method. In order to keep the tutorial’s length in a reasonable level we won’t use it here, so just return from it:
func pasteboardPropertyList(forType type: NSPasteboard.PasteboardType) -> Any? {
    return nil
}
Returning Writable Pasteboard Types
Pasteboard types are actually UTI string values, and returning supported by the system types is as easy as shown next. Notice that an array of pasteboard types is what must be returned by the following method:
func writableTypes(for pasteboard: NSPasteboard) -> [NSPasteboard.PasteboardType] {
    var types = [NSPasteboard.PasteboardType]()

    if let _ = imageData {
        types.append(.tiff)
    }

    if let _ = quote {
        types.append(.string)
    }

    return types
}
What’s interesting though is how to return a custom pasteboard type that will allow us to drag and drop an AvatarInfo instance from one place in our app to another. In order to do that, we have to initialize a new pasteboard type with a custom UTI type.
Creating A Custom Pasteboard Type
A custom pasteboard type can be created really easy, as long as we provide upon its initialization a unique string that represents the custom UTI type. The recommended process to generate such a unique string is to compose it by combining the bundle identifier and a string value that describes the purpose of the UTI type.
The following does what was just described:
let customUTIType = (Bundle.main.bundleIdentifier ?? "") + ".avatarInfoCustomUTI"Note that the bundleIdentifier is an optional value. If it’s nil then the prefix before the “avatarInfoCustomUTI” will be just an empty string.
We will return the above string from a class method in the AvatarInfo class. By doing so we will be able to create pasteboard types using the custom UTI type from anywhere in the app. And as you will see, we will need to do so a couple more times later.
So, inside body of the AvatarInfo class add the following:
class func getUTIType() -> String {
    return (Bundle.main.bundleIdentifier ?? "") + ".avatarInfoCustomUTI"
}
Back to the writableTypes(for:) method, add the following line after initializng the types array:
func writableTypes(for pasteboard: NSPasteboard) -> [NSPasteboard.PasteboardType] {
    var types = [NSPasteboard.PasteboardType]()

    types.append(NSPasteboard.PasteboardType(rawValue: AvatarInfo.getUTIType()))

    ...

    return types
}
And that’s it. All the desired pasteboard types are now returned and they will be used by the pasteboard item we will create pretty soon.
Providing Data
When a drag operation is taking place, no actual data is being moved or copied. However, after a successful drop operation the destination app asks for the actual data for any pasteboard type defined in the writableTypes(for:) method that supports.
We can make AvatarInfo class provide that data by adopting the NSPasteboardItemDataProvider protocol. In the AvatarInfo.swift file add the following new extension with the one and only required method:
extension AvatarInfo: NSPasteboardItemDataProvider {
    func pasteboard(_ pasteboard: NSPasteboard?, item: NSPasteboardItem, provideDataForType type: NSPasteboard.PasteboardType) {

    }
}
Now, for each supported pasteboard type we returned earlier in the writableTypes(for:) method we must set the equivalent data to the item parameter. We have already said that we’ll be supporting three different types: The custom pasteboard type that will be used internally in our app, image type for the avatar image and string type for the quote text. Based on that, we can define a switch statement and act for each case separately:
switch type {
    case .init(AvatarInfo.getUTIType()):

    case .tiff:

    case .string:

    default: break
}
See that again we initialize a pasteboard type using the custom UTI type that the getUTIType() method returns.
Let’s start with the easiest, the tiff pasteboard type. It represents the image pasteboard type, so we’ll set the data of the imageData property to the item if it’s not nil:
case .tiff:
    guard let imageData = imageData else { return }
    item.setData(imageData, forType: type)
NSPasteboardItem class provides a couple of handy methods to set and get data such the one you see here. As arguments it requires the actual data as a Data object and the pasteboard type.
Continuing to the quote text, we can create a data object based on the quote string value and pass it to the item (if it’s not nil as well):
case .string:
    guard let quoteData = quote?.data(using: .utf8) else { return }
    item.setData(quoteData, forType: type)
Finally, in case of the custom pasteboard type and given that we want all data from the contained properties in the AvatarInfo class to be copied to the destination view, we will encode as JSON and pass the encoded data to the pasteboard item:
case .init(AvatarInfo.getUTIType()):
    guard let encodedSelf = try? JSONEncoder().encode(self) else { return }
    item.setData(encodedSelf, forType: type)
Note: In order to achieve encoding now and decoding later, it’s really important that our class adopts the Encodable and Decodable protocols, or simply the Codable protocol.
So, here’s the entire new method now:
extension AvatarInfo: NSPasteboardItemDataProvider {
    func pasteboard(_ pasteboard: NSPasteboard?, item: NSPasteboardItem, provideDataForType type: NSPasteboard.PasteboardType) {
        switch type {
            case .init(AvatarInfo.getUTIType()):
                guard let encodedSelf = try? JSONEncoder().encode(self) else { return }
                item.setData(encodedSelf, forType: type)

            case .tiff:
                guard let imageData = imageData else { return }
                item.setData(imageData, forType: type)

            case .string:
                guard let quoteData = quote?.data(using: .utf8) else { return }
                item.setData(quoteData, forType: type)

            default: break
        }
    }
}
Starting A Drag Session
A drag session starts from a view or from a window as it’s an action that involves user interaction. In our demo app, the AvatarView that we used so far as a drag destination will become a drag source as well. To do that, let’s extend it and let’s adopt a new protocol, the NSDraggingSource protocol.
extension AvatarView: NSDraggingSource {

}
There is one required method we have to implement:
func draggingSession(_ session: NSDraggingSession, sourceOperationMaskFor context: NSDraggingContext) -> NSDragOperation {

}
Here we need to return the drag operation that we desire to take place by the drag operation. Even further, we can return different drag operation value depending on whether the drag takes place inside or outside the app. For example:
func draggingSession(_ session: NSDraggingSession, sourceOperationMaskFor context: NSDraggingContext) -> NSDragOperation {
    if context == .outsideApplication {
        return .copy
    } else {
        return .move
    }
}
In the implementation shown above we specify a copy operation when drag and drop takes place out of the app, and a move operation when drag and drop happens inside our app only.
However, let’s keep things simple and let’s return the copy operation in all cases:
func draggingSession(_ session: NSDraggingSession, sourceOperationMaskFor context: NSDraggingContext) -> NSDragOperation {
    return .copy
}
A drag session starts with a mouse event, usually a mouse down or mouse dragged event. Here we’ll override the mouse dragged event, but it would be equally right if you wanted to use the mouse down:
override func mouseDragged(with event: NSEvent) {

}
The first thing we’ll do here is to create a new pasteboard item that will be written to the dragging pasteboard, and along with that to specify the data provider for the dragged item:
let pasteboardItem = NSPasteboardItem()
pasteboardItem.setDataProvider(avatarInfo, forTypes: [.init(AvatarInfo.getUTIType()), .tiff, .string])
See that the avatarInfo instance is the data provider in the second line above since the AvatarInfo class conforms to NSPasteboardItemDataProvider protocol, and that we specify the pasteboard types that will be included in the dragging session.
Next, we have to create a dragging item. This is what users will see and “touch” while dragging. We will pass the pasteboardItem we created above as an argument upon initialization:
let draggingItem = NSDraggingItem(pasteboardWriter: pasteboardItem)A dragging item must have a source frame. Since our AvatarView view is a dragging source, we will set its bounds as the item’s frame:
draggingItem.setDraggingFrame(self.bounds, contents: nil)Finally, the dragging session starts with the following:
beginDraggingSession(with: [draggingItem], event: event, source: self)The first argument expected above is an array of dragging items. Here we have just one, and most of the times you’ll have one item only, but this doesn’t really matter. Wrap them up in an array and pass them as you see here.
The second argument is the event that triggers the new dragging session, and the third argument is the view or window that consists of the dragging source; in this case the self AvatarView instance.
You can run the app now and start a dragging session from the app. However you won’t see any visual indication that the drag operation has started. Let’s fix that now.
Getting A View Snapshot
In order to indicate a drag operation you can use either a custom image, or to get a snapshot (a screenshot) of the source view. Here we’ll get a snapshot of the AvatarView.
NSView class provides an instance method called dataWithPDF(inside:) and its purpose is to return the contents of a view inside a specified frame as PDF data. This data can be used then to create a NSImage object and finally use it with the dragging item.
In the mouseDragged(with:) method and right after the line where the draggingItem is being initialized add the following two statements:
override func mouseDragged(with event: NSEvent) {
    ...
    let draggingItem = NSDraggingItem(pasteboardWriter: pasteboardItem)

    let pdfData = self.dataWithPDF(inside: self.bounds)
    let imageFromPDF = NSImage(data: pdfData)

    ...
}
Now update the setDraggingFrame(_:contents:) method of the draggingItem and pass the imageFromPDF as argument to the contents parameter:
override func mouseDragged(with event: NSEvent) {
    ...
    let draggingItem = NSDraggingItem(pasteboardWriter: pasteboardItem)

    let pdfData = self.dataWithPDF(inside: self.bounds)
    let imageFromPDF = NSImage(data: pdfData)

    draggingItem.setDraggingFrame(self.bounds, contents: imageFromPDF)

    beginDraggingSession(with: [draggingItem], event: event, source: self)
}
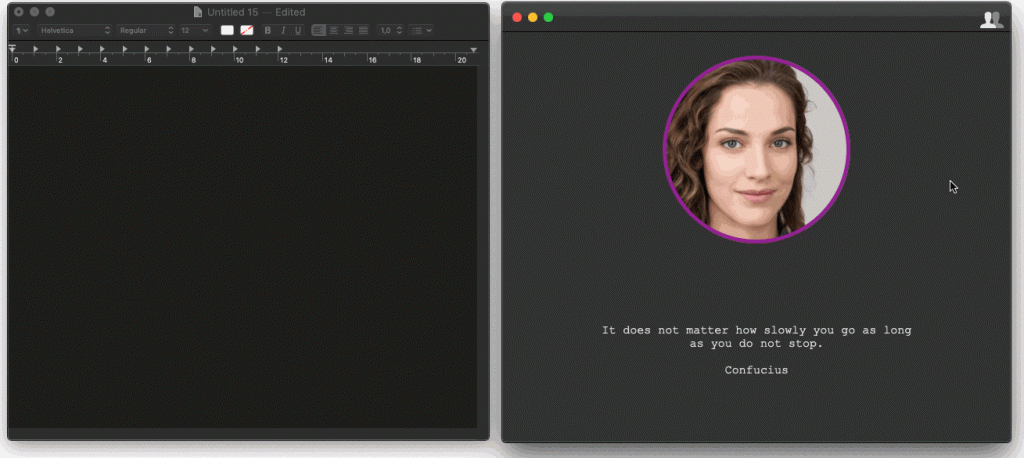
Now run the app again and start dragging from the AvatarView. You will have a snapshot of the view contents being dragged around.

Even though it’s not possible to drag and drop inside the app yet, it’s possible to drag and drop to other applications. For example, open Textedit app and drop the dragged item there. The quote text and the image will be copied over!
A Few Optional Methods
When starting a new dragging session you can optionally implement some additional methods that let you track the drag operation. Even though we won’t use them, I present them here in case you want to use them in your own projects. In the order they are presented, these methods notify when a dragging session starts, is in progress, and ends. All of them belong to NSDraggingSource protocol.
func draggingSession(_ session: NSDraggingSession, willBeginAt screenPoint: NSPoint) {

}


func draggingSession(_ session: NSDraggingSession, movedTo screenPoint: NSPoint) {

}


func draggingSession(_ session: NSDraggingSession, endedAt screenPoint: NSPoint, operation: NSDragOperation) {

}
Dropping A Custom Pasteboard Item On A Table View
In order to see how drag and drop works inside the app, we’ll use another view as the drag destination. This is the AvatarListView that can be found in the starter project, and it has been set as the default view of the AvatarListViewController which in turn is presented in a different window.
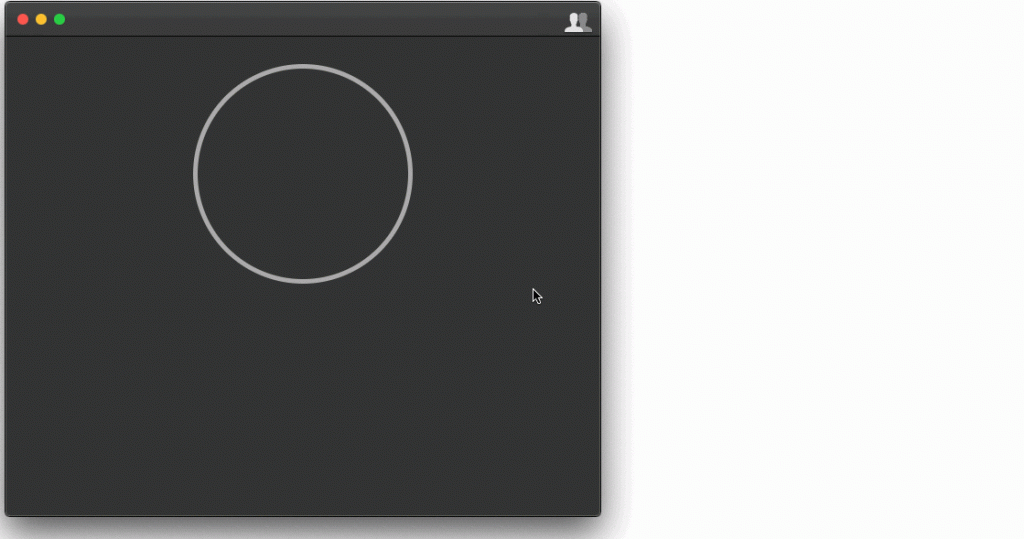
Actually, AvatarListView won’t be the destination view of the drag operation, but the table view included in it. We have already seen in the previous parts how to accept drag operations in a NSView object, so this is an opportunity to get a taste about how to do the same in table views.
So, open the AvatarListView.swift file, where you’ll find most code that’s necessary to make table view working already implemented. As you will see, AvatarListView class contains a property called avatars. It’s an array that can hold AvatarInfo objects and it consists of the data source for the table view.
Our starting point is to define the dragged types that the table view will accept. Here we want to register for the custom UTI type we specified in the AvatarInfo class only.
In the awakeFromNib() method add the following line:
override func awakeFromNib() {
    ...

    tableView.registerForDraggedTypes([NSPasteboard.PasteboardType(rawValue: AvatarInfo.getUTIType())])
}
Once again we initialize a new pasteboard type using the custom UTI type string.
Now we need to implement two delegate methods, so go inside the extension that conforms to NSTableViewDelegate protocol. Start by adding this:
func tableView(_ tableView: NSTableView, validateDrop info: NSDraggingInfo, proposedRow row: Int, proposedDropOperation dropOperation: NSTableView.DropOperation) -> NSDragOperation {

}
This method can be used to validate the drop. Here we can first of all check if the dragged item has a valid type or not. What’s also interesting is that we can change the visually indicated row that the drop will take place on.
By default, the row after the last one is highlighted automatically to indicate where drop operation will happen. The row parameter value provides the index of proposed row. We can change that and set a specific row to be highlighted when dragging items using the setDropRow(_:dropOperation:) table view method. For example, the following will always highlight the first row:
func tableView(_ tableView: NSTableView, validateDrop info: NSDraggingInfo, proposedRow row: Int, proposedDropOperation dropOperation: NSTableView.DropOperation) -> NSDragOperation {
    if avatars.count > 0 {
        tableView.setDropRow(0, dropOperation: .on)
    }

    return .copy
}
Of course, the order of AvatarInfo objects in the avatars array must be in accordance to the way you want them displayed, otherwise any new dropped item will be shown in the last row of the table view.
The following variation causes the entire table to be selected instead of a specific row whenever a new item is about to be dropped:
func tableView(_ tableView: NSTableView, validateDrop info: NSDraggingInfo, proposedRow row: Int, proposedDropOperation dropOperation: NSTableView.DropOperation) -> NSDragOperation {
    tableView.setDropRow(-1, dropOperation: .on)
    return .copy
}
Of course, you can avoid all the above and keep the default behaviour by the system. In this case just return the desired drag operation value:
func tableView(_ tableView: NSTableView, validateDrop info: NSDraggingInfo, proposedRow row: Int, proposedDropOperation dropOperation: NSTableView.DropOperation) -> NSDragOperation {
    return .copy
}
You will be able to try out all the above after having implemented the following method. The actual drop operation is taking place here, as this is where the data matching to the dragged item is fetched from the dragging pasteboard:
func tableView(_ tableView: NSTableView, acceptDrop info: NSDraggingInfo, row: Int, dropOperation: NSTableView.DropOperation) -> Bool {

}
Let’s go step by step in the actions that will let us fetch the dragged data, which is nothing else but an encoded AvatarInfo object.
Note: For clarity reasons, objects presented next will be unwrapped in separate guard statements.
At first we will get the pasteboard item from the dragging pasteboard:
guard let draggedItem = info.draggingPasteboard.pasteboardItems?.first else { return false }Next, we will get the data matching to the pasteboard type with the custom UTI type:
guard let avatarInfoData = draggedItem.data(forType: NSPasteboard.PasteboardType(AvatarInfo.getUTIType())) else { return false }In one more guard statement we’ll decode the dragged data and get an AvatarInfo object:
guard let draggedAvatarInfo = try? JSONDecoder().decode(AvatarInfo.self, from: avatarInfoData) else { return false }Passing that point we have an AvatarInfo object that can be appended to avatars array:
avatars.append(draggedAvatarInfo)Alternatively, if you want each dropped item to be appearing first in the table view then insert instead of appending:
avatars.insert(draggedAvatarInfo, at: 0)Lastly, two more things: We have to reload the table view and return true from the method indicating that drop operation was successful:
tableView.reloadData()

return true
Here’s the entire method:
func tableView(_ tableView: NSTableView, acceptDrop info: NSDraggingInfo, row: Int, dropOperation: NSTableView.DropOperation) -> Bool {

    guard let draggedItem = info.draggingPasteboard.pasteboardItems?.first,
     let avatarInfoData = draggedItem.data(forType: NSPasteboard.PasteboardType(AvatarInfo.getUTIType())),
     let draggedAvatarInfo = try? JSONDecoder().decode(AvatarInfo.self, from: avatarInfoData)
     else { return false }

    avatars.append(draggedAvatarInfo)
    tableView.reloadData()

    return true
}
Note: Previously in this post, when we were making the AvatarView capable of accepting drag operations, we used the readObjects(forClasses:options:) method in order to get data from the dragging pasteboard. In the method above you see an alternative way of getting data from the dragging pasteboard; using the pasteboard items.
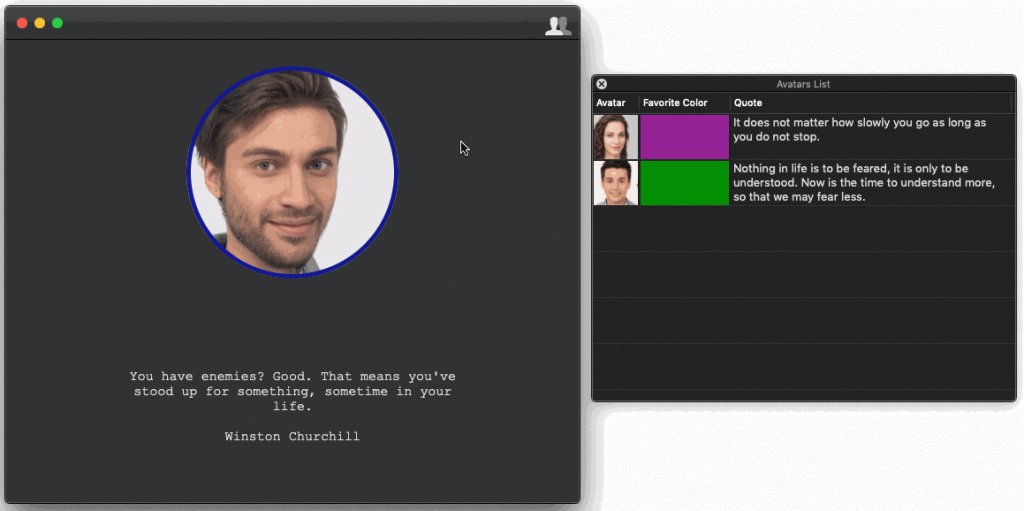
Run the app now and open the secondary window by clicking on the toolbar item. After you’ve dragged an avatar image, color and quote text start a new drag session by clicking and dragging from the AvatarView towards the table view in the secondary window. You’ll see that the drag and drop is working perfectly for our custom UTI type and within our app!
Conclusion
In this post we explored new things on macOS programming that have to do with drag and drop operations. Certainly it consists of a big chapter in programming and obviously not all of its aspects could be covered in one tutorial. However, what you’ve read here reflects the most important things you should know about drag and drop.
You can use this knowledge as the starting point for further research on the topic. Undoubtedly, making an app support drag and drop operations is a big advantage regarding user experience, and it allows for greater usability as well. I leave you with that, hoping that you’ve enjoyed reading about this interesting and useful topic!
For reference, you can download the full project on GitHub.


