


When Parse announced its shutdown last January, thousands of developers were upset and feared for the worst. In fact, Parse powers thousands of apps around the world, so the thought of Facebook shutting down its beloved developer platform came as a shock to many.
With Parse’s immenent shutdown next January, many of the features parse users came to love are also going away with it. However, software engineers at Parse have heard their customers’ complaints and quickly remedied many of the initial issues developers feared; Parse released an open-sourced version of their server, dashboard, and SDKs.
That being said, migrating to parse-server is not a seamless process and takes both time and effort. As a result, time and effort must be taken into account when considering this process.
In first two parts of the Parse migration series, I have walked you through how the Parse migration process works. If you’re unfamiliar with the migration process, please read my first and second tutorial.
In this final tutorial of the series, we’re going to take a close look at what’s involved in hosting your own server of the parse dashboard, updating cloud code with the new promises syntax, and working with push notifications. Let’s dive in!
Cloud Code on Parse-Server
Cloud Code, the Javascript SDK written for a server-side environment, was convinced back in 2011 to take the recessing and querying time off the client and onto the server. In Parse-Server, cloud code still exists, albeit differently. Two major changes exist in the new parse-server:
First, in Parse-server, the master key (which allowed developers to bypass ACL security in the cloud and is used for security measures), does not exist in its current iteration. Previously, Parse supported the usage of Parse.Cloud.useMasterKey(); however, parse-server requires developers make use of the following syntax in every request that must bypass ACLs:
{ useMasterKey: true }
Now, let’s take a look at how the masterKey usage in cloud code has changed.
Old Cloud Code:
Parse.Cloud.define("queryEvent", function(request, response) {
  Parse.Cloud.useMasterKey();
    var Query = Parse.Object.extend("ClassName");
    var query = new Parse.Query(Query);
    query.first({
      success: function(object) {
        response.success(object);
      },
      error: function(error) {
        response.error(error);
      }
    });
});
New Cloud Code:
Parse.Cloud.define("queryEvent", function(request, response) {
  var Query = Parse.Object.extend("ClassName");
  var query = new Parse.Query(Query);
  query.first({ useMasterKey: true }).then(function(object) {
        response.success(object);
      }, function(error) {
        response.error(error);
      });
});
As you can see, it is not an overly complicated process, but certainly one that requires time and effort. In addition, parse-server makes use of JavaScript’s promises syntax (noticeable by the
.then(function(object) {
            response.success(object);
      }, function(error) {
        response.error(error);
      });
Secondly, parse-server is a full node environment. This means that while you can no longer use the Parse cloud code modules (such as stripe and mailgun), you can use their official npm modules. npm is the official package manager for node, allowing developers to utilize multiple packages/modules in their app. This is great for developers who were previously restricted to using only parse cloud modules.
Let’s take a look at how an existing cloud code module looks like when migrated to an npm version hosted on parse-server.
Existing stripe module:
 Stripe.Charges.create({
        amount: 1600,
        currency: "usd",
        source: 'YOUR_TOKEN'
      }, { success: function(resp) { },
            error: function(myObject, error) { }
 });
New Stripe Module (npm module):
stripe.customers.create({
  email: '[email protected]'
}).then(function(customer) {
  return stripe.charges.create({
    amount: 1600,
    currency: 'usd',
    customer: customer.id
  });
}).then(function(charge) {
  // New charge created on a new customer
}).catch(function(err) {
  // Deal with an error
});
Now, developers can use any npm module in the parse-server environment, but you’ll need to read up on the documentation of each to implement the npm modules. To learn more, please visit the official npm website for more information.
Installing the Parse Dashboard
While Parse server is open source and free to all, in order to use the dashboard, you must also spin up another server to run this and configure it properly with the right keys. Installing the Parse dashboard is incredibly simple to setup. In this section of the tutorial, we’re going to wire up the open sourced Parse dashboard to your parse-server app and run it on localhost. With that, let’s dive in!
To get the latest version of the Parse dashboard, use git to clone the repo from github, cd into the directory, and install the necessary non modules with the below commands.
cd ~/Desktop
git clone https://github.com/ParsePlatform/parse-dashboard.git
cd parse-dashboard
npm install
Now, open the folder you cloned in a text editor of your choice (I’ll be using Sublime) and modify the parse-dashboard-config.json file with your app keys as seen below. Use the same information you used to setup your parse-server when filling out these keys.
{
  "apps": [
    {
      "serverURL": "https://api.parse.com/1",
      "appId": "xxxxxxxxxxxxxx",
      "masterKey": "xxxxxxxxxxxxxx",
      "javascriptKey": "xxxxxxxxxxxxxx",
      "restKey": "xxxxxxxxxxxxxx",
      "appName": "xxxxxxxxxxxxxx"
    },
    {
      "serverURL": "http://localhost:1337/parse",
      "appId": "xxxxxxxxxxxxxx",
      "masterKey": "xxxxxxxxxxxxxx",
      "appName": "xxxxxxxxxxxxxx"
    }
  ]
}

Save the file and you’re ready to roll!
To run the dashboard locally, simply type npm run dashboard in the terminal.
Parse server is now running on localhost port 4040! Congratulations! Navigate to locahost:4040/apps to view your very own parse dashboard!
Managing Push Notifications in Parse-Server
Push notifications on Parse-Server are a beast of their own. Parse.com was famous for its easy to implement push notification service, which was based on Amazon’s AWS cloud. Unfortunately for Parse developers, parse-server does not support push notifications natively, meaning that you will have to use an something like Amazon Web Services Simple Notification Service (SNS) to handle push if you want to maintain your own push notification server. In addition, scheduled push notifications in parse are not supported either.
That all being said, Batch.com, a push notification provider, has developed a very appealing solution for existing parse customers.

Batch’s website details the migration process, which has been specially taylored to parse users. The Batch aticle describes the process, which involves navigating to Parse.com and clicking to the export section under the app’s settings.
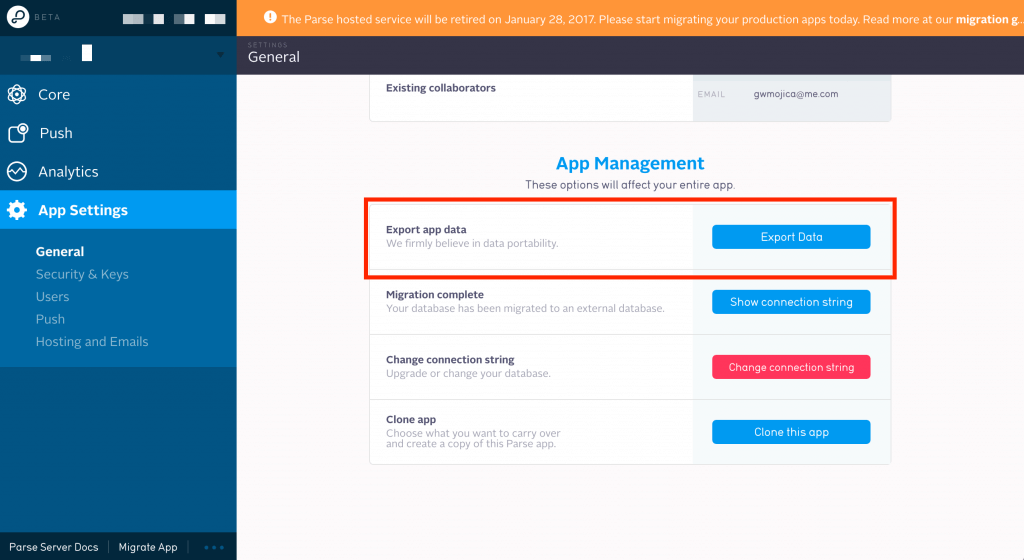
This will prompt Parse to send you an email with the push data. Simply download the zip file and upload it to the batch website linked above, signup for an account, and you’re ready to roll!
It’s suprisingly not that difficult to wire up push notifications on batch. That being said, you will need to pay for them and batch does charge a premium for notifications.
Wrapping Up
Although Parse is closing its doors next year, developers should not fret! With parse-server open source and ready for usage, it’s never been a better time to be a developer.
In this tutorial, we took a look at setting up the Parse dashboard on localhost, took a look at migrating cloud code to a custom node environment, and discussed how to power push notifications on batch.com. With this tutorial, we wrap up our parse migration series on AppCoda. I hope you found this three part series to be of benefit and help as you begin to migrate your parse app.
Remember, you can always fork the parse-server github repo and submit a pull request. Happy coding!


