

The Photo Editing Extension allows a user to edit a photo or video within the Photo app using third party apps. Previously users had to take a picture with the Camera app and then switch to the photo editing app to make edits, or they had to import pictures from their Camera Roll. Now, this app switching can be eliminated, enabling users to edit their photos and images without leaving the Photos app. After editing is done and the user confirms the changes made in a Photo Editing extension, the adjusted content is available in Photos. The original version of the content is kept so that the user can revert the changes made in an extension.
We are going to look at how to create a Photo Editing Extension. So as to concentrate on creating the extension and not a full app from scratch, I have created a starter project that you can download so as to follow along.
The project is of a simple application that detects faces in an image and pixellates the faces. If no faces are detected, the image will not be changed. This app will be the container app of our extension. Extensions have to be shipped as part of a containing app. You cannot have a stand-alone extension. For more on this and for a deeper explanation on how extensions work, you can read through the introduction of a previous article we did on the Today extension.
I placed the image processing code in a framework. This is so I can use the code in the extension and in the container app. When you create an extension, it has to be in its own target, so if you want to reuse code between the main app and the extension, you have to place the common code in an embedded framework. In the downloaded project, I have already created the framework. If you want to know how to create one, read the previously mentioned article which details the process.
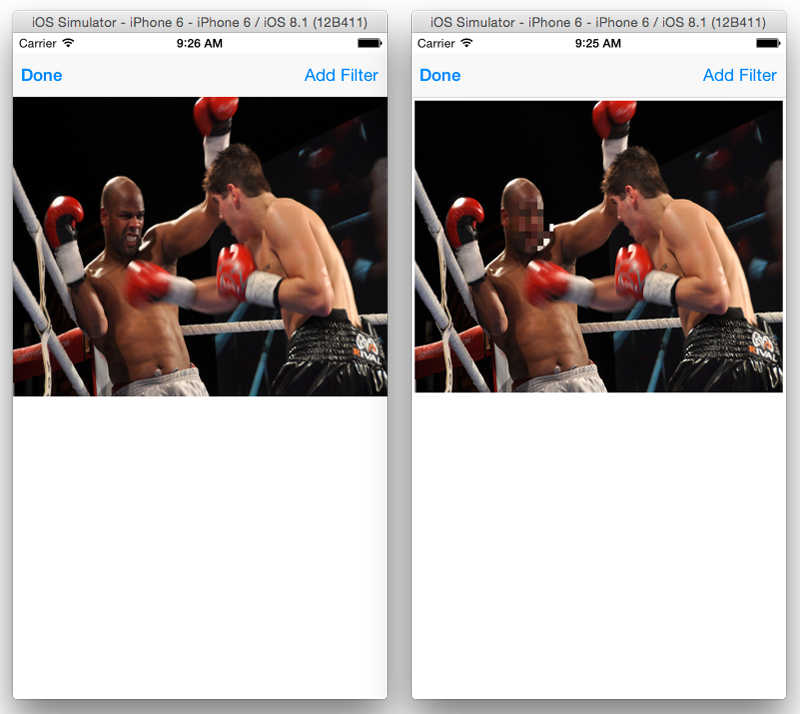
On running the app, you will be presented with a collection view loaded with several thumbnail images. On tapping on a thumbnail, a view showing the large version of the image will be presented. On the navigation bar of this view, there is an Add Filter button. When tapped, the image is processed and run through the face detection API. When faces are detected on the image, a pixellate filter is placed on a circle centered on the face. Some examples of this are shown below.
We will create an extension that will make this functionality available to other apps.
Creating the Extension
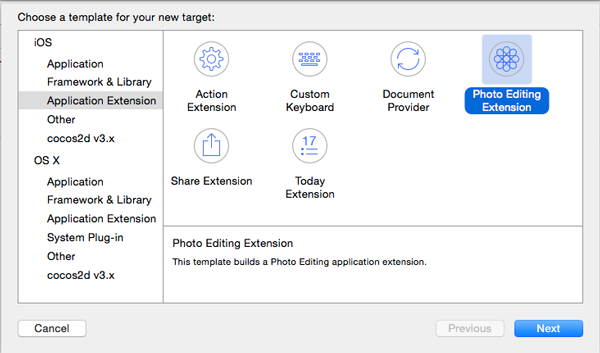
To get started, select the FaceBlur project in the Project Navigator, and then choose Editor > Add Target. Choose iOS > Application Extension > Photo Editing Extension and click Next
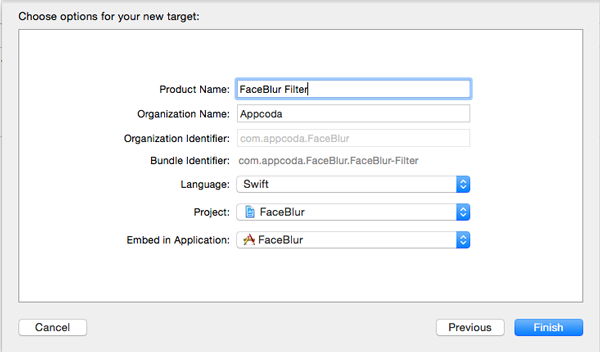
Set Product Name to FaceBlur Filter, Swift as the language, and leave the other fields as they are.
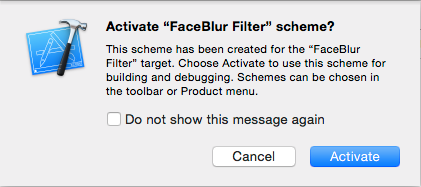
Activate the new scheme when prompted to.
If you look at the Project Navigator, you will see a new group labelled FaceBlur Filter. It contains 3 files – PhotoEditingViewController.swift, MainInterface.storyboard and Info.plist.
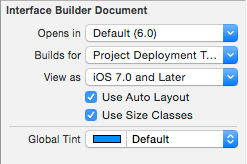
If you look at MainInterface.storyboard, you will notice that the Interface Builder canvas looks similar to what we had been used to in previous iOS versions i.e. it doesn’t use an adaptive layout. The view controller resembles that of the iPhone and there is no Size Class control at the bottom of Interface Builder. We want to build an extension with an adaptive layout that will work well on varying screen sizes.
Select the Photo Editing View Controller in the Document Outline. In the File Inspector, check the Use Size Classes checkbox and confirm this in the pop up window that appears.
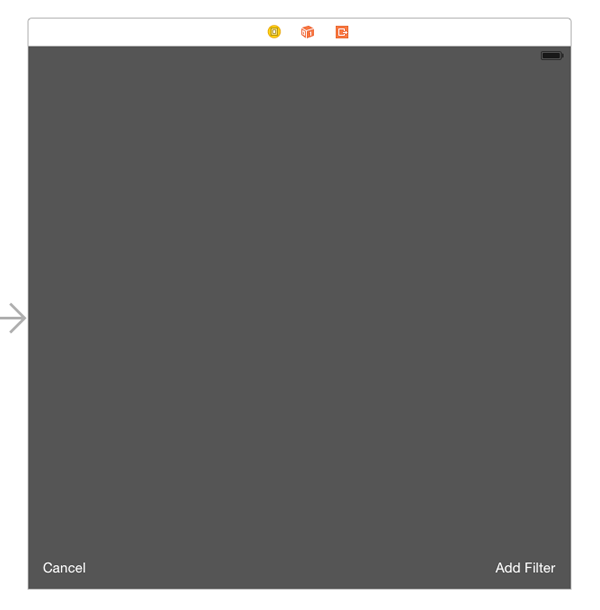
Delete the view controller from the storyboard and drag another View Controller from the Object Library. As you can see, its size will be a rough square instead of the size of a particular device.
In the Identity inspector, set the view controller’s class to PhotoEditingViewController and then in the Attributes Inspector check Is Initial View Controller.
In the Document Outline, select the View and set its background color to Dark Gray Color in the Attributes Inspector.
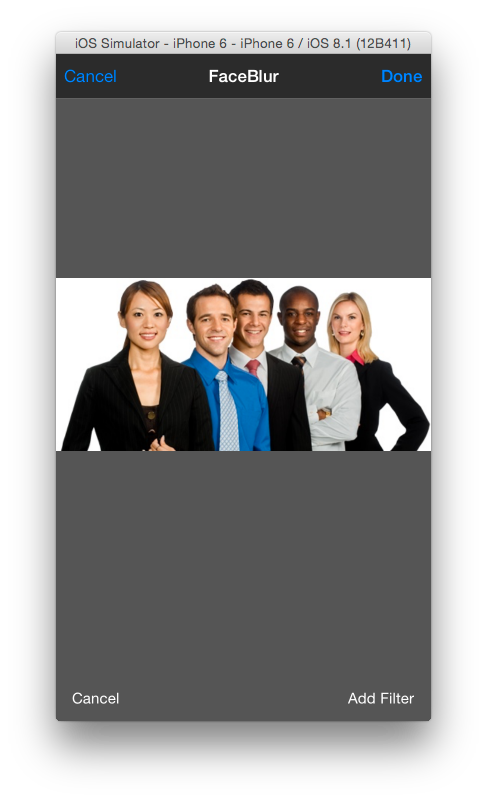
Drag two buttons to the view and set them at the bottom of the view. One on the far left and the other on the far right. Change their color to white and change the title of the left one to Cancel and the one on the right to Add Filter. You should have something similar to the below view.
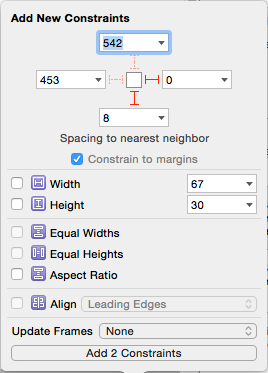
Select the Cancel button and pin its left and bottom.
Select the Add Filter button and pin its right and bottom.
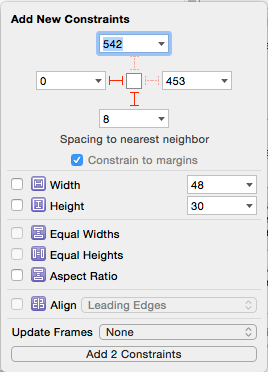
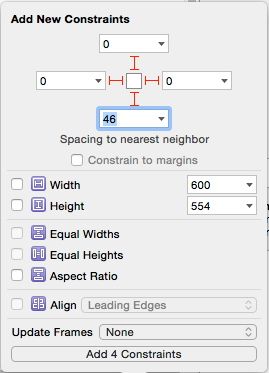
Drag an Image View onto the main View. Resize it so that its top, right and left sides are snapped to the view’s sides. Drag its bottom edge downwards until a blue guide line appears close to where the buttons are placed. With the Image View still selected, click on the Pin menu and uncheck Constrain to margins. Set the top, left and right pins to 0 and for the bottom one, click the drop down menu of the bottom pin and select Bottom Layout Guide. Add the 4 constraints.
Add an outlet for the Image view by Control-dragging from the Image View to the PhotoEditingViewController class (use the Assistant editor to get a split view of the storyboard and class file). Name the outlet imageView. Add another outlet for the Cancel button and name it cancelButton. Add one for the Add Filter button and name it addFilterButton.
Control-drag from the Cancel button to the PhotoEditingViewController class and change the Connection to Action. Set the Type to UIButton and Name to cancel. Do the same for the Add Filter button and name it addFilter. You should have the following outlets and actions.
    @IBOutlet weak var imageView: UIImageView!
    @IBOutlet weak var cancelButton: UIButton!
    @IBOutlet weak var addFilterButton: UIButton!

    @IBAction func cancel(sender: UIButton) {
    }

    @IBAction func addFilter(sender: UIButton) {
    }
The PhotoEditingViewController class conforms to the PHContentEditingController protocol and if you look at the class you will see implementations of some of its methods.
- startContentEditingWithInput(contentEditingInput:, placeholderImage:) – This is called before the view controller appears, and when the asset to be edited is available. It is passed two objects – a PHContentEditingInput instance (which describes the asset to be edited) and a UIImage instance (which can be the original image or a past edited image depending on what is returned by canHandleAdjustmentData(adjustmentData:) described below).
- finishContentEditingWithCompletionHandler(completionHandler:) – This is called when done with editing. An instance of PHContentEditingOutput is created which stores the edits and adjustment data that describes the edit. This is passed to the completionHandler.
- cancelContentEditing – This is called when the user cancels editing. You should clean up resources that aren’t needed.
- canHandleAdjustmentData(adjustmentData:) – If your extension can work with previous edits made, then return true.
We’ll edit some of these methods.
To start off, first import the ImageProcessingKit framework. Add the following to the file.
import ImageProcessingKit
Add the following variables to the class
var processedImage: UIImage?
let processor = ImageProcessor()
Modify addFilter() as shown.
@IBAction func addFilter(sender: UIButton) {
    if let input = input {
        processedImage = processor.processImage(input.displaySizeImage)
        imageView.image = processedImage
    }
}
This applies the photo edits to the display image. The changes aren’t applied to the full size image here. This enables the user to test out different filters – if an extension offers different filters – before they decide on a particular one.
Modify cancel() as shown to set the image view back to the original image when the user taps the Cancel button.
@IBAction func cancel(sender: UIButton) {
    if let input = input {
        imageView.image = input.displaySizeImage
        processedImage = nil
    }
}
Modify startContentEditingWithInput() as shown.
func startContentEditingWithInput(contentEditingInput: PHContentEditingInput?, placeholderImage: UIImage) {
    input = contentEditingInput
    if let input = contentEditingInput {
        imageView.image = input.displaySizeImage
    }
}
This captures the input and displays it in the image view, when editing is about to start.
Modify finishContentEditingWithCompletionHandler() as shown.
func finishContentEditingWithCompletionHandler(completionHandler: ((PHContentEditingOutput!) -> Void)!) {

    if input == nil {
        self.cancelContentEditing()
        return
    }

    dispatch_async(dispatch_get_global_queue(CLong(DISPATCH_QUEUE_PRIORITY_DEFAULT), 0)) {
        let contentEditingOutput = PHContentEditingOutput(contentEditingInput: self.input)

        let archiveData = NSKeyedArchiver.archivedDataWithRootObject("Face Blur")
        let identifier = "com.appcoda.FaceBlur.FaceBlur-filter"
        let adjustmentData = PHAdjustmentData(formatIdentifier: identifier, formatVersion: "1.0", data: archiveData)
        contentEditingOutput.adjustmentData = adjustmentData

        if let path = self.input!.fullSizeImageURL.path {
            var image = UIImage(contentsOfFile: path)!
            image = self.processor.processImage(image)

            let jpegData = UIImageJPEGRepresentation(image, 1.0)
            var error: NSError?

            let saveSucceeded = jpegData.writeToURL(contentEditingOutput.renderedContentURL, options: .DataWritingAtomic, error: &error)
            if saveSucceeded {
                completionHandler(contentEditingOutput)
            } else {
                println("Save error")
                completionHandler(nil)
            }
        } else {
            println("Load error")
            completionHandler(nil)
        }
    }
}
First, we check if input is nil. If so, nothing is done, so we return. Next we dispatch an asynchronous block to do the work.
Next we create an instance of PHContentEditingOutput using the input object. We then create an instance of PHAdjustmentData. Adjustment data is saved along with the modified image. The PHAdjustmentData object provides an application-defined “recipe” you can use to reconstruct the edit, so that if your extension provides different filters, the object can save the order in which a user applied the filters so that they can resume editing a previously edited image. The data needs to have a unique identifier and a version number. For the identifier, we use the reverse domain name notation, to ensure its uniqueness. A version number helps subsequent versions of your extension un-archive previous versions differently.
Next we load the full sized image from disk and apply the filter. We then convert this to JPEG data and write it back out to disk. If done successfully, the completion handler is called and passed the output item.
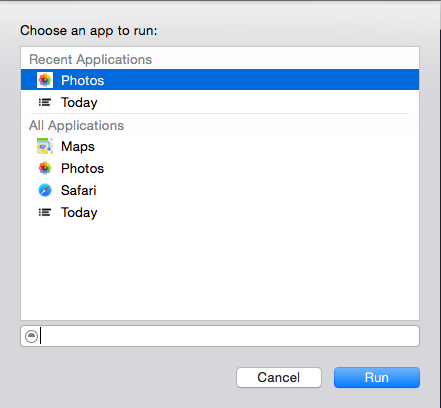
To run the extension, first make sure the Scheme is set to FaceBlur Filter. Run the project. A window will appear for you to select an app to run. Select Photos.
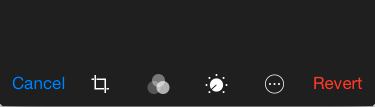
Photos app will launch. Select an image and tap Edit. On the bottom right corner, you’ll see an icon of a circle with three dots.
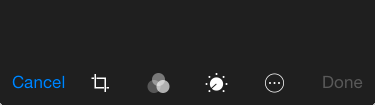
Tap it to reveal activated 3rd party Photo Editing Extensions.
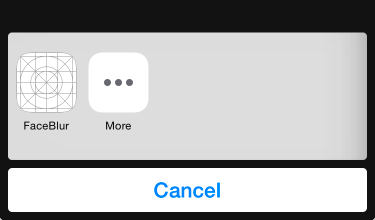
Select FaceBlur and then tap Add Filter. The image will be processed and edited if any faces are detected. You can cancel the changes or select Done to keep them.
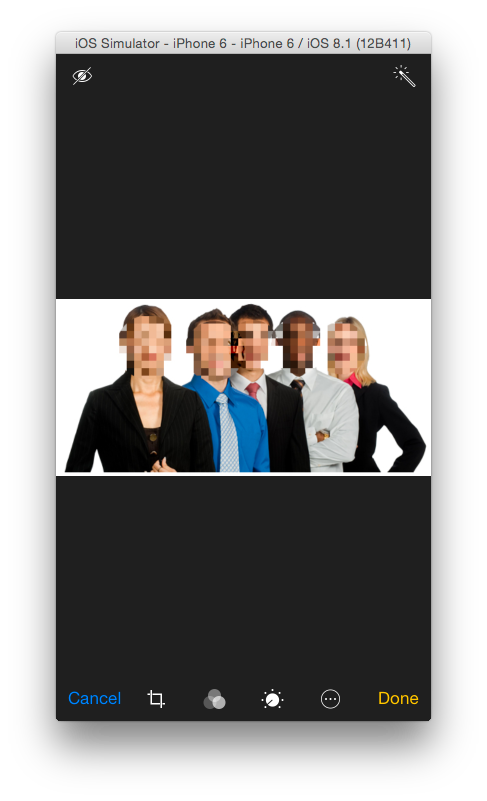
On selecting done, you will be taken back to the Photos app view where you’ll see the edited image.
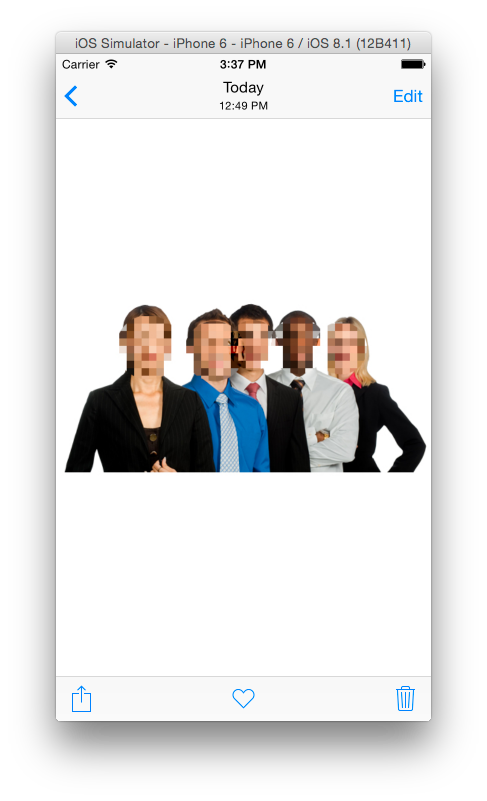
You can revert the changes a filter makes by selecting the image and on the Edit view, selecting Revert.
Conclusion
We’ve looked at how to create a simple Photo Editing extension. You can add more complexity to it, like creating an extension that can work with past edits. I hope the tutorial provides you a good reference to start with when working on your own extensions. Be sure to check out the App Extension Programming Guide for more information on extensions.
For your reference, you can download the complete Xcode project here.
Note: When you run the extension, you might notice some error messages about token consumption and CoreMedia permissions. These started appearing with the release of Xcode 6 GM seed so they might not be there in future releases, or might have a fix for future versions of iOS 8. But for now, the extension works fine despite them.


