

Importing photos and videos as media items is one of the most common features that the majority of iOS applications include. In general lines, there are two ways to do that; either by using a system-provided controller, or by implementing a custom picker manually. Obviously, going with the second approach is a much harder and complicated process.
In this post we are going to focus on the first option, and particularly on a brand new photo picker controller that was first introduced in iOS 14. That is the PHPicker API! Let’s take a look at a few interesting and useful details, but let’s do that starting from a different point.
Up until iOS 13, the available photo picker to use had been the UIImagePickerController; a familiar view controller that made its debut many years back. UIImagePickerController has been providing double functionality; the first is photo and videos importing to the app, and the other capture of new media using a camera from the iPhone or iPad.
This controller, however, carries along two disadvantages; the first is that it provides a relatively limited environment to pick media items from. Users can select one photo or video at each time only, while there’s no option to search for specific items when there are many of those stored in user’s library. The second downside is that developers are required to ask from users for their consent in order to present it, and therefore add new entries in the app’s Info.plist file with a description of the intended use.
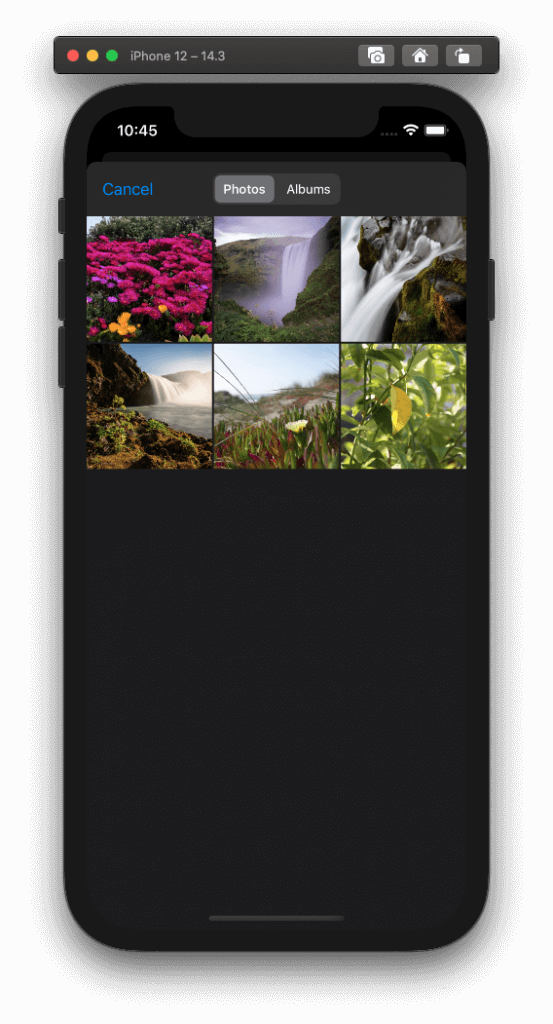
PHPicker changes all that, and makes importing photos and videos an easier and faster task. First of all, its greatest feature is that it allows both single and multiple item selection, a feature that is definitely much appreciated by users. In addition, it offers a search feature in a picker similar to the Photos app, so users meet a familiar place; they already know how to move and what to do when such a picker is presented to them.
Also, and contrarily to the UIImagePickerController, PHPicker provides a better privacy and does not require to ask for user consent so it can be used. Even though an app can trigger its presentation, the picker runs in a separate process where users can select only type of media necessary for their tasks, and do nothing beyond that; not even to get a snapshot of the picker. So, with PHPicker, simply forget about usage descriptions and rely on the built-in iOS privacy.
To get the photos and videos that users have picked and handle them in our apps, PHPicker transfers them over temporarily and offers a few ways to fetch them. We are going to see all the related how-to in the upcoming parts of this post. However, before we continue, keep something important in mind; PHPicker is not a class, nor a framework. It’s just a name that hides classes and other types behind it, where all of them belong to the PhotosUI framework, also announced in WWDC 2020.
What PHPicker does not do is to offer capture capabilities. If an app wants to do so, then the UIImagePickerController is still the way to go. Also, apps running on iOS 13 and below cannot use PHPicker APIs; it’s meant for iOS 14 and above only.
That being said, in this tutorial we are going to meet PHPicker and all necessary actions that will let us import photos, videos and live photos to a demo application. We will have the chance to talk about some not so much known techniques, and we’ll see various aspects of PHPicker, such as how to configure it or how to handle picked items. In the mix we will also add pinches of SwiftUI, so get ready for a really interesting post!
An Overview Of The Demo App
In order to get a good, in-depth taste of PHPicker, we are going to be working on a simple demo application. It’s about a single-screen SwiftUI app, and there is a starter project to download that I’ve prepared for you.
Once you download and open it in Xcode, you’ll find a few files in the Project navigator:
- ItemsView.swift: The SwiftUI view that we’ll be working on.
- PhotoPicker.swift: This is where we’ll do the PHPicker related work.
- PhotoPickerModel.swift: A place where we’ll implement a custom model to keep data about selected media items.
- LivePhotoView.swift: It will become handy in order to preview live photos in the demo app.
I’m not going to provide any details about the contents of these files, as we are just about to see thoroughly next.
In the ItemsView there’s some initial code already implemented. Even though we won’t perform any navigation, there is a NavigationView added in order to create a navigation bar and therefore to have two bar buttons; one for adding new media items to the app (a plus icon), and one for deleting them (a trash icon).
The main content of the view is practically empty. There is an EmptyView that we are going to replace soon with a List view, and inside that List we are going to display the various media that we will be importing. There is also a sheet ready to be used; with it we’ll be presenting the photo picker.
Take your time to look around in the starter project, and once you’re done, then just keep reading. A quite interesting and detailed tutorial is just about to unfold.

Presenting The PHPicker View Controller
Let’s start working in order to present the PHPicker controller. We are going to show it modally, and for that job we are going to employ the sheet in the ItemsView; presenting content modally is what a sheet is meant for.
In the demo application doing so has already been taken care of:
.sheet(isPresented: $showSheet, content: {

})
In the ItemsView.swift file you will find the sheet view modifier right after the closing of the NavigationView. This is what presents the actual sheet, but the flag that controls whether the sheet should be presented or not is the showSheet property that has been marked with the @State property wrapper:
@State private var showSheet = falseThe sheet modifier gets two arguments:
- The binding value of the @State property that indicates whether sheet should be shown or not. That binding value is the
$showSheetargument in code, and it means that content inside the sheet can change the value ofshowSheet, which belongs to ItemsView. - A closure where we’ll provide the sheet’s content; soon this will be the picker controller.
The PHPicker controller is a UIKit view controller, represented by the PHPickerViewController class. Since it’s not a native SwiftUI component, unavoidably we will mix SwiftUI and UIKit together.
In order to make a UIKit view controller available to SwiftUI and accessible in it, it’s necessary to create a new custom type, a structure, that will be conforming to a specific protocol called UIViewControllerRepresentable. That structure will actually be implementing and dealing with the UIKit view controller, and it will be the bridge between the controller and the SwiftUI view that is meant to be making use of it.
Let’s see that happening in action, but for keeping our code as clean and readable as possible, let’s work on a different file. That is the PhotoPicker.swift in the starter project, so just click on it to open and start editing it.
The first step is to replace the Foundation framework imported by default with the following two:
import SwiftUI
import PhotosUI
The SwiftUI framework is needed so we can use the UIViewControllerRepresentable protocol; the PhotosUI for accessing the PHPickerViewController class.
Next, let’s define a custom type, which is going to be a structure and we’ll call PhotoPicker. Don’t forget that it has to be conforming to the UIViewControllerRepresentable protocol:
struct PhotoPicker: UIViewControllerRepresentable {

}
Every UIViewControllerRepresentable type must be necessarily doing the following three things:
- To specify the view controller type that is dealing with.
- To implement a method where it creates, configures and returns the view controller instance.
- To implement one more method that is used in order to perform updates to the view controller when those originate from the SwiftUI environment. Even though it’s mandatory to define it, this method can remain empty if there is no reason to update the view controller. And that’s what we’ll do here; we’ll just leave it empty.
Having said all that, let’s see how they are all implemented in the PhotoPicker structure:
struct PhotoPicker: UIViewControllerRepresentable {
    typealias UIViewControllerType = PHPickerViewController

    func makeUIViewController(context: Context) -> PHPickerViewController {

    }

    func updateUIViewController(_ uiViewController: PHPickerViewController, context: Context) {

    }
}
We’ll now focus on the makeUIViewController(context:) method, as that’s the place where we’ll initialize the picker view controller. At the initilization time of a PHPickerViewController object, we must provide the desired configuration that should apply to the picker when it will be presented. That configuration is given as a PHPickerConfiguration object, which is another PHPicker API.
Initially we’ll start simple, by allowing to pick only photos. Also, at first we’ll limit the number of allowed picked items to one (1), but that’s something we are going to change later. In order to do all that, at first we have to create a new PHPickerConfiguration object:
func makeUIViewController(context: Context) -> PHPickerViewController {
    var config = PHPickerConfiguration()
    config.filter = .images
    config.selectionLimit = 1
}
It’s also necessary to specify the value of one more property of the config object:
config.preferredAssetRepresentationMode = .currentEven though the documentation of that property is actually empty on Apple docs, the import process is going to take significantly too much time in order to complete without setting current to preferredAssetRepresentationMode. So, add the above along with the other two configurable properties.
With the configuration object ready, we can move on and initialize a PHPickerViewController instance, and eventually return it from the method:
func makeUIViewController(context: Context) -> PHPickerViewController {
    ...

    let controller = PHPickerViewController(configuration: config)

    // Set the delegate here...

    return controller
}
See that we are passing the config in the initializer of the controller object at the time of its creation. Also, right before the return statement, there is a comment I added there about setting the delegate. And here is why:
A user will have two choices once the picker controller has been presented; either to pick a photo to import, or to cancel and dismiss the picker. In any case, the selected action will be communicated back through a delegate method, which we obviously have to implement and handle the results. However, at this point we still don’t have the object that we will set as the picker’s delegate. And it cannot be the PhotoPicker instance; it has to be a class instance. In particular for UIViewControllerRepresentable types, a coordinator class is playing that role.
Implementing The Coordinator Class
A coordinator class is a custom type that has to be implemented inside a UIViewControllerRepresentable type, in our case inside the PhotoPicker structure, and it has a quite specific purpose; to act as the delegate for view controllers that send messages through delegate methods, and pass received data to SwiftUI. If we could phrase that in simpler words, just think that this is the way for a UIKit view controller to send messages to the SwiftUI view that is using it.
It all starts by defining the following class in the PhotoPicker body:
struct PhotoPicker: UIViewControllerRepresentable {
    ...

    class Coordinator {

    }
}
In the class body, we will declare the following property which will be keeping the PhotoPicker instance:
class Coordinator {
    var photoPicker: PhotoPicker
}
Along with that, we’ll also create a custom initializer method:
class Coordinator {
    var photoPicker: PhotoPicker

    init(with photoPicker: PhotoPicker) {
        self.photoPicker = photoPicker
    }
}
Now, and before we go any further, it’s the best time to create a Coordinator instance in the PhotoPicker structure by using an optional method of the UIViewControllerRepresentable protocol. That method will simply initialize and return a Coordinator object, passing the PhotoPicker instance (self) as an argument:
struct PhotoPicker: UIViewControllerRepresentable {
    ...

    func makeCoordinator() -> Coordinator {
        Coordinator(with: self)
    }

    class Coordinator { ... }
}
Back to the makeUIViewController(context:) method, we are now able to replace the following comment:
// Set the delegate here...with this:
controller.delegate = context.coordinatorNotice that the Coordinator instance is accessible through the context parameter value of the method. After having added the above, here’s the entire method:
func makeUIViewController(context: Context) -> PHPickerViewController {
    var config = PHPickerConfiguration()
    config.filter = .images
    config.selectionLimit = 1
    config.preferredAssetRepresentationMode = .current

    let controller = PHPickerViewController(configuration: config)
    controller.delegate = context.coordinator
    return controller
}
The PHPicker Delegate Method
We can now pay our full attention to the implementation of the Coordinator class. At first, it’s necessary to make it conform to the PHPickerViewControllerDelegate protocol; the one that will provide us with the delegate method that has to be implemented:
class Coordinator: PHPickerViewControllerDelegate {
    ...
}
Even though two different kind of actions can take place in the picker view controller after it has been presented (pick photos or cancel), there is one delegate method to implement only. This is called both when user selects media items, and when just cancels and dismisses the picker. This is the following:
class Coordinator: PHPickerViewControllerDelegate {
    ...

    func picker(_ picker: PHPickerViewController, didFinishPicking results: [PHPickerResult]) {

    }
}
See that the selected items are contained in the results parameter; it’s a collection of PHPickerResult objects, which we’ll deal with in a while.
At this point, there is a question rising; how are we supposed to let the SwiftUI view know that the picker has been dismissed, and whether the user selected items or just cancelled?
This question does not include the actual selected media items. Those will be handled asynchronously and we’ll provide them to the SwiftUI view in a different way which we’ll implement next. But to answer and come up to a solution, first we have to consider something else.
The time that the picker will be dismissed is undefined and depends totally on the user. We can’t predict it and the best approach in order to react to that is by defining and using an action handler. That action handler will be called in the delegate method, but it will be implemented as a closure in the SwiftUI view, provided to the PhotoPicker instance right at the time of the initialization. Then, each app will be able to trigger any necessary further actions once it has the information that the picker has been dismissed.
So, in the PhotoPicker structure, add the following declaration at the top:
struct PhotoPicker: UIViewControllerRepresentable {
    var didFinishPicking: (_ didSelectItems: Bool) -> Void

    ...
}
The argument that we’ll provide to the above callback will be indicating whether the user just dismissed the picker, or that happened after having selected media items.
Returning to the picker(_:didFinishPicking:) delegate method now, we can add the first line of code which will be calling the above callback, passing the proper value as argument:
func picker(_ picker: PHPickerViewController, didFinishPicking results: [PHPickerResult]) {
    photoPicker.didFinishPicking(!results.isEmpty)
}
If the results array is not empty and the user has selected media items, then the argument above will be true. Otherwise, it’s going to be false. Notice also that we are accessing it through the photoPicker property of the Coordinator class; photoPicker has been declared for accessing PhotoPicker properties like what we just did above.
If the user simply dismissed the picker, then there’s nothing to do besides than just returning from the method. We will proceed if only the results array is not empty, but we’ll work on that in just a while. For now, let’s append the following to the delegate method:
func picker(_ picker: PHPickerViewController, didFinishPicking results: [PHPickerResult]) {
    ...

    guard !results.isEmpty else {
        return
    }
}
We can now go back to the ItemsView.swift file, and create a PhotoPicker instance in the sheet’s content body:
.sheet(isPresented: $showSheet, content: {
    PhotoPicker() { didSelectItems in
        // Handle didSelectItems value here...
        showSheet = false
    }
})
Here we won’t deal with the value of the didSelectItems parameter of the closure, but see the comment I’ve put in the above snippet; that’s the place to check whether it’s true or false, meaning to determine if the user has selected items or not, and then act accordingly.
The only thing we’re doing here is to toggle the value of the showSheet property and set it to false. Doing so will cause the dismissal of the sheet, and eventually of the photo picker.
You can give the app a first try at this point, however you’ll get the same result no matter if you select a photo or just cancel. The picker will simply get dismissed.
Implementing A Model To Store Picked Items Data
We managed to present the PHPicker view controller without much effort, but it’s practically not useful at all right now. We haven’t done any results handling yet, but even if we proceed to that now, where exactly are we going to store the fetched photos?
We have to come up with a solution to that, and that’s why in this part we’ll focus on the implementation of a basic data model. It will let us keep photos, videos and live photos once we have extracted them from the results in the picker delegate method.
So, to work our way towards that, we’ll open the PhotoPickerModel.swift file to add some new code there.
As before, the first thing we’ll do in this file is to replace the Foundation framework with the next two:
import SwiftUI
import Photos
After that, let’s define the following structure:
struct PhotoPickerModel {

}
Inside the PhotoPickerModel we will define another custom type, an enumeration with cases that will be indicating the type of the media that an instance of this structure is holding:
struct PhotoPickerModel {
    enum MediaType {
        case photo, video, livePhoto
    }
}
One of the tasks that we’ll perform later, will be to present a collection of PhotoPickerModel items in a SwiftUI List view. A List, as well as some other views, need each item in the collection to be uniquely identified by some value if possible. We can avoid do that and ask SwiftUI to create unique values automatically. Indeed, it will do that by calculating the hash value of each item, but it’s always a better option to provide our own.
In fact, that can be done really easily, as long as we make the PhotoPickerModel conform to a specific protocol called Identifiable. That protocol has one requirement only; the custom type that adopts it to have a property called id. It can be of any type we want, but we must ensure that it’s going to have a unique value for each instance of the PhotoPickerModel.
There are various ways to generate unique values, but in order to keep things simple in this tutorial we are going to use UUID strings as id values. According to Apple docs, a UUID is:
A universally unique value that can be used to identify types, interfaces, and other items.
So, with all that in mind, let’s update the PhotoPickerModel as shown next:
struct PhotoPickerModel: Identifiable {
    ...

    var id: String
}
Now we can continue on declaring properties that will be storing the various media items we can get from the photo picker.
Let’s start with normal photos. In that case we are talking about images, so we need to declare a UIImage property:
var photo: UIImage?Things change when it’s about videos. As we will see in details next, a video cannot be fetched as a single object. When dealing with videos, we’ll unavoidably be dealing with files, so what we actually need to store here is the URL to the file containing a picked video:
var url: URL?Apart from the above two media types, PHPicker also allows to import live photos. A live photo can be taken as a single object, just like normal images can, but there is a specific data type to use here; the PHLivePhoto:
var livePhoto: PHLivePhoto?Finally, there’s one last property that has to be declared. That is the type of the media:
var mediaType: MediaType = .photoProviding a default initial value (photo here) helps avoid to declare the above as an optional, and therefore make some future tasks easier.
That’s all we need, so here’s how the PhotoPickerModel has become after having added all the above:
struct PhotoPickerModel: Identifiable {
    enum MediaType {
        case photo, video, livePhoto
    }

    var id: String
    var photo: UIImage?
    var url: URL?
    var livePhoto: PHLivePhoto?
    var mediaType: MediaType = .photo
}
See that the photo, url and livePhoto have been declared as optional properties, meaning that their default value is nil. That makes sense, if you think that when a PhotoPickerModel item stores the data of a specific media type, just one property will get an actual value; there will be no values to assign to the other two properties.
In addition to all the above, we will also implement a few custom initializer methods in order to provide a convenient way to store each media type. Let’s start with the case of photos:
init(with photo: UIImage) {
    id = UUID().uuidString
    self.photo = photo
    mediaType = .photo
}
Three distinct things take place here:
- We create the unique identifier for the current item.
- We keep the photo to the
photoproperty. - We provide the proper MediaType value to the
mediaTypeproperty. In this case, doing that might looks redundant asphotois the default value formediaType, however it makes no harm to be specific.
The implementation of the initializers for the other two media types is going to be done in an exact similar fashion, so let’s see them together:
init(with videoURL: URL) {
    id = UUID().uuidString
    url = videoURL
    mediaType = .video
}

init(with livePhoto: PHLivePhoto) {
    id = UUID().uuidString
    self.livePhoto = livePhoto
    mediaType = .livePhoto
}
In both of them we assign the parameter object to the matching property, and we set the correct media type value. Of course, we create a unique id value as well.
For now the PhotoPickerModel is finished, but we’ll come back to it one more time in order to add a handy method we’ll need later.
The PickedMediaItems Class
Even though we just implemented the PhotoPickerModel structure, we can’t just use it as is. We need one more custom type that will actually be keeping an array of such objects. Besides from just being the place where we’ll be storing media items once they have been extracted from the picker results, it will also be the datasource for the List view we’ll show in the ItemsView.
While still being in the PhotoPickerModel.swift file, go after the closing curly bracket of the PhotoPickerModel structure and add the next class:
class PickedMediaItems: ObservableObject {

}
It conforms to ObservableObject protocol for one reason; to make it possible to inform SwiftUI views about changes happening to the array we are declaring right next simply by annotating it with the @Published property wrapper.
class PickedMediaItems: ObservableObject {
    @Published var items = [PhotoPickerModel]()
}
items array is a collection of PhotoPickerModel objects. When items will be added to that array, or removed from it, the ItemsView will be notified about that right before the change actually takes place. As a result, it will re-render the entire view, and the displayed content will be in harmony with the contents of the items collection.
Of course, marking items with the @Published property wrapper is not enough for what I just described to happen; there’s a counterpart action we have to take in the ItemsView as well, but before we get to that, let’s add the following method to the PickedMediaItems class just for our own convenience:
class PickedMediaItems: ObservableObject {
    ...

    func append(item: PhotoPickerModel) {
        items.append(item)
    }
}
The only thing the above method does, is to append the given argument to the items array. As said, it’s here just to make storing new items faster. Later we’ll make one more addition to the PickedMediaItems class, but for now we are good to go.
Let’s go to the ItemsView.swift file now, and at the beginning of the ItemsView structure, right where the declaration of the showSheet @State property is, add the following:
struct ItemsView: View {
    @ObservedObject var mediaItems = PickedMediaItems()

    ...
}
mediaItems property is an instance of the PickedMediaItems class. By marking it with the @ObservedObject property wrapper, we enable the view to observe for and react to changes that happen to the items array that was annotated as @Published in the PickedMediaItems class. Now, whenever a change occur to that array, view will be re-rendered in order to show the proper content.
Notice that ItemsView structure is the place where we declare and at the same time initialize the mediaItems object. Even though we need it here because it will act as the datasource for a List view that we’ll add next, there’s also another type where it’s necessary as well; the PhotoPicker structure!
Open the PhotoPicker.swift file, and at the beginning of the PhotoPicker structure declare the next property:
struct PhotoPicker: UIViewControllerRepresentable {
    @ObservedObject var mediaItems: PickedMediaItems

    ...
}
Here we declare the exact same property (we could have used a different name if we wanted to) marked with the @ObservedObject property wrapper too, but there’s a difference; we do not initialize it!
Instead, we will pass the mediaItems object we created in the ItemsView right upon the initialization of the PhotoPicker object. To do that, go back to the ItemsView.swift and update it according to the next snippet, inside the sheet’s content closure:
.sheet(isPresented: $showSheet, content: {
    PhotoPicker(mediaItems: mediaItems) { didSelectItem in
        // Handle didSelectItems value here...
        showSheet = false
    }
})
From now on, whenever a media item will be added to the items array of the mediaItems property, ItemsView will be notified about that and it will redraw its contents in order to display the new item. Of course, we have to make a few additions to the ItemsView in order for that to happen, but we’ll get to that soon.
Getting A Photo From Picker Results
In the picker(_:didFinishPicking:) delegate method of the PHPickerViewControllerDelegate we saw that selected items in the picker are represented as a collection of PHPickerResult objects. Each one of them contains a property called itemProvider, which is an instance of the NSItemProvider class. Citing the definition from Apple docs:
NSItemProvider: An item provider for conveying data or a file between processes during drag and drop or copy/paste activities, or from a host app to an app extension.
In the introduction of this post I said that PHPicker runs on a different process out of the app. When a user selects an item to import, that item is transferred from that process to our own app wrapped into an item provider object.
Having that in mind, let’s go to the PhotoPicker.swift file and in the Coordinator class, where we are going to implement the following method:
private func getPhoto(from itemProvider: NSItemProvider) {

}
This one will be extracting the photo from the given item provider, and on success, it will be storing it to a new PhotoPickerModel object, which in turn will be appended to the items array of the PhotoPicker’s mediaItems property. Notice that we declare it as private; it’s meaningful for the Coordinator class only, and there is no reason to make it visible out of it.
Since we want to get a photo, the first step in the method is to check if we can actually load an image object from the item provider. This is done as follows:
if itemProvider.canLoadObject(ofClass: UIImage.self) {

}
The above method returns true or false, depending on whether the item provider can load an image object. Notice the UIImage.self argument; with that we tell to the method that we are interested in the UIImage type.
Supposing that the above returns true, our next move is to load the image from the item provider. This is possible in a similar way as above, but using a different method this time:
itemProvider.loadObject(ofClass: UIImage.self) { object, error in

}
This method works asynchronously, and on completion it will bring back either the loaded object (a UIImage object in this case), or an error if occurred, as parameter values in the completion handler.
Before doing anything else, we have to check if the error is nil or not. In this tutorial we won’t do any specific error handling, we’ll simply print the error description. But in a real app, you’d probably want to perform a more appropriate action in such case.
if let error = error {
    print(error.localizedDescription)
}
If there’s not an error, then most probably the object contains the image we are looking for. But in order to get it, we have to cast to the UIImage type; object is a NSItemProviderReading value:
if let image = object as? UIImage {

}
If casting and unwrapping at the same time the optional object to the image constant succeeds, then we can eventually store the loaded image to a new PhotoPickerModel instance. This is what we’ll append to the items array of the PhotoPicker’s mediaItem property afterwards. Note that this is a task that has to take place on the main thread of the app! We are just about to trigger changes to a @Published property (the items array), and that should always happen to the main thread.
DispatchQueue.main.async {
    self.photoPicker.mediaItems.append(item: PhotoPickerModel(with: image))
}
The new PhotoPickerModel is created with the PhotoPickerModel(with: image) part using the first custom initializer we implemented, and it’s given as an argument to the append(item:) method. This one appends it to the items array of the mediaItems property.
Our method is ready, so let’s see how it looks complete:
private func getPhoto(from itemProvider: NSItemProvider) {
    if itemProvider.canLoadObject(ofClass: UIImage.self) {
        itemProvider.loadObject(ofClass: UIImage.self) { object, error in
            if let error = error {
                print(error.localizedDescription)
            }

            if let image = object as? UIImage {
                DispatchQueue.main.async {
                    self.photoPicker.mediaItems.append(item: PhotoPickerModel(with: image))
                }
            }
        }
    }
}
However, we are not done yet; we still don’t make any use of the above method. The place to call it is the picker(_:didFinishPicking:) delegate method in the Coordinator class. Before adding a few bits of new code there, remember that we configured our picker so it’s possible to select one photo only. That means that in the picker(_:didFinishPicking:) we’ll take the item provider of the first result, and then we’ll call the getPhoto(from:) providing the item provider as argument.
Here’s how the picker(_:didFinishPicking:) must be updated with what I just said:
func picker(_ picker: PHPickerViewController, didFinishPicking results: [PHPickerResult]) {
    ...

    let itemProvider = results[0].itemProvider
    self.getPhoto(from: itemProvider)
}
Displaying Photos
With the PhotoPicker type capable of fetching selected photos, let’s head to the ItemsView.swift file. Here we’ll do the necessary preparations, so photos to be displayed after they have been selected in the picker.
I mentioned a few times up until now that we are going to use a List view in order to show multiple selected media items. That List does not exist yet, and that’s what we’ll do as a first step here; to create it.
Right now in the ItemsView body you will find an empty view (EmptyView), which acts as a placeholder until we have something to show. That time has come, so replace the following line:
EmptyView()with the following List initialization:
List(mediaItems.items, id: \.id) { item in

}
The first argument in the List is a collection of items that will be used as the datasource by the views that we’ll add to the List. The second argument is the keypath to the id value of each item in the collection (\.id). That is the id property declared in the PhotoPickerModel structure. The third argument is the closure where we’ll add all necessary views in order to display photos, videos, and live photos. The List works by making iterations, and the item value in the closure represents the currently accessed item object in the items collection.
Since we want to display photos, we are going to use an Image view for that purpose. We’ll put that inside the List’s closure:
List(mediaItems.items, id: \.id) { item in
    Image(uiImage: item.photo ?? UIImage())
}
Two things to notice here; first, we are initializing an Image view passing a UIImage as an argument. That’s how we keep photos stored in the PhotoPickerModel. Second, in case the photo property of the item is nil, then we just provide an empty UIImage object.
Even though the above will show the photo that’s saved in the item, it won’t do that properly; if you would run the app now, you would have seen that the photo does not fit the Image view size. To change that, we’ll set a specific aspect ratio value with the aspectRatio(contentMode:) view modifier. However, in order for that to have a real effect, it’s necessary to use prior to it the resizable() modifier, so the Image view can resize its contents:
List(mediaItems.items, id: \.id) { item in
    Image(uiImage: item.photo ?? UIImage())
        .resizable()
        .aspectRatio(contentMode: .fit)
}
The snippet above is the only modification we had to do in ItemsView. All the rest will happen automatically, as the view will redraw its contents once a photo has been stored to the items collection of the PickedMediaItems instance.
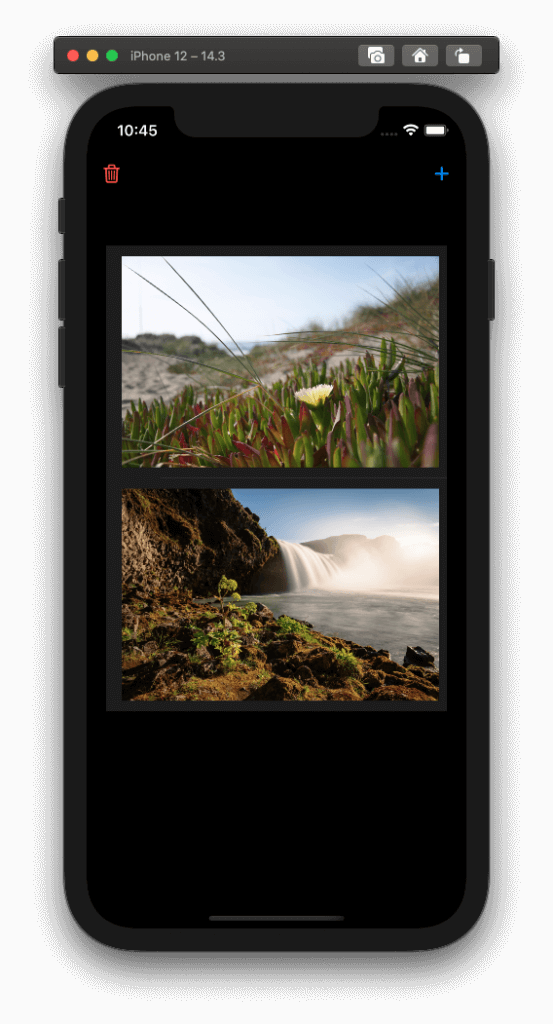
Run the app again now, and tap on the plus button to select and import a photo. You can do that multiple times; all of them will be displayed in the List view we just defined.
Picking Multiple Photos
Now that we have managed to pick and present a single photo, let’s continue to changing that and let’s allow multiple photo picking. The place to start working for that is the PhotoPicker type, so open the PhotoPicker.swift file to edit it.
In the makeUIViewController(context:) method there is a line where we set the maximum selection limit:
config.selectionLimit = 1To allow picking unlimited items, set the selectionLimit to zero:
config.selectionLimit = 0You can also set a specific number if you want to have a limit higher than 1 but not unlimited.
Next stop is the picker(_:didFinishPicking:) delegate method inside the same file. Currently we are accessing the item provider of the first result only, and then we provide it to the getPhoto(from:) method.
Having changed the number of items items that can be selected, that implementation will not give us back all selected photos. To change that, first spot the following two lines:
let itemProvider = results[0].itemProvider
self.getPhoto(from: itemProvider)
Once you find them, move them inside a loop as shown here:
for result in results {
    let itemProvider = results[0].itemProvider
    self.getPhoto(from: itemProvider)
}
That for loop will go through all returned results, and process all photos. There is one last change to do; replace the first line in the loop that contains the results[0] with this:
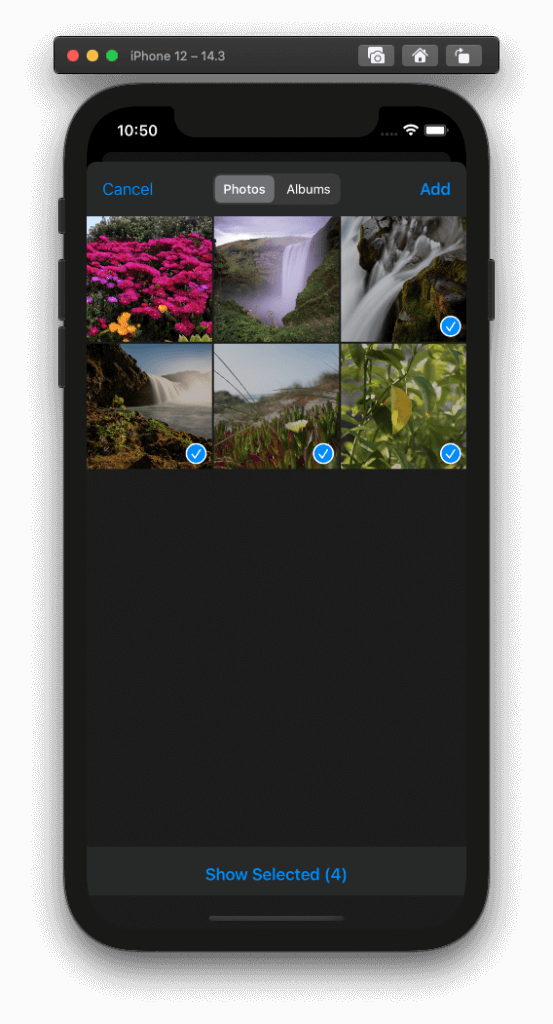
let itemProvider = result.itemProviderBy running the app now you will find out that it’s possible to select and import multiple photos at once.
Importing Videos
The solution we implemented in the getPhoto(from:) method inside the Coordinator class of the PhotoPicker type works for photos, and with slight modifications is going to work for live photos too. But when it comes to videos, the approach we must follow is totally different.
Unlike photos, there is not a single object we can load from the item provider; and that makes sense if you think about it. It’s not possible to load hundreds of megabytes of data to memory just for a single video. Videos have to be loaded from files.
And that’s exactly what we’ll do; we are going to deal with files.
Thankfully, NSItemProvider class has more APIs available to use, and one of them allows to get the data of a selected item as a file. However, there is something important to know here; the item provider creates a temporary file for every video we want to get to the “tmp” folder of the app, and then deletes it automatically after a while. It’s our duty to copy that file to a location where it can live for a longer time, such as the documents or the caches directory of the app.
So, here we are going to implement another method in the Coordinator class, which will be responsible for getting a video from an item provider, and copying it to the documents directory of our application. Let’s define it:
private func getVideo(from itemProvider: NSItemProvider, typeIdentifier: String) {

}
The first argument is the item provider object which will provide us with the video file. The second argument is something that we meet for first time in this tutorial, but meant to play an important role here. It’s the uniform type identifier (UTI) of the file we want to fetch.
Note: In a nutshell, a UTI is a string value with a special syntax that allows to uniquely identify the kind of data in files, data types, etc, and it was defined by Apple. I would recommend to read here and here for more information from the official documentation.
To get an idea, the string “public.png” is the type identifier for PNG images. A type identifier can inherit from other types as well; for example, “public.png” inherits from “public.image”. Keep that information in mind, we’ll need it soon.
How we’ll get the type identifier that we need to provide in this new method is something that we will bother with later. Now, let’s start adding some code to it.
The first and quite important move is to actually request from the item provider to give us the file representation of the selected video. This is done as shown right below, and see that we provide the type identifier as an argument:
itemProvider.loadFileRepresentation(forTypeIdentifier: typeIdentifier) { url, error in

}
The method is executed asynchronously, and in its completion handler we are going to deal with the video file. The url parameter is pointing to the temporary file that the item provider created for us. Of course, chances for something to go wrong always exist, so the error object is there to let us know what error occurred, if any.
Just like we did in the getPhoto(from:) method, we’ll continue by examining whether error is nil or not. If it’s not, we’ll simply print the error message, but do something more useful than that in your apps:
if let error = error {
    print(error.localizedDescription)
}
In case where error is nil and we can proceed, then the first we’ll do is to unwrap the url object; it’s an optional value, and we must be sure that it’s not nil:
guard let url = url else { return }If for some reason it’s nil, and at the same time the error is nil, then there’s nothing else we can do. We simply return from the method.
Supposing that url is unwrapped properly, then our next task is to copy the video file from the temporary URL to the documents directory of the app. Note that this the directory of my choice for the purposes of the tutorial, you can use caches directory instead.
Before we perform the actual copy operation, it’s necessary to construct the target URL. This will be composed by two parts:
- The URL to the documents directory.
- The last path component of the source directory, meaning the file name and any potential extension it might have.
Let’s get the URL to the documents directory first:
let documentsDirectory = FileManager.default.urls(for: .documentDirectory, in: .userDomainMask).firstGetting the last path component from the source URL is as easy as that (don’t copy the following, it’s just a demo):
url.lastPathComponentTo add it to the documents directory URL, we’ll use the appendingPathComponent() method of the URL class, and eventually we’ll build the target URL:
guard let targetURL = documentsDirectory?.appendingPathComponent(url.lastPathComponent) else { return }If the target URL has been constructed properly, and once we make sure that it’s not nil by unwrapping it, then we can do the actual copy. First though, we’ll check if a file with the similar path already exists or not to the target URL, and if so we’ll delete it and then we’ll copy.
Deleting and copying files are operations that can throw exceptions, and the proper way to treat them is by including them in a do-catch statement:
do {

} catch {
    print(error.localizedDescription)
}
Once again, if something bad happens, we just print the error description.
Inside the do clause now, let’s do the real work. We’ll use the FileManager class to perform all file-related tasks. We’ll start by checking if a similarly named file exists, and we’ll delete it, if it does:
if FileManager.default.fileExists(atPath: targetURL.path) {
    try FileManager.default.removeItem(at: targetURL)
}
fileExists(atPath:) and removeItem(at:) are the FileManager methods that do the job. Notice that FileManager is a Singleton class, and we access everything through the default shared object. Also, two more noteworthy things:
removeItem(at:)method can throw an exception, so it’s marked with thetrykeyword.- The parameter of the
fileExists(atPath:)should be a string value, but the parameter of theremoveItem(at:)should be a URL object. That’s why in the first case we access thepathproperty of the target URL; it returns it as a string value.
Next, we can perform the actual copy:
try FileManager.default.copyItem(at: url, to: targetURL)We mark this method with the try keyword too, as if the file copy fails it will throw an exception. The first argument we provide it with is the source URL, and the second is the destination URL.
If things go well and we get no exception up to this point, then we can go ahead and create a new PhotoPickerModel object in order to store the target URL; the place where we are going to find the selected video in order to display it in the app. Rememeber that we do that on the main thread of the app:
DispatchQueue.main.async {
    self.photoPicker.mediaItems.append(item: PhotoPickerModel(with: targetURL))
}
The method is now complete:
private func getVideo(from itemProvider: NSItemProvider, typeIdentifier: String) {
    itemProvider.loadFileRepresentation(forTypeIdentifier: typeIdentifier) { url, error in
        if let error = error {
            print(error.localizedDescription)
        }

        guard let url = url else { return }

        let documentsDirectory = FileManager.default.urls(for: .documentDirectory, in: .userDomainMask).first
        guard let targetURL = documentsDirectory?.appendingPathComponent(url.lastPathComponent) else { return }

        do {
            if FileManager.default.fileExists(atPath: targetURL.path) {
                try FileManager.default.removeItem(at: targetURL)
            }

            try FileManager.default.copyItem(at: url, to: targetURL)

            DispatchQueue.main.async {
                self.photoPicker.mediaItems.append(item: PhotoPickerModel(with: targetURL))
            }
        } catch {
            print(error.localizedDescription)
        }
    }
}
Updating The Picker Delegate Method
As we did with the getPhoto(from:) method, we are going to call getVideo(from:typeIdentifier:) in the picker’s delegate method too. But in order to do that, we must come up with a solution about two things:
- How to get the type identifier necessary for the method we just implemented.
- How to distinguish the media type so we know which method to call; the one for getting the photo, or the one for getting the video.
In fact, taking care of the first will help answer the second bullet above as well! We will be based on the type identifier of the data that each item provider carries over; depending on the parent type that conforms to, we’ll decide whether it’s a photo or a video. Photo-related types conform to “public.image” type, and video-related types conform to “public.movie” type.
But first things first. To get the type identifier of the data that an item provider contains, we have to access a property called registeredTypeIdentifiers. Its value is an array of strings representing all types that data relates to. The first object of that array is what we actually need:
let typeIdentifier = itemProvider.registeredTypeIdentifiers.firstTo manage to determine what parent type the identifier conforms to, it’s necessary to create an object of the UTType type, also new in iOS 14:
let utType = UTType(typeIdentifier)Let’s combine the above two in one single guard statement, as both of them can give us a nil value:
guard let typeIdentifier = itemProvider.registeredTypeIdentifiers.first,
      let utType = UTType(typeIdentifier)
else { continue }
The above must go inside the for loop in the picker(_:didFinishPicking:) method:
for result in results {
    let itemProvider = result.itemProvider

    guard let typeIdentifier = itemProvider.registeredTypeIdentifiers.first,
          let utType = UTType(typeIdentifier)
    else { continue }

}
Note that the call to the getPhoto(from:) method does not exist now in the above snippet. That’s because we have to determine first if data on each item provider is an image or a video.
To achieve that, we will use a method of the UTType type, called conforms(to:), in an if statement (still inside the for loop) as shown next:
if utType.conforms(to: .image) {

} else if utType.conforms(to: .movie) {

}
The argument provided to the conforms(to:) is a UTType value indicating the parent type that we want to know if our type inherits from.
Now, depending on whether we are talking about an image or a video, we can call the appropriate custom method:
if utType.conforms(to: .image) {
    self.getPhoto(from: itemProvider)
} else if utType.conforms(to: .movie) {
    self.getVideo(from: itemProvider, typeIdentifier: typeIdentifier)
}
Before we switch to the ItemsView in order to make it possible to playback videos, let’s go to the makeUIViewController(context:) method of the PhotoPicker structure in order to allow picking videos as well. Find the next line:
config.filter = .imagesNow, replace it with this:
config.filter = .any(of: [.images, .videos])The any(of:) method is a PHPickerFilter API that let us provide an array of PHPickerFilter values matching to media items we want to make available in the picker; exactly what is shown above.
Playing Back Videos
At the moment, the ItemsView is capable of presenting only photos. But now that we are able to import videos as well, that’s something we are going to change. To determine what kind of media should be displayed, we are going to be based on the mediaType property of each PhotoPickerModel item in the List view.
To get started with the view updates, first open the ItemsView.swift file. Then, inside the List view add the following (you can remove for a while the Image view with its modifiers):
List(mediaItems.items, id: \.id) { item in
    if item.mediaType == .photo {

    } else if item.mediaType == .video {

    }
}
The conditional display of views is the first reason for the existence of the mediaType property. There is one more, but we’ll talk about that in a while.
Now, in the first case where the media type indicates a photo, we can put back the Image view and its modifiers:
List(mediaItems.items, id: \.id) { item in
    if item.mediaType == .photo {
        Image(uiImage: item.photo ?? UIImage())
            .resizable()
            .aspectRatio(contentMode: .fit)
    } else if item.mediaType == .video {

    }
}
In the else if clause where the media type regards a video, we are going to add a view that is capable of playing back videos. As you will see right next, video playback is an extremely simple task in iOS 14.
But first, we need to import another framework to the view; go to the beginning of the file, and right after the SwiftUI import statement add the following:
import AVKitThe AVKit framework will allow us to access the VideoPlayer structure; a SwiftUI view that allows to playback videos.
The argument we have to provide with a VideoPlayer view upon initialization is an AVPlayer instance:
An object that provides the interface to control the player’s transport behavior.
An AVPlayer object in turn is initialized with a URL pointing to the location of a video file; exactly what we keep stored in our model for videos!
So, after all that, let’s see how everything is done in code. At first we’ll make sure that the URL to a video file is not nil; in case it is, we’ll add an EmptyView:
if let url = item.url {

} else { EmptyView() }
In the if let clause, we’ll create a new VideoPlayer view, passing an AVPlayer object as argument:
VideoPlayer(player: AVPlayer(url: url))Lastly, to avoid strange effects when media will be displayed in the List, let’s set a minimum height to the video player:
VideoPlayer(player: AVPlayer(url: url))
    .frame(minHeight: 200)
Here’s the List view now:
List(mediaItems.items, id: \.id) { item in
if item.mediaType == .photo {
Image(uiImage: item.photo ?? UIImage())
.resizable()
.aspectRatio(contentMode: .fit)
} else if item.mediaType == .video {
if let url = item.url {
VideoPlayer(player: AVPlayer(url: url))
.frame(minHeight: 200)
} else { EmptyView() }
}
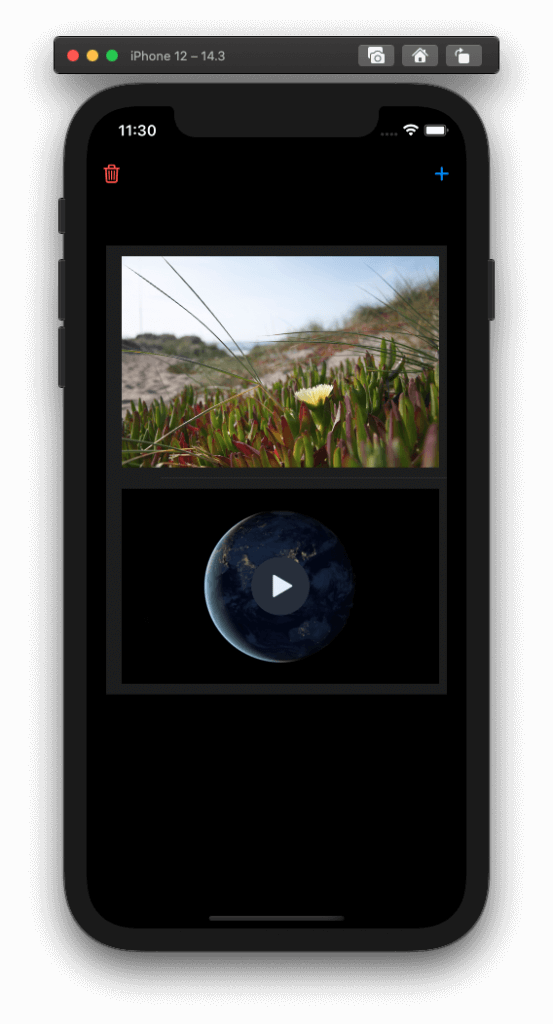
}Now we can go ahead and pick both photos and videos. When you add a video, you’ll see that you can start and stop its playback using default controls provided by iOS.
Importing Live Photos
Having dealt with photos and videos, it’s about time to discuss about how to import live photos to the app using the PHPicker view controller. As you will see in this part, there are many similarities to handling photos, and that will allow us to use code we have already implemented.
To get started, open the PhotoPicker.swift file and go to the getPhoto(from:) method in the Coordinator class. Unlike videos but like photos, live photos can be loaded as objects from an item providers. Therefore, the loadObject(ofClass:) method can be used in this case too, with the only difference being the type of object we want to load.
In fact, everything we’ve done in getPhoto(from:) method will be kept almost as is. What needs to be added as a first step, is a way to determine whether the object that is about to be loaded should be a normal photo or a live photo. And to do that, we’ll start with the method’s signature. We will add a new parameter value, a Boolean value, which will be indicating whether the item provider contains a live photo or not. Update the method as follows:
private func getPhoto(from itemProvider: NSItemProvider, isLivePhoto: Bool) {
    ...
}
When isLivePhoto is false, then the UIImage type is what we will provide to both canLoadObject(ofClass:) and loadObject(ofClass:) methods. But when it’s true, then we have to specify a different type. For live photos, that type is PHLivePhoto.
Based on that thinking, let’s add the following statement as the first line in the getPhoto(from:isLivePhoto:) method. It declares a constant called objectType as a NSItemProviderReading type; the data type that both item provider methods expect. In case of a normal photo, it gets the type of the UIImage (UIImage.self), and in case of a live photo, it gets the type of the PHLivePhoto (PHLivePhoto.self):
private func getPhoto(from itemProvider: NSItemProvider, isLivePhoto: Bool) {
    let objectType: NSItemProviderReading.Type = !isLivePhoto ? UIImage.self : PHLivePhoto.self

    ...
}
Now we can update the arguments we provide to both canLoadObject(ofClass:) and loadObject(ofClass:) methods:
if itemProvider.canLoadObject(ofClass: objectType) {
    itemProvider.loadObject(ofClass: objectType) { object, error in
        ...
    }
}
A few lines below, we have the code that converts the loaded object to a UIImage and then stores it to a new PhotoPickerModel object. We have to move that part of code inside an if-else condition which will be checking the value of the isLivePhoto parameter value:
if !isLivePhoto {
    if let image = object as? UIImage {
        DispatchQueue.main.async {
            self.photoPicker.mediaItems.append(item: PhotoPickerModel(with: image))
        }
    }
} else {

}
In the else clause we’ll do exactly what we do in the case of the image object; except that this time we’ll cast to a PHLivePhoto object:
if let livePhoto = object as? PHLivePhoto {
    DispatchQueue.main.async {
        self.photoPicker.mediaItems.append(item: PhotoPickerModel(with: livePhoto))
    }
}
These are the necessary changes to this method, and here’s how it finally looks:
private func getPhoto(from itemProvider: NSItemProvider, isLivePhoto: Bool) {
    let objectType: NSItemProviderReading.Type = !isLivePhoto ? UIImage.self : PHLivePhoto.self

    if itemProvider.canLoadObject(ofClass: objectType) {
        itemProvider.loadObject(ofClass: objectType) { object, error in
            if let error = error {
                print(error.localizedDescription)
            }

            if !isLivePhoto {
                if let image = object as? UIImage {
                    DispatchQueue.main.async {
                        self.photoPicker.mediaItems.append(item: PhotoPickerModel(with: image))
                    }
                }
            } else {
                if let livePhoto = object as? PHLivePhoto {
                    DispatchQueue.main.async {
                        self.photoPicker.mediaItems.append(item: PhotoPickerModel(with: livePhoto))
                    }
                }
            }

        }
    }
}
Now, let’s update the picker(_:didFinishPicking:) delegate method for one last time. From a previous part, we have a condition there that checks the parent type of the type identifier taken from the item provider:
if utType.conforms(to: .image) {
    self.getPhoto(from: itemProvider)
} else if utType.conforms(to: .movie) {
    self.getVideo(from: itemProvider, typeIdentifier: typeIdentifier)
}
We are going to append an else case to the condition, which will match to live photos. In it we’ll call the getPhoto(from:isLivePhoto:) method, passing true as the second argument:
if utType.conforms(to: .image) {
    ...
} else if utType.conforms(to: .movie) {
    ...
} else {
    self.getPhoto(from: itemProvider, isLivePhoto: true)
}
Then, we are going to fix the call to getPhoto(from:) method in the if clause. That method now expects for one more parameter value, which in that case will be false, indicating a normal photo:
if utType.conforms(to: .image) {
    self.getPhoto(from: itemProvider, isLivePhoto: false)
} else if utType.conforms(to: .movie) {
    self.getVideo(from: itemProvider, typeIdentifier: typeIdentifier)
} else {
    self.getPhoto(from: itemProvider, isLivePhoto: true)
}
Changes have finished in that method too. Lastly, let’s pay one more visit to the makeUIViewController(context:) method of the PhotoPicker structure, and allow to select live photos in the picker along with the other media types. Replace the following line:
config.filter = .any(of: [.images, .videos])with this one:
config.filter = .any(of: [.images, .videos, .livePhotos])And with that, our work in the PhotoPicker.swift file is now finished.
Previewing Live Photos
A live photo is a special category of media, and in order to preview such a photo properly, PhotosUI framework provides a specific view for that; it’s called PHLivePhotoView. That’s the good news, because there’s bad news as well when working in SwiftUI. PHLivePhotoView is a UIView, meaning a UIKit view, and it cannot be used natively in SwiftUI.
To workaround this issue, it’s necessary to create a new custom type, a structure, that will be conforming to the UIViewRepresentable protocol. In analogy to UIViewControllerRepresentable and view controllers, UIViewRepresentable allows to bring UIKit views to SwiftUI.
The steps required to be followed in order to implement a UIViewRepresentable type are quite similar to those we already met in the PhotoPicker structure. We’ll go through them by implementing a new type which we’ll call LivePhotoView.
We’ll do that in a separate file, the one that remains in the starter project and we haven’t added code to yet; The LivePhotoView.swift, so open to edit it.
Start by replacing the Foundation framework with the usual two we added in other files too:
import SwiftUI
import PhotosUI
Now, let’s define our new type, the LivePhotoView, which will be conforming to the UIViewRepresentable protocol:
struct LivePhotoView: UIViewRepresentable {

}
UIViewRepresentable has three requirements, similar to the UIViewControllerRepresentable:
- To specify the type of view that we are importing to SwiftUI.
- To implement a method where we’ll initialize, configure and return the view.
- To implement one more method for updating the view.
Let’s add all those at once and specify the PHLivePhotoView as the one that our custom type will be handling:
struct LivePhotoView: UIViewRepresentable {
    typealias UIViewType = PHLivePhotoView

    func makeUIView(context: Context) -> PHLivePhotoView {

    }

    func updateUIView(_ uiView: PHLivePhotoView, context: Context) {

    }
}
The updateUIView(_:context:) method is required to exist, but adding code to it is optional. We are going to leave it empty, as there’s nothing to update.
Before initializing a brand new PHLivePhotoView, let’s declare the following property to LivePhotoView structure:
struct LivePhotoView: UIViewRepresentable {
    var livePhoto: PHLivePhoto

    ...
}
This is going to be the actual live photo that we will be previewing.
Initializing a PHLivePhotoView instance hides no surprises; at first we create the instance, then we assign the live photo object, and finally we return it from the makeUIView(context:) method:
func makeUIView(context: Context) -> PHLivePhotoView {
    let livePhotoView = PHLivePhotoView()
    livePhotoView.livePhoto = livePhoto
    return livePhotoView
}
It’s possible in a PHLivePhotoView to playback a part of the live photo’s video, as a hint that this is a live and not a normal photo. If you want to see that happening, add the following line right before returning from the method above:
livePhotoView.startPlayback(with: .hint)There is also a delegate protocol called PHLivePhotoViewDelegate, and provides two delegate methods:
livePhotoView(_:willBeginPlaybackWith:)

livePhotoView(_:didEndPlaybackWith:)
You can use them to be notified when the playback of a live photo is about to start, or it’s finished respectively. We don’t need them, so we won’t implement them here. But be advised; in order to do that, you have to add a Coordinator class in LivePhotoView, exactly as we did in the PhotoPicker structure. Also, the coordinator will have to inherit from the NSObject class and adopt the PHLivePhotoViewDelegate protocol.
With the LivePhotoView type implemented at this point, let’s head to the ItemsView.swift file to make use of it. Inside the List view we have a conditional presentation of views; we display an Image view for normal photos, and a VideoPlayer view for videos.
Now we are going to add an else clause to that condition, where we’ll create a LivePhotoView instance. There, we’ll pass the fetched live photo as argument, but after we’ve made sure that it’s not nil. If it is, once again we’ll have an EmptyView:
List(mediaItems.items, id: \.id) { item in
    if item.mediaType == .photo {
        ...
    } else if item.mediaType == .video {
        ...
    } else {
        if let livePhoto = item.livePhoto {
            LivePhotoView(livePhoto: livePhoto)
                .frame(minHeight: 200)
        } else { EmptyView() }
    }
}
See that once again we set a minimum height for the live photo view, like we did for the VideoPlayer view.
To test importing live photos, you will have to run the app in a real device and pick one or more of those from the library. If you have enabled the hint playback with the method I demonstrated previously, then you’ll see the live photo playing back automatically. Regardless, just long press on any imported live photo and you’ll preview it just like you do in Photos app!
Deleting Media Items
Before we reach to the end of our work in this post, it would be a good idea to make it possible to delete media items that have been imported to the app. By doing that, we’ll enable the trash button that already exists in the starter project and it’s not usable up until now. Also, this will make the demo app more complete.
We’ll manage to delete items by performing three distinct steps. The first one is going to take place in the PhotoPickerModel.swift file, in the PhotoPickerModel structure. It’s necessary to add a new method which:
- Will be setting nil to
photoandlivePhotoproperties. - Will be deleting the video file using the stored URL, and then making the URL nil as well.
All that will happen conditionally in a switch statement:
mutating func delete() {
    switch mediaType {
        case .photo: photo = nil
        case .livePhoto: livePhoto = nil
        case .video:
            guard let url = url else { return }
            try? FileManager.default.removeItem(at: url)
            self.url = nil
    }
}
Notice that we mark the delete() method as mutating because it’s causing changes to the properties of the structure. Also, to speed up the work, we use the try? keyword with the removeItem(at:) method without a do-catch statement.
Our next stop is the PickedMediaItems class; we’ll add a method which will be calling the one that we just implemented for each item existing in the items array, and then will be emptying it:
func deleteAll() {
    for (index, _) in items.enumerated() {
        items[index].delete()
    }

    items.removeAll()
}
Finally, the last step is to go to ItemsView.swift file, and update the action of the trash button in the navigationBarItems modifier:
.navigationBarItems(leading: Button(action: {
    mediaItems.deleteAll()
}, ...
If you run the app now, all items you have imported to the app will be deleted by tapping on the trash button.
Bonus Part – Visually Distinguish Media Items
This part is not a mandatory step in order to work with PHPicker and handle media items. The essential part of the work has already finished, but this is an additional step that will make the demo application a bit better, and might give you ideas for your own apps. So, reading it is optional.
The way the demo app is right now, makes it difficult to say what the type of each imported media item is simply by looking at it. There is a difference in videos, as there is the play button on top them, but what about normal and live photos? Unless we tap on them, we don’t know their type.
To make it easy to distinguish each media item, we are going to add a small image on top of each displayed media item. Each media type will have a different image, but what makes it interesting is that we are not going to import any custom images to the project. We will use SF Symbols for that.
Note: In case you haven’t done that yet, I really recommend to download the SF Symbols app from Apple.
To display an SF Symbol to an Image view as an image, the Image(systemName:) initializer must be used. The argument we need to pass to it, it’s the name of the SF Symbol we want to use as a string value.
Since we have three different media types, we are going to create a small assistive method in the ItemsView structure which will be performing a simple task; it will return the name of the SF Symbol that should be used, depending on the mediaItem value of each item in the List view.
In the ItemsView.swift file, go right after the ItemsView’s body, and add the following method:
fileprivate func getMediaImageName(using item: PhotoPickerModel) -> String {
    switch item.mediaType {
        case .photo: return "photo"
        case .video: return "video"
        case .livePhoto: return "livephoto"
    }
}
We are using a switch statement in order to return the proper SF Symbol name for each mediaItem possible value. The returned string values are not random; they have been taken from the SF Symbols app. Also, the above method is the second reason why mediaType property was necessary in the PhotoPickerModel type.
Now, in order to display an Image with an SF Symbol on top of each view that displays a media item, it’s necessary to use a ZStack; such a stack piles up contained views on top of each other.
Inside the List view, add the following as the first thing in the closure:
List(mediaItems.items, id: \.id) { item in
    ZStack(alignment: .topLeading) {

    }
}
The argument we provide to the alignment parameter of the ZStack is the desired position of the top-most view. That view will be the Image view with the SF Symbol, and it will be placed on the top-leading edge of the view that exists underneath.
Note: Top-leading edge is the top-left side for LTR localizations, and top-right side for RTL localizations.
Next, inside the ZStack’s closure we will add the conditional presentation of the views as is:
ZStack(alignment: .topLeading) {
    if item.mediaType == .photo {
        Image(uiImage: item.photo ?? UIImage())
            .resizable()
            .aspectRatio(contentMode: .fit)
    } else if item.mediaType == .video {
        if let url = item.url {
            VideoPlayer(player: AVPlayer(url: url))
                .frame(minHeight: 200)
        } else { EmptyView() }
    } else {
        if let livePhoto = item.livePhoto {
            LivePhotoView(livePhoto: livePhoto)
                .frame(minHeight: 200)
        } else { EmptyView() }
    }

    // Image view will go here...
}
Even though we have several lines of code in the condition above, the final result will be the display of one view only. Right below that bunch of lines, exactly where I’ve put the // Image view will go here... comment, we’ll add the Image view:
Image(systemName: getMediaImageName(using: item))This is where the getMediaImageName(using:) method we implemented above is meant to be used. Even though that line will show the SF Symbol as an image, it would be nice to configure it a bit with view modifiers and make it look nice.
At first we’ll make sure that the SF Symbol image will fit to the Image view size, so we’ll add the next two modifiers:
.resizable()
.aspectRatio(contentMode: .fit)
Then, we’ll set a specific size for the Image view; the resizable() modifier we added above will help on that:
.frame(width: 24, height: 24)Also, we’ll apply some padding around the image inside the Image view, and we’ll set a semi-transparent background color; with that we ensure that the image will be visible on any background underneath the Image view:
.padding(4)
.background(Color.black.opacity(0.5))
Finally, we’ll set a foreground color to the displayed image in order to make sure that it will be looking properly in both light and dark color scheme:
.foregroundColor(.white)Eventually, this is how the List view looks after all the above:
List(mediaItems.items, id: \.id) { item in
ZStack(alignment: .topLeading) {
if item.mediaType == .photo {
Image(uiImage: item.photo ?? UIImage())
.resizable()
.aspectRatio(contentMode: .fit)
} else if item.mediaType == .video {
if let url = item.url {
VideoPlayer(player: AVPlayer(url: url))
.frame(minHeight: 200)
} else { EmptyView() }
} else {
if let livePhoto = item.livePhoto {
LivePhotoView(livePhoto: livePhoto)
.frame(minHeight: 200)
} else { EmptyView() }
}
Image(systemName: getMediaImageName(using: item))
.resizable()
.aspectRatio(contentMode: .fit)
.frame(width: 24, height: 24)
.padding(4)
.background(Color.black.opacity(0.5))
.foregroundColor(.white)
}
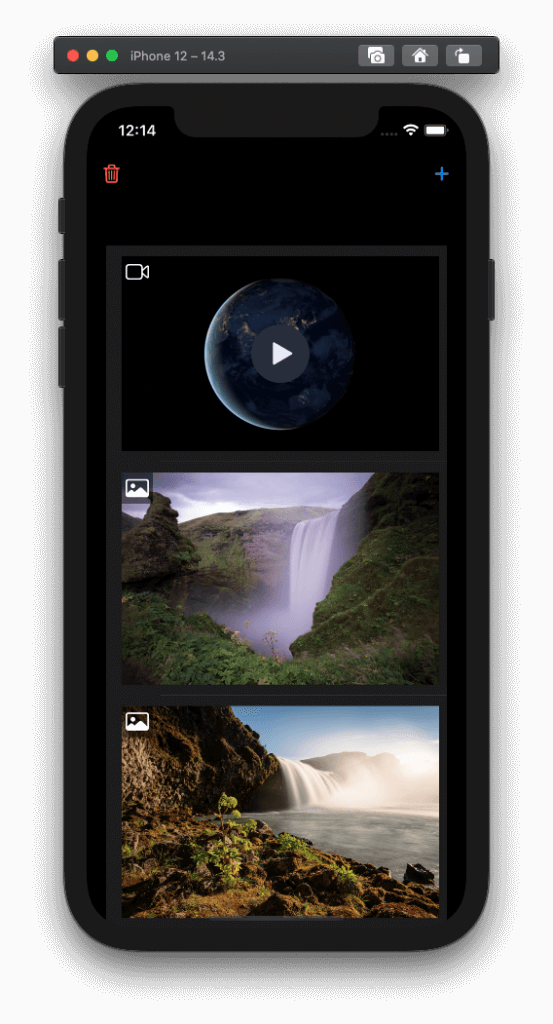
}If you run the app now you’ll see the SF Symbols presented above each media item, indicating their type. If you run on a device, you’ll see how live photos look too.
Summary
In an undeniably long post, we met the brand new PHPicker API in iOS 14, and how to use it in order to import photos, videos and live photos to your apps. You can now take what you learnt and did here, and use it straight in your projects. Or, feel free to modify whatever you find necessary and make it fit your needs.
Before closing, I’d like to give you a word of caution. Imported normal and live photos are loaded to memory at full size, and you can easily run out of memory if you import many of them. That will lead to unexpected terminations of your app, which is a really bad thing to happen on users’ hands. You have two options to counterattack that; either to resize imported images before displaying them (as an intermediate step after fetching them), or, even better, to use the method we followed for videos; to copy files instead of loading objects. That might not be that easy for live photos, as they require a lot of additional work in order to break and put back together the image and the video, but keep it in mind anyway.
For a small number of imported photos, you’ll have no problem at all. With that said, I hope you enjoyed this tutorial, and that you learnt something new here! Take care!
You can download the complete project on GitHub.


