Apple announced WatchOS 2 at WWDC this year. WatchOS 2 features a lot of new frameworks that are now accessible for developers. These include programmatic access to the digital crown, new ways to play video and audio, use of the built-in microphone and the Taptic engine. On top of that, we will also be able to develop apps for the Apple Watch itself! This means we will no longer need an iPhone to run the code. The developer preview is already available and the public release will be available this fall.
We will look into the new features of WatchOS 2 in future tutorials. But today, let’s start with something basic.
In this tutorial, you’ll learn how to make a selectable table app for Apple Watch. We’re going to make a simple table of 5 countries. Each item can be selected to reveal more information about the country such as its capital.
Creating the Project and Adding the Target
Let’s start by creating an new Xcode project. Open Xcode and select “Create a new Xcode project”. Xcode will show you a list of templates for our new project. We’ll opt for “Single View Application.”
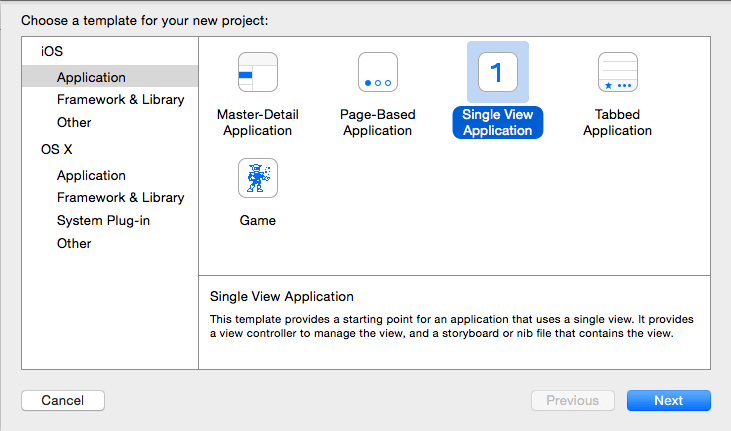
When Xcode prompts you for a project name. Key in ‘Countries’. Make sure you choose ‘Swift’ for the language. Next, choose a folder on your Mac to save it and click ‘Create’.
As you know, an Apple Watch app can’t exist on its own in the current version of WatchKit. You need an iPhone app to which you can add an Apple Watch Target. This is because Watch apps have to be developed to extend the functionality of an iPhone app, and not the opposite.
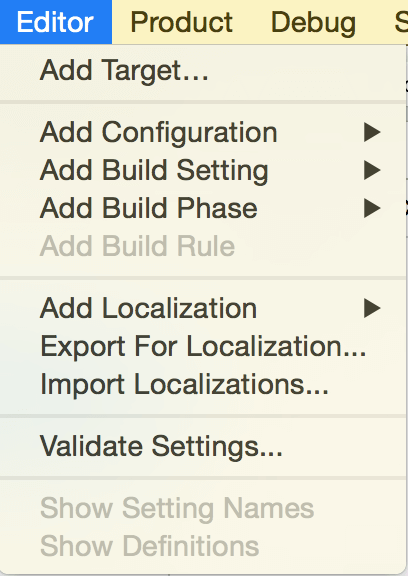
Right now, we only have a target in the project. Let’s add one for the Watch app. Select ‘Editor’ in the Menu Bar and click on ‘Add Target…’.
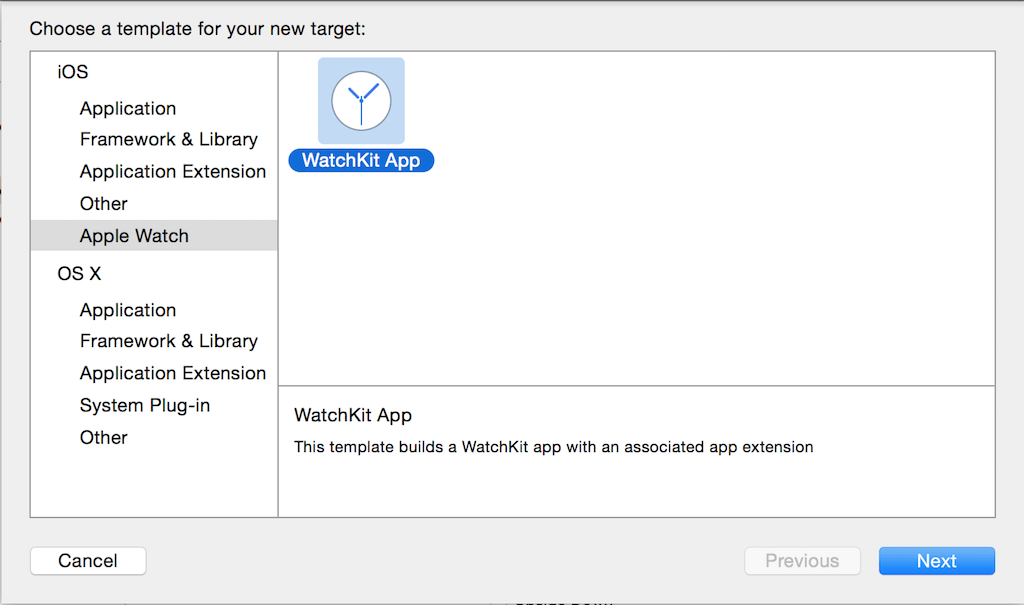
You will be greeted by this window. Under ‘Apple Watch’, select ‘WatchKit App’ and click ‘Next’.
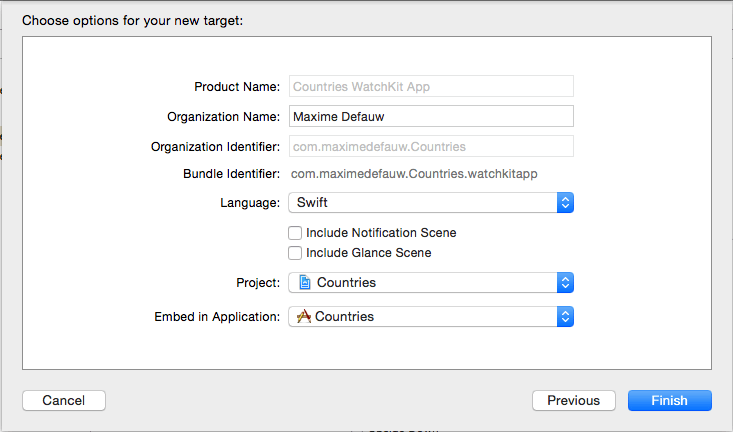
The next window appears, giving you the option to add a Notification and/or a Glances Interface. You can deselect them. Click ‘Finish’ to add the Apple Watch target to your app.
Once this is done, you’ll be prompted to activate “Countries WatchKit App” scheme. Click “Activate” to proceed.
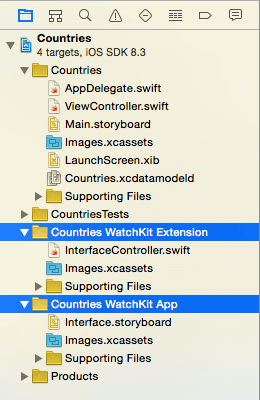
Now you should notice two new folders in your Project Navigator. The first one, WatchKit Extension, is the one that includes all the .swift (code) files and the images used within the app. The second folder, WatchKit App, includes the storyboard and a folder for the icons of the app. Only this one will be copied to your Apple Watch.
Designing the User Interface
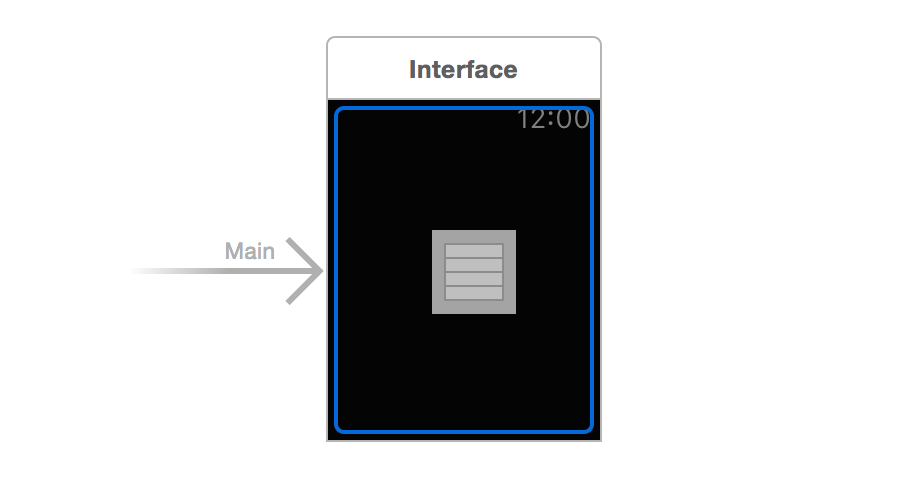
In the WatchKit App folder, locate the Interface.storyboard. This is where we’re going to design our app. At the moment, we only have one view. This is the main screen or the view that is presented when the app is launched. By default, it is empty. As we’re going to display a list of countries in this screen, let’s add a table. In the Object Library, drag a Table object and put it into the interface.
Once this is done, we have to design the cells for the table. The cell we need is quite simple: it should only contain a label. Drag a label from the object library and place it inside the table row.
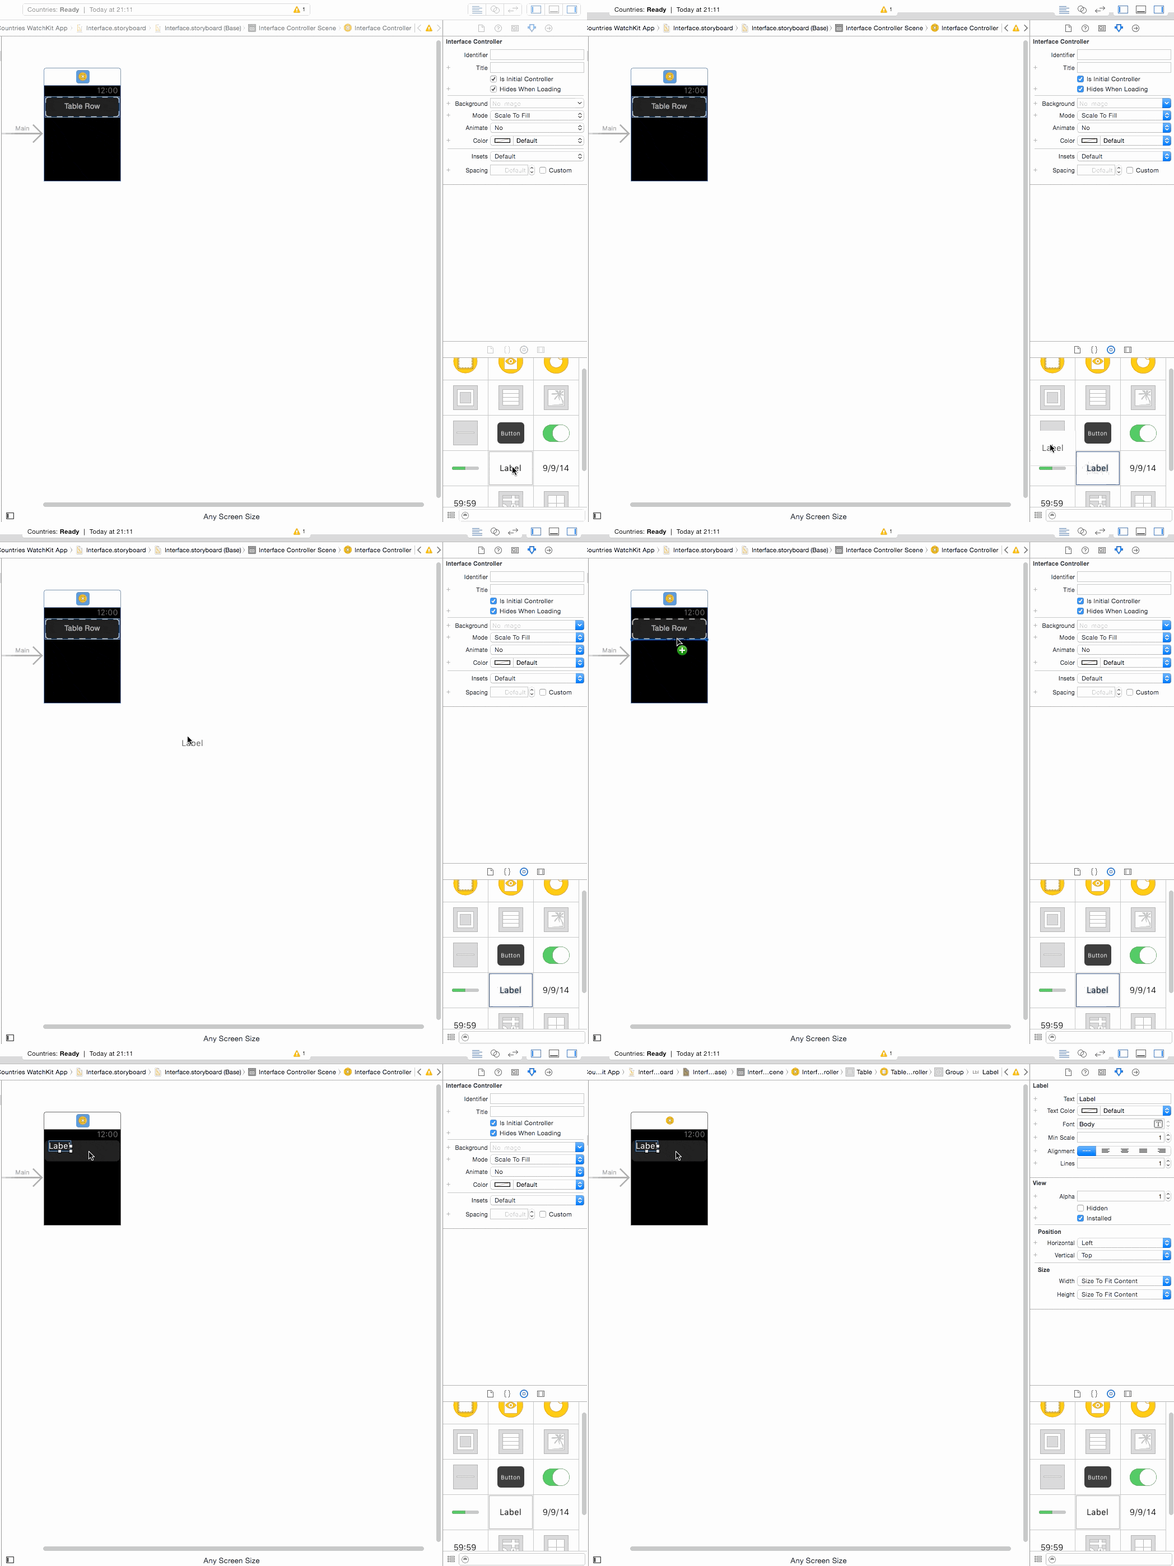
In the Attribute Inspector, change the text to ‘country name’. Under the Position section, change both horizontal and vertical options to Center. If you want to make it bigger, you can also change its font to ‘system’ and set the size to 20 points.
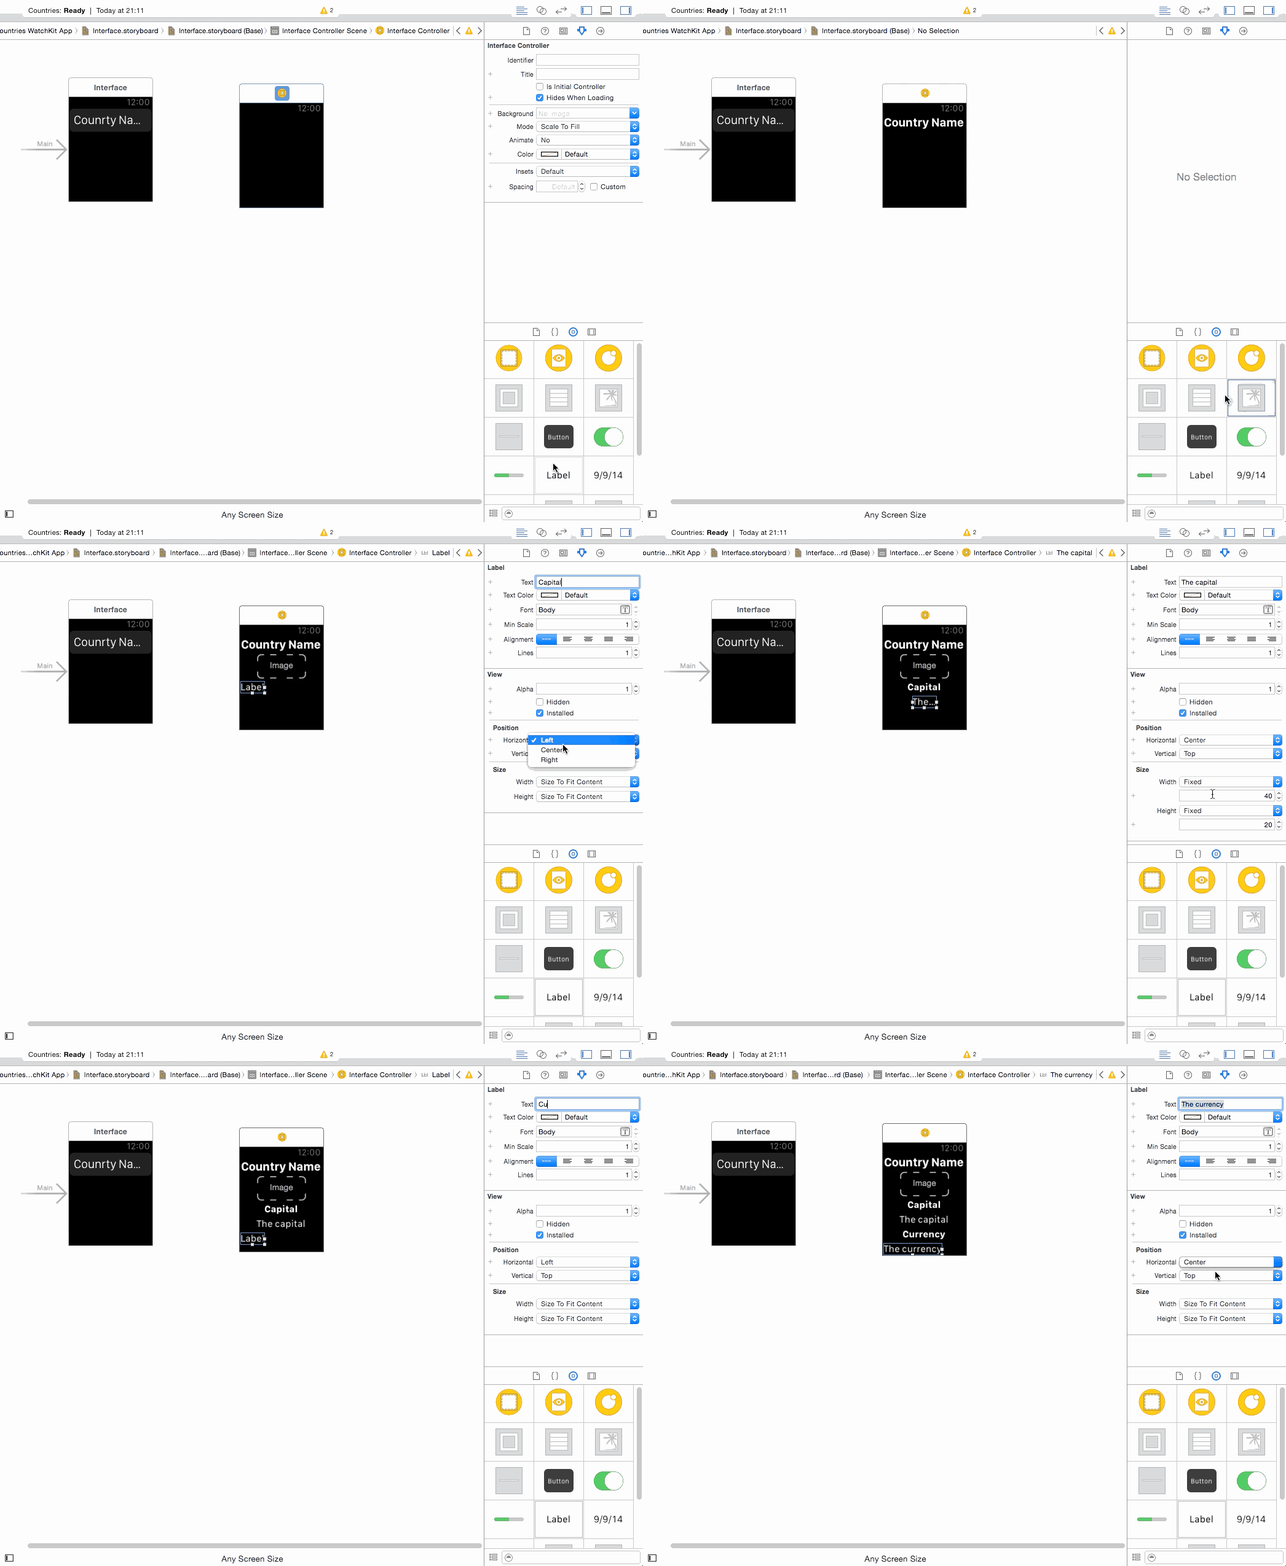
We’re now ready to create our next interface, which will appear when a user selects a particular country. In that interface, it shows the user further information about the country including flag, currency and capital. Drag an Interface Controller from the Object Library to the storyboard.
Next, add the following:
- A label for the Country name
- An Image for the Flag
- 4 Labels for the Capital and the Currency – The “Capital” label is just a static text label, while the “The Capital” label is a dynamic label that shows the capital of the selected country. Similarly, the “Currency” label is just a title, while the “The Currency” label will be used to display the currency of the country dynamically.
Next, download the images here and add them to your Xcode project. Be sure to add the images to the Images.xcassets folder of the WatchKit Extension instead of the WatchKit App.
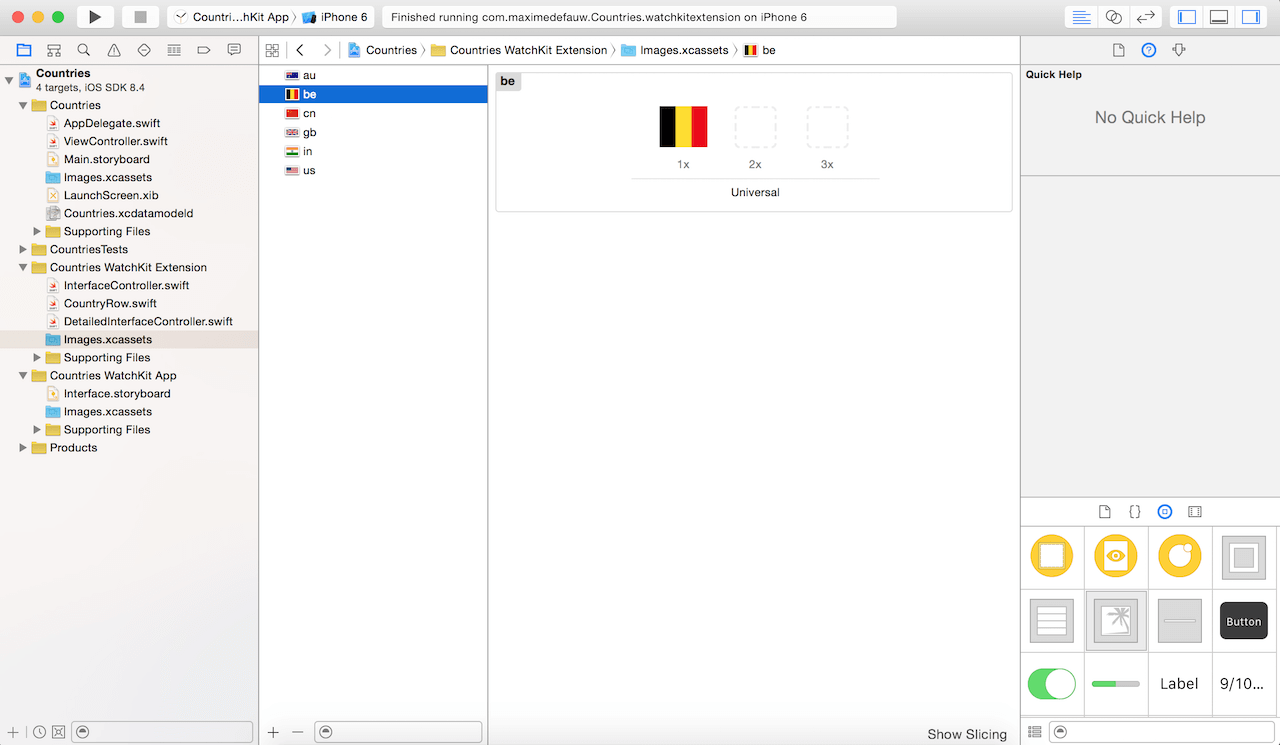
Once this is done, we can set a default flag in Interface.storyboard. First, select the image. In the Attributes Inspector, change the Image option to “us”.
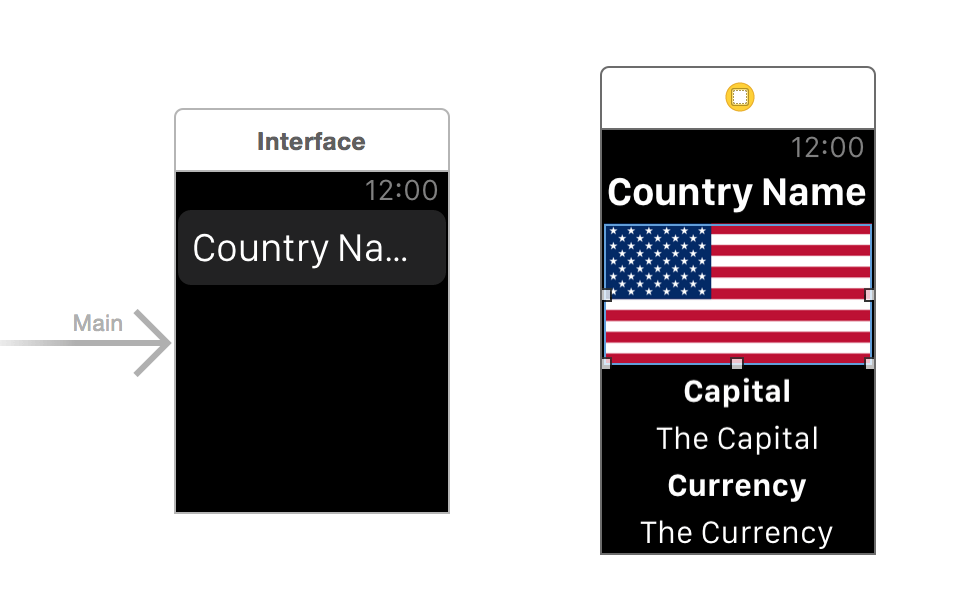
When Xcode generates the files of the WatchKit Extension, it already created the InterfaceController.Swift file for the first Interface Controller. But we need to create a class for the detailed view controller manually. In the project navigator, right click the “Countries WatchKit Extension” folder and select “New File…”. Choose the “Cocoa Touch Class” template and click “Next”. Name the class “DetailInterfaceController” and set it as a subclass of “WKInterfaceController”. Click Next and create the file.
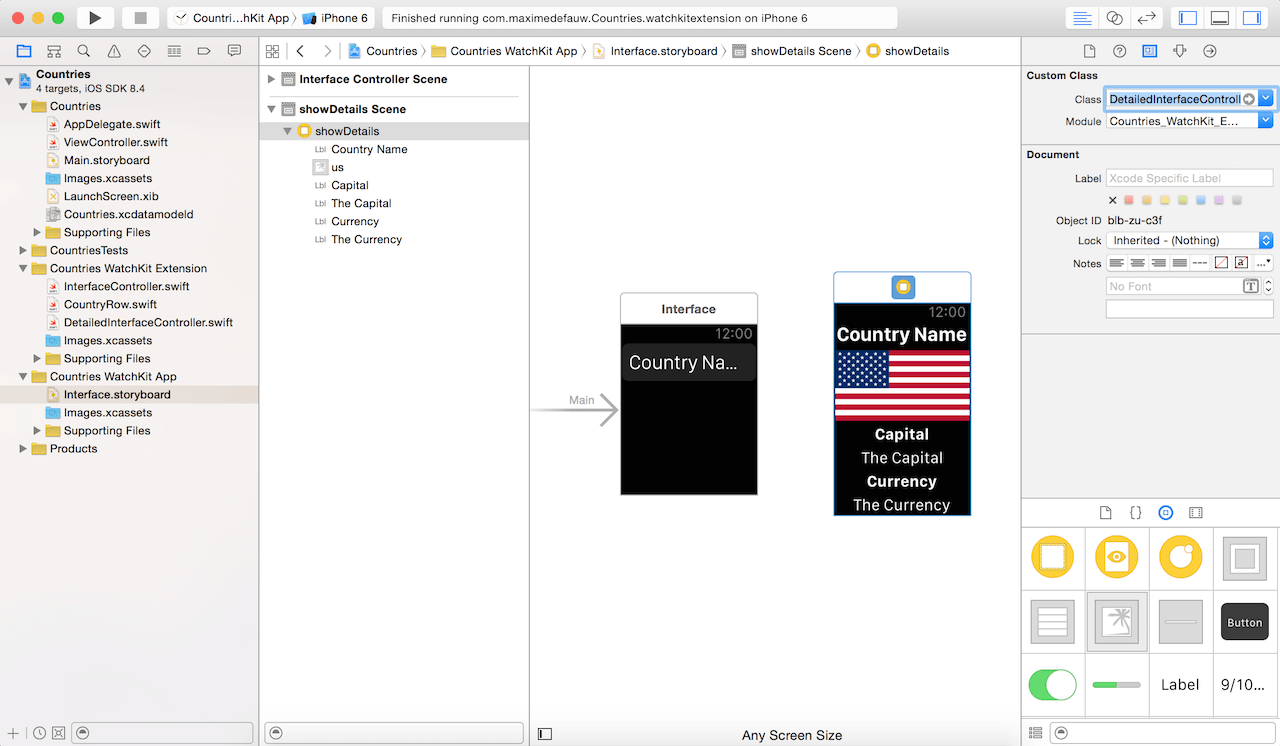
Similar to that in iOS development, the next step is to connect the DetailInterfaceController class with the Detail Interface Controller in our storyboard. Go back to Interface.storyboard and select the Detail Interface Controller. Under the Identity Inspector, set the custom class to DetailInterfaceController.
Start Coding
With the user interface ready, we can finally start coding! In the first screen, we have to present a list of countries. This means we’ll need some kind of ordered list to store the country data. An array should be good enough. In the InterfaceController.swift file, declare a countries array:
var countries = ["Belgium", "USA", "UK", "India", "China", "Australia"]
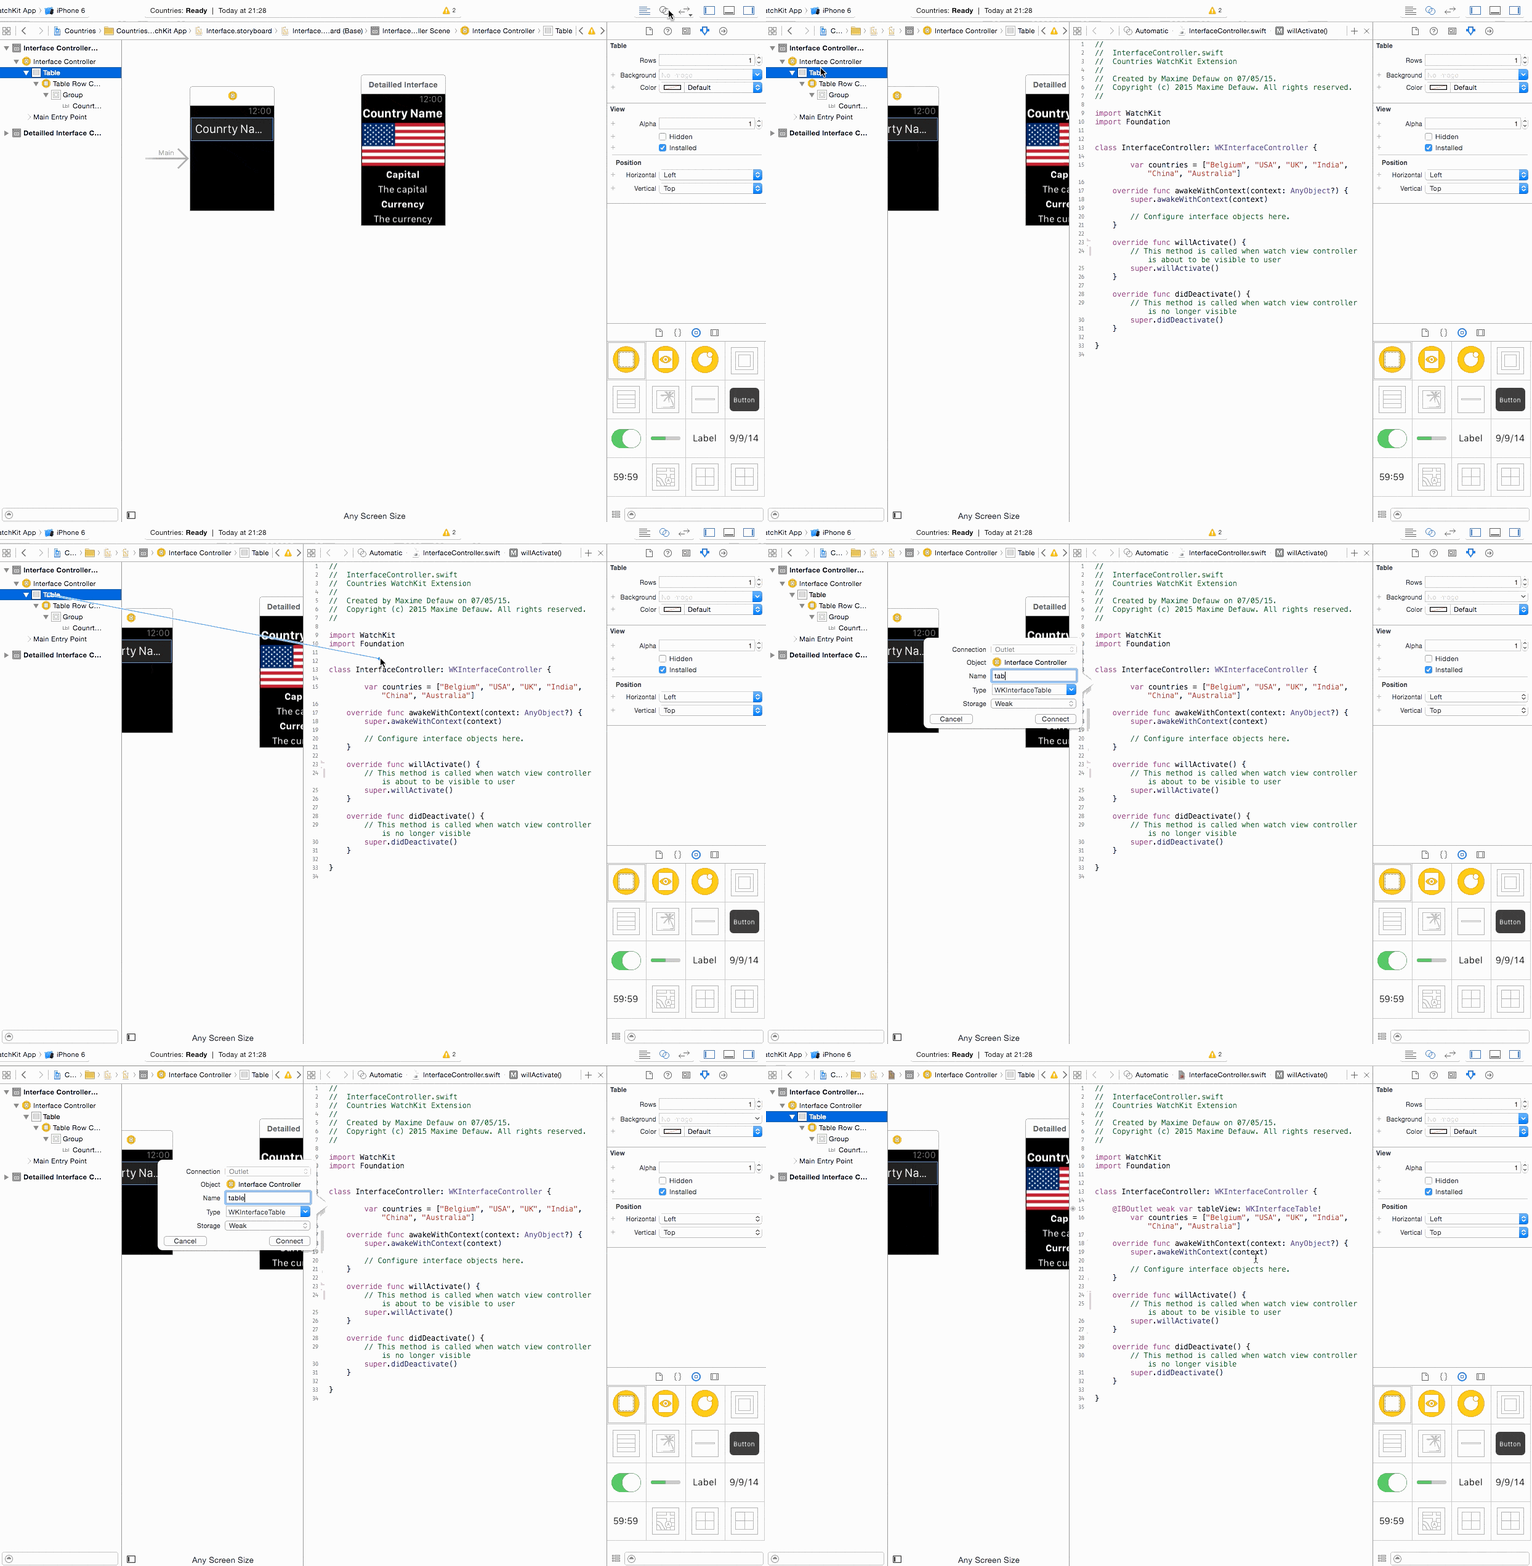
Next, we have to establish the connections between our code and the UI elements in the storyboard. The easiest way of doing this is open up the assistant editor to show both our storyboard and the corresponding class side by side. Control-drag from the table object to the InterfaceController class to add an outlet variable. When prompted, set the name of the variable to “tableView”.
Once the connection is made, we can load the table with the country names. Obviously, a table consists of rows. Like coding a custom row in iOS app, you’ll need to create some kind of class to associate it with the row. For our project, the row is rather simple: it only consist of one Label. Create a new class file for the table row. Name the class CountryRow and set it as a subclass of NSObject. After the file is created, make sure to replace “import UIKit” with “import WatchKit” in the file.
Next, go back to the storyboard. Select the table row controller of Interface Controller. Under the Attributes Inspector, set the to identifier to “CountryRow”. Make sure the “Selectable” option is enabled. Then choose the Identity Inspector, set the custom class to CountryRow. Now, create an outlet variable for the “Country Name” label in the CountryRow Class. Name the outlet variable “countryName”.
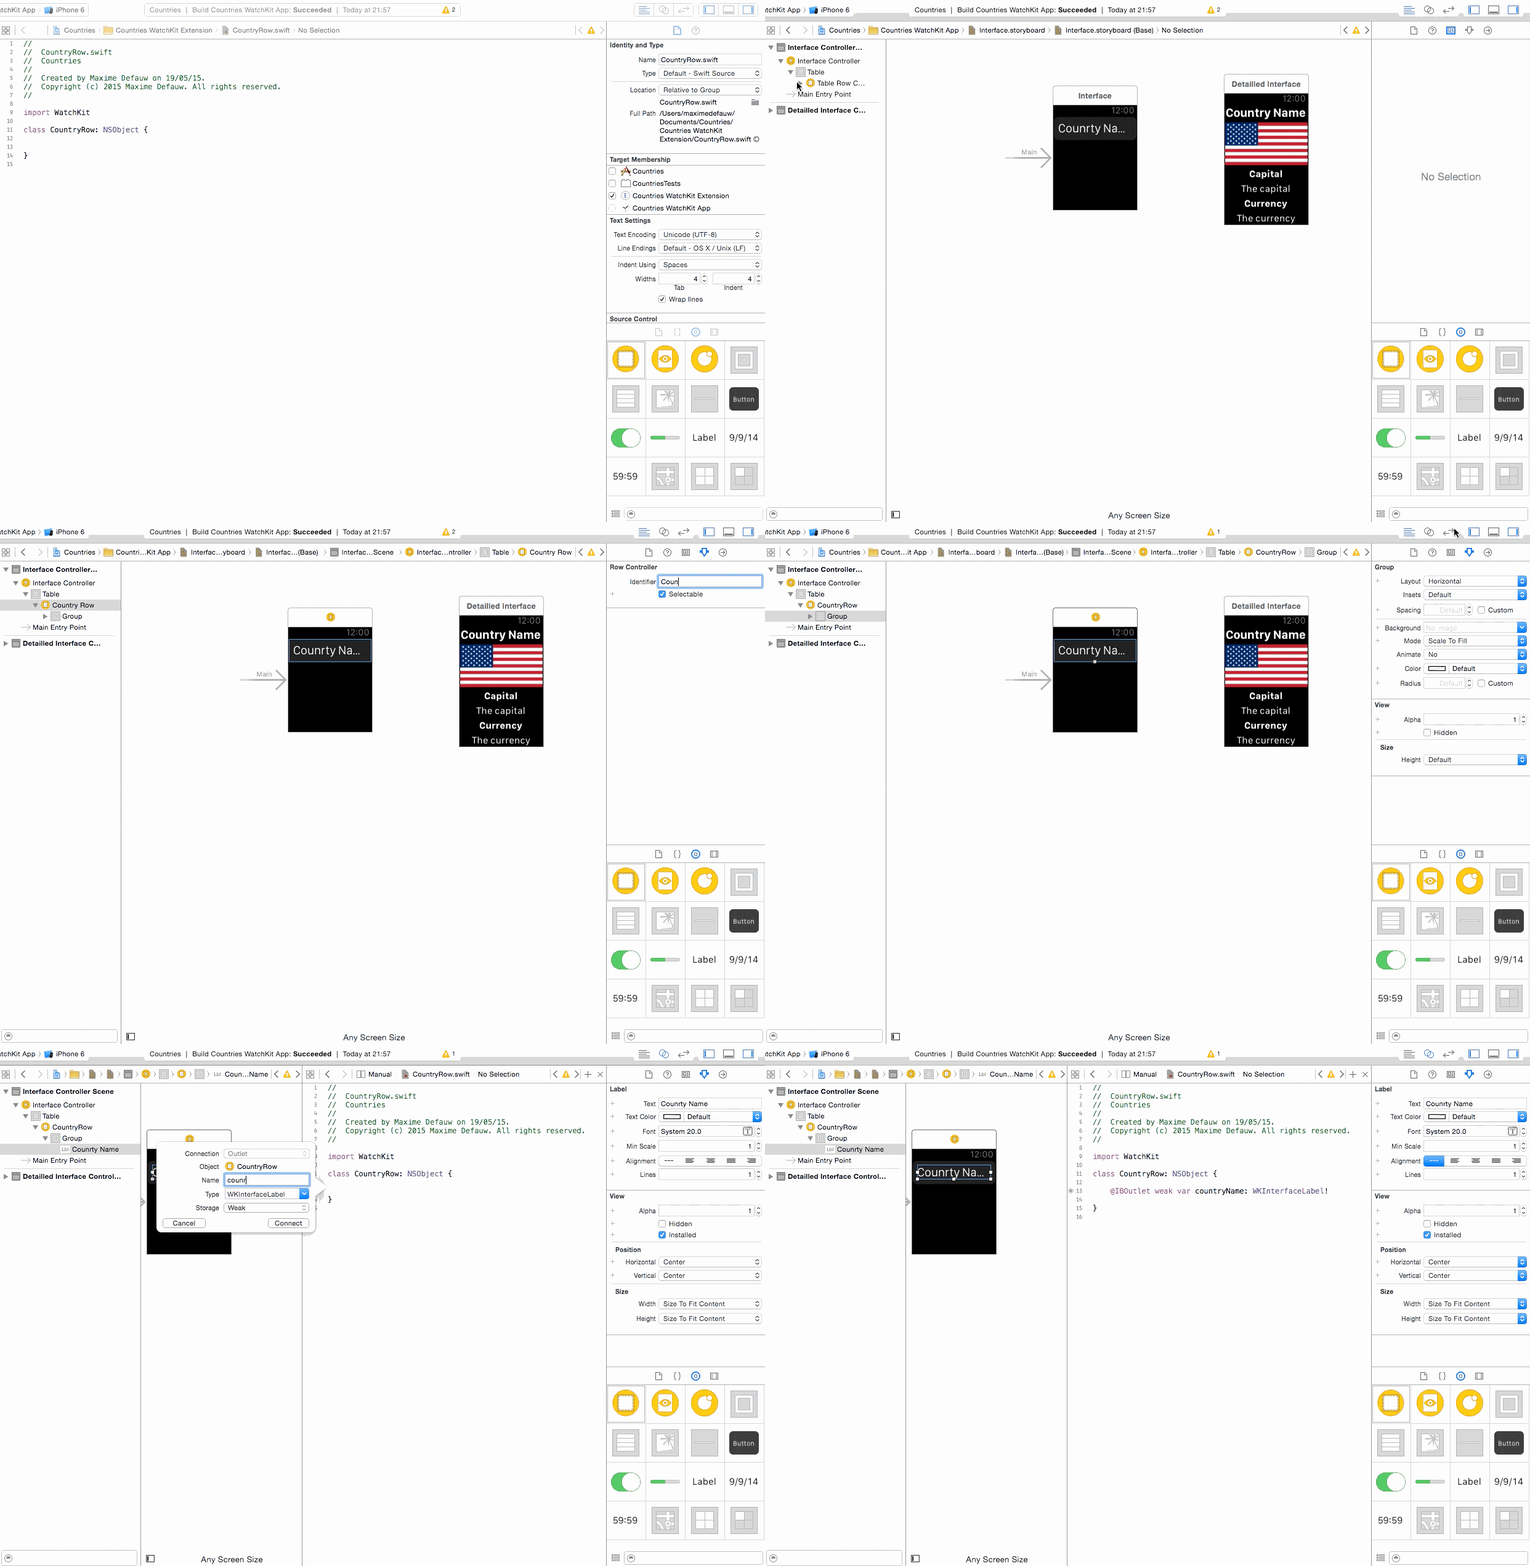
In the InterfaceController.swift file, insert the following method to load the data in the table:
func setupTable() {
    tableView.setNumberOfRows(countries.count, withRowType: "CountryRow")

    for var i = 0; i < countries.count; ++i {
        if let row = tableView.rowControllerAtIndex(i) as? CountryRow {
            row.countryName.setText(countries[i])
        }
    }
}
In the above code, we first define the number of rows of the table. In this case, the number of rows is equal to the number of countries in the array. The row type is the identifier of the row. Next, we iterate through the array and set the label of each row.
Lastly, call the setupTable method in the awakeWithContext method. If you're new to WatchKit development, the awakeWithContext method is similar to the viewDidLoad method in iOS development. When a certain interface is loaded, the awakeWithContext method will be called to initialize the interface controller.
override func awakeWithContext(context: AnyObject?) {
    super.awakeWithContext(context)
    // Configure interface objects here.
    setupTable()
}
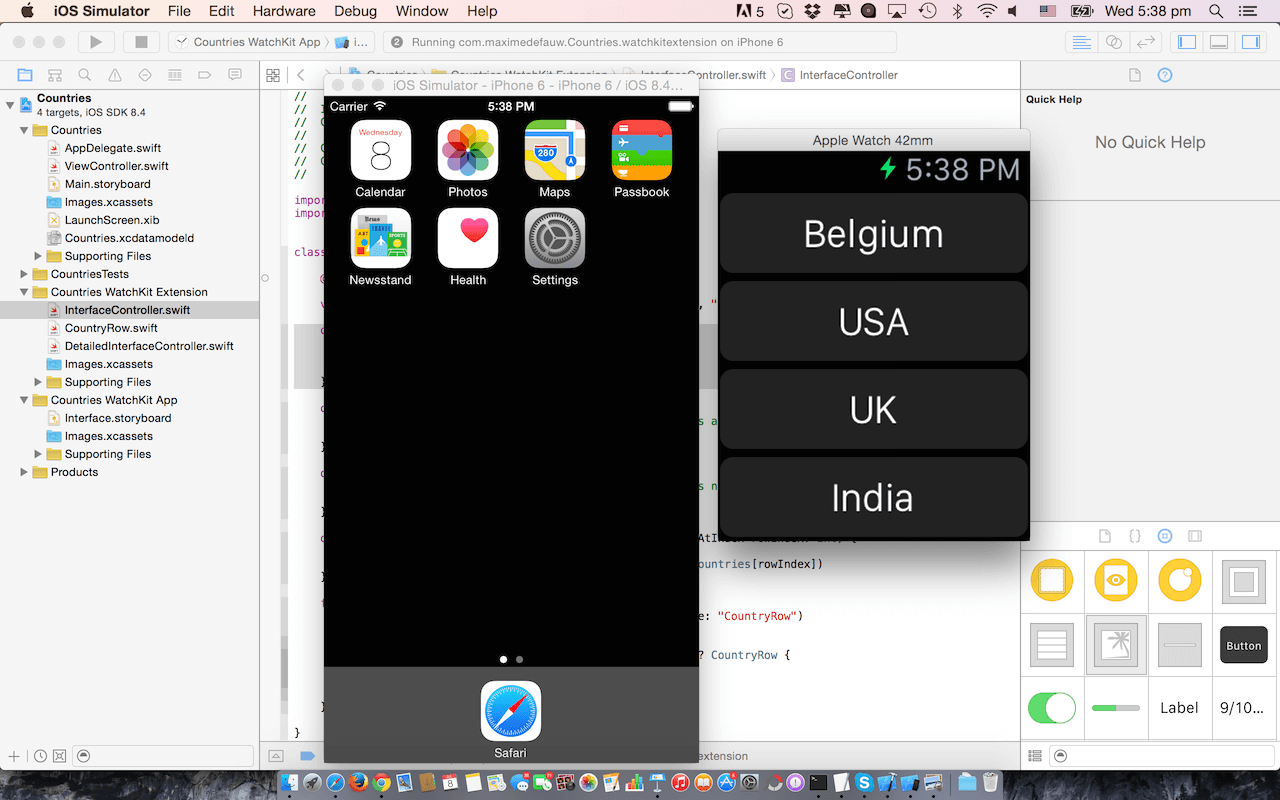
Now let's run the project and see what we have achieved. To run the app, select the "Countries WatchKit App" scheme and hit the Run button. Once the app is running, you may have to select Hardware > External Devices > Apple Watch - 42mm to bring up the Apple Watch simulator. If everything is working properly, you should see a table with country names.
Coding the Detail Interface
Cool! You have managed data loading in a table. Let's move onto the detailed interface. When a user selects a country, the detailed view will be presented. We'll start by managing the transition between these two views. Add the following code to InterfaceController.swift.
override func table(table: WKInterfaceTable, didSelectRowAtIndex rowIndex: Int) {
    self.pushControllerWithName("showDetails", context: countries[rowIndex])
}
In WatchKit, the WKInterfaceController class comes with the table(_:didSelectRowAtIndex:) method to handle table row selection. Here we override the method to provide our own implementation.
In the app, we use a hierarchical navigation style (similar to the navigation controller in iOS). So we call the pushControllerWithName method to animate the new interface controller onto the screen. The method accepts two parameters: the name of the interface controller and the data to be passed to the new interface controller. Here the new interface controller is the detail view. Later we will give it an identifier called "showDetails". The "countries.[rowIndex]", which is the selected country, is passed as a parameter during the transition.
Great! What's left is to configure the detailed interface with appropriate identifier and outlet variables. In the storyboard, select the detailed interface and set the identifier (under the Attributes inspector) to "showDetails".
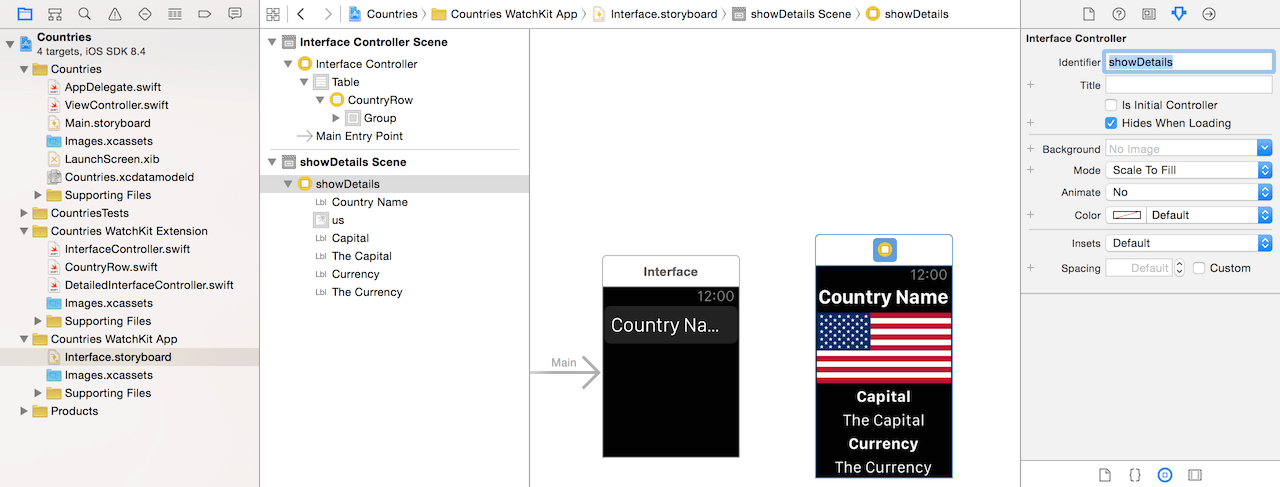
Next, connect all the elements of the Detail Interface to the DetailInterfaceController.Swift file. Your outlet connections should be like this:
- The "Country Name" label is connected with the outlet named "countryName".
- The "The Capital" label is connected with the outlet named "capital".
- The "The Currency" label is connected with the outlet named "currency".
- The image is connected with the outlet named "flag".
In code, it should be look like this:
@IBOutlet weak var countryName: WKInterfaceLabel!
@IBOutlet weak var capital: WKInterfaceLabel!
@IBOutlet weak var currency: WKInterfaceLabel!
@IBOutlet weak var flag: WKInterfaceImage!
Next, declare the following variables in the DetailedInterfaceController class:
let capitals = ["Belgium":"Brussels",
    "USA":"Washington DC",
    "UK":"London",
    "India":"New Delhi",
    "China":"Beijing",
    "Australia":"Canberra"]
let currencies = ["Belgium":"EUR",
    "USA":"USD",
    "UK":"GBP",
    "India":"INR",
    "China":"CNY",
    "Australia":"AUD"]
let flags = ["Belgium":"be",
    "USA":"us",
    "UK":"gb",
    "India":"in",
    "China":"cn",
    "Australia":"au"]
To keep things simple, we just hardcode the country information in the form of dictionary instead of pulling it from a web service.
Lastly, update the awakeWithContext method with the following code:
override func awakeWithContext(context: AnyObject?) {
    super.awakeWithContext(context)

    let name = context as! String
    countryName.setText(name)
    capital.setText(capitals[name]!)
    currency.setText(currencies[name]!)
    flag.setImage(UIImage(named:flags[name]!))
}
The above code is pretty straightforward so I will not go into the details. Now it's time to test the app again. If you follow everything correctly, your app should work as expected! When tapping a country, it will show the detail interface with the appropriate information.
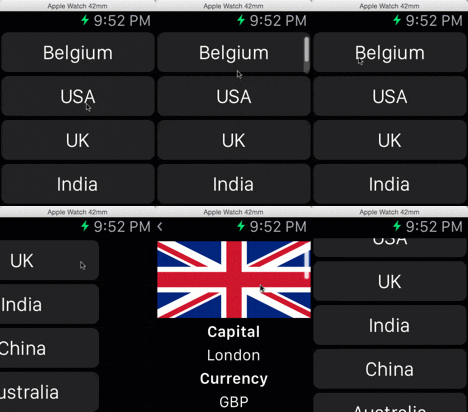
After going through tutorial, I hope you have a better idea about how to create selectable table in a Watch app. For reference, you can download the Xcode project here.
What do you think about this tutorial? Please leave me comment and share your thought.


