

Welcome to a new tutorial where I’m going to show you a practical approach on how to create your own Swift packages. If you’re not familiar with that term, a Swift package wraps up code that can be reused in projects, to be shared with other developers, as well as to be added as a dependency to projects. Creating and managing Swift packages has been an integrated functionality in Xcode since version 11, and that makes dealing with them a fast and straightforward process.
A Swift package is mainly composed by two parts: The source code which is the heart of the package, and a manifest file, the Package.swift, which is the place where the package configuration takes place. A package can be a dependency to a project, but it can also have its own dependencies, meaning other packages that it is based on. Those dependencies are described in the manifest file. Besides that, a Swift package can exist locally on your computer or remotely, usually as a repository on GitHub. Local packages can be edited while they are integrated in a project, so it’s possible to make changes on them intentionally or not. It’s always a good idea to add a local version of a package to a project during its implementation, but if it’s about just using it, then a remote version consists of a safer and easier approach. Obviously, public repositories containing Swift packages can also be shared with other developers too.
Speaking of sharing packages, responsible for distributing a package around is the Swift Package Manager tool. From the official documentation:
The Swift Package Manager is a tool for managing the distribution of Swift code. It’s integrated with the Swift build system to automate the process of downloading, compiling, and linking dependencies.
Swift Package Manager is what lies behind the scenes and makes it possible to fetch and share Swift packages. It’s not new in Xcode 11; it used to be a command line tool before that. But starting in version 11, Swift Package Manager is integrated in Xcode and makes dealing with packages easy. Please read more about the Swift Package Manager in the official documentation and on its GitHub page.
Note that Swift packages are based heavily on versioning, and to be precise on the semantic versioning standard. For example, 1.2.5 is an example of such a version number, where the first number is the major version, the second is the minor version, and the third is the patch version. I provide a quick description about those numbers later on in this post, but if you don’t feel comfortable with the semantic versioning system then you should definitely read a little bit here.
Swift packages are becoming the new trend, and it seems that other dependency managers are going to meet a strong competitor here. Starting from Xcode 11 the simplified process to create and manage Swift packages has given the advantage to it, and the fact that reusable code can be created in almost no time is what I like the most. With that said, please read on to learn how to create and deal with your own Swift packages through a practical guide.
Demo App for Creating with Swift Package
The purpose of this tutorial is to show how to create a Swift package from scratch, so this is where we are going to put all our efforts. The demo application and the demo code in general that we will be using in this tutorial is not that interesting nor of any importance. Initially, please download the starter material which is going to be our entry point in our today discussion.
When you unzip the starter stuff you will find three subfolders in it:
- The starter project: This is the demo application for today and the place where we’ll begin working from.
- The Public folder: It contains a class called
MathOperationswhich is the sample code which we’ll use as content for the Swift package. It’s a bit modified comparing to the one found in the starter project; thepublicmodifier has been addded to make the class and any necessary methods and properties public and visible out of the package. You’ll understand more about all this when the proper time will come. - The Package folder: The Swift package which we’ll create step by step in this post.
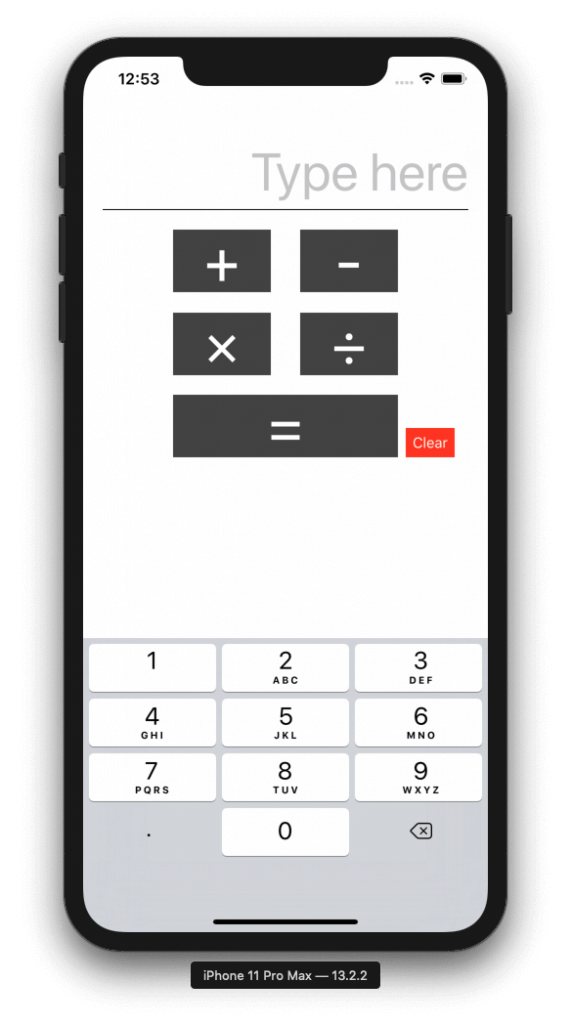
That starter project implements a really simple calculator app that is capable of performing the four basic mathematical operations: Addition, subtraction, multiplication and division. The app itself is not interesting at all and there is nothing new to learn there; the “juicy” part here though is how the mathematical operations are performed and what we can do with them.
Being more precise, if you open the starter project in Xcode you’ll find a class called MathOperations (mentioned above) implemented in the MathOperations.swift file. This is the place where the four simple mathematical operations are being implemented along with a few auxiliary stuff (such as the Operation custom type). This class follows the singleton pattern, so there’s no need to create instances of it when it’s about to be used. All provided functionalities are available through a shared object.
MathOperations is being used in the ViewController.swift file where all the rest functionality regarding the simple calculator app is implemented. Specifically, there are three IBAction methods to take a look at: performOperation(_:), showResult(_:) and clear(_:). The first one is connected to the four operation buttons in Main.storyboard file (+, -, *, /) and it stores the selected operation type to the MathOperations class. The second is the one that actually triggers the calculations and displays the results to the user. The last one just clears the text field contents and asks from MathOperations to initialize all key variables.
Take a few moments to run the demo app and to see the implementation of the starter project in general, but don’t lose too much time on that. The purpose here is not to comprehend its implementation, but to use it as a “tool” for what’s about to come next.
What we are going to do
Now that you’ve taken a first taste of the starter project, let’s clarify what our goal is in this post. As you can see, all mathematical operations are taking place in the MathOperations class. Now, what if we wanted to make this class a reusable component? What if we wanted to use the same code in multiple projects and not only in this one? And even further, what if we wanted to share it with other developers so they can use it as is on their own projects?
The answer is simple: We will create a Swift package to manage all the above easily.
You might think that it’s not worth the hassle for just one file of code, which in any case could be imported to other projects or shared around easily. However, don’t forget that this is just a demo. In real life chances are that a package will contain more than one source files, and to go one step further, it’s also possible that this package will have its own dependencies, meaning other frameworks or libraries that is based on.
With that said, let’s get into action and let’s create a Swift package based on the MathOperations class.
Creating Your First Swift Package
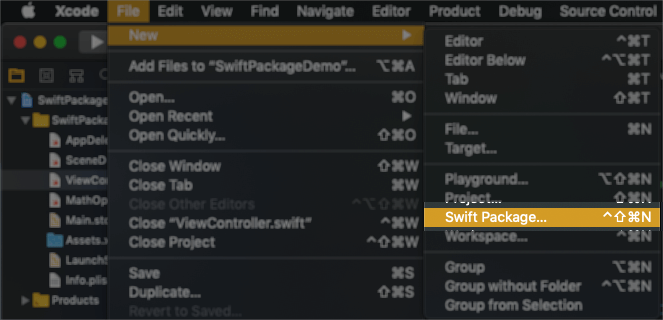
Creating a new Swift package is a simple and straightforward process. To get started, go to File > New > Swift Package… menu in Xcode.
The first step is to specify a name for the package, as well as to choose a destination folder on the computer where all package contents (files and folders) will be saved to. To follow along to this tutorial, name the package MathOpsPackage and choose any folder that’s convenient for you.
At the bottom of the window you’ll find some additional options. The first one is about whether a Git repository should be created along with the package. I would recommend to leave it unchecked so you can follow the next steps as they’re presented, but just so you know from now, we will indeed create a repository a bit later. Besides that, you can add the new package directly into an existing project or workspace simply by opening the Add to: popup button. We don’t need that here, so make sure you keep the Don’t add to any project or workspace as the selected option.

By clicking on the Create button Xcode will create the new package. Let’s take a look at its structure:
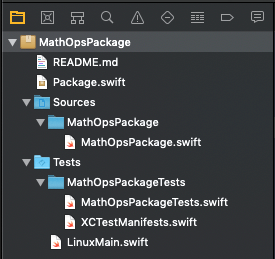
The Readme File
This is the place to describe any APIs, features, functionalities and anything else you think is necessary about the package you are creating. Even though you might not find it important enough, this is what others will see and read when they’re going to integrate your package into their projects. So, it’s your chance to explain how things work. I strongly recommend to write a good description even if the package is “for your eyes only”. You will appreciate your efforts to fill it up with valuable information if it happens to work with your package long after its creation; remembering things again won’t be a painful process.
In a following part of this post we’ll create a repository on GitHub where we’ll push the demo package that we’re building here. The Readme file of the package is going to be the Readme page of the repository. In my opinion that consists of another good reason to write and maintain a proper description. What makes the Readme file interesting is that it supports Markdown formatting, and that allows us to write rich text which can have headers, lists, images, links, and so on.
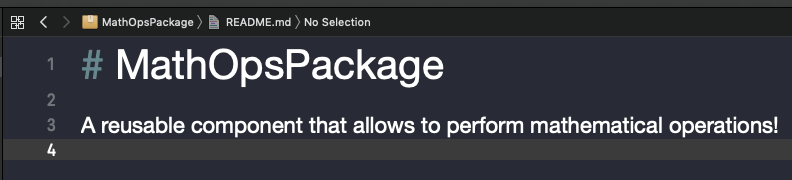
For the MathOpsPackage that we’re creating here the following description is good enough, however feel free to type more content and find out how to use Markdown for producing a well formatted description.
The Package.Swift
Package.swift is the place where package configuration takes place, and it’s also called the package’s manifest file. Configuration is done by initializing an object of the Package class which cannot be changed afterwards, and where a series of arguments must be provided with some of them being mandatory and some others being optional. When creating a new package, Xcode prepares a default configuration for us which is good enough if the package has no special requirements.
// swift-tools-version:5.1
// The swift-tools-version declares the minimum version of Swift required to build this package.

import PackageDescription

let package = Package(
    name: "MathOpsPackage",
    products: [
        // Products define the executables and libraries produced by a package, and make them visible to other packages.
        .library(
            name: "MathOpsPackage",
            targets: ["MathOpsPackage"]),
    ],
    dependencies: [
        // Dependencies declare other packages that this package depends on.
        // .package(url: /* package url */, from: "1.0.0"),
    ],
    targets: [
        // Targets are the basic building blocks of a package. A target can define a module or a test suite.
        // Targets can depend on other targets in this package, and on products in packages which this package depends on.
        .target(
            name: "MathOpsPackage",
            dependencies: []),
        .testTarget(
            name: "MathOpsPackageTests",
            dependencies: ["MathOpsPackage"]),
    ]
)
Usually a package will be defining one library and one target only, so the default values of the products and targets parameters suffice. However, if more than one libraries or targets are defined in the package then you’ll have to append them in a similar fashion as you see in the default initialization.
It’s possible that dependencies is a parameter that you’ll be wanting to provide values for more often. Here you specify other packages that your package is based on, called dependencies. In such a case you must provide the path to the dependency if it lives locally, or the URL (as a string value) along with the versioning rules that should be followed. We’ll see a few more things about versioning rules in a while, but what’s important to know right now is that when pointing to a dependency it’s necessary to also specify which version or range of versions of it the package is allowed to use. As you can see in the following screenshot, there are a few initializers for specifying dependencies for the package:

Depending on your needs, you can specify dependencies using a starting minimum version up to the next major, or a range of versions including or not the maximum defined version. For example, the following adds a dependency that will be using only versions starting from 1.2.3 and ending to 2.3.4, including the lower and upper limits.
.package(url: "https://url/to/cool/dependency", "1.2.3"..."2.3.4")In another example, the following specifies the minimum required version of a dependency:
.package(url: "https://url/to/cool/dependency", from: 1.0.0)Besides all the above, there’s another parameter value that you will definitely find useful to provide in the Package initialization. It’s the platforms parameter which is optional to provide and therefore does not exist in the default boilerplate code. Using the platforms parameter value you can specify the supported operating systems or the minimum required OS version. Platforms must be specified right after the name of the package and each platform is a value of a special custom type called SupportedPlatform. The following defines the minimum required versions for running in iOS and macOS systems:
let package = Package(
    name: "MathOpsPackage",
    platforms: [
        SupportedPlatform.iOS(.v11),
        SupportedPlatform.macOS(.v10_14)
    ],
    ...
)
For simplicity you can omit the SupportedPlatform type:
platforms: [
    .iOS(.v11),
    .macOS(.v10_14)
]
Keep in mind that Xcode is always your assistant when configuring the package in the Package.swift file. Auto-suggestions and Quick Help can show you the way while trying to specify the various package configuration values, and don’t forget about the official documentation as well. Not only you’ll find additional help, but also more things and information to read about.
Note that the Package.swift file must always start with the “// swift-tools-version” string followed by a version number. That number specifies the minimum version of Swift tools and language compatibility required for using the package. Read the official documentation for more information.
The Tests Folder
If you write tests for your code and you want them to be included in the package, then this is the place where you should put them. Actually, Xcode creates a test example which you can edit replace, delete or comment out as per your needs. Here we won’t add any tests, so just comment out the following line in the MathOpsPackageTests.swift file:
// XCTAssertEqual(MathOpsPackage().text, "Hello, World!")The Sources Folder
This is the heart of the package. It’s the place where you’ll be adding all the source code files. See that in the package we are creating there is a subfolder having the same name to the package (MathOpsPackage) under the Sources folder. Inside this subfolder you’ll find a sample code file having once again the same name to the package; this file is created automatically by Xcode. Obviously we’re not going to keep it, but it’s an indication by Xcode where your code files should be put. The purpose of the subfolders under Sources is for separating the source code in case multiple libraries should be the product of the package. Of course, in that case additional libraries should be also declared in the Package.swift file according to what we said earlier.
Adding Code To The Package
Having gone through a short exploration of the various parts that a package consists of, it’s time to put things in action. The code we want to reuse and distribute already exists in the MathOperations.swift file of the starter project, so we won’t write any new code here. Instead, we’ll move that file from the starter project to the package.
Here are the steps to do it easily:
- In Xcode place the SwiftPackageDemo project and the MathOpsPackage side by side.
- Drag and drop the MathOperations.swift file from the project to the Sources > MathOpsPackage folder in the package. Xcode should show errors now in the
ViewControllerclass. - The MathOperations.swift file will get a red color in the project. Right click on it and select Delete to remove it.
- Switch to the MathOpsPackage package now. Delete the MathOpsPackage.swift file that was created automatically by Xcode.
- Press Cmd + B to make sure that the package builds successfully.
- The package is now pretty much ready, so close it.
Using The Package
The MathOpsPackage is now containing the core code that makes math operations possible. Our goal here is to integrate it to the SwiftPackageDemo project and to make use of it eventually. The easiest way is by dragging it into the project.
- Open Finder and locate the package’s directory.
- With Xcode being open next to the Finder, drag and drop the MathOpsPackage directory to the Project Navigator.
- Xcode will add the package to the project and you’ll be able to expand it and reach the source code files like you would normally do if you had it open as a standalone project.
There a few more additional steps required from this point on:
- In the Project Navigator click to the project object and make sure that the General tab of the SwiftPackageDemo target is visible.
- Click on the Plus button (+) in the Frameworks, Libraries, and Embedded Content section.
- In the window that appears select the MathOpsPackage library and click Add.
The selected library should be listed now in the frameworks section:

Finally, switch to the ViewController.swift file where all Xcode errors appear. Go to the top of the file and add the following import statement which imports the MathOpsPackage module to the file:
import MathOpsPackagePress Cmd + B to build the project and wait for it to finish. I guess you would be expecting to see the success message, however that’s not the case here! Why?
Changing API Visibility
The reason for the Xcode errors this time is quite simple: ViewController class cannot access the MathOperations class because it belongs to a different module (in the MathOpsPackage module) and the access level of the MathOperations class is set to internal by default. That means that only code inside the MathOpsPackage is capable of accessing the MathOperations class right now.
The way to work around this problem is to expose the class and any properties and methods we want by using the public modifier. Fixes can be done while the package is integrated to the SwiftPackageDemo project; it’s not necessary to open it standalone in Xcode.
Expand the MathOpsPackage in Xcode until you reach the source file. Now, instead of doing any changes by hand and for your convenience you will replace the current source code file. Right click to the MathOperations.swift file and choose the Delete option. When asked, move it to the trash. Then, go to the starter material you downloaded for this tutorial where you can find an updated version of the MathOperations.swift under the Public folder. Drag and drop it right exactly to the place where the file you just deleted was; under the Sources > MathOpsPackage folder in the MathOpsPackage package.
Open the new file you just dragged to the package and you’ll see that the public keyword makes public all those parts of code we need to access from the ViewController class in our main project. Press Cmd + B again now. If you followed all steps as described up until to this point you’ll see the build process succeeding this time! Congratulations, you just used your first Swift package into a project!
Note: You can read more about access control here.
Publishing Package On GitHub
If you aim on creating Swift packages and keeping them locally, then you can stop reading here and go practice your new knowledge by making your own packages. However, almost always is way more convenient to create a git repository on GitHub and have your package there even if your are not going to share it with anyone else. If we are talking about reusing your own custom components, then it’s much better and safer to add a package as a dependency to a project by simply fetching it from GitHub (Xcode actually does that) than searching around on your local folders, dragging, dropping and risking to make accidental changes to it; because as you’ve seen, a local package can be modified even when it’s integrated to a project.
So, in this part we are going to cover exactly this case; how to prepare the package for GitHub by creating a local repository first and then pushing it to GitHub.
Creating A Local Git Repository
To get started, close the SwiftPackageDemo project and open the package alone in Xcode. Open the Window > Welcome to Xcode menu, and choose the package from the projects list. Alternatively, locate the package folder in Finder and double click on the Package.swift file.
With the package open now in Xcode:
- Go to Source Control > Create Git Repositories… menu.
- If the package is not selected by default in the window that appears, then click to select it.
- Click on the Create button.
The above will create a local repository and it will commit all package files to it. Note that the above steps won’t work for you if you initially created the package project with a git repository. If that’s your case, then use the Source Control > Commit… menu to commit all changes made to the package since it was created.
Connecting A GitHub Account To Xcode
The next step is to create a repository on GitHub. You need to have an account on GitHub for this purpose. If you don’t have one, then it’s a good time to make one now and then keep reading here.
If you haven’t added your GitHub account to Xcode yet it’s about time to do it. If you have it connected already then jump to the next step.
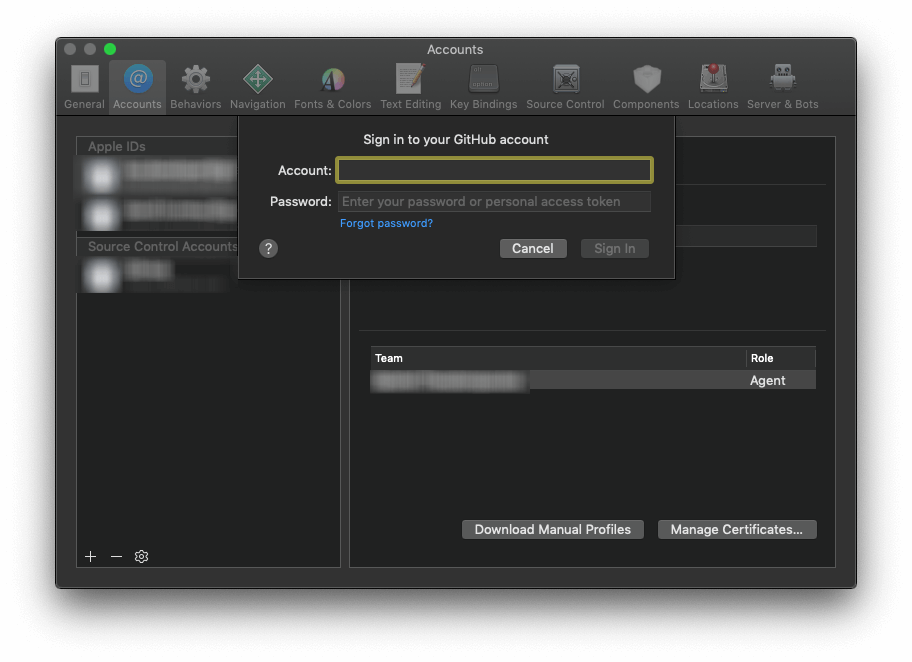
- Open Xcode > Preferences… menu and then go to Accounts tab.
- Click on the Plus button (+) to the bottom left side of the window.
- Choose “GitHub” as the type of the account, and click Continue.
- Provide your account name and your password and then click on Sign In.
Creating A Remote Repository
With the GitHub account configured, click to open the Source Control navigator in Xcode or just press Cmd + 2. Then:
- Select the repository and go to Editor > Create Remote… menu, or even faster right click on it and select the Create “MathOpsPackage” Remote….
- In the window that appears most default option values do not need to change. However, most probably you don’t want to create a public repository which is automatically selected. In that case select the Private option so your repository on GitHub won’t be publicly available. Later you can change its visibility or choose who you’re going to share with.
- Change the repository name if you do not like the default suggested name (MathOpsPackage here). Also, if you have more than one GitHub accounts connected to Xcode then make sure to select the correct one.

Once you are ready click on the Create button. This will perform two actions: It will create a new repository on GitHub, and it will push all changes committed locally to that remote repository.
Pushing The Package Version
As I wrote in the beginning of this post, Swift packages are based on version numbering heavily and they use the semantic versioning standard to distinguish various versions. That means that a package needs major, minor and patch numbers expressed as one unified number where parts are separated by dots (A.B.C). To summarize the significance of each number:
- major number indicates important changes and additions to the package which can also lead to no backwards compatibility.
- minor number indicates smaller changes like new API additions or important fixes that don’t break the overall functionality.
- patch number indicates small fixes to existing APIs.
So far we haven’t specified any version for our package. The only thing happened automatically is an identifier assigned to the repository when we committed the package files to the repository. You can find that identifier if you select the repository in the Source Control navigator (Cmd + 2); it appears in the far right side of the main window area:

To give a version number follow the next steps:
- Right click on the repository in the Source Control navigator.
- Select the Tag “master”… option.
- In the window that appears type the number for this version. Value 1.0.0 is fine for out demo here.
- Optionally type a message.
- Click on the Create button.
A tag number has been assigned now to this version of the project as you can see in Xcode as well.

However this tag number exists locally only. We need to push it on GitHub as well. So:
- Open the Source Control > Push… menu.
- Make sure to check the Include tags check box.
- Also make sure that the automatically selected remote branch is the correct one (origin/master in our case).
- Click on the Push button.
The version number of the post now exists on GitHub repository as well. In case we perform any changes to the package and we commit again, then we’ll update the version number following the process described in this part by changing the tag number once again. If we’re about to make a small change we could go to version 1.0.1, while if we’re about to add something new to the MathOperations class we could change to 1.1.0.
Finally, if you want to see the package on GitHub after all the work we’ve done so far:
- Right click on the repository in the Source Control navigator.
- Select the View on GitHub… option.
The GitHub page will open in your default browser. If you need to find the tag number click on the 1 Release link right above the files listing.
Using A Remote Package
Our package has been pushed to GitHub successfully, so you can close it in Xcode and open again the SwiftPackageDemo project. Knowing how to create and push a package to a remote repository is just one side of the coin; the other side is to know how to use a package that exists on GitHub.
At first, delete the MathOpsPackage package from the demo project by right clicking on it in Xcode and selecting the Delete option. When asked for confirmation, make sure to click on the Remove Reference button otherwise the local package project will be sent to Trash.
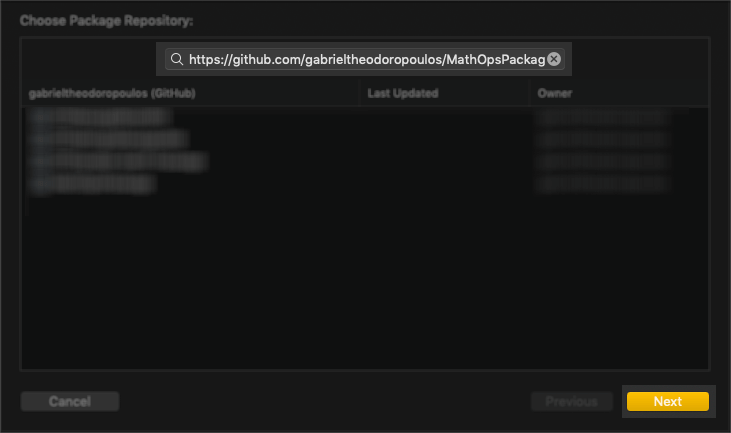
In your browser now open the package repository on GitHub. Click on the Clone or download green button and copy the URL to the remote repository.
Back in Xcode again, open the File > Swift Packages > Add Package Dependency… menu option. In the window that shows up paste the URL you just copied from GitHub and click on Next button.
In the next step you have to choose the version of the package you want to use. Provided options allow to use the version number, the branch or the commit identifier. Regarding the version number, there are a few options for specifying the desired version up to which the package should be updated when new versions exist on GitHub. By default, the current version up to the next major is selected, which means all future versions with major number starting with 1 will be good for use (1.x.y), but not any new versions where the major number is changed. There are additional options if you open the popup button, such as choosing a version range or a specific version number.
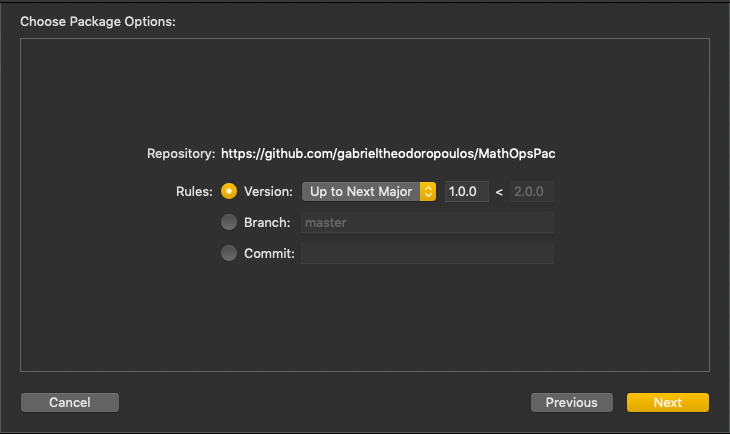
The default option is good enough for our demo project here, so click on the Next button again.
Once Xcode finishes cloning the repository and resolving any potential issues, there’s one last step where you have to choose the target that the package should be added to. In our demo project there’s just one target so click on the Finish button. Obviously, the MathOpsPackage should be selected in the list.
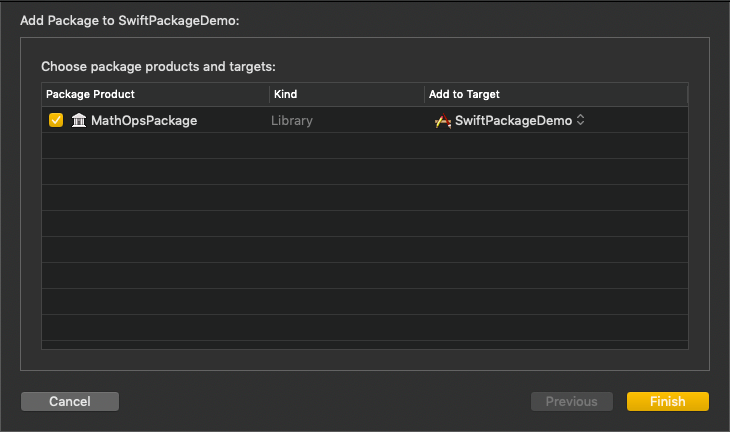
If the entire process is finished without problems, then the package will appear in the Project navigator as shown here:
Build the project to verify that it’s all good and there’s not any error. The package library is automatically added to the Frameworks, Libraries, and Embedded Content section of the SwiftPackageDemo target in the last step of the guide above. Don’t forget to use the import keyword for importing any module your packages add to the project, like the MathOperations in this demo.
If you’re using packages that are being updated on GitHub, then you can easily fetch the most recent versions by using the File > Swift Packages > Update to Latest Package Versions menu option. Additionally, use the File > Swift Packages > Reset Package Caches and File > Swift Packages > Resolve Package Versions to fix any potential problems you might have with packages.
Removing A Package Dependency
Removing a package dependency it’s quite easy in Xcode. Open the Swift Packages tab in your project settings and select the package you want to delete. Then, press on the minus (-) button to remove the dependency.

Summary
As it seems Swift packages consist of an excellent way to reuse and distribute code when working on Apple ecosystem. The process to create and use package dependencies is fast and easy and it doesn’t take more than a few minutes once you get used to it.
Writing the source code contained in the package is the hard and most crucial part, as this is what actually defines the existence of a package. Even though in this post you took an existing file as the source code for the package we created here, I strongly recommend to write the code of your own packages while you have them integrated in actual projects. It’s the fastest way to know if the code you’re adding to a package is actually working properly with the project you’re working on. When you’re done, then follow the steps presented in the previous parts to take the local package off from your project, push it remotely on GitHub and use it from there afterwards.
As a last piece of advice, keep in mind that any additions or modifications made to a package’s code are not instantly visible to other modules (such as the main project) when the package is integrated into the project and is being implemented in parallel. Build (Cmd + B) first to make changes visible and then make use of them.
Finally, I’m personally really fond of Swift packages and I’ve created quite a bit of them so far, both public and private, so I can use my reusable components easily and efficiently. I advice you to do the same; trust me, it worths it!


