

Apple integrated Swift 3 into Xcode 8 beta at WWDC and will release the final version later on this year. This is the language’s first version that is open source and works both on Mac OS X and Linux. If you have followed the Swift Evolution process since December last year and even already played with it in the IBM sandbox, you know that there are a lot of changes. It is quite sure if you compile your app in Xcode 8, it will break your code.
The changes of Swift 3 can be grouped into two major categories:
- Removed features that have already been deprecated in Swift 2.2
- Language modernisation issues
Let’s start with the removed ones, since they are easier to understand and you may have encountered them before as warnings in Xcode 7.3.
++ and — Operators
The increment and decrement operators are inherited from C and their functionality is straightforward – add or subtract 1 to a certain variable:
var i = 0
i++
++i
i--
--i
However, things get complicated when it comes to deciding which one to choose. Each of them comes in two possible flavours: prefix and postfix – they are all functions under the hood and return values which you may use or discard thanks to operator overloading.
This is overwhelming for beginners, so they have been removed – use the addition (+=) and subtraction (-=) assignment operators instead:
var i = 0
i += 1
i -= 1
Of course, you can use the addition (+) and subtraction (-) operators as well – the compound assignment operators approach is shorter though:
i = i + 1
i = i - 1
C-style for Loop is History
The most common usage of the increment and decrement operators is the C-style for loop. Removing the operators means that this feature is gone as well, since there is nothing you can do with it that you can’t do with the for-in control flow statement and ranges.
If you have some programming background, you probably write the for loop like this to print the numbers from 1 to 10:
for (i = 1; i <= 10; i++) {
  print(i)
}
In Swift 3, you're no longer allowed to do that. And this is its Swift 3 counterpart - notice the closed range operator (...) in action:
for i in 1...10 {
  print(i)
}
Alternatively, you can also use the for-each loop with closures and shorthand arguments - read more about loops here.
(1...10).forEach {
  print($0)
}
Remove var from Function Parameters
Function parameters are usually defined as constants, since you don’t need to modify them in its body. However, there are certain cases when declaring them as variables might come in handy. In Swift 2, you can mark a function parameter as variable with the var keyword. Once the parameter is marked as var, it creates a local copy of the value so you can modify its value in the body of the function.
As an example, the following function determines the greatest common divisor of two given numbers - if you skipped the Maths class back in high school, read more about it here:
func gcd(var a: Int, var b: Int) -> Int {

  if (a == b) {
    return a
  }

  repeat {
    if (a > b) {
      a = a - b
    } else {
      b = b - a
    }
  } while (a != b)

  return a
}
The algorithm is simple: if both numbers are already equal, return one of them. Otherwise, compare them, subtract the smaller one from the bigger one and assign the result to the larger one until they become equal and return any one of them. As you can see, by marking a and b as variables, we can change their values in the function.
Swift 3 no longer allows developers to set function parameters as variables as Swift developers may get confused between var and inout. So the latest version of Swift simply removes var from function parameters.
Therefore, to write the same gcd function in Swift 3, it requires a different approach. You'll need to save the values of the function parameters to local variables:
func gcd(a: Int, b: Int) -> Int {

  if (a == b) {
    return a
  }

  var c = a
  var d = b

  repeat {
    if (c > d) {
      c = c - d
    } else {
      d = d - c
    }
  } while (c != d)

  return c
}
If you want to learn more about the motivation behind the removal, you can check out the original proposal.
Consistent Label Behaviour for Function Parameters
Function parameter lists are tuples under the hood, so you can use them to call functions, as long as the tuple’s structure matches the function's prototype. Take the gcd() function as an example. You can invoke the call like this:
gcd(8, b: 12)
Or you may even call the function like below:
let number = (8, b: 12)
gcd(number)
As you can see, you do not need to specify the label of the first parameter in Swift 2. However, you have to specify the label of the second (and the rest of the parameters) when calling the function.
This syntax is confusing for beginners, so it is designed to standardize the label behaviour. In Swift 3, you call the function like this:
gcd(a: 8, b: 12)
You have to explicitly specify the label of the first parameter. If you don't do that, Xcode 8 will show you an error.
Your first reaction to this change may be "OMG! I will have to make a lot of modifications to my existing code." You're right. That's tons of changes. So Apple offers a way to suppress the first parameter label of a function call. You can add an underscore to the first parameter like this:
func gcd(_ a: Int, b: Int) -> Int {

...

}
By doing this, you can invoke the function using the old way - without specifying the first label. This would make your code migration from Swift 2 to Swift 3 simpler.
Selectors as Strings No Longer Works
Let’s create a button and make it do something when you tap on it - use playgrounds only, no Interface Builder allowed:
// 1
import UIKit
import XCPlayground

// 2
class Responder: NSObject {

  func tap() {
    print("Button pressed")
  }
}
let responder = Responder()

// 3
let button = UIButton(type: .System)
button.setTitle("Button", forState: .Normal)
button.addTarget(responder, action: "tap", forControlEvents: .TouchUpInside)
button.sizeToFit()
button.center = CGPoint(x: 50, y: 25)

// 4
let frame = CGRect(x: 0, y: 0, width: 100, height: 50)
let view = UIView(frame: frame)
view.addSubview(button)
XCPlaygroundPage.currentPage.liveView = view
There’s quite a lot going on here, so let’s break it into steps:
- Import the UIKit and XCPlayground frameworks - you need them to create the button and show it in the playground’s assistant editor.
Note: You should enable the assistant editor in Xcode to interact with the button: View -> Assistant Editor -> Show Assistant Editor.
-
Define the tap method which fires when the user presses the button and make a responder object for the button’s target - its base class is NSObject, because selectors only work with Objective-C methods.
-
Declare the button and set its properties.
-
Declare the view and its corresponding frame, add the button to it and display it in the playground’s assistant editor.
Take a look at the highlighted code. The button's selector is a string. If you type it wrong, the code will compile but crash at runtime, since no corresponding method can be found.
To resolve the potential issue in compile time, Swift 3 replaces string selectors with the #selector() keyword. This enables the compiler to detect the problem early if you don't get the method's name right.
button.addTarget(responder, action: #selector(Responder.tap), for: .touchUpInside)
That’s it for the removed features. Now let’s move on to the language modernisation highlights.
Key-paths as Strings
This feature is similar to the previous one, but it applies to key-value coding (KVC) and key-value observing (KVO):
class Person: NSObject {
  var name: String = ""

  init(name: String) {
    self.name = name
  }
}
let me = Person(name: "Cosmin")
me.valueForKeyPath("name")
You create a Person class that is key-value coding compliant, make my identity with the class designated initialiser and use the corresponding key-path to determine my name. Again, if you get it wrong, everything will blow up and I won't be happy! 🙁
Fortunately, this will not happen in Swift 3 anymore. Key-path strings have been replaced with the #keyPath() expression:
class Person: NSObject {
  var name: String = ""

  init(name: String) {
    self.name = name
  }
}
let me = Person(name: "Cosmin")
me.value(forKeyPath: #keyPath(Person.name))
Drop NS Prefix for Foundation Types
The NS prefix goes way back for Foundation types - if you are in the mood for a history lesson, check this out. A typical example is JSON parsing:
let file = NSBundle.mainBundle().pathForResource("tutorials", ofType: "json")
let url = NSURL(fileURLWithPath: file!)
let data = NSData(contentsOfURL: url)
let json = try! NSJSONSerialization.JSONObjectWithData(data!, options: [])
print(json)
You use Foundation classes to connect to the file and extract the JSON data in an appropriate way: NSBundle -> NSURL -> NSData -> NSJSONSerialization.
The NS prefix has been dropped in Swift 3, so it all boils down to Bundle -> URL -> Data -> JSONSerialization:
let file = Bundle.main().pathForResource("tutorials", ofType: "json")
let url = URL(fileURLWithPath: file!)
let data = try! Data(contentsOf: url)
let json = try! JSONSerialization.jsonObject(with: data)
print(json)
M_PI vs .pi
Let's compute the circumference and area of a circle with a given radius:
let r =  3.0
let circumference = 2 * M_PI * r
let area = M_PI * r * r
For old versions of Swift, you use M_PI to refer to the pi constant. Swift 3 integrates the pi constant in the Float, Double and CGFloat types:
Float.pi
Double.pi
CGFloat.pi
The above piece of code will be written like this in Swift 3:
let r = 3.0
let circumference = 2 * Double.pi * r
let area = Double.pi * r * r
With type inference, you can even omit the type. Here is a shorter version:
let r = 3.0
let circumference = 2 * .pi * r
let area = .pi * r * r
Grand Central Dispatch
Grand Central Dispatch (CGD) is used for networking operations that don’t block the user interface on the main thread. It’s written in C and its API is overwhelming to beginners, even for trivial tasks such as creating an asynchronous queue and making it do something:
let queue = dispatch_queue_create("Swift 2.2", nil)
dispatch_async(queue) {
  print("Swift 2.2 queue")
}
Swift 3 eliminates all the boilerplate code and redundant stuff by taking an object oriented approach:
let queue = DispatchQueue(label: "Swift 3")
queue.async {
  print("Swift 3 queue")
}
Core Graphics is Now More Swifty
Core Graphics is a powerful drawing framework, but it uses a C-style API similar to GCD:
let frame = CGRect(x: 0, y: 0, width: 100, height: 50)

class View: UIView {

  override func drawRect(rect: CGRect) {
    let context = UIGraphicsGetCurrentContext()
    let blue = UIColor.blueColor().CGColor
    CGContextSetFillColorWithColor(context, blue)
    let red = UIColor.redColor().CGColor
    CGContextSetStrokeColorWithColor(context, red)
    CGContextSetLineWidth(context, 10)
    CGContextAddRect(context, frame)
    CGContextDrawPath(context, .FillStroke)
  }
}
let aView = View(frame: frame)
You create the view’s frame, extend the UIView class, override the drawRect() method for custom drawing and make the view with the new content.
Swift 3 takes a totally different approach - unwrap the current graphics context first and perform all drawing operations related to it afterwards:
let frame = CGRect(x: 0, y: 0, width: 100, height: 50)

class View: UIView {

  override func draw(_ rect: CGRect) {
    guard let context = UIGraphicsGetCurrentContext() else {
      return
    }

    let blue = UIColor.blue().cgColor
    context.setFillColor(blue)
    let red = UIColor.red().cgColor
    context.setStrokeColor(red)
    context.setLineWidth(10)
    context.addRect(frame)
    context.drawPath(using: .fillStroke)
  }
}
let aView = View(frame: frame)
Note: The context is nil before the view calls its drawRect() method, so you unwrap it with the guard statement - read more about this here.
Verbs vs Nouns Naming Convention
Time for a little bit of grammar! 🙂 Swift 3 groups methods into two categories: methods that return a certain value - think of them as nouns - and methods that perform a certain kind of action - think of them as verbs.
Here is how you print the numbers from 10 to 1:
for i in (1...10).reverse() {
  print(i)
}
You use the reverse() method to reverse the range. Swift 3 treats this operation as a noun since it returns the original range in reverse order. It adds the "ed" suffix to the method:
for i in (1...10).reversed() {
  print(i)
}
The most common usage of tuples is to print the contents of an array:
var array = [1, 5, 3, 2, 4]
for (index, value) in array.enumerate() {
  print("\(index + 1) \(value)")
}
Swift 3 treats this method as a noun since it returns a tuple containing the array’s current index and value and adds the "ed" suffix to it:
var array = [1, 5, 3, 2, 4]
for (index, value) in array.enumerated() {
  print("\(index + 1) \(value)")
}
Another example is array sorting. Here is how you sort an array in ascending order:
var array = [1, 5, 3, 2, 4]
let sortedArray = array.sort()
print(sortedArray)
Swift 3 treats this method as a noun since it returns the sorted array. The sort method is now named as sorted:
var array = [1, 5, 3, 2, 4]
let sortedArray = array.sorted()
print(sortedArray)
Let’s sort the array on the spot, without using an intermediate constant. In Swift 2, you write the code like this:
var array = [1, 5, 3, 2, 4]
array.sortInPlace()
print(array)
You use sortInPlace() to sort a mutable array. Swift 3 treats this method as a verb since it performs the actual sorting without returning anything else. It uses just the base word that describes the action. So sortInPlace() is now renamed to sort():
var array = [1, 5, 3, 2, 4]
array.sort()
print(array)
Swiftier APIs
Swift 3 adopts a simple philosophy for its APIs - omit needless words, so if something is redundant or can be inferred from the context, remove it:
XCPlaygroundPage.currentPagebecomesPlaygroundPage.currentbutton.setTitle(forState)becomesbutton.setTitle(for)button.addTarget(action, forControlEvents)becomesbutton.addTarget(action, for)NSBundle.mainBundle()becomesBundle.main()NSData(contentsOfURL)becomesURL(contentsOf)NSJSONSerialization.JSONObjectWithData()becomesJSONSerialization.jsonObject(with)UIColor.blueColor()becomesUIColor.blue()UIColor.redColor()becomesUIColor.red()
Enumeration Cases
Swift 3 treats enumeration cases like properties, so use lowerCamelCase naming instead of upperCamelCase notation for them:
.Systembecomes.system.TouchUpInsidebecomes.touchUpInside.FillStrokebecomes.fillStroke.CGColorbecomes.cgColor
@discardableResult
In Swift 3, Xcode will show you a warning if you do not use a return value of a function or method. Here is an example:
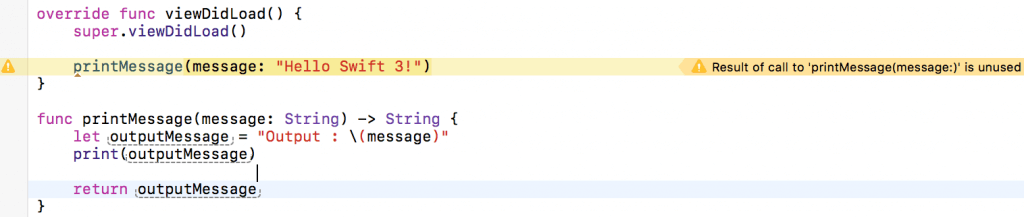
In the above code, the printMessage method returns the resulting message to the caller. However, the returned value is not used. It may be a potential issue, so the compiler in Swift 3 will give you a warning.
In case, it is not a must to handle the returned value. You can suppress the warning by adding @discardableResult to the method declaration:
override func viewDidLoad() {
    super.viewDidLoad()

    printMessage(message: "Hello Swift 3!")
}

@discardableResult
func printMessage(message: String) -> String {
    let outputMessage = "Output : \(message)"
    print(outputMessage)

    return outputMessage
}
Summary
That's all about Swift 3. The new version of Swift is a major release that makes the language even better. It contains a lot of fundamental changes that will definitely impact your existing Swift code. I hope this tutorial helps you better understand the changes, and hopefully, save you some time to migrate your Swift project.
All the code in this tutorial can be found in this Playground project. I have tested it on Xcode 8 Beta. So make sure you use Xcode 8 to run the project.
If you have any questions or issues, please let me know. Happy coding! 🙂


