

From time to time, we received questions about how to create confetti animations. Undoubtedly, you can build the animation from the ground up using SwiftUI or UIKit. Recently I came across an open source library called ConfettiSwiftUI that allows developers to create different types of confetti animations. So, instead of developing the animation from scratch, let’s see how to create some confetti animations using the Swift package.
Basic Usage of ConfettiSwiftUI
ConfettiSwiftUI is available as a Swift package. Therefore, it’s very easy to bundle it in your Xcode project.
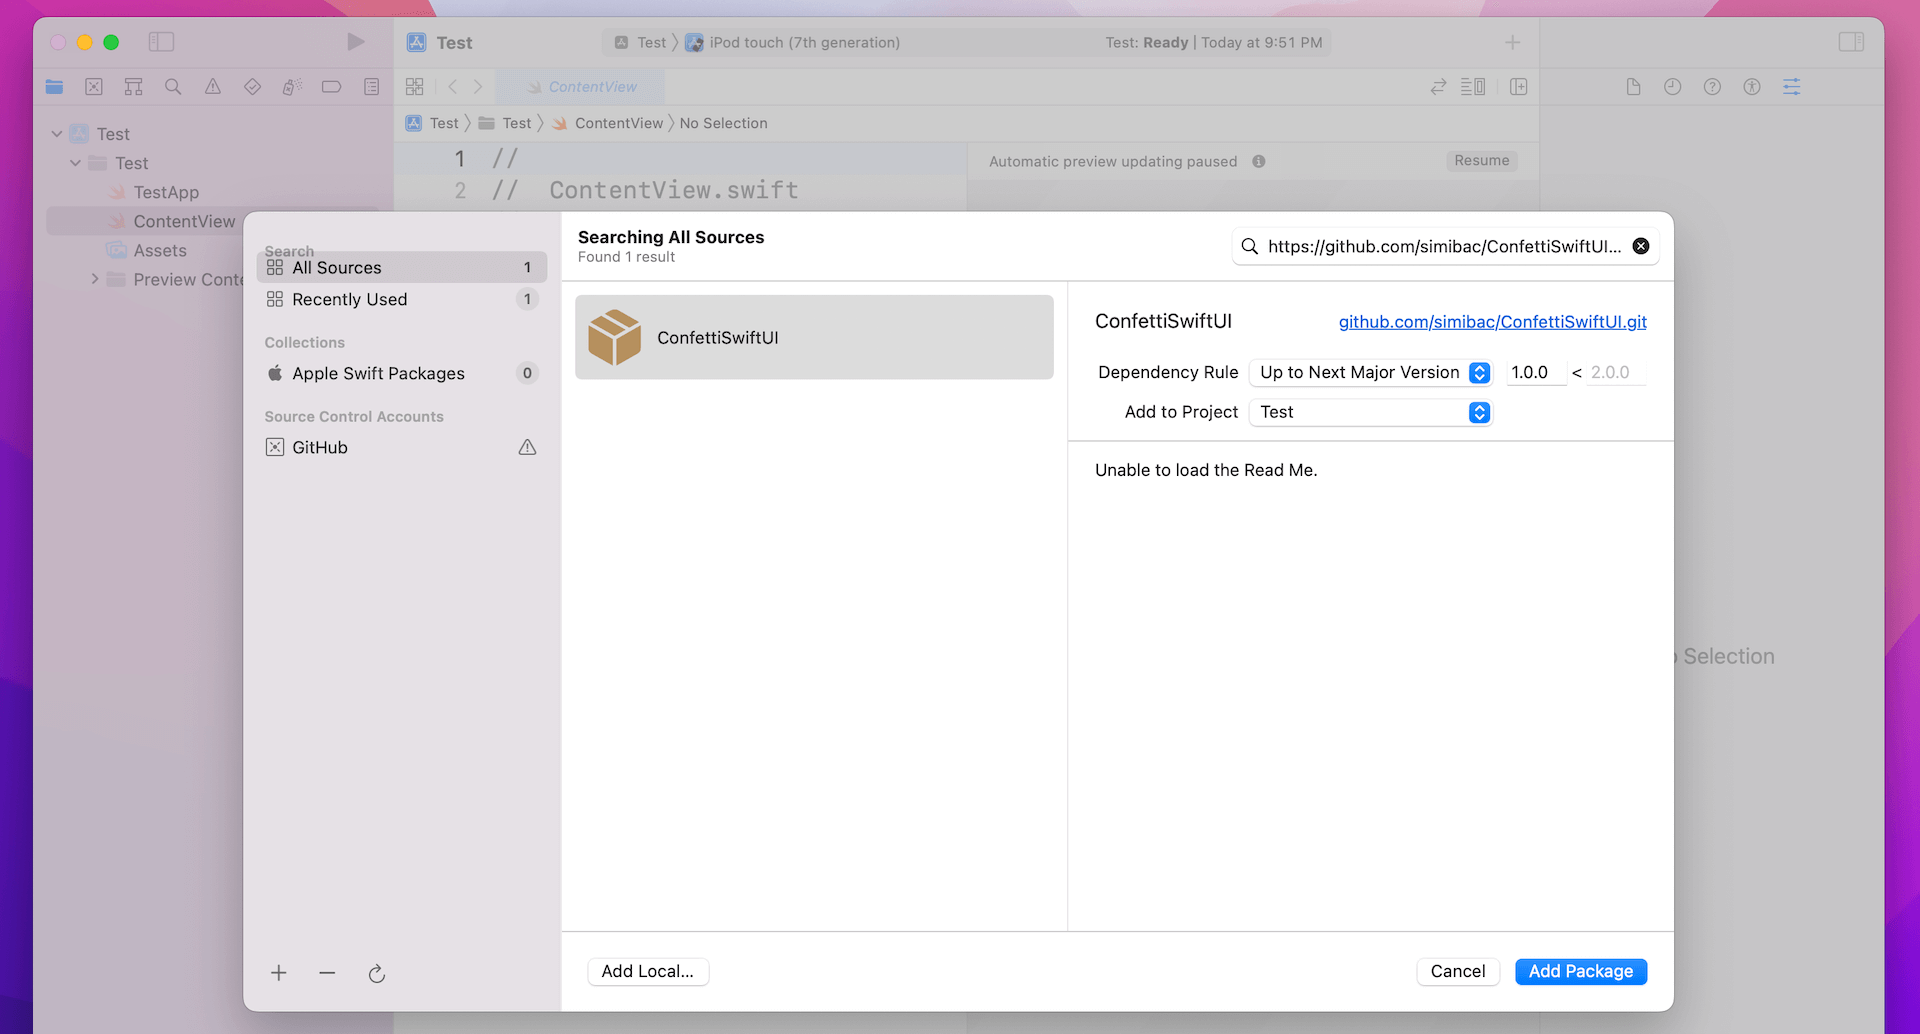
Assuming you’ve created a new Xcode project, you can go up to the Xcode menu and choose File > Add Packages…. Then key in the following package URL:
https://github.com/simibac/ConfettiSwiftUI.gitXcode should automatically load the package information. Clicking the Add Package button to add the package to the project.
Once the Swift package is downloaded, you can switch over to the ContentView.swift file. To use the library, you just need to import ConfettiSwiftUI and update ContentView like this:
struct ContentView: View {
@State private var counter = 0
var body: some View {
Button(action: {
counter += 1
}) {
Text("🎃")
.font(.system(size: 50))
}
.confettiCannon(counter: $counter)
}
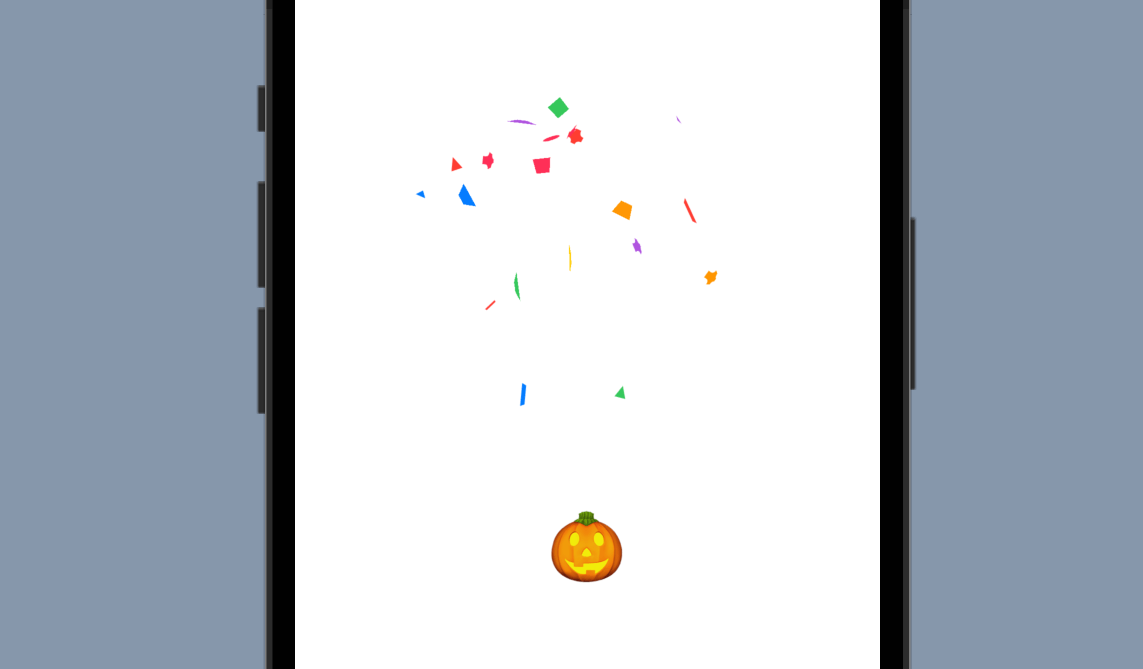
}In the code, we create an emoji button and attach the confettiCannon modifier, which is the modifier for rendering the confetti animation. The modifier accepts various parameters but most of them are optional. You just need to provide a binding to a counter for triggering the animation.
When the button is tapped, we increase the value of the counter variable by one. This is how we trigger the confetti animation.
Run the app on a simulator or simply test the app in the preview pane. You will see a confetti animation when you tap the emoji button.
Adding More Confetties
ConfettiSwiftUI provides several parameters for developers to customize the confettie animation. You can control the amount of confettis by using the num parameter:
.confettiCannon(counter: $counter, num: 50)By default, it generates 20 confettis. You can adjust the value to suit your needs.
Changing the Explosion Radius
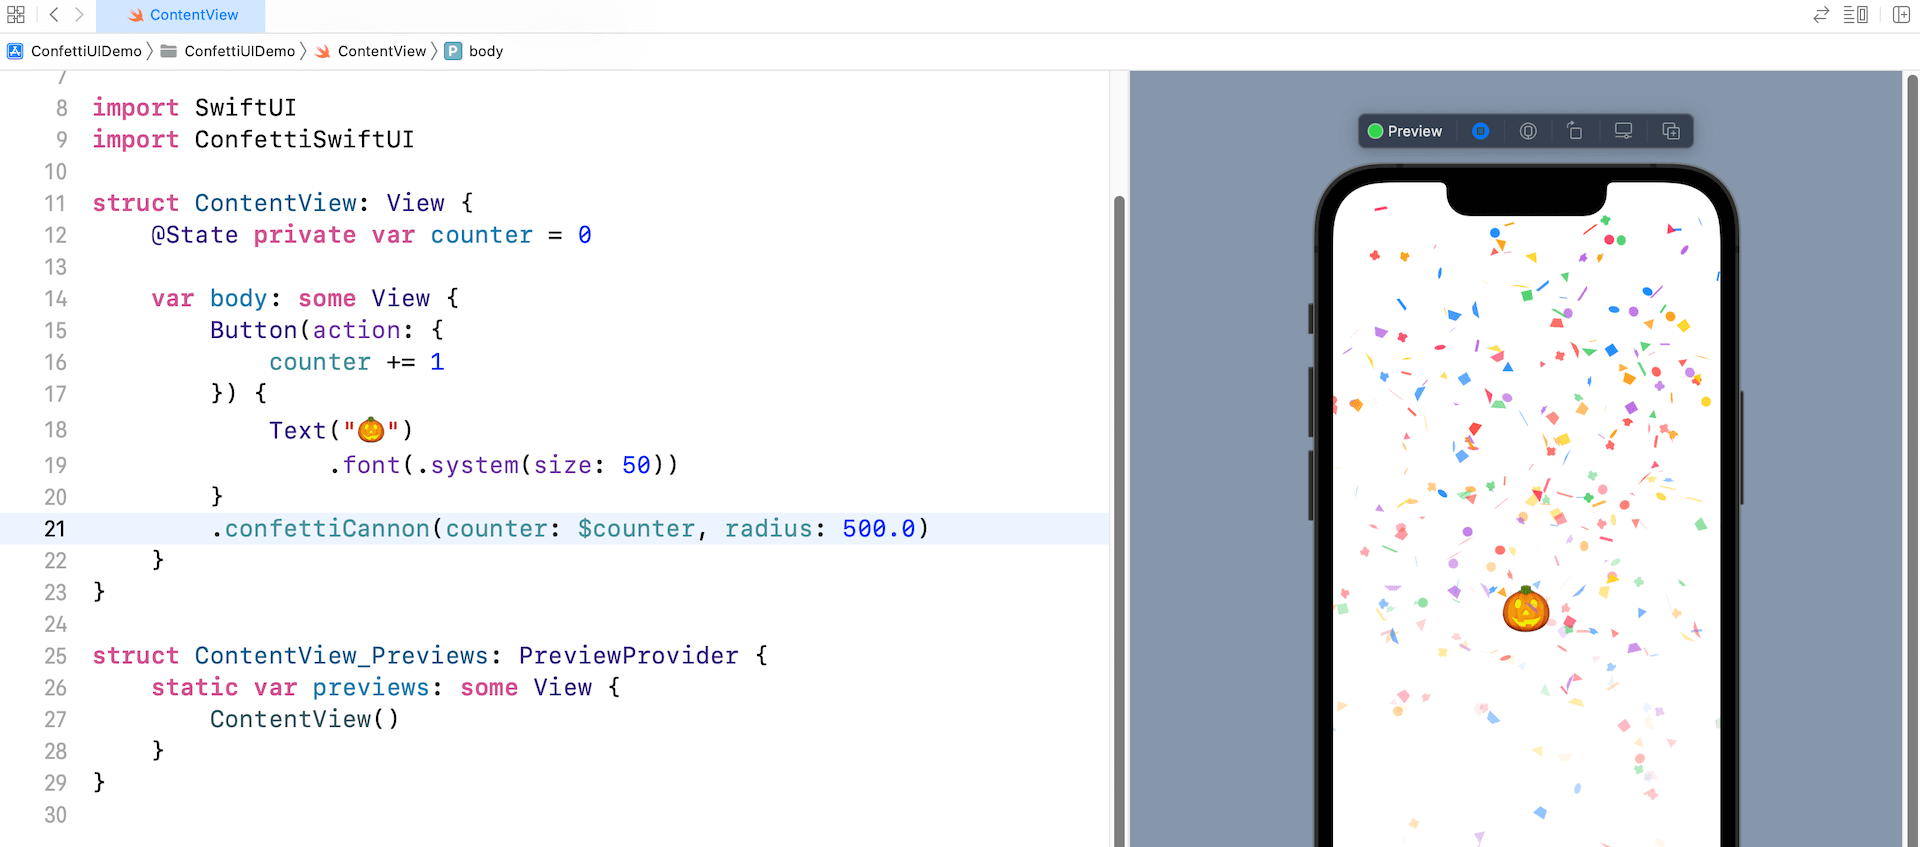
If you want to control the width of the confetti animation, you can change the value of the radius parameter:
.confettiCannon(counter: $counter, radius: 500.0)The default value is set to 300.0. A larger value will create a confetti animation that spreads out more.
Customizing the Color and Rain Height
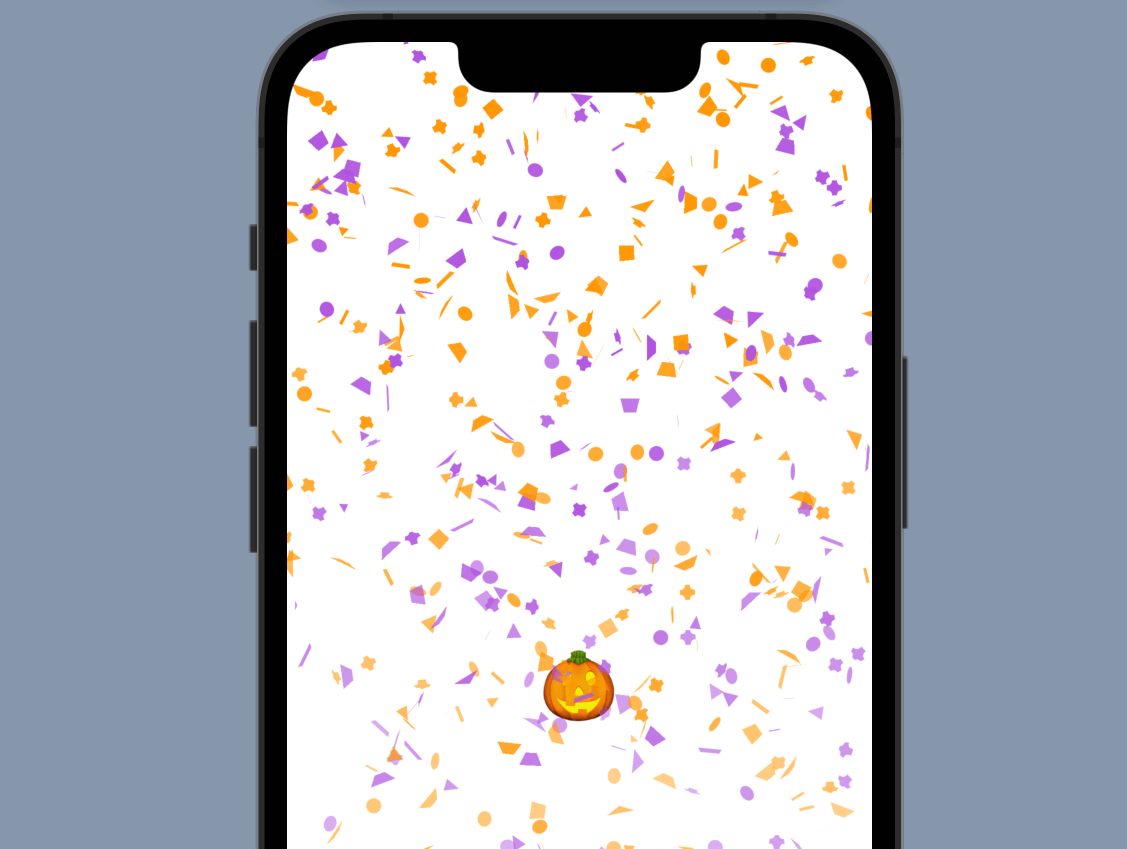
You can also customize the color of the confettis and the vertical distance of the animation using the colors and rainHeight parameters respectively:
.confettiCannon(counter: $counter, colors: [.purple, .orange], rainHeight: 1000.0, radius: 500.0)The code above creates a confetti animation that consists of both purple and orange confettis.
Using Your Own Shape
This open source library also lets you use your own shape for rendering the confettis. You can use an emoji text, another built-in shape (e.g. .roundedCross) or even a SF symbol.
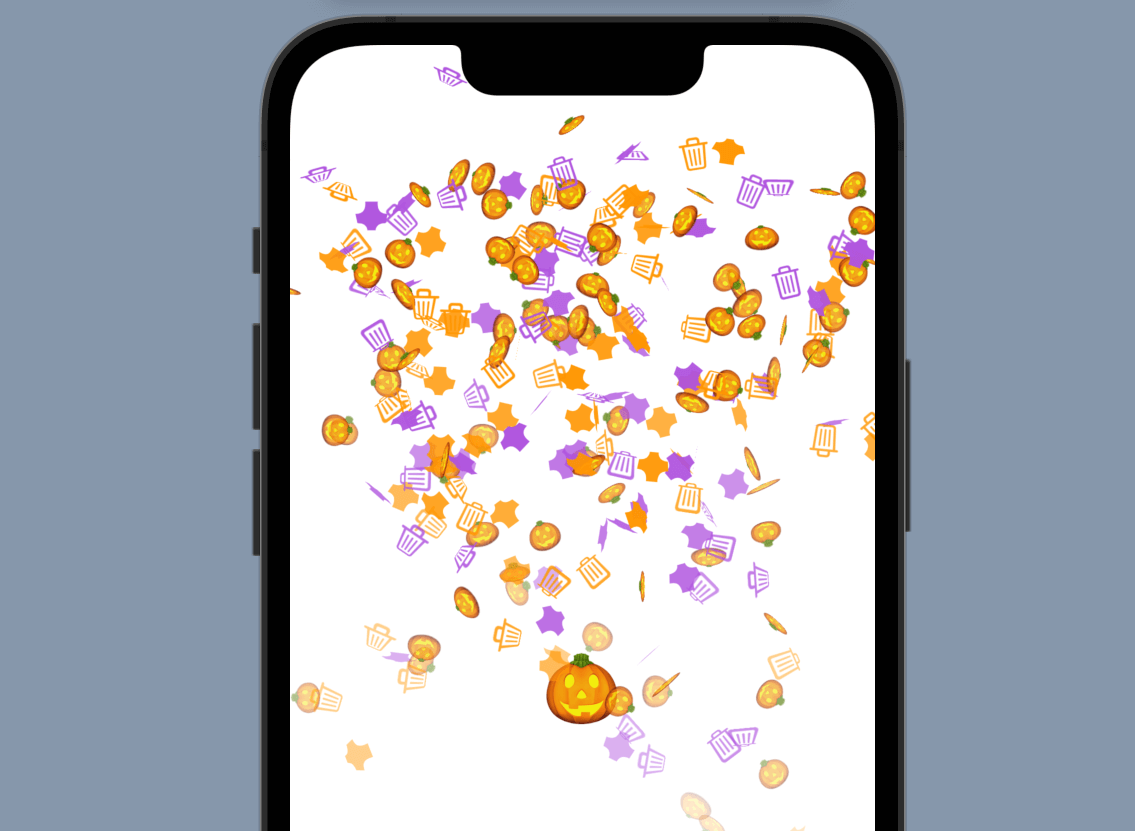
.confettiCannon(counter: $counter, confettis: [.sfSymbol(symbolName: "trash"), .shape(.roundedCross), .text("🎃")], colors: [.purple, .orange], confettiSize: 20.0, radius: 400.0)You specify your own shape in the confettis parameter and adjust the size of confetti by changing the value of the confettiSize parameter.
Keep Repeating
The modifier also provides the repetitions and repetitionInterval parameters if you want to rerun the same animation over and over again. Here is the sample code snippet:
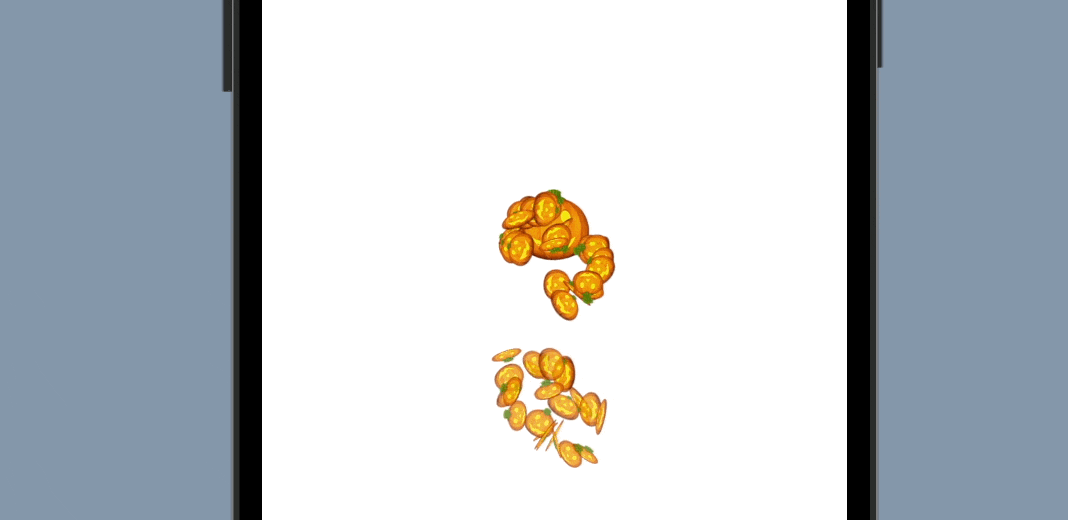
.confettiCannon(counter: $counter, num: 1, confettis: [ .text("🎃")], colors: [.purple, .orange], confettiSize: 20.0, radius: 10.0, repetitions: 1000, repetitionInterval: 0.05)This repeats the same confetti animation for 1000 times with the repetition interval set to 0.05s.
Wrap Up
ConfettiSwiftUI is a great open source library for rendering Confetti animations. It’s highly customizable, with various properties for controlling the size and shape of the confettis. In this tutorial, I only covers some of the commonly-used parameters. You can head over to the official API documentation and check out other configurable properties.
I hope you enjoy this tutorial and take some time to further explore this library.


