

SwiftUI list is very similar to UITableView in UIKit. In the first release of SwiftUI, Apple’s engineers already made creating list view construction a breeze. You do not need to create a prototype cell and there is no delegate/data source protocol. With just a few lines of code, you can build a list view with custom cells. In iOS 14, Apple continued to improve the List view and introduce several new features. In this tutorial, we will show you how to build an expandable list / outline view and explore the inset grouped list style.
Building an Expandable List View
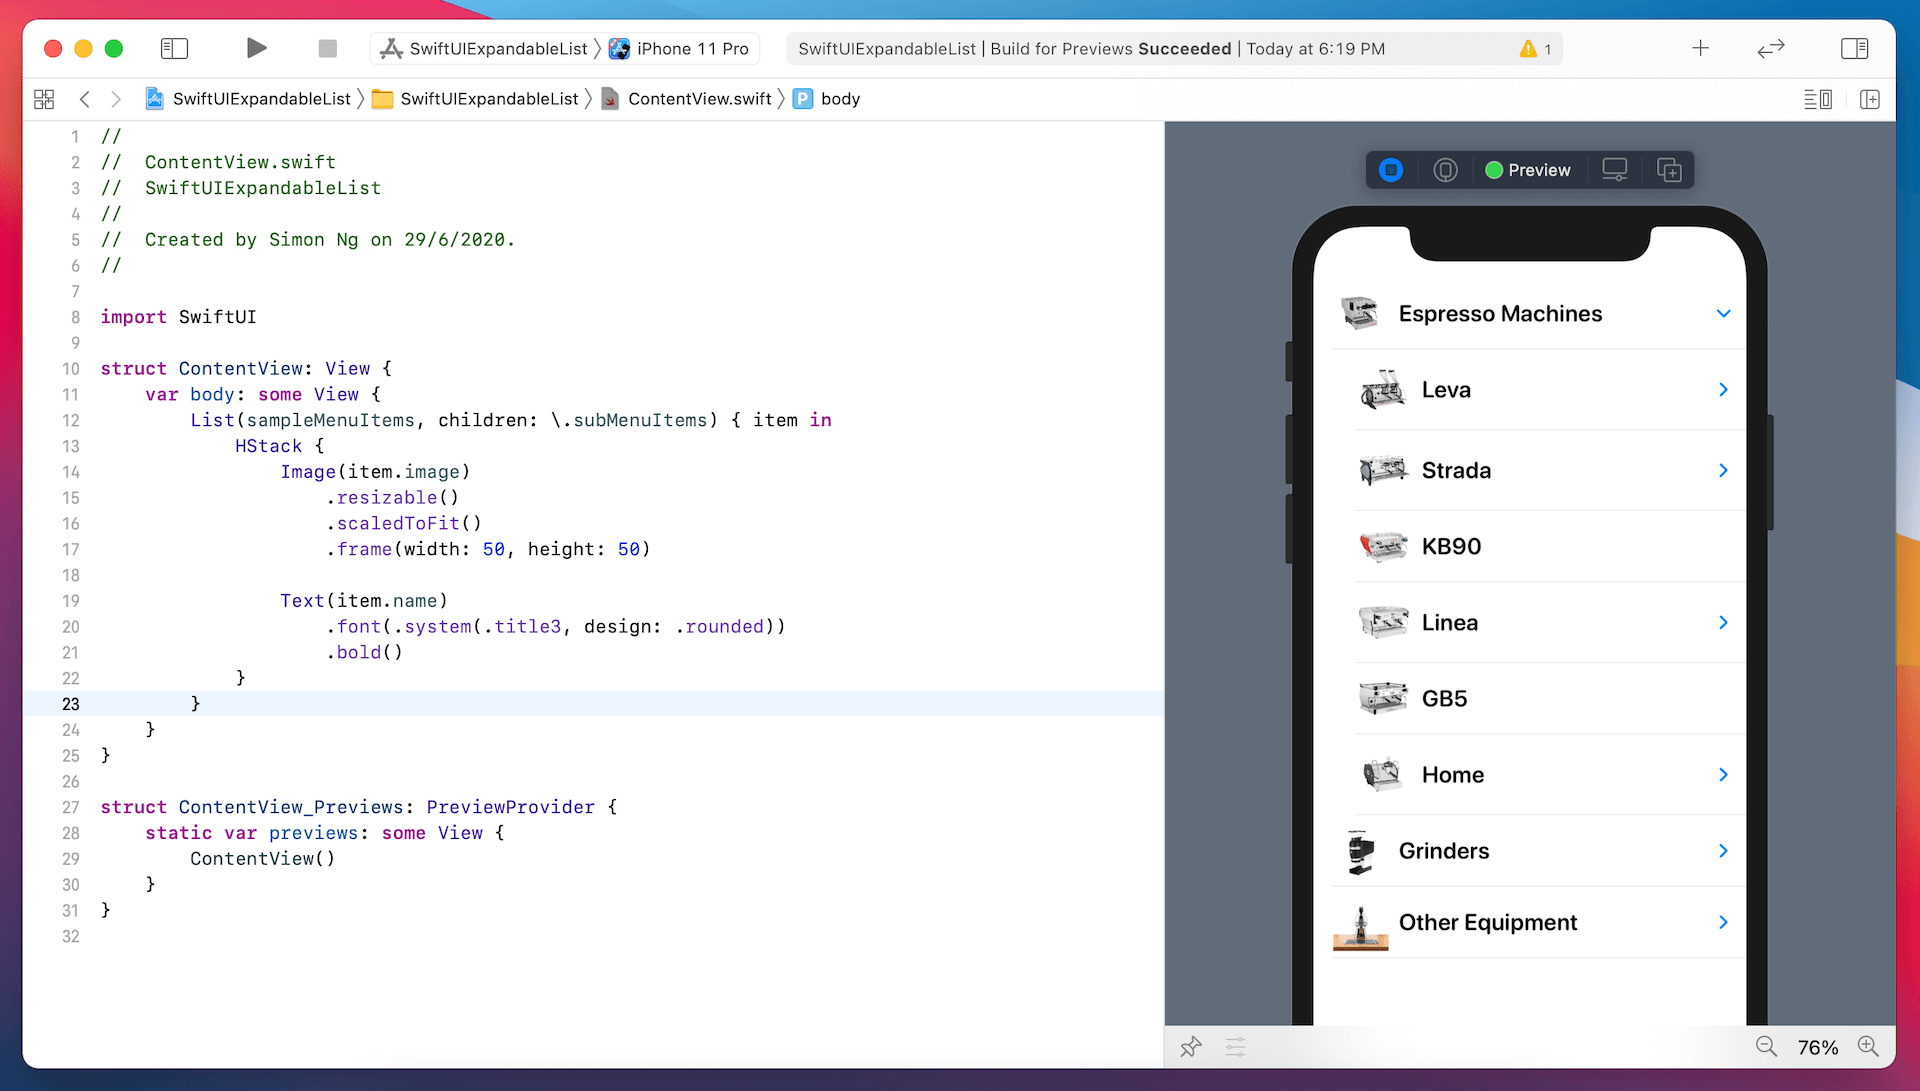
First, let’s take a look at the final deliverable. I’m a big fan of La Marzocco, so I used the navigation menu on its website as an example. The list view below shows an outline of the menu and users can tap the disclosure button to expand the list.
Of course, you can build this outline view using your own implementation. In the new version of SwiftUI, Apple just made it simpler for developers to build this kind of outline view, which automatially works on iOS, iPadOS, and macOS.
To make the list view expandable, all you need to do is create a data model like this:
struct MenuItem: Identifiable {
    var id = UUID()
    var name: String
    var image: String
    var subMenuItems: [MenuItem]?
}
In the code above, we have a struct that models a menu item. To make a nested list, the key here is to include a property that contains an optional array of children (i.e. subMenuItems). Note that the children are of the same type of its parent.
For the top level menu items, we can create an array of MenuItem like this:
// Main menu items
let sampleMenuItems = [ MenuItem(name: "Espresso Machines", image: "linea-mini", subMenuItems: espressoMachineMenuItems),
                        MenuItem(name: "Grinders", image: "swift-mini", subMenuItems: grinderMenuItems),
                        MenuItem(name: "Other Equipment", image: "espresso-ep", subMenuItems: otherMenuItems)
                    ]
For each of the menu item, we specify the array of the sub-menu items. In case if there is no sub-menu item, you can omit the subMenuItems parameter or pass it a nil value. For the sub-menu items, we can define them like this:
// Sub-menu items for Espressco Machines
let espressoMachineMenuItems = [ MenuItem(name: "Leva", image: "leva-x", subMenuItems: [ MenuItem(name: "Leva X", image: "leva-x"), MenuItem(name: "Leva S", image: "leva-s") ]),
                                 MenuItem(name: "Strada", image: "strada-ep", subMenuItems: [ MenuItem(name: "Strada EP", image: "strada-ep"), MenuItem(name: "Strada AV", image: "strada-av"), MenuItem(name: "Strada MP", image: "strada-mp"), MenuItem(name: "Strada EE", image: "strada-ee") ]),
                                 MenuItem(name: "KB90", image: "kb90"),
                                 MenuItem(name: "Linea", image: "linea-pb-x", subMenuItems: [ MenuItem(name: "Linea PB X", image: "linea-pb-x"), MenuItem(name: "Linea PB", image: "linea-pb"), MenuItem(name: "Linea Classic", image: "linea-classic") ]),
                                 MenuItem(name: "GB5", image: "gb5"),
                                 MenuItem(name: "Home", image: "gs3", subMenuItems: [ MenuItem(name: "GS3", image: "gs3"), MenuItem(name: "Linea Mini", image: "linea-mini") ])
                                ]

// Sub-menu items for Grinder
let grinderMenuItems = [ MenuItem(name: "Swift", image: "swift"),
                         MenuItem(name: "Vulcano", image: "vulcano"),
                         MenuItem(name: "Swift Mini", image: "swift-mini"),
                         MenuItem(name: "Lux D", image: "lux-d")
                        ]

// Sub-menu items for other equipment
let otherMenuItems = [ MenuItem(name: "Espresso AV", image: "espresso-av"),
                         MenuItem(name: "Espresso EP", image: "espresso-ep"),
                         MenuItem(name: "Pour Over", image: "pourover"),
                         MenuItem(name: "Steam", image: "steam")
                        ]
With the data model prepared, we can write the code to present the list view. The List view now has an optional children parameter. If you have any sub items, you can provide its key path (i.e. \.subMenuItems). SwiftUI will then look up the sub menu items recursively and present it in a form of outline. Here is the sample code:
List(sampleMenuItems, children: \.subMenuItems) { item in
    HStack {
        Image(item.image)
            .resizable()
            .scaledToFit()
            .frame(width: 50, height: 50)

        Text(item.name)
            .font(.system(.title3, design: .rounded))
            .bold()
    }
}
In the closure of the List view, you describe how each of the row looks like. In the sample code, we layout an image and a text view using HStack. If you’ve added the code in ContentView correctly, SwiftUI should render the outline view as shown below:
Using Inset Grouped List Style
In iOS 13, Apple brought a new style to UITableView called Inset Grouped, where the grouped sections are inset with rounded corners. However, this style was not available to the List view in the SwiftUI framework. With the upcoming release of iOS 14, Apple added this new style to SwiftUI list.
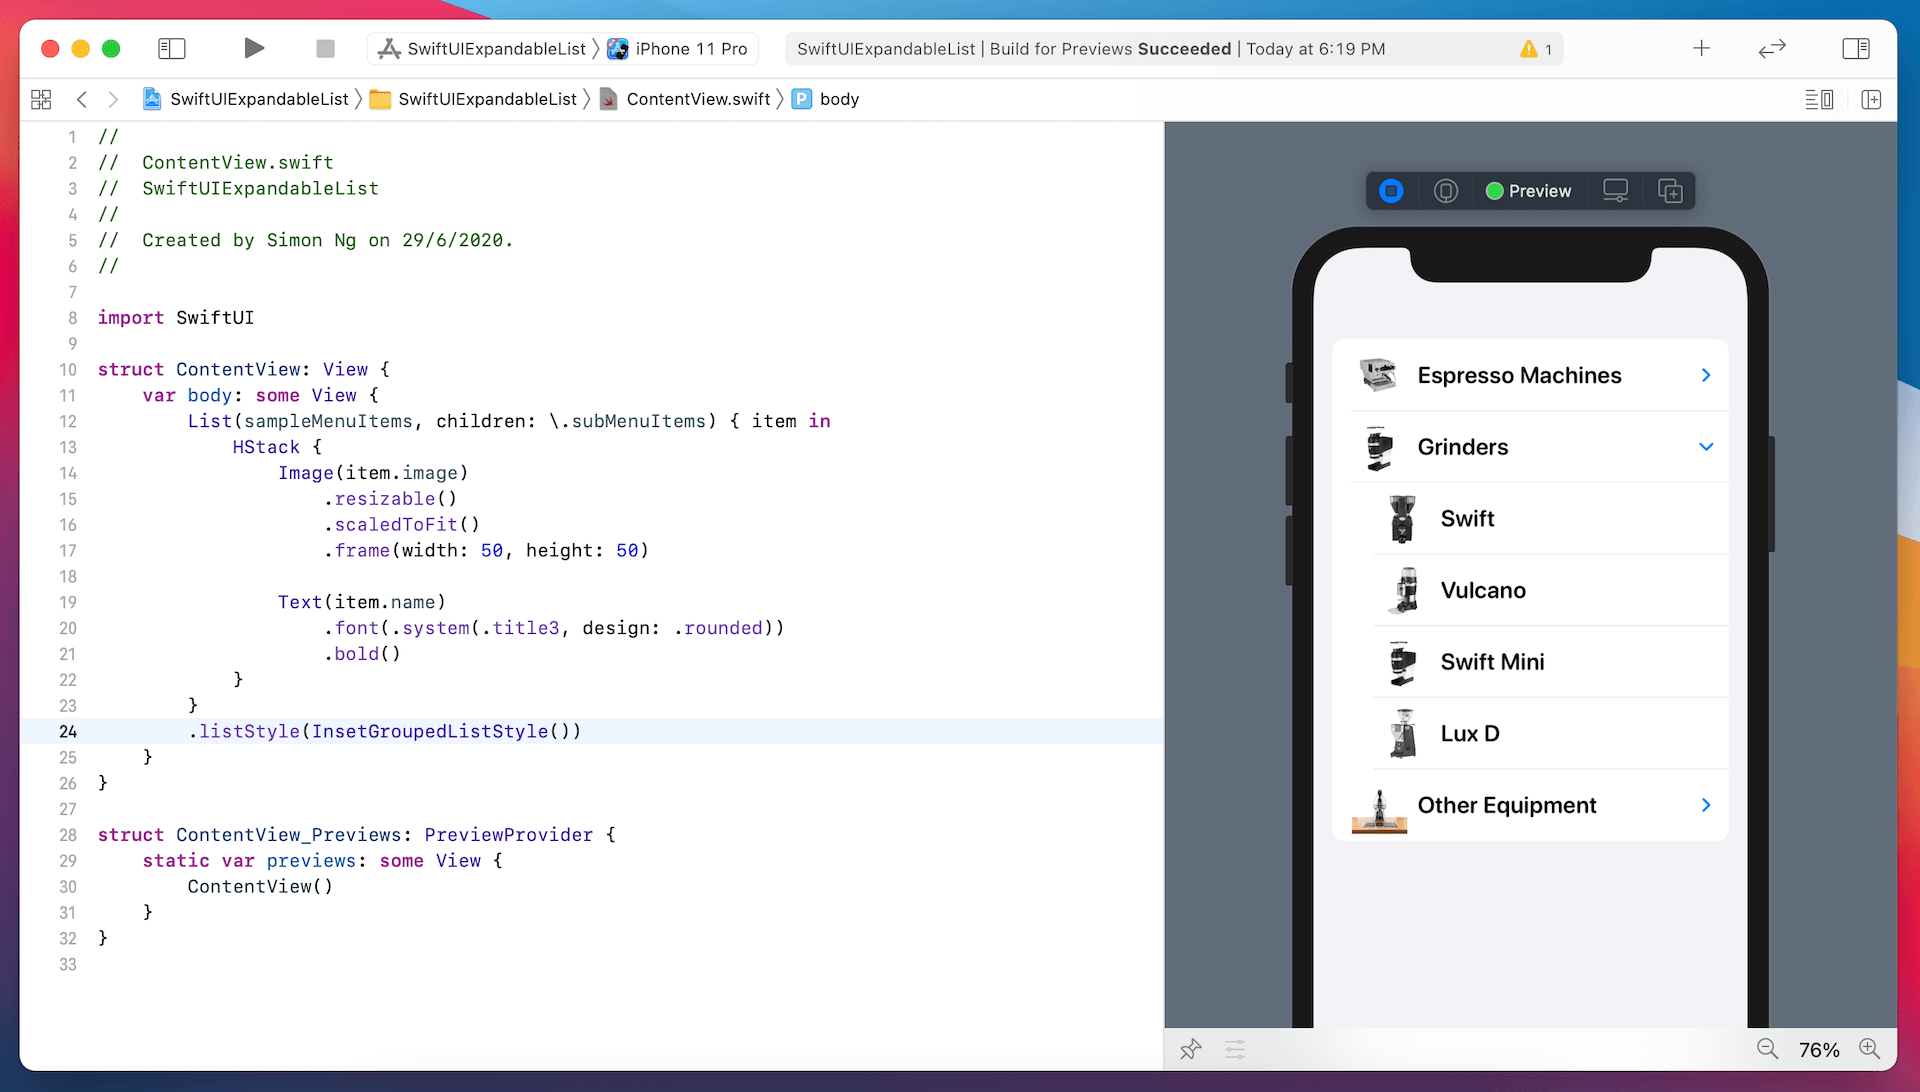
To use this new list style, you can attach the .listStyle modifier to the List view and pass it the instance of InsetGroupedListStyle like this:
List {
  ...
}
.listStyle(InsetGroupedListStyle())
You’ve followed me to make the change. The list view should now change to the inset grouped style.
Summary
We introduced to you two new features for SwiftUI List view in this tutorial. As you can see in the demo, it is very easy to build an outline view or expandable list view. All you need to do is prepare with a correct data model. The List view will handle the rest, traverse the data structure, and render the outline view.
Other than these new additions, Apple also brings you another list style called SidebarListStyle in iOS 14. On top of that, the new update provides OutlineGroup and DisclosureGroup for you to further customize the outline view. We will further look into these features in a separate tutorial. Stay tuned.


