

MapKit is a powerful framework that allows developers to add maps, annotations, and location-based features to their iOS applications. With SwiftUI, you can easily integrate MapKit into your app and create interactive and dynamic maps that offer a great user experience. In this tutorial, we will explore how to work with maps and annotations in SwiftUI, and how to customize the map style and camera position.
The MapKit Basics
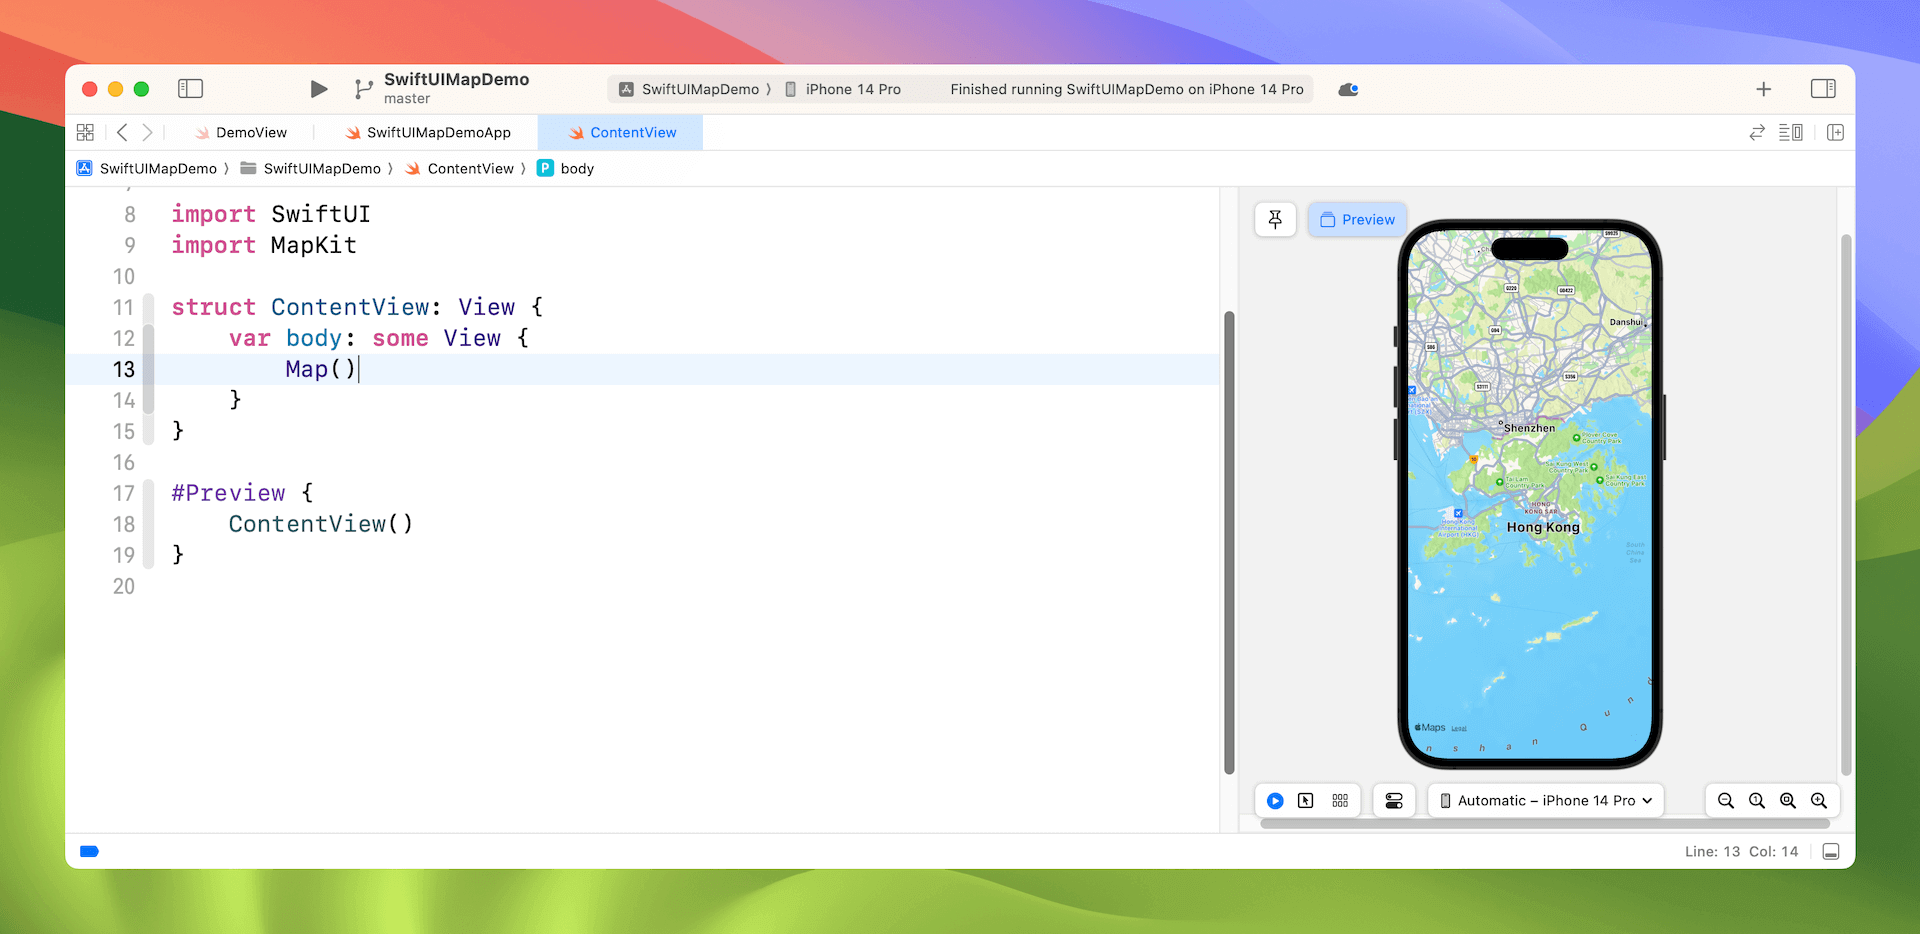
Let’s start with the basics of MapKit. The MapKit framework includes a Map view that developers can use to embed a map in any SwiftUI project. Here is an example:
import SwiftUI
import MapKit

struct ContentView: View {
  var body: some View {
    Map()
  }
}
Before using the Map view, you have to import the MapKit framework. Then, to create a map, simply instantiate a Map view. If you’ve opened the Preview canvas in Xcode, you should see a full screen map in the simulator.
Changing the Initial Position with Map Camera
Instead of displaying a default location, the Map view has another init method for you to change the initial position of the map:
init(
    initialPosition: MapCameraPosition,
    bounds: MapCameraBounds? = nil,
    interactionModes: MapInteractionModes = .all,
    scope: Namespace.ID? = nil
) where Content == MapContentView<Never, EmptyMapContent>
You can an instance of MapCameraPosition as the initial position of the map. MapCameraPosition contains various properties that you can use to control which place or region is displayed, including:
automaticitem(MKMapItem)– for displaying a specific map item.region(MKCoordinateRegion)– for displaying a specific region.rect(MKMapRect)– for displaying specific map boundaries.camera(MapCamera)– for displaying an existing camera position.userLocation()– for displaying the user’s location
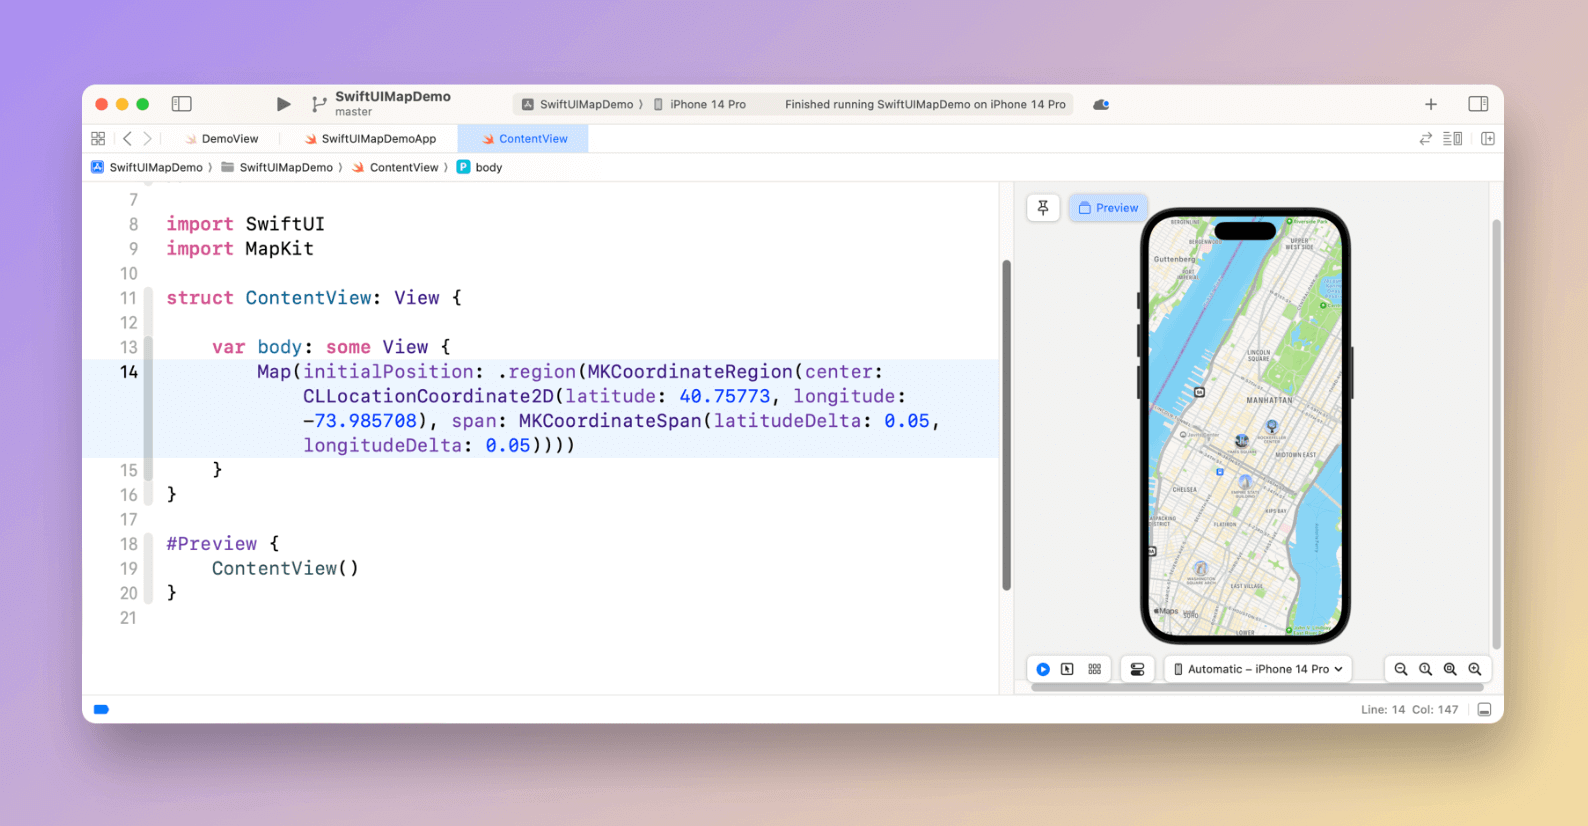
For instance, you can instruct the map to display a specific region by using .region(MKCoordinateRegion):
Map(initialPosition: .region(MKCoordinateRegion(center: CLLocationCoordinate2D(latitude: 40.75773, longitude: -73.985708), span: MKCoordinateSpan(latitudeDelta: 0.05, longitudeDelta: 0.05))))The coordinates in the above sample is the GPS coordinates of Times Square in New York. The value of span is used to define your desired zoom level of the map. The smaller the value, the higher is the zoom level.
If you have a particular location for display, you can pass a map item as the initial position. Here is a sample code snippet:
extension CLLocationCoordinate2D {
    static let bigBen = CLLocationCoordinate2D(latitude: 51.500685, longitude: -0.124570)
}

struct ContentView: View {

    var body: some View {
        Map(initialPosition: .item(MKMapItem(placemark: .init(coordinate: .bigBen))))
    }
}
Animating the Change of Map Position
The Map view also provides an additional init method that accepts a binding to MapCameraPosition. If you need to change the position of the map, this init method is more appropriate:
@State private var position: MapCameraPosition = .automatic
Map(position: $position) {
.
.
.
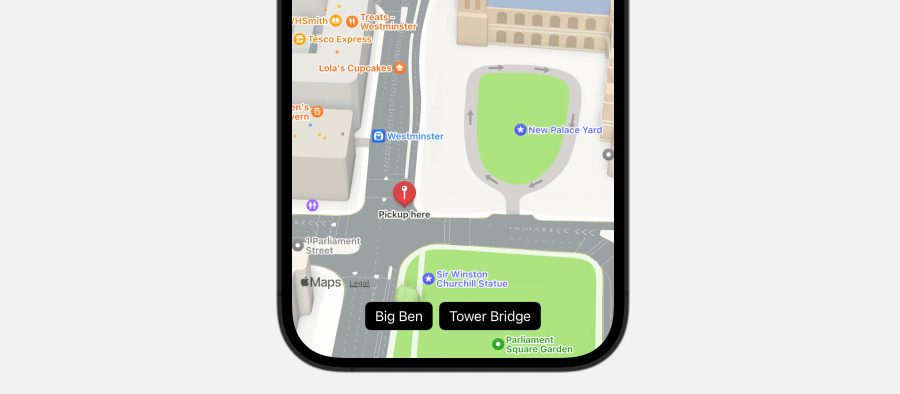
}For example, if you want to add two buttons for users to switch between two locations, you can write the code like this:
extension CLLocationCoordinate2D {
    static let bigBen = CLLocationCoordinate2D(latitude: 51.500685, longitude: -0.124570)
    static let towerBridge = CLLocationCoordinate2D(latitude: 51.505507, longitude: -0.075402)
}

struct ContentView: View {

    @State private var position: MapCameraPosition = .automatic

    var body: some View {
        Map(position: $position)
            .onAppear {
                position = .item(MKMapItem(placemark: .init(coordinate: .bigBen)))
            }
            .safeAreaInset(edge: .bottom) {
                HStack {
                    Button(action: {
                        withAnimation {
                            position = .item(MKMapItem(placemark: .init(coordinate: .bigBen)))
                        }
                    }) {
                        Text("Big Ben")
                    }
                    .tint(.black)
                    .buttonStyle(.borderedProminent)

                    Button(action: {
                        withAnimation {
                            position = .item(MKMapItem(placemark: .init(coordinate: .towerBridge)))
                        }
                    }) {
                        Text("Tower Bridge")
                    }
                    .tint(.black)
                    .buttonStyle(.borderedProminent)
                }
            }
    }
}
By wrapping the position variable with withAnimation, the map view will automatically animate the position change.

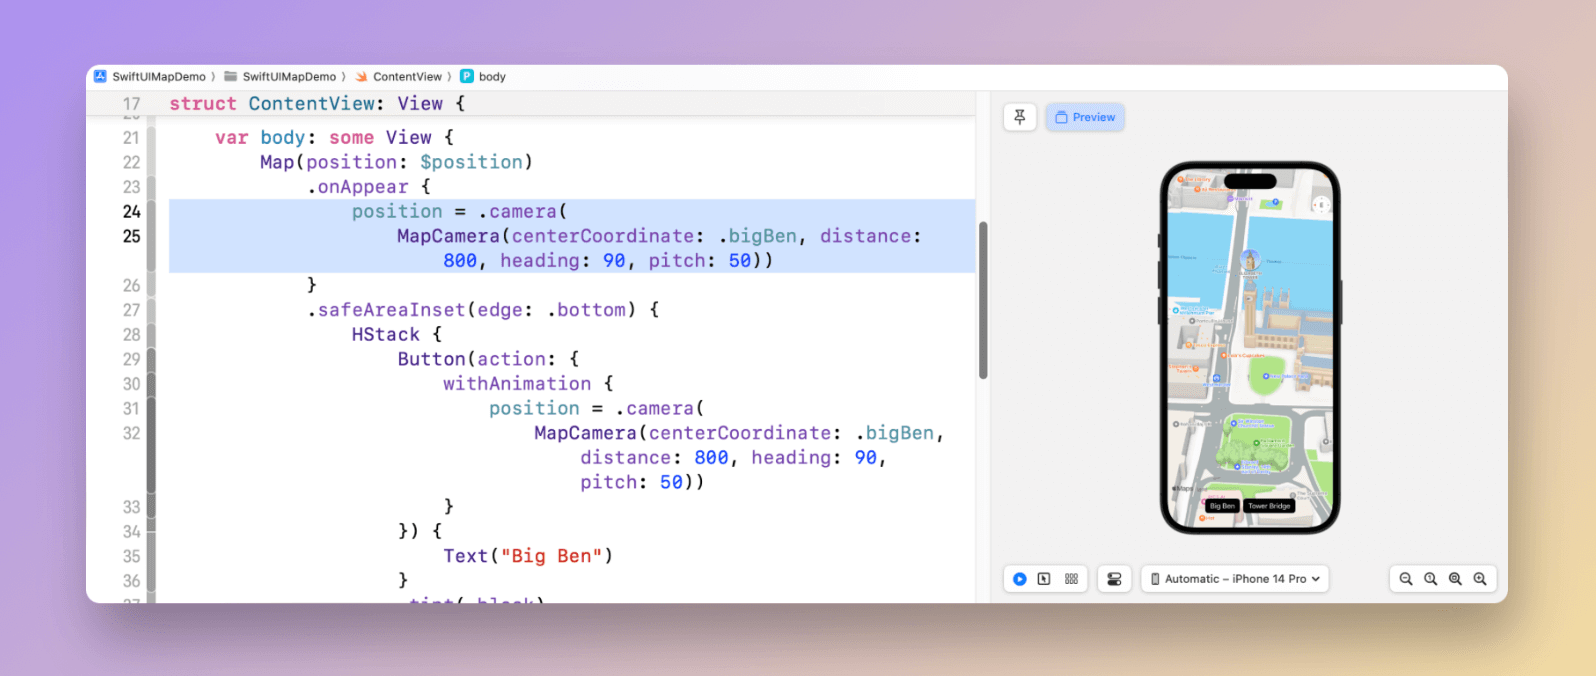
This animation works even better when you provide a MapCamera with a pitch angle to create a 3D perspective. To see what happens, you can try changing the position of Big Ben in the following line of code:
position = .camera(MapCamera(
                                        centerCoordinate: .bigBen,
                                        distance: 800,
                                        heading: 90,
                                        pitch: 50))
When you preview the map view, the camera angle adjusts to show a 3D perspective of the region.
Adding Markers and Annotations
Markers are a useful feature in MapKit that allow you to display content at a specific coordinate on the map. It adds an extra layer of information to your map, such as a store or a restaurant. Markers can be customized with a system image and tint color, making them visually distinct and easy to recognize. Whether you’re building a navigation app or a travel guide, markers are a valuable tool that can help you create a better user experience.
To add a marker, you can create the Marker view in the map content builder closure like this:
Map(position: $position) {
    Marker("Pickup here", coordinate: .pickupLocation)
}
Optionally, you can customize the Marker object with a system image. To change the color of the marker, use the tint modifier:
Marker("Pickup here",
                systemImage: "car.front.waves.up",
                coordinate: .pickupLocation)
                .tint(.purple)
In addition to Marker, SwiftUI now includes an Annotation view in iOS 17 for indicating a location on a map. It functions similarly to Marker, but offers greater flexibility for customization.
To add an annotation, you create an Annotation view in the map content closure. Here is a sample code snippet for adding a simple annotation:
Map(position: $position) {
    Annotation("Pick up", coordinate: .pickupLocation, anchor: .bottom) {
        Image(systemName: "car.front.waves.up")
    }
}
You have the flexibility to customize the annotation in a variety of ways. By attaching different modifiers to it, you can change its appearance and behavior. Additionally, you can use stack views to arrange the different components of the annotation and create a layout that suits your needs. Here is an example:
Annotation("Pick up", coordinate: .pickupLocation, anchor: .bottom) {
    ZStack {
        Circle()
            .foregroundStyle(.indigo.opacity(0.5))
            .frame(width: 80, height: 80)

        Image(systemName: "car.front.waves.up")
            .symbolEffect(.variableColor)
            .padding()
            .foregroundStyle(.white)
            .background(Color.indigo)
            .clipShape(Circle())
    }
}
This results an animated annotation as shown in the below illustration.
Changing the Map Style
By default, the map view renders the map in a standard style. However, you can change the style by using the mapStyle modifier:
Map {

}
.mapStyle(.imagery(elevation: .realistic))
This creates a map style based on satellite imagery. By specifying a realistic elevation, the map view renders a 3D map with a realistic appearance.

Optionally, you can also change the map style to hybrid like this:
.mapStyle(.hybrid)Summary
This tutorial covers how to work with maps and annotations in SwiftUI, using the MapKit framework. The latest version of SwiftUI offers additional APIs and views for developers to further customize the map view. By now, you should know how to embed a map in your app and add an annotation to highlight a location on the map.
If you want to learn more about SwiftUI, don’t forget to check out our Mastering SwiftUI book.


