In the earlier tutorial, we introduced a new feature of ScrollView in iOS 17, which enables developers to easily detect the scroll position and implement the scroll-up (or scroll-down) feature. In addition to this functionality, the latest version of SwiftUI also introduces a new modifier called scrollTransition that allows us to observe the transition of views and apply various animated effects.
Note: To follow this tutorial, please make sure you use Xcode 15 (or up).
Previously, we built a basic scroll view. Let’s continue using it as an example. For reference, here is the code for creating a scroll view:
ScrollView {
    LazyVStack(spacing: 10) {
        ForEach(0...50, id: \.self) { index in

            bgColors[index % 5]
                .frame(height: 100)
                .overlay {
                    Text("\(index)")
                        .foregroundStyle(.white)
                        .font(.system(.title, weight: .bold))
                }
                .onTapGesture {
                    withAnimation {
                        scrollID = 0
                    }
                }
        }
    }
    .scrollTargetLayout()
}
.contentMargins(50.0, for: .scrollContent)
.scrollPosition(id: $scrollID)
Using ScrollTransition Modifier
A transition in scroll views describes the changes a child view should undergo when its appearing or disappearing. The new scrollTransition modifier enables us to monitor these transitions and apply different visual and animated effects accordingly.
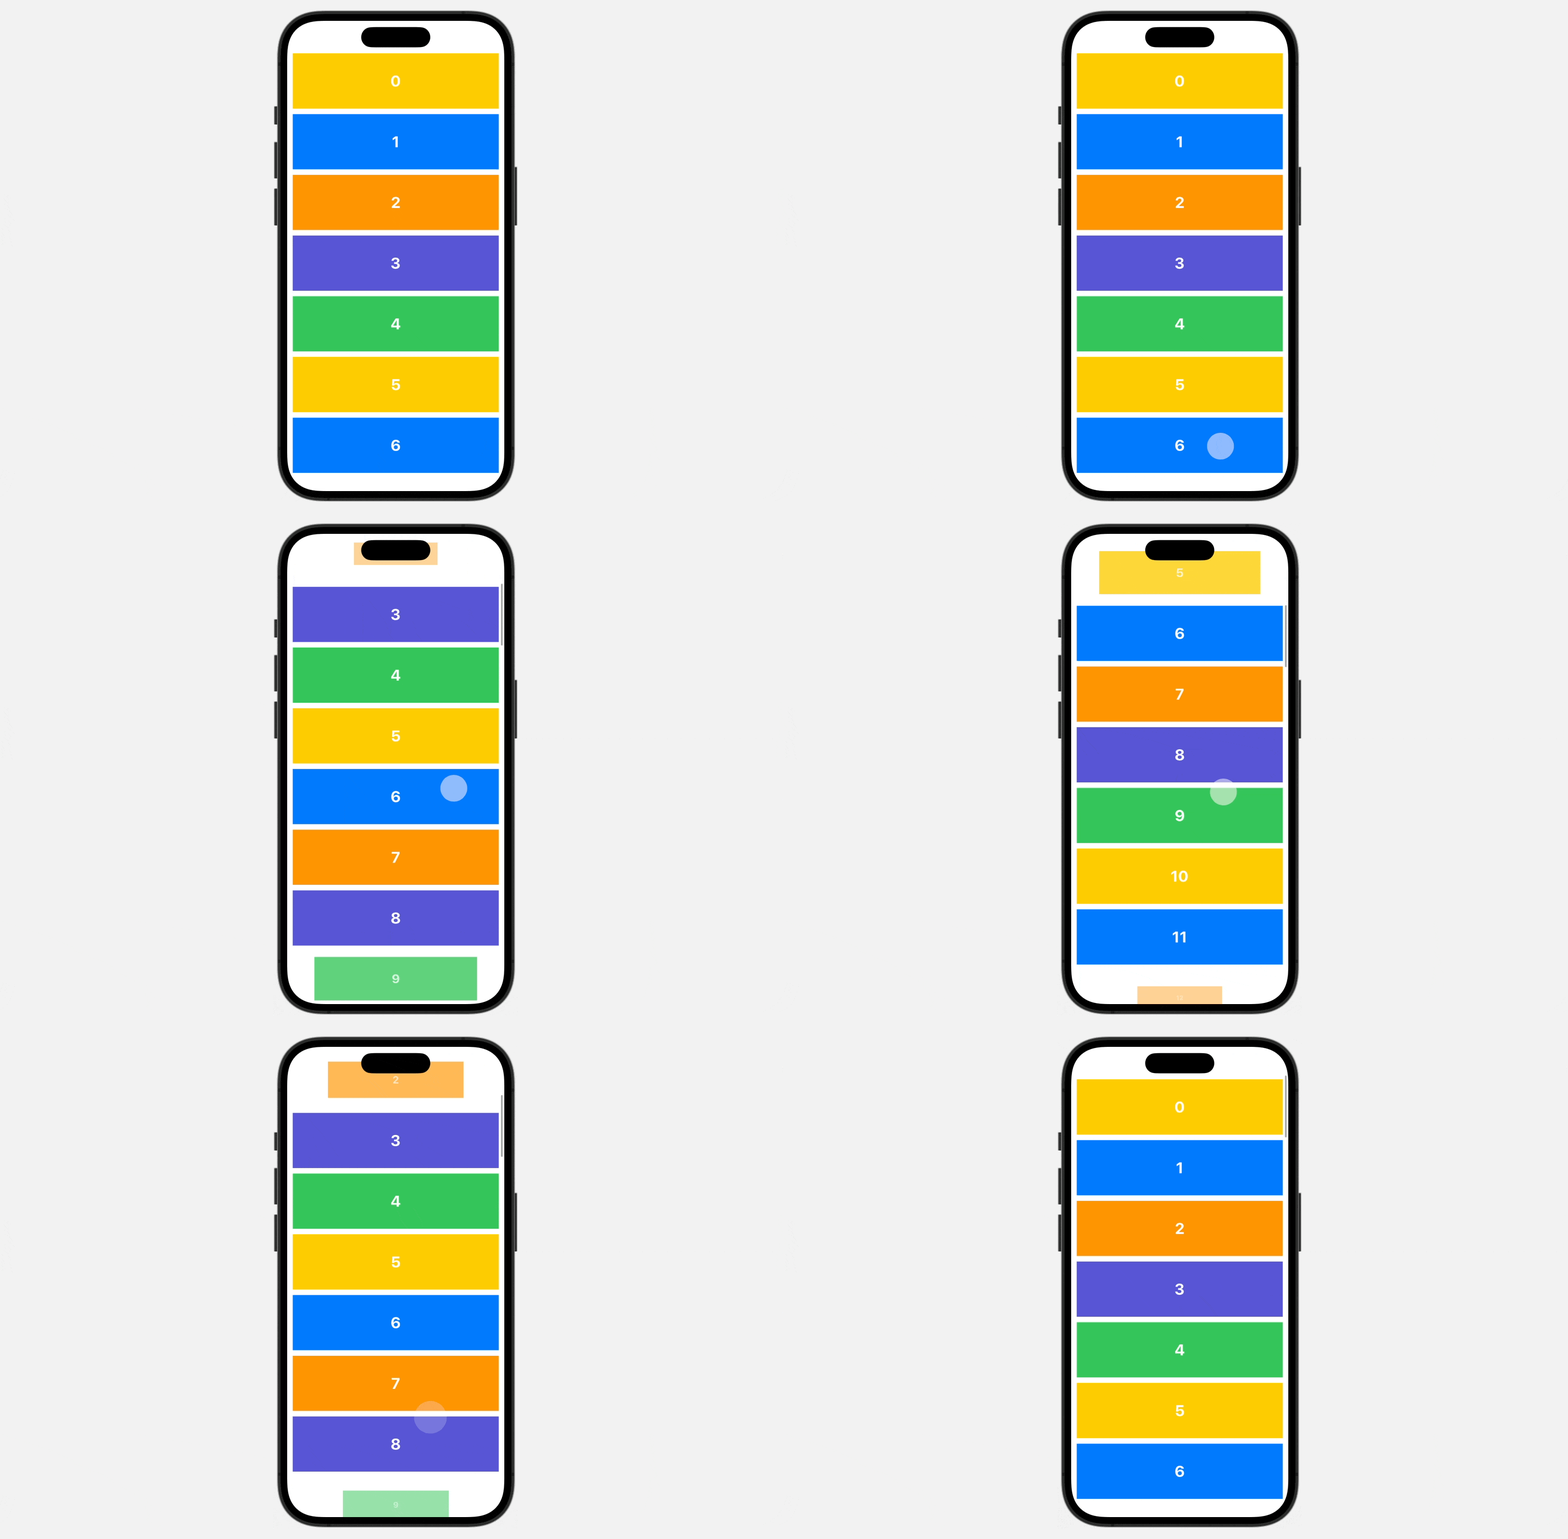
To demonstrate how it works, let’s modify the code from the previous section by adding the scrollTransition modifier to the scroll view. Here is the updated code:
ScrollView {

.
.
.

}
.scrollTransition { content, phase in

    content
        .opacity(phase.isIdentity ? 1.0 : 0.3)
                .scaleEffect(phase.isIdentity ? 1.0 : 0.3)
}
We apply a subtle animation by changing the opacity and size of child views. The scrollTransition closure passes two parameters: the child view and the transition phase. There are three possible values for transition phases: .identity, .topLeading, and .bottomTrailing. Based on the phase, we can apply different visual effects.
The .identity value indicates that the child view is fully visible in the scroll view’s visible region. The .topLeading value indicates that the view is about to move into the visible area at the top edge of the scroll view, while .bottomTrailing indicates that the view is about to move into the visible area at the bottom edge of the scroll view.
During the identity phase, scroll transitions should not typically result in any visual changes to the view. Therefore, in the code above, we reset both opacity and size to their original state when the view is in the identity phase. For other phases, we make the view smaller and more transparent. This is how we animate views during the scroll transition.
Working with Scroll Transition Configuration
A scroll transition configuration controls how a view transitions as it appears or disappears. When you use the .scrollTransition modifier, the default configuration is .interactive. This configuration lets you smoothly blend the transition effect as you scroll your view into the visible region of the container.
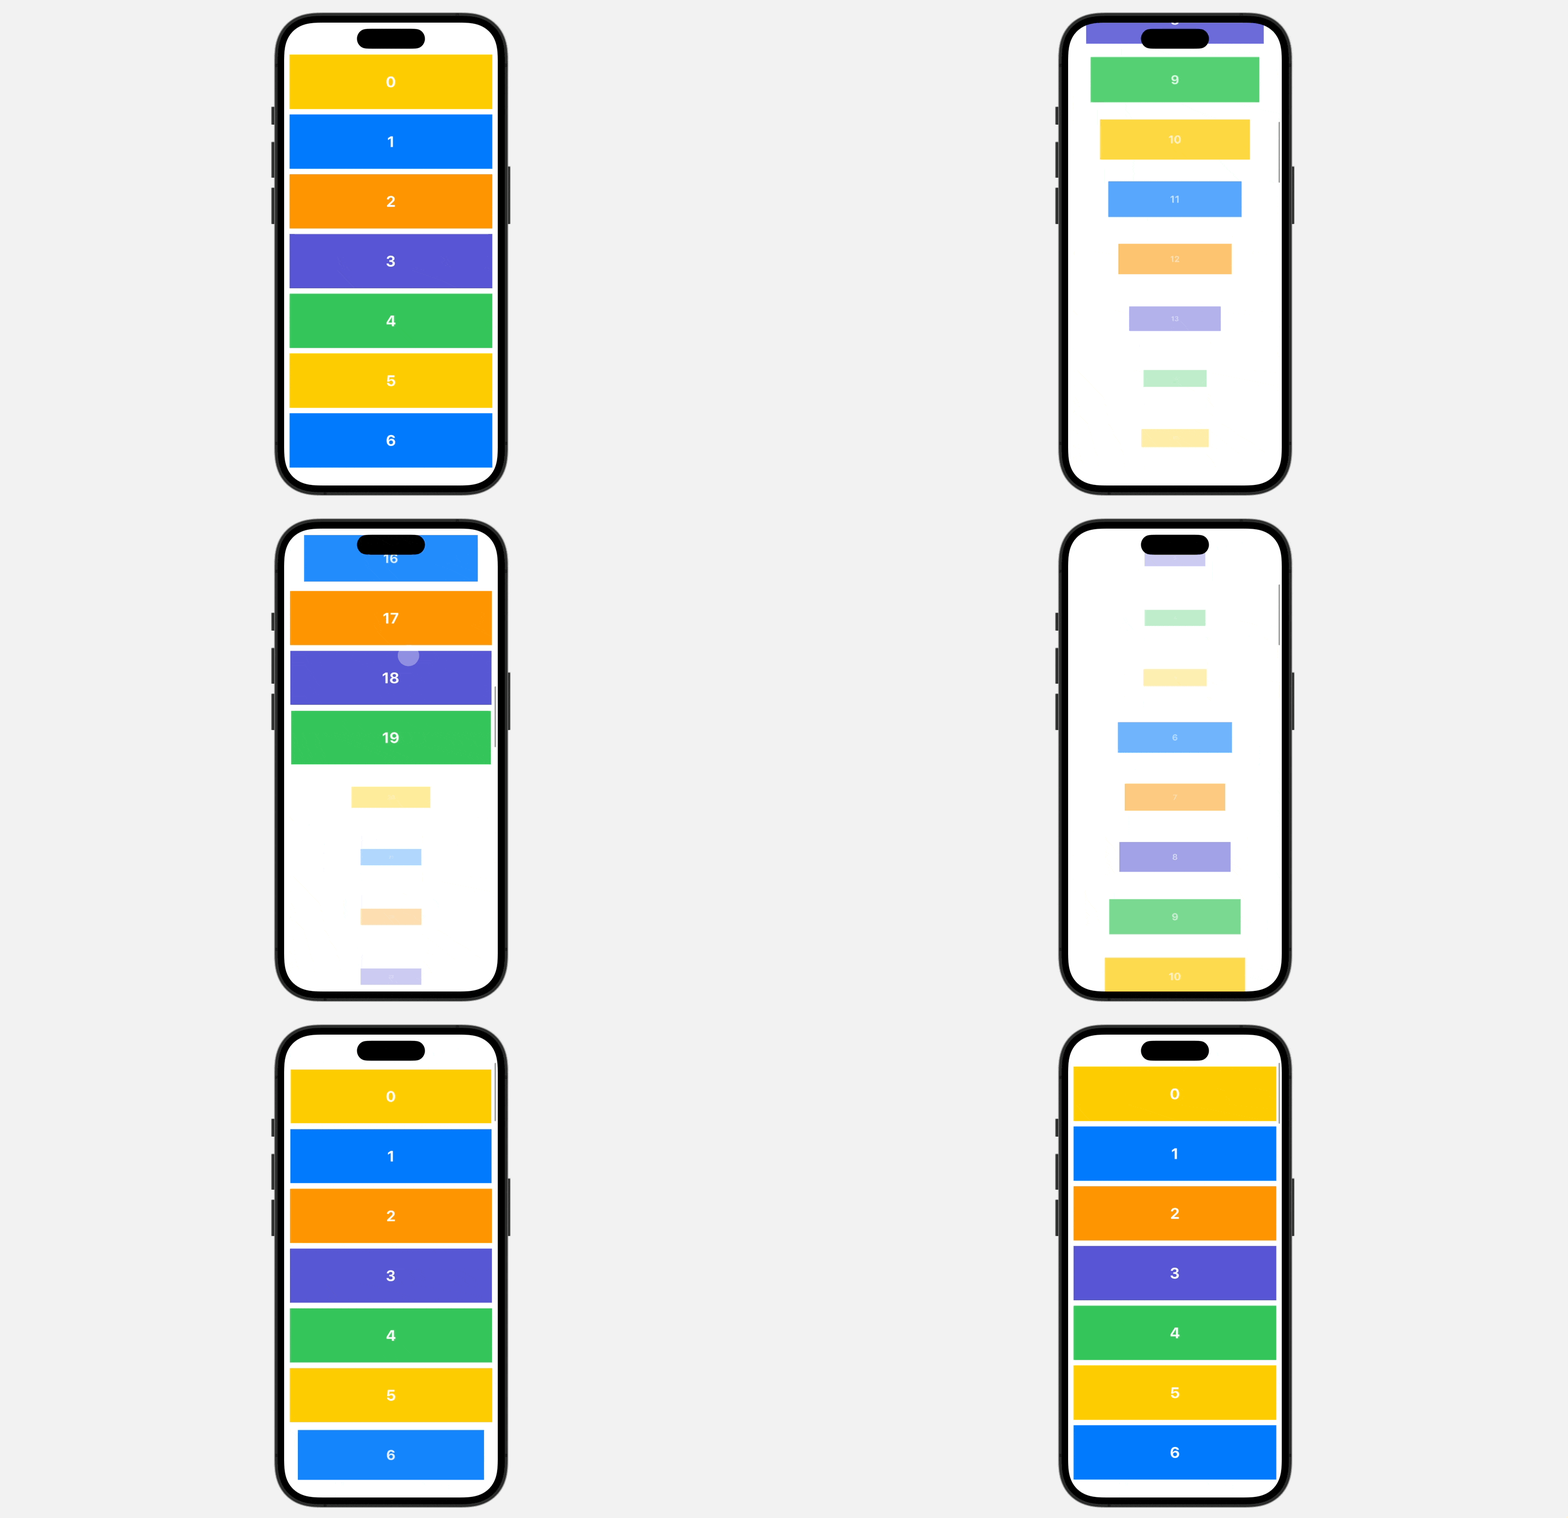
Other than the default configuration, you also have the option to use .animated to smoothly animate the transition when the view is displayed. You can replace the .scrollTransition modifier like this to achieve a slightly different animated effect:
.scrollTransition(.animated) { content, phase in

    content
        .opacity(phase.isIdentity ? 1.0 : 0.3)
        .scaleEffect(phase.isIdentity ? 1.0 : 0.3)

}
Optionally, you can also define a threshold for the transition animation. Let me provide an example to illustrate why we may need to adjust the threshold. In the code, modify the frame height of the color view from 100 to 300 like this:
bgColors[index % 5]
        .frame(height: 300)
After making the change, you should notice that the third item in the scroll view is minimized and has already been applied with the transparent effect.
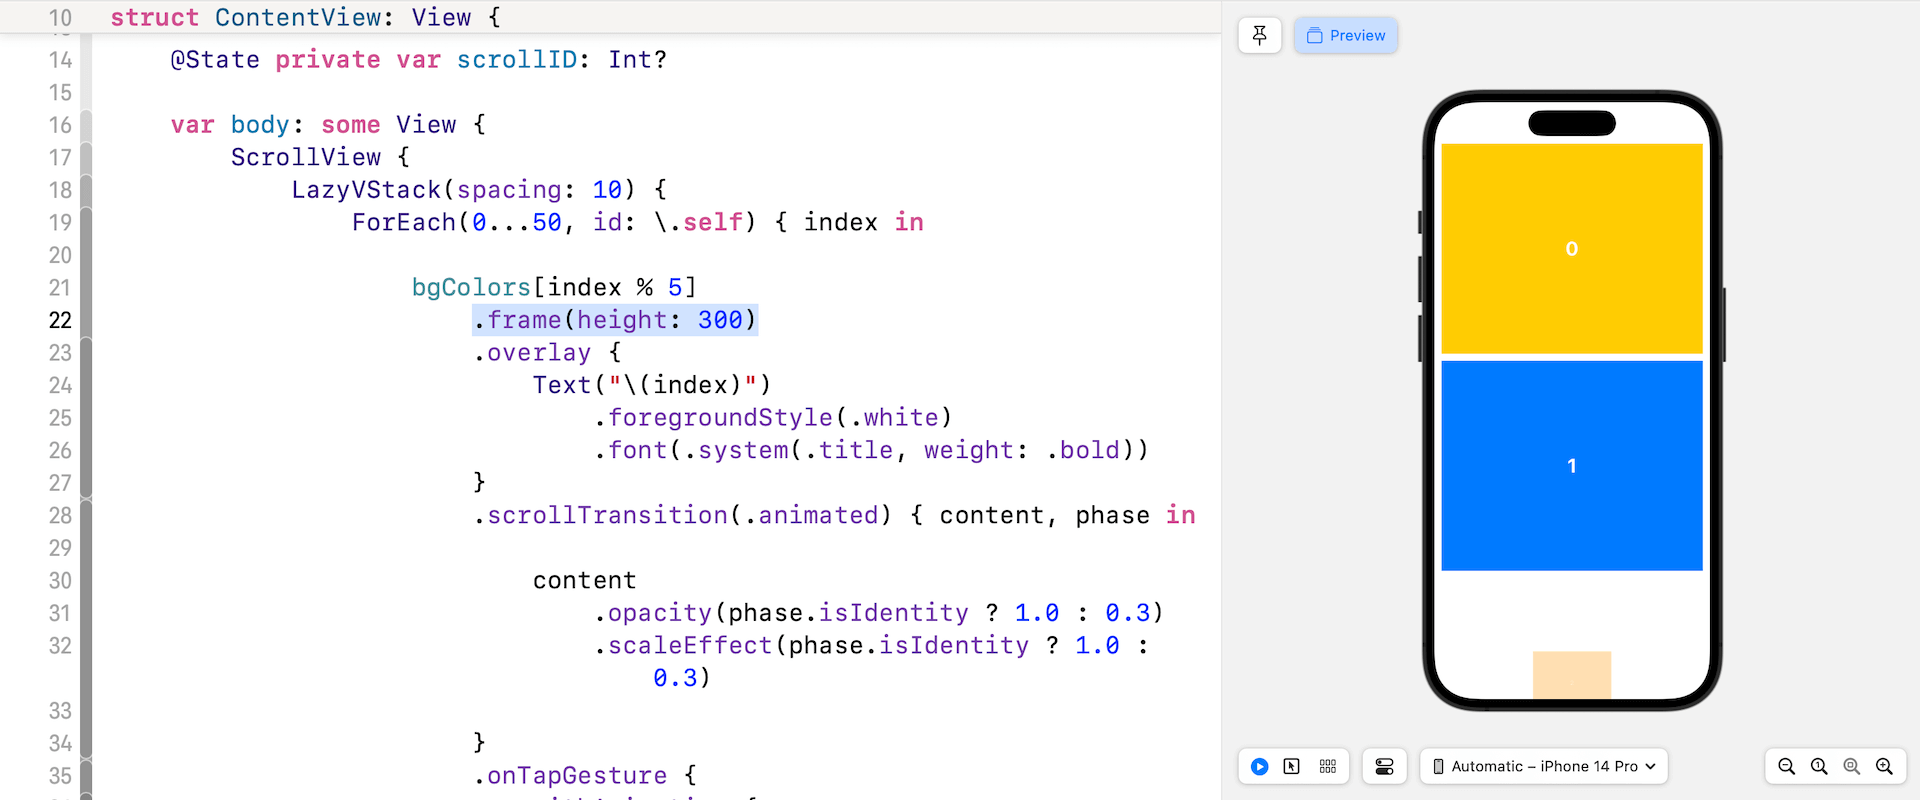
This is not the desired UI layout. The expected behavior is for the third item to be fully visible and not in a transitional state. In this case, we can alter the threshold to define when the animation takes place.
The threshold determines when the view is considered visible (i.e. the identity phase) based on how much of the view intersects with the scroll view. To change the threshold, you can update the scrollTransition modifier like this:
.scrollTransition(.animated.threshold(.visible(0.3))) { content, phase in

    .
    .
    .

}
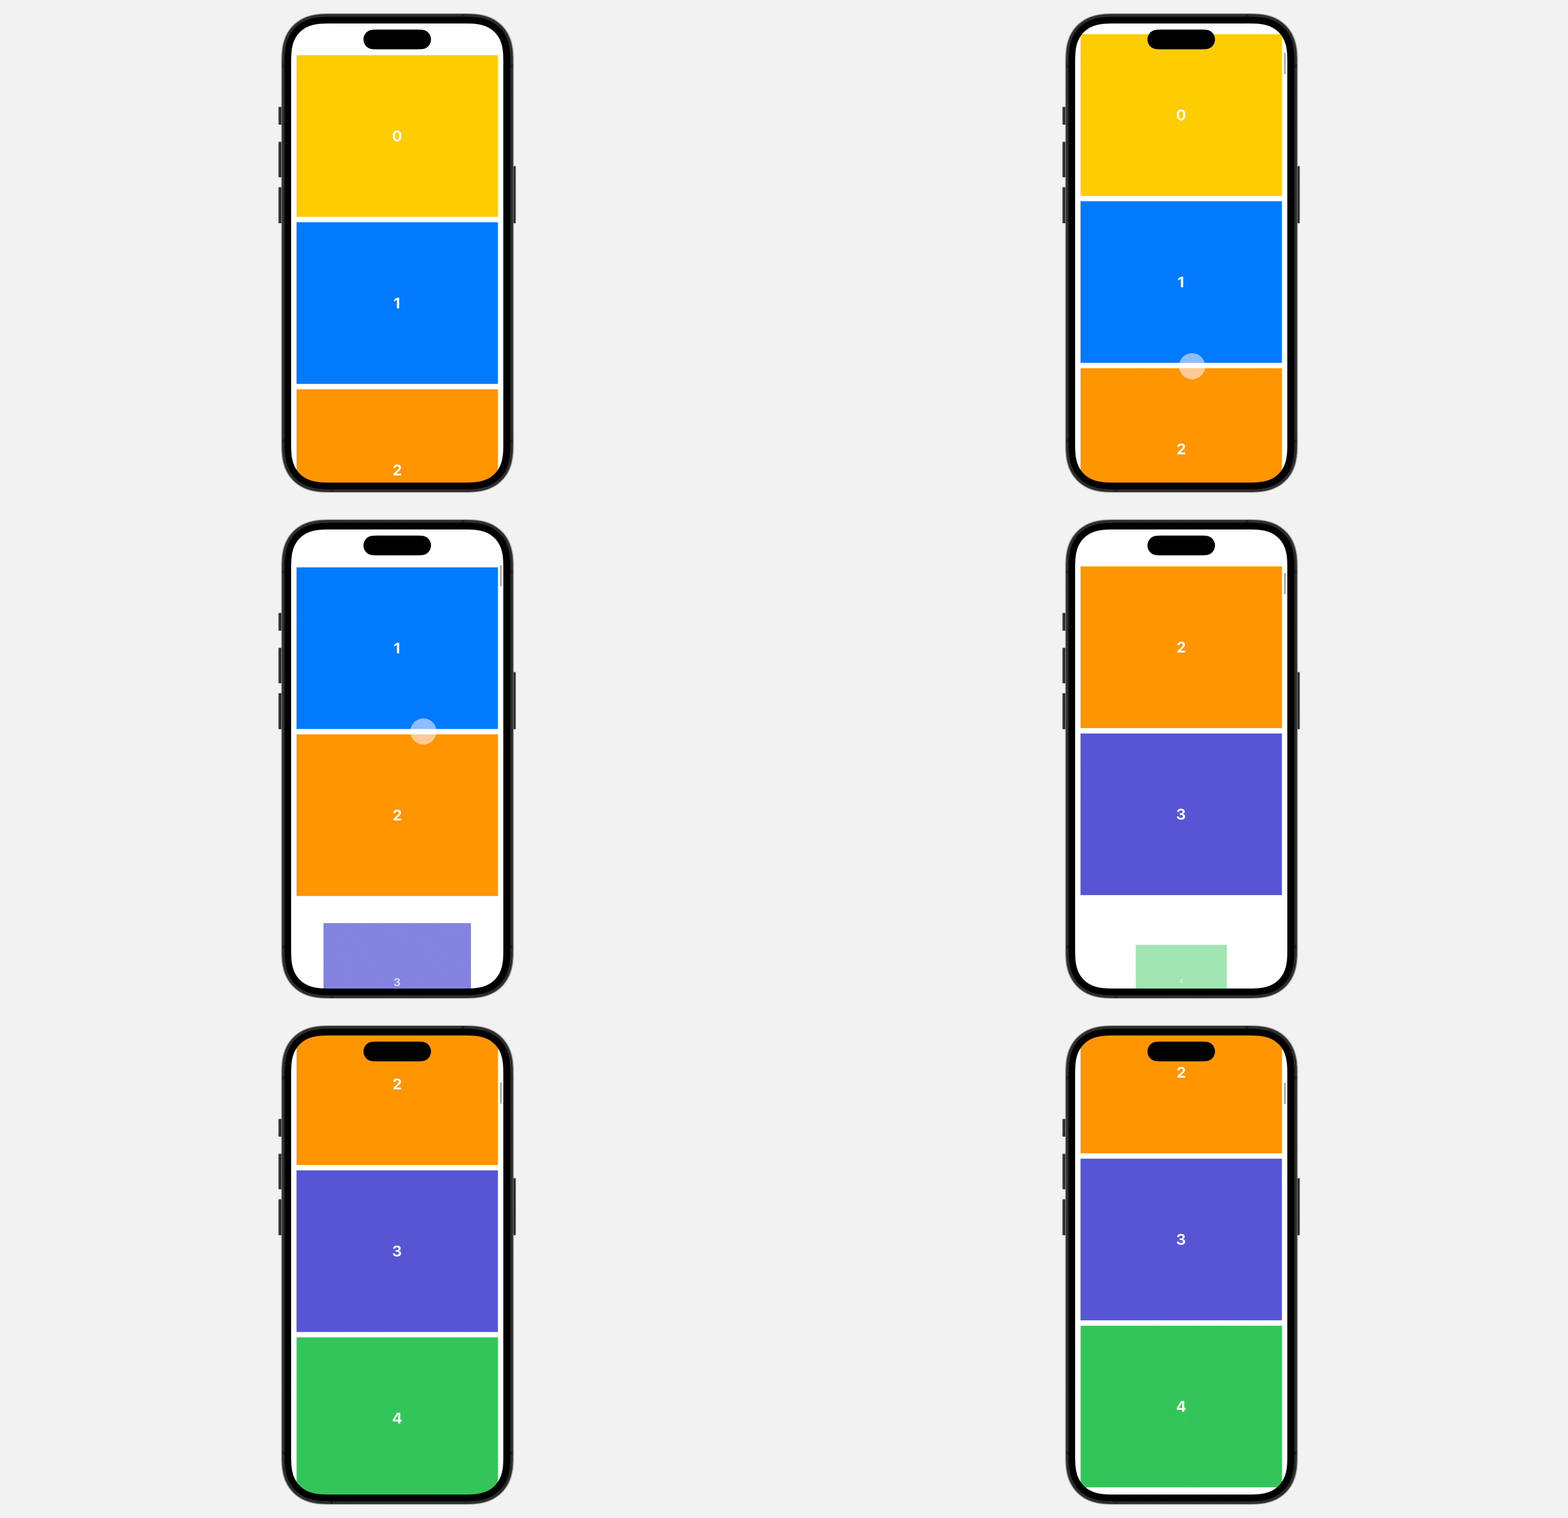
The code above sets a threshold where the view is considered fully visible when it is 30% visible within the scrolling area. As soon as you update the code, the third item of the scroll view will be fully displayed. The animation will only occur when the item is less than 30% visible.
Using the Phase Value
The phase parameter provides the value of the transition phase, ranging from -1.0 to 1.0. This value can be utilized to apply scaling or other animated effects. When the phase is -1, it represents the topLeading phase, and when it’s 1, it corresponds to the bottomTrailing phase. The identity phase is represented by a value of 0.
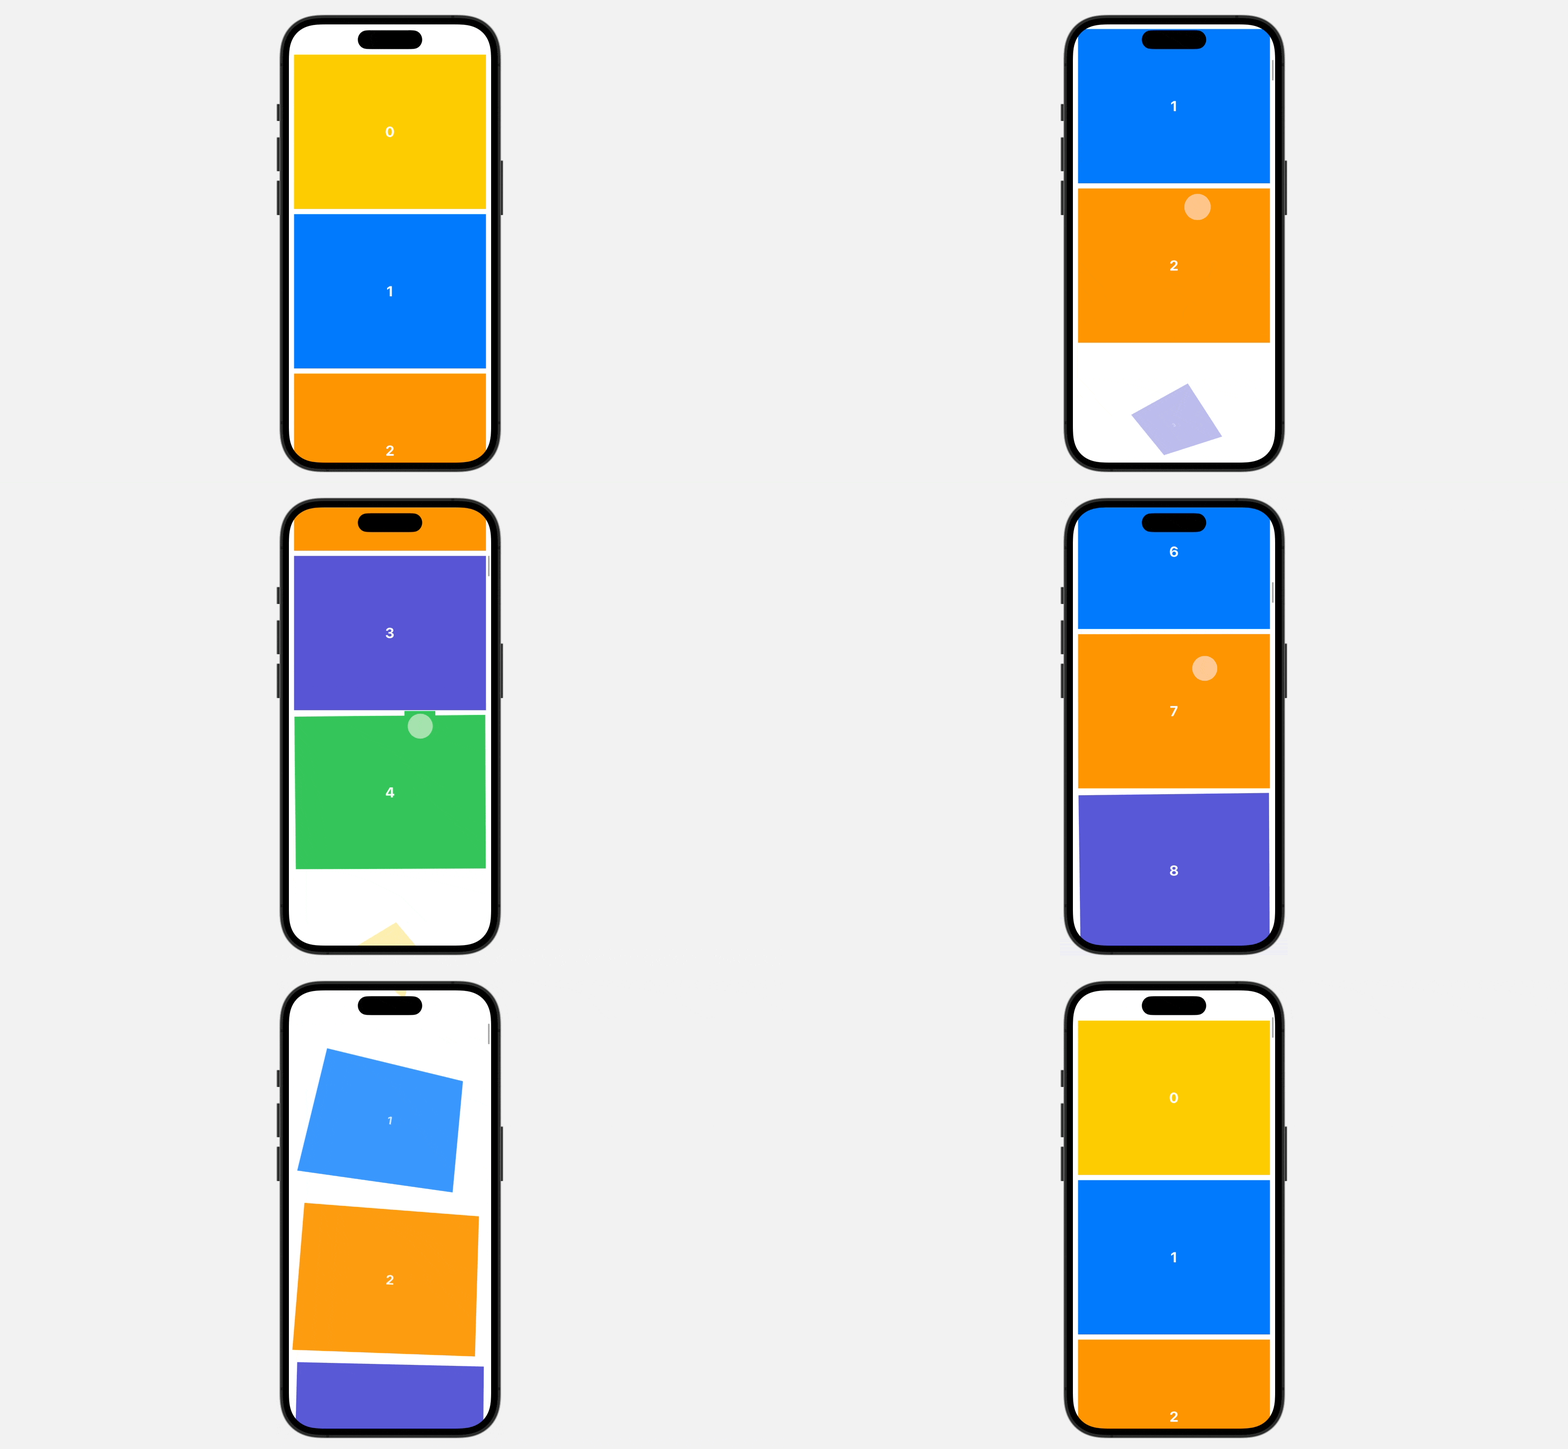
For example, we can utilize the phase value to apply a 3-dimensional rotation effect:
.scrollTransition(.animated.threshold(.visible(0.3))) { content, phase in

    content
        .opacity(phase.isIdentity ? 1.0 : 0.3)
        .scaleEffect(phase.isIdentity ? 1.0 : 0.3)
        .rotation3D(.radians(phase.value), axis: (1, 1, 1))

}
Summary
In this tutorial, we explain how to use the scrollTransition modifier in SwiftUI to animate the transition of views in a ScrollView. The modifier allows developers to apply various visual and animated effects to child views based on the transition phase.
By mastering this modifier, you can take their app’s user experience to the next level.
If you want to learn more about SwiftUI, you can check out our Mastering SwiftUI book.


