In WWDC 21, Apple introduced some of the most anticipated enhancements for List view in the SwiftUI framework. Prior to iOS 15, it is not very straightforward to hide line separators in a List view. We’ve shown you a workaround by using UIKit APIs in this tutorial. But this year, SwiftUI provides a dedicated modifier named .listRowSeparator for developers to control the visibility of line separators. On top of that, you are also allowed to modify the tint color of the separators.
The UIKit framework has built-in APIs for you to create swipe actions in a table view. In iOS 14, you have to provide your own implementation if you want to add custom swipe actions. With the upcoming release of iOS 15, SwiftUI introduced a new modifier called .swipeActions for adding swipe actions in both leading and trailing positions.
In this tutorial, I will walk you through these new modifiers with code samples.
Let’s get started.
Hiding Line Separators in List View
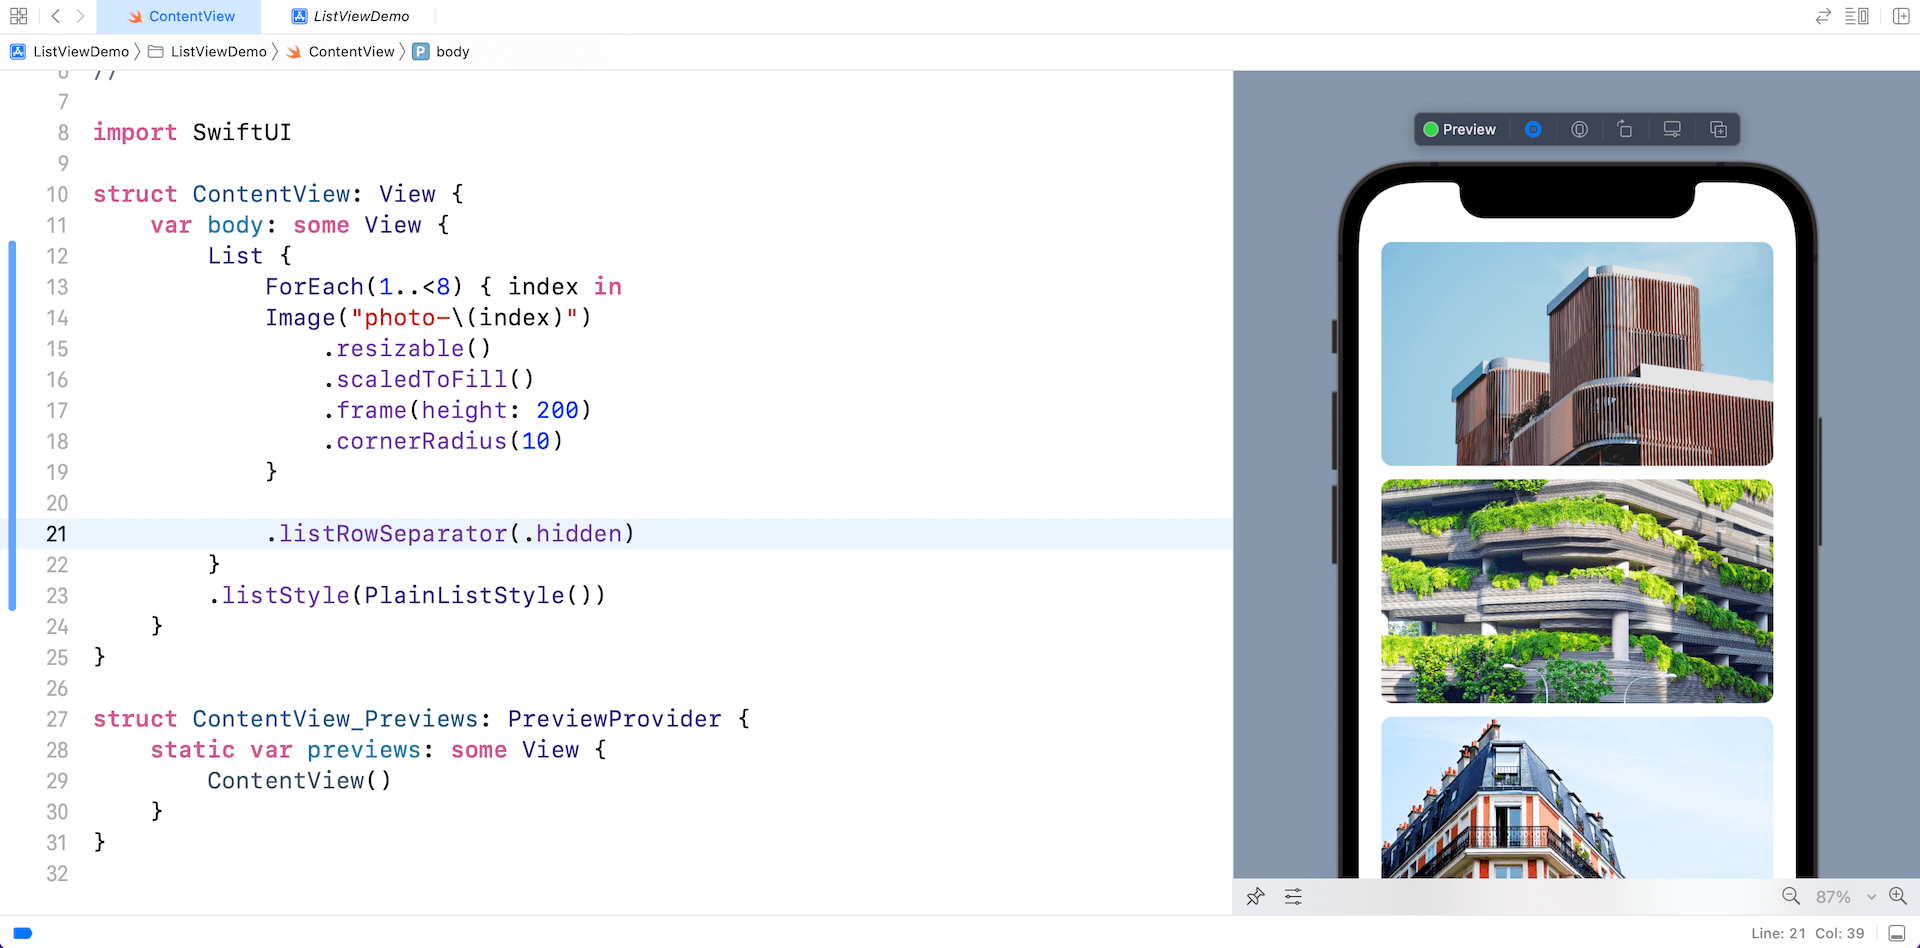
To hide the line separators in a List view, you just need to add the .listRowSeparator modifier and set its value to .hidden like this:
List {
    ForEach(1..<8) { index in
    Image("photo-\(index)")
        .resizable()
        .scaledToFill()
        .frame(height: 200)
        .cornerRadius(10)
    }

    .listRowSeparator(.hidden)
}
.listStyle(PlainListStyle())
To make the line separators appear again, you can set the value of the modifier to .visible. Here is a sample code:
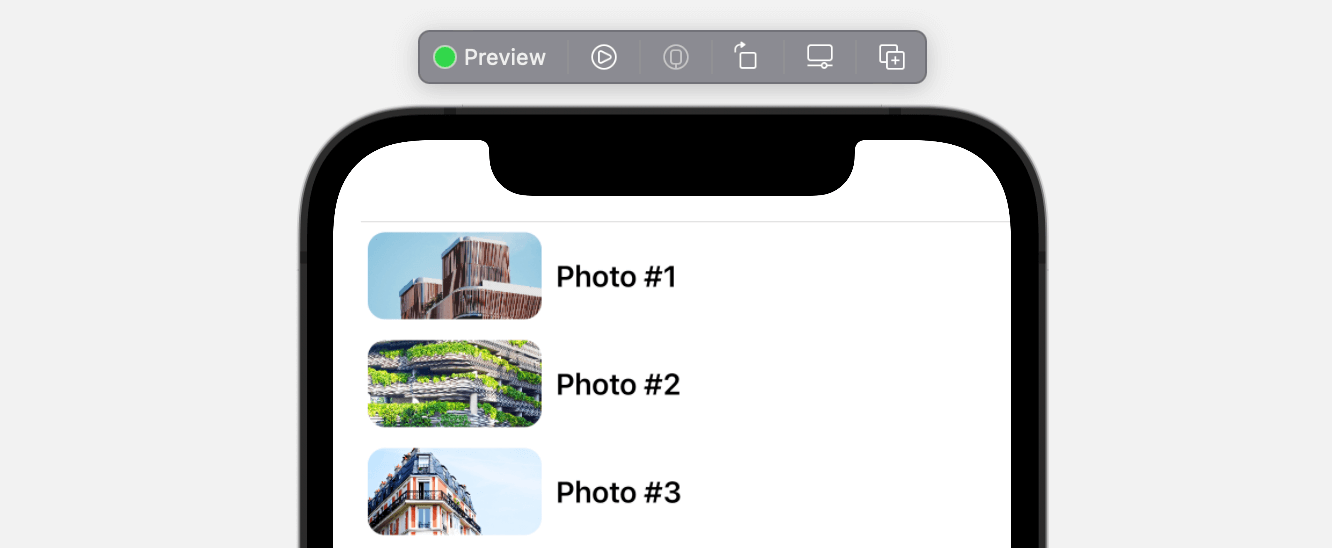
.listRowSeparator(showLineSeparator ? .visible : .hidden)If you want to have a finer control on the line separators, you can use an alternate version of .listRowSeparator by specifying the edges parameter. Say, for example, if you want to keep the separator at the top of the list view, you can write the code like this:
.listRowSeparator(.hidden, edges: .bottom)And, you will see the result below in the preview pane.
Changing the Color of Line Separators in List View
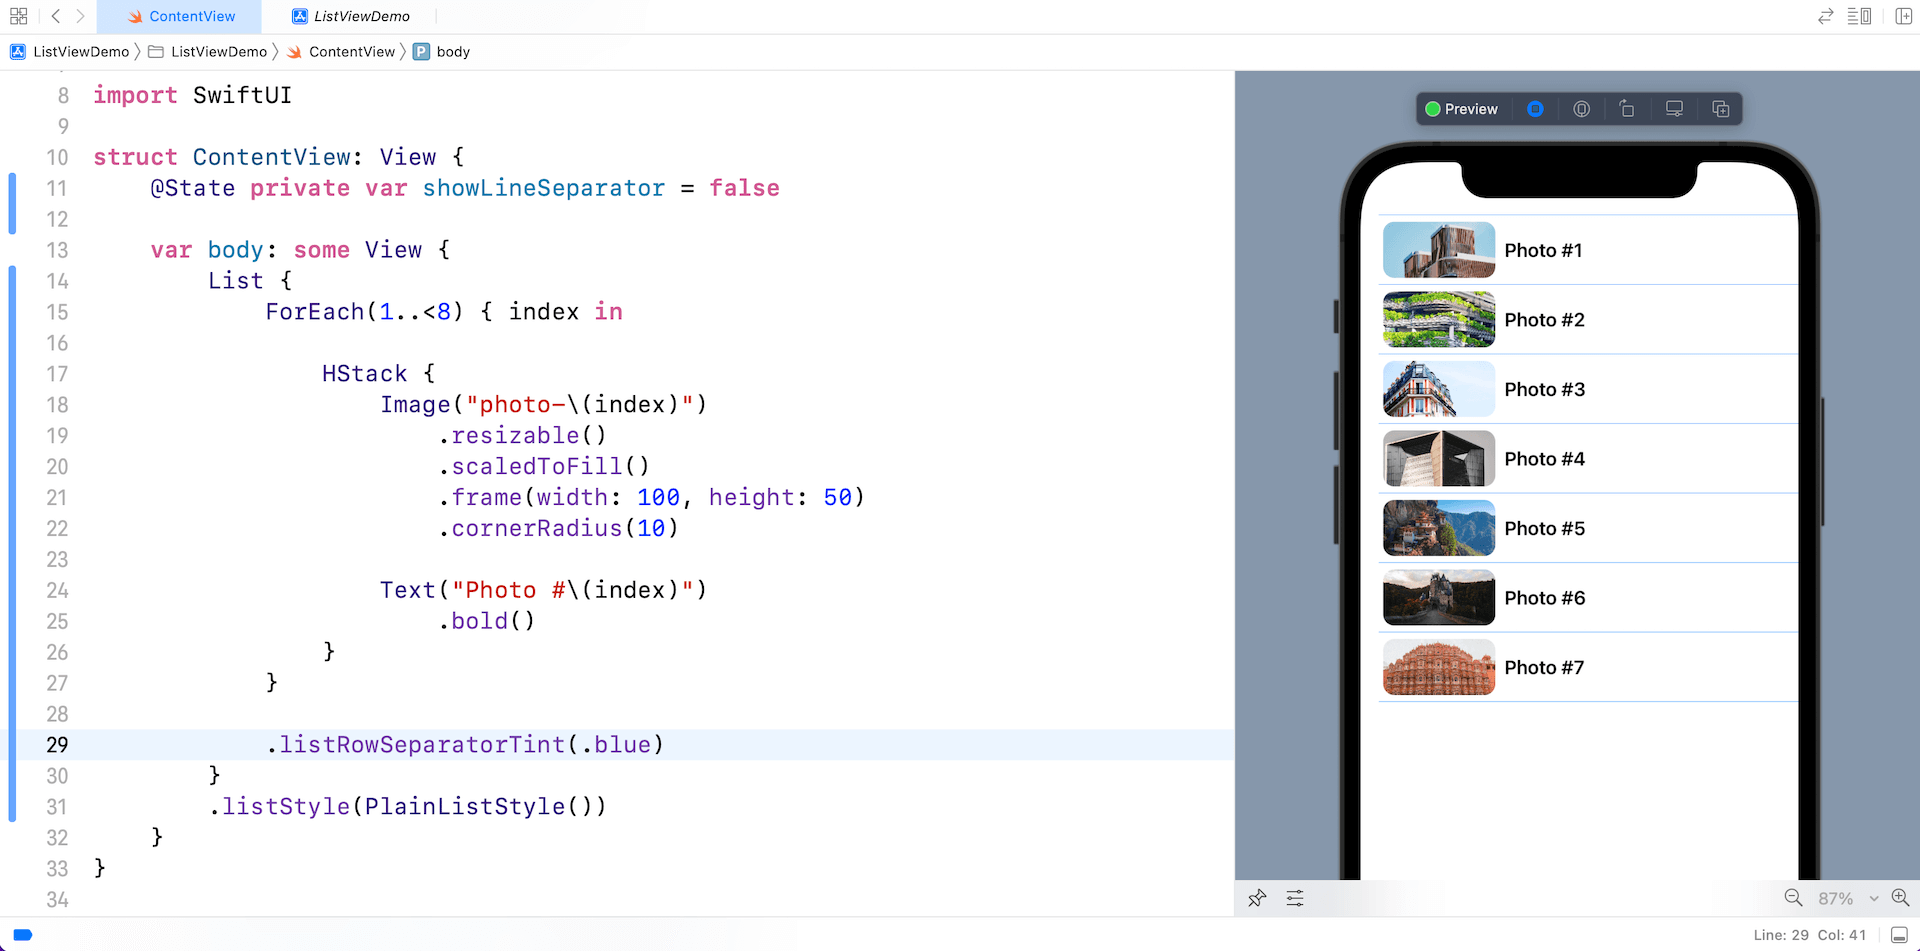
In iOS 15, not only can you hide the line separators, you can easily change the line color in a List view by embedding the .listRowSeparatorTint modifier in the List view.
List {
    ForEach(1..<8) { index in

        HStack {
            Image("photo-\(index)")
                .resizable()
                .scaledToFill()
                .frame(width: 100, height: 50)
                .cornerRadius(10)

            Text("Photo #\(index)")
                .bold()
        }
    }

    .listRowSeparatorTint(.blue)
}
Creating Custom Swipe Actions in List Rows
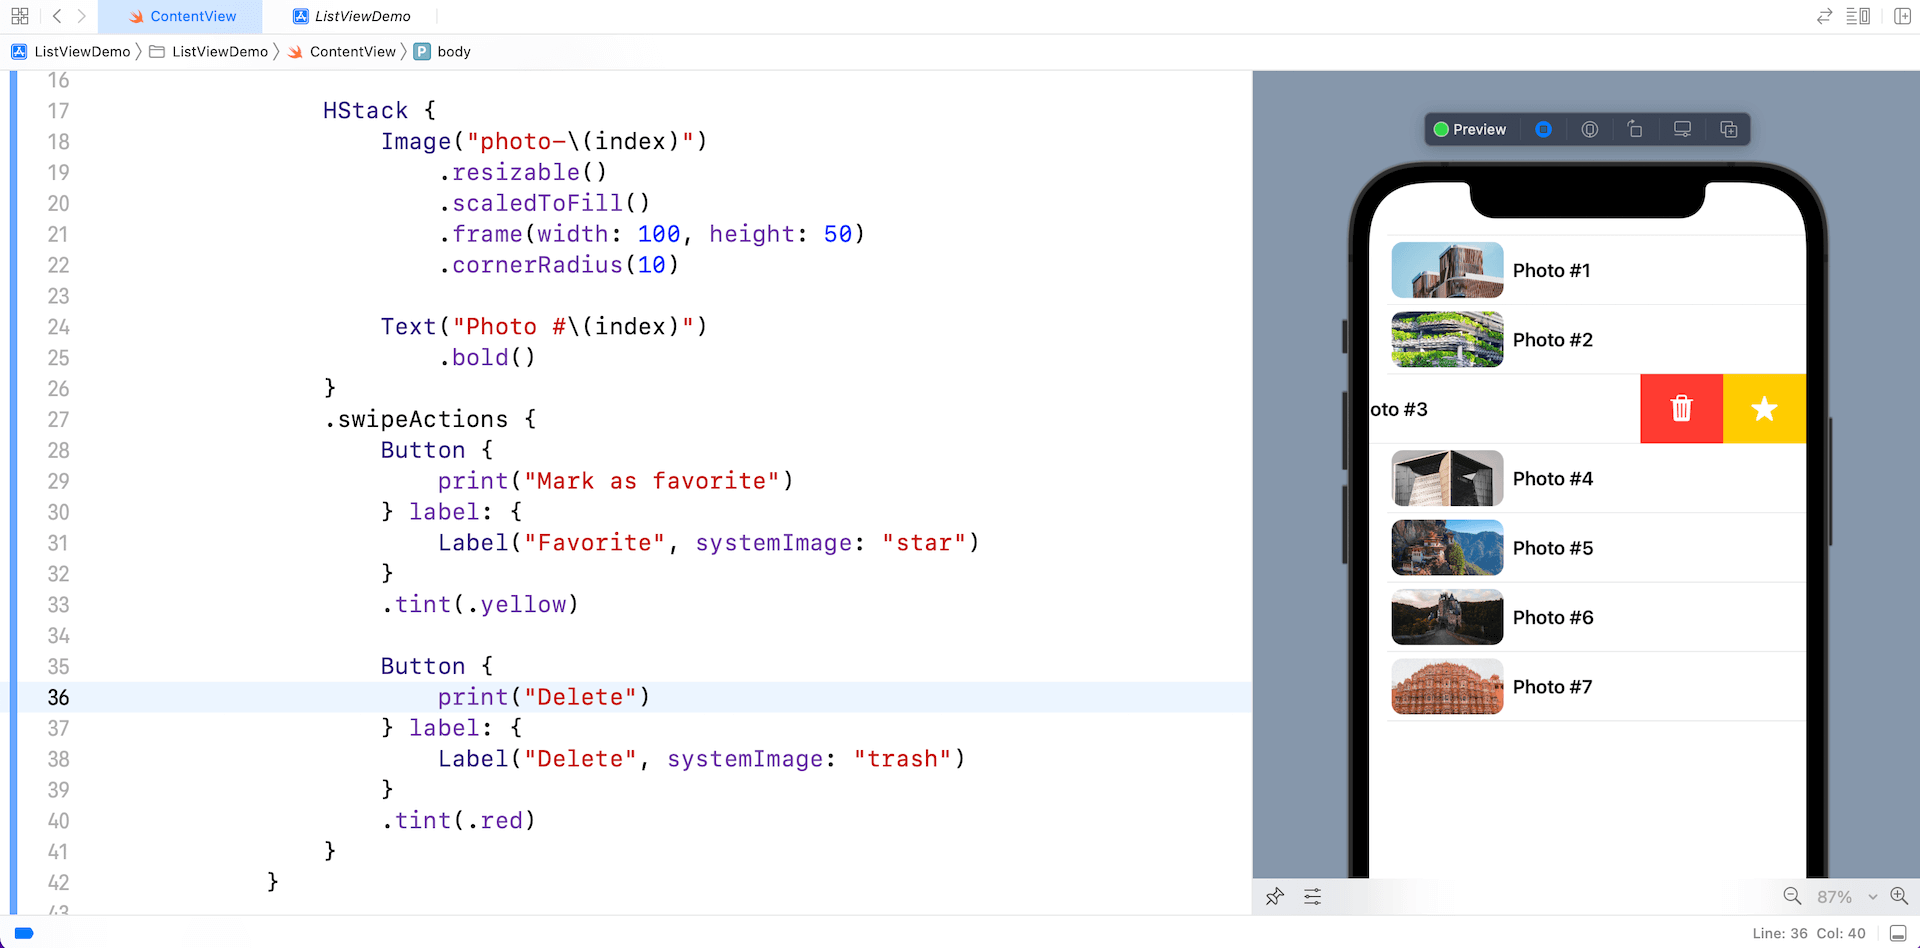
In iOS 15, SwiftUI introduces a new modifier called .swipeActions for developers to create custom swipe actions in any list rows. All you need to do is attach the .swipeActions modifier to the view of the list row. Here is an example:
List {
    ForEach(1..<8) { index in

        HStack {
            Image("photo-\(index)")
                .resizable()
                .scaledToFill()
                .frame(width: 100, height: 50)
                .cornerRadius(10)

            Text("Photo #\(index)")
                .bold()
        }
        .swipeActions {
            Button {
                print("Mark as favorite")
            } label: {
                Label("Favorite", systemImage: "star")
            }
            .tint(.yellow)

            Button {
                print("Delete")
            } label: {
                Label("Delete", systemImage: "trash")
            }
            .tint(.red)
        }
    }

}
This creates two swipe buttons which will be revealed when a user swipe the row to the left. By default, SwiftUI provides full swipe support for the swipe actions. If there are more than one swipe action, the first one will be triggered automatically. In the example above, the Mark as Favorite action will be executed if the user performs a full swipe on any of the rows.
The .swipeActions modifier also lets you specify the position of the swipe buttons. By default, SwiftUI adds all the swipe buttons to the right side of the list. You can set the edge parameter to .leading to move the swipe buttons to the leading side of the list.
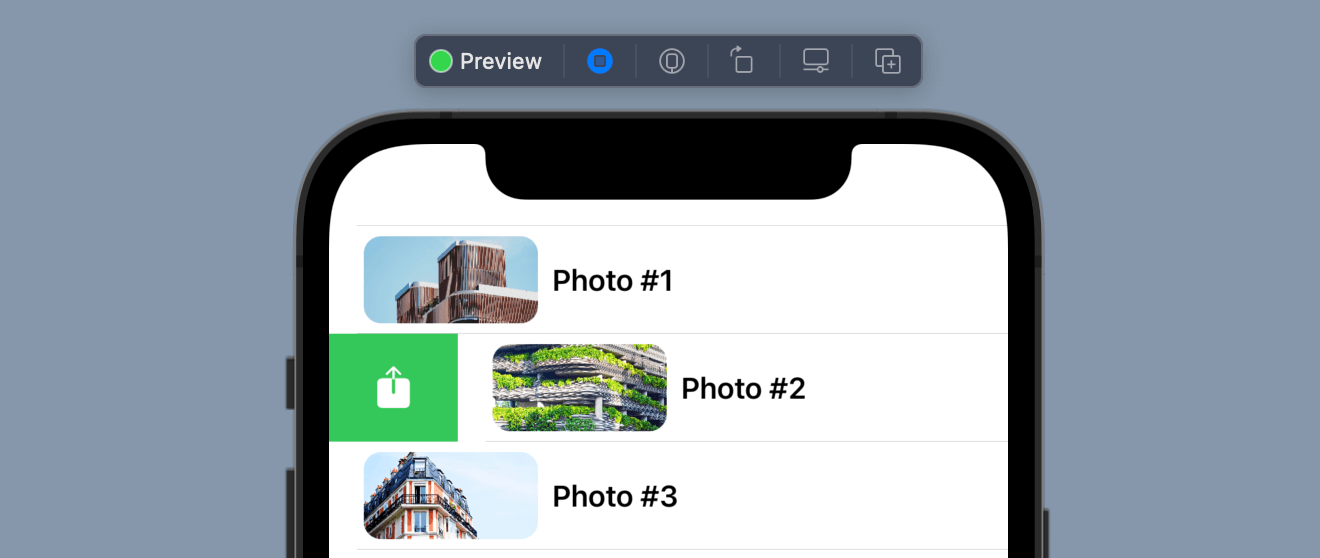
To create swipe buttons for both sides of the list, you can attach two .swipeActions modifiers like this:
List {
    ForEach(1..<8) { index in

        HStack {
            Image("photo-\(index)")
                .resizable()
                .scaledToFill()
                .frame(width: 100, height: 50)
                .cornerRadius(10)

            Text("Photo #\(index)")
                .bold()
        }
        .swipeActions(edge: .trailing) {
            Button {
                print("Mark as favorite")
            } label: {
                Label("Favorite", systemImage: "star")
            }
            .tint(.yellow)

            Button {
                print("Delete")
            } label: {
                Label("Delete", systemImage: "trash")
            }
            .tint(.red)
        }
        .swipeActions(edge: .leading) {
            Button {
                print("Share")
            } label: {
                Label("Share", systemImage: "square.and.arrow.up")
            }
            .tint(.green)

        }
    }

}
Summary
The new version of SwiftUI brought some welcome enhancements to List views. You can now easily customize the appearance of line separators and add custom swipe actions to the list view with just a few lines of code.
Please note that all the code are tested on Xcode 13 and iOS 15.


