

The tab bar interface appears in some of the most popular mobile apps such as Facebook, Instagram, and Twitter. A tab bar appears at the bottom of an app screen and let users quickly switch between different functions of an app. In UIKit, you use the UITabBarController to create the tab bar interface. For the SwiftUI framework, it provides a UI component called TabView for developers to display tabs in the apps.
In this tutorial, we will show you how to create a tab bar interface using TabView, handle the tab selection, and customize the appearance of the tab bar. All the source code below are tested on Xcode 12. If you haven’t upgraded to the latest version of Xcode, it’s better to upgrade the development tool to version 12.
Using TabView to Create the Tab Bar Interface
Assuming you’ve created a SwiftUI project using Xcode 12, let’s start with a simple text view like this:
struct ContentView: View {
var body: some View {
Text("Home Tab")
.font(.system(size: 30, weight: .bold, design: .rounded))
}
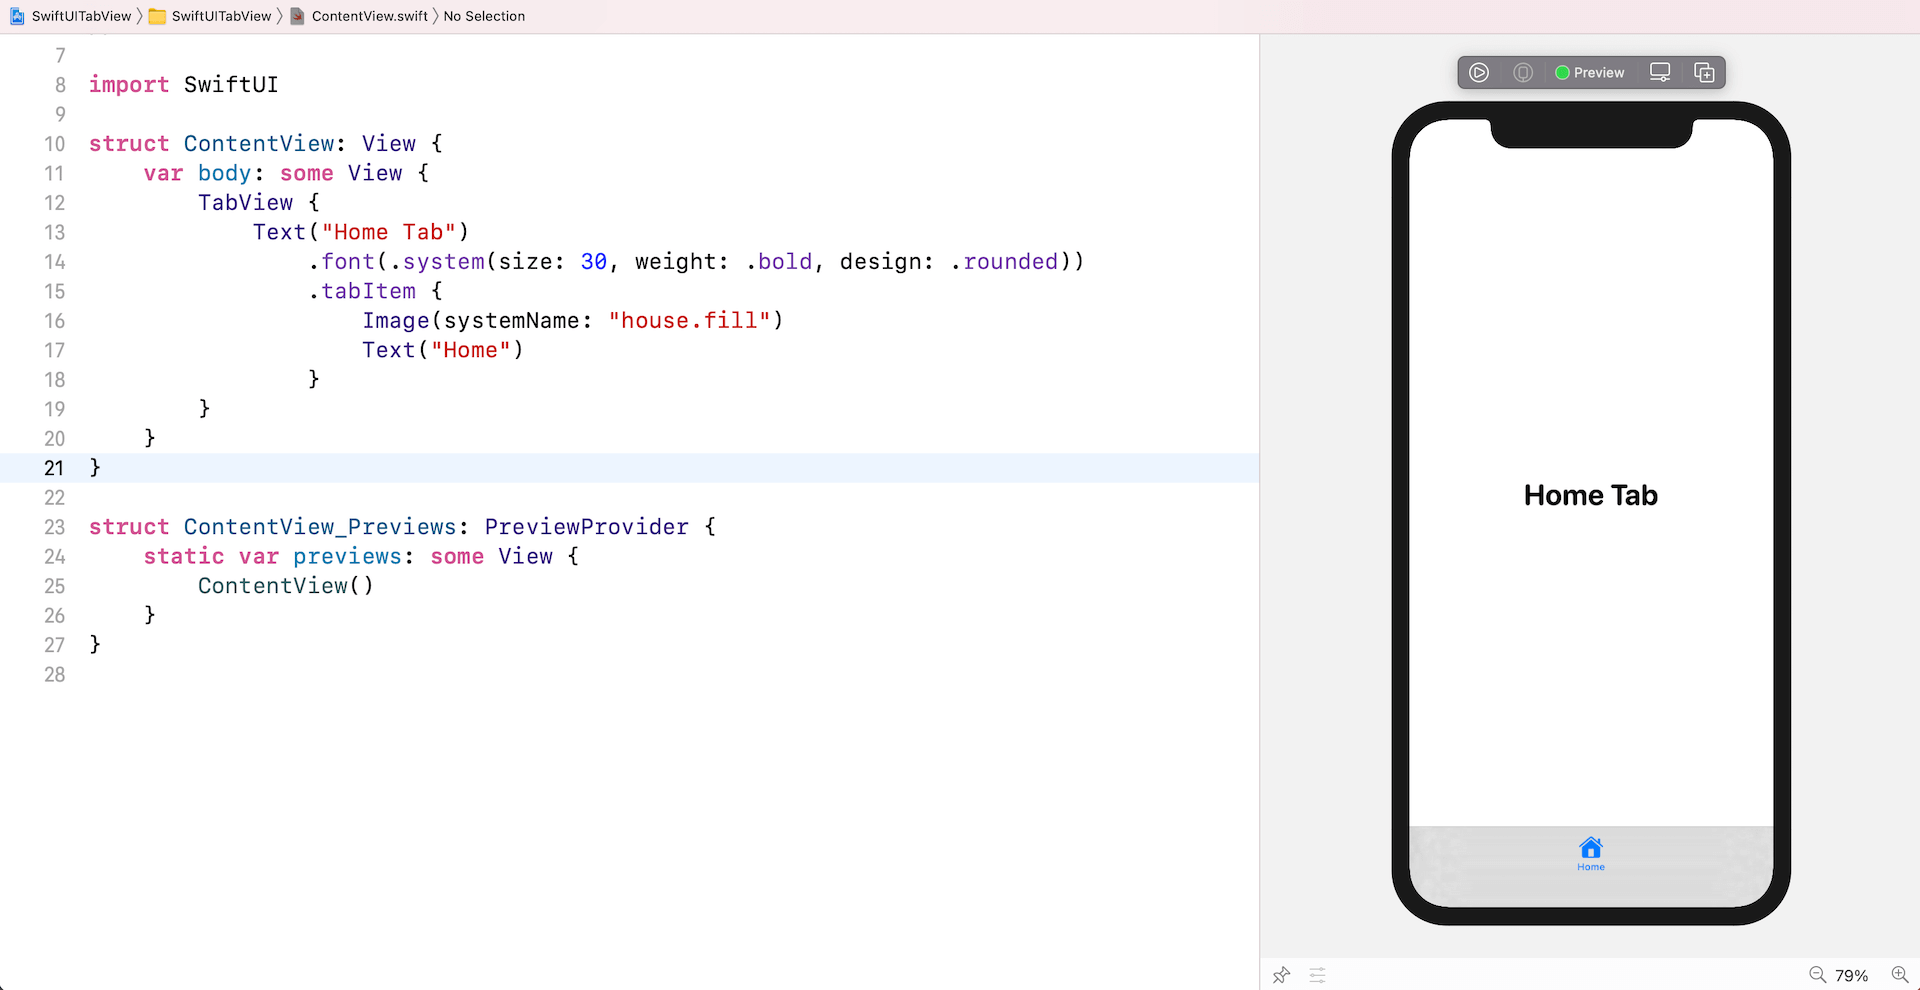
}To embed this text view in a tab bar, all you need to do is wrap it with the TabView component and set the tab item description by attaching the .tabItem modifier like this:
struct ContentView: View {
    var body: some View {
        TabView {
            Text("Home Tab")
                .font(.system(size: 30, weight: .bold, design: .rounded))
                .tabItem {
                    Image(systemName: "house.fill")
                    Text("Home")
                }
        }
    }
}
This will create a tab bar with a single tab item. In the sample code, the tab item has both image and text, but you are free to remove one of the those.
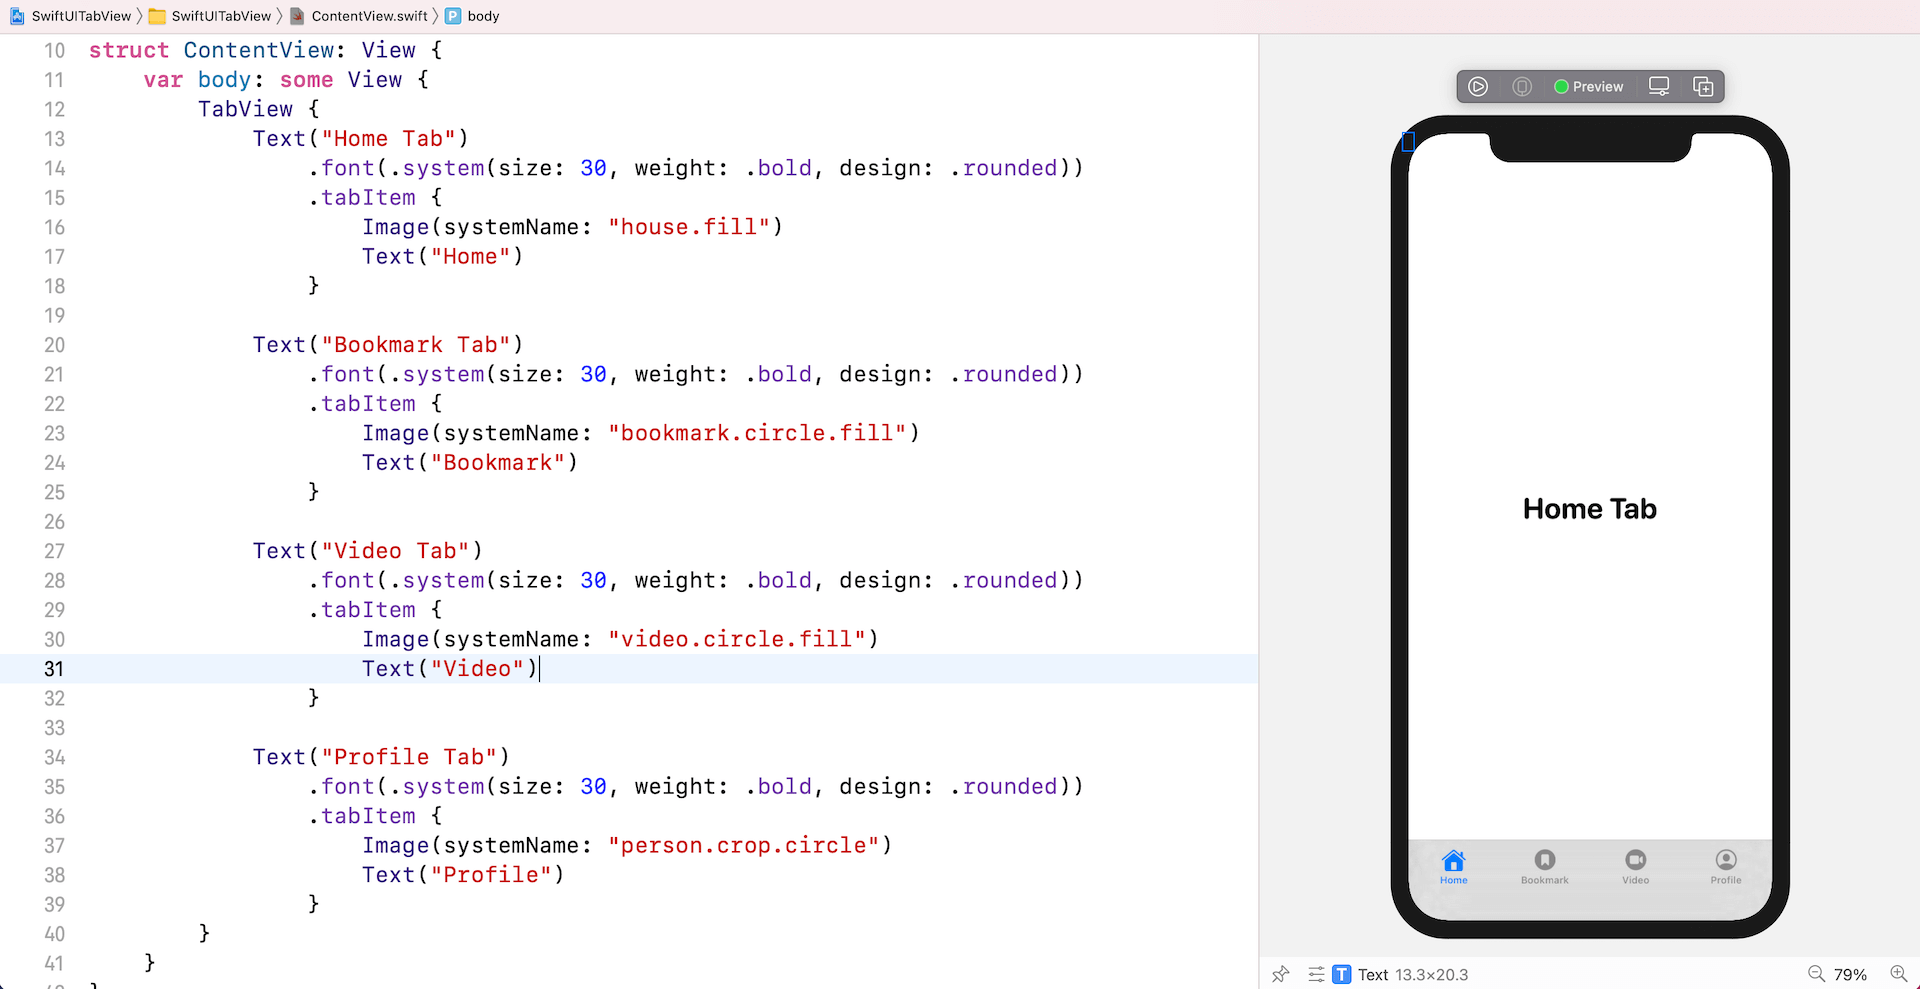
To display more tabs, you just need to add the child views inside the TabView like this:
TabView {
    Text("Home Tab")
        .font(.system(size: 30, weight: .bold, design: .rounded))
        .tabItem {
            Image(systemName: "house.fill")
            Text("Home")
        }

    Text("Bookmark Tab")
        .font(.system(size: 30, weight: .bold, design: .rounded))
        .tabItem {
            Image(systemName: "bookmark.circle.fill")
            Text("Bookmark")
        }

    Text("Video Tab")
        .font(.system(size: 30, weight: .bold, design: .rounded))
        .tabItem {
            Image(systemName: "video.circle.fill")
            Text("Video")
        }

    Text("Profile Tab")
        .font(.system(size: 30, weight: .bold, design: .rounded))
        .tabItem {
            Image(systemName: "person.crop.circle")
            Text("Profile")
        }
}
This gives you a tab bar interface with 4 tab items.
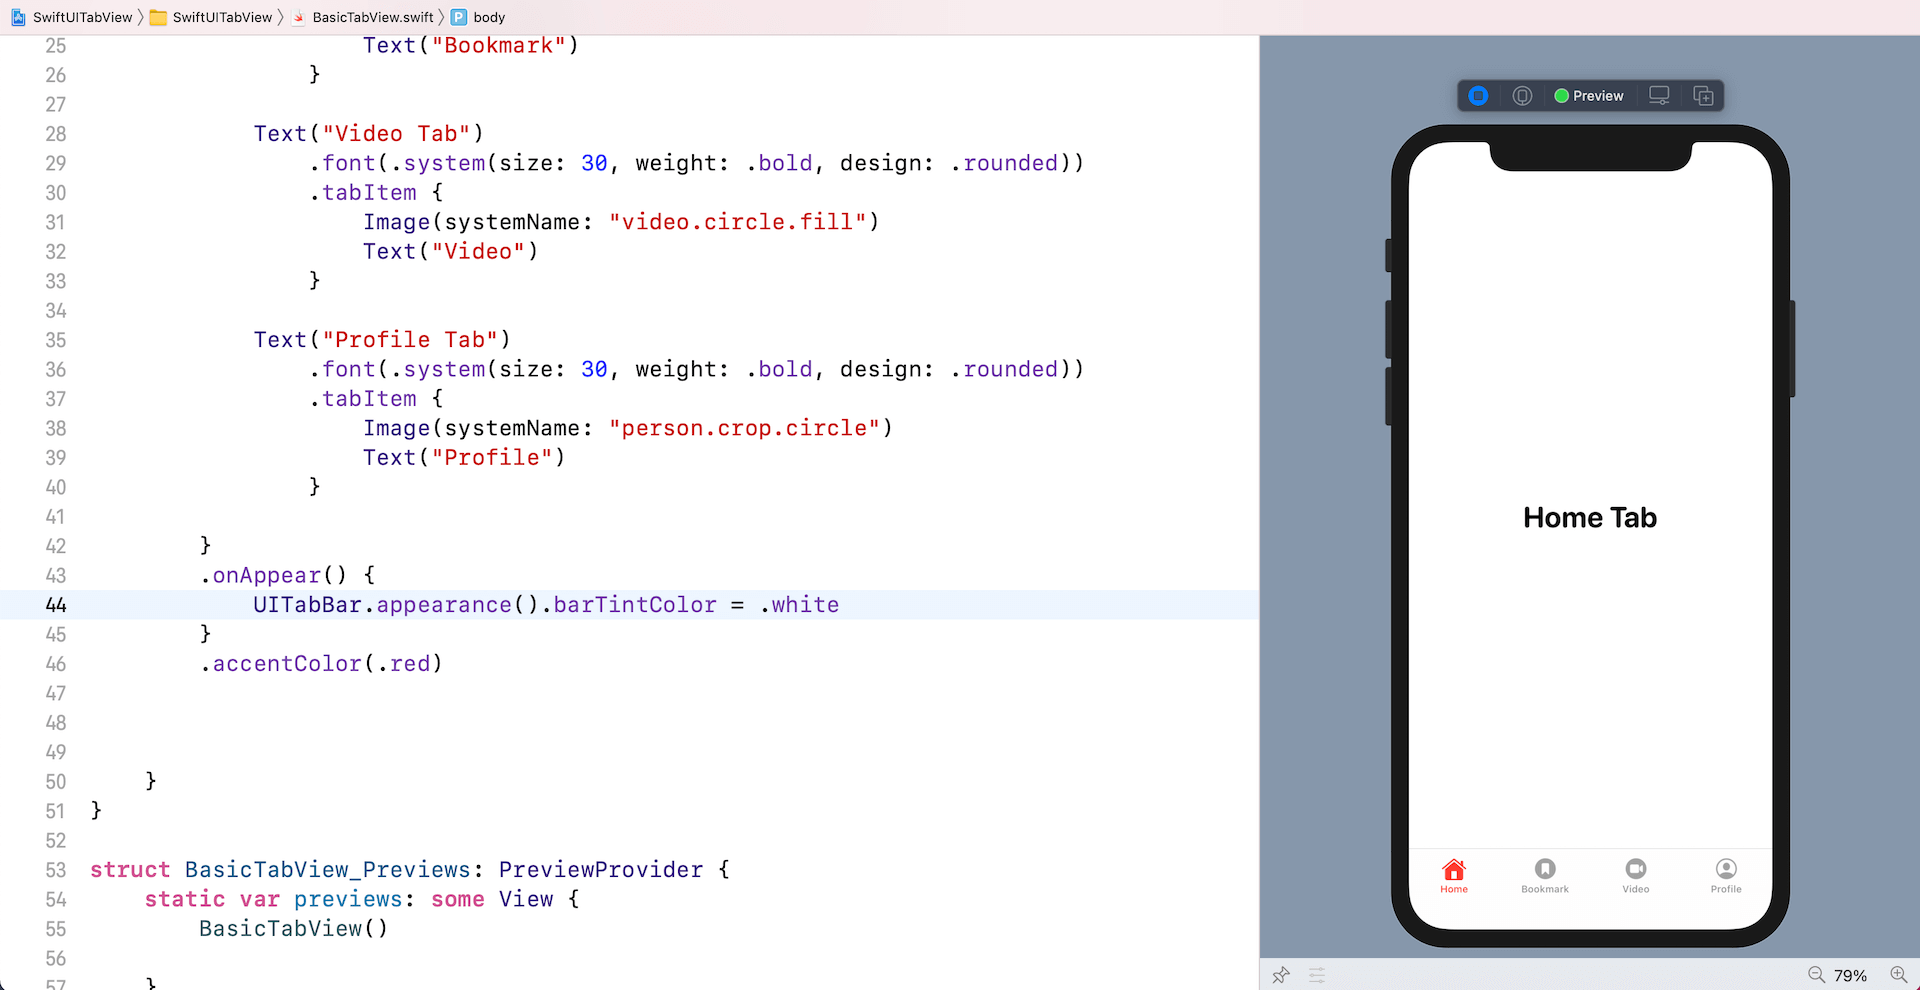
Customizing the Tab Bar Color
By default, the color of the tab bar item is set to blue. You can change its color by attaching the .accentColor modifier to TabView like this:
TabView {

}
.accentColor(.red)
Yet the SwiftUI framework doesn’t have a built-in modifier for changing the tab bar’s color. If you want to change that, you may use the appearance API of UIKit like below:
.onAppear() {
    UITabBar.appearance().barTintColor = .white
}
If you attach the call to TabView, the color of the tab bar should be changed to white.
Switching Between Tabs Programmatically
Users can tap the tab bar items to switch between tabs, which is automatically handled the TabView. In some use cases, you may want to switch to a specific tab programmatically. The TabView has another init method for this purpose. The method takes a state variable which associates with the tag value of the tabs.
TabView(selection: $selection)As an example, declare the following state variable in ContentView:
@State private var selection = 0Here we initialize the selection variable with a value of 0, which is the tag value of the first tab item. We haven’t defined the tag value for the tab items yet. Therefore, update the code like this and attach the tag modifier for each of the tab items:
TabView(selection: $selection) {
    Text("Home Tab")
        .font(.system(size: 30, weight: .bold, design: .rounded))
        .tabItem {
            Image(systemName: "house.fill")
            Text("Home")
        }
        .tag(0)

    Text("Bookmark Tab")
        .font(.system(size: 30, weight: .bold, design: .rounded))
        .tabItem {
            Image(systemName: "bookmark.circle.fill")
            Text("Bookmark")
        }
        .tag(1)

    Text("Video Tab")
        .font(.system(size: 30, weight: .bold, design: .rounded))
        .tabItem {
            Image(systemName: "video.circle.fill")
            Text("Video")
        }
        .tag(2)

    Text("Profile Tab")
        .font(.system(size: 30, weight: .bold, design: .rounded))
        .tabItem {
            Image(systemName: "person.crop.circle")
            Text("Profile")
        }
        .tag(3)
}
We give each tab item a unique index by attaching the tag modifier. The TabView is also updated to take in the binding to the selection value. To switch to your preferred tab programmatically, all you need to do is to update the value of the selection variable.
Say, you can create a Next button that switches to the next tab like this:
ZStack(alignment: .topTrailing) {
    TabView(selection: $selection) {
        .
        .
        .
    }
    .accentColor(.red)
    .onAppear() {
        UITabBar.appearance().barTintColor = .white
    }

    Button(action: {
        selection = (selection + 1) % 4
    }) {
        Text("Next")
            .font(.system(.headline, design: .rounded))
            .padding()
            .foregroundColor(.white)
            .background(Color.red)
            .cornerRadius(10.0)
            .padding()

    }
}
After making the changes and run the app in the preview canvas, you can switch to the tabs by tapping the Next button.
Hiding the Tab Bar in a Navigation View
You can embed a tab view in a navigation view by wrapping the TabView component with NavigationView like this:
NavigationView {
    TabView(selection: $selection) {
        .
        .
        .
    }

    .navigationTitle("TabView Demo")
}
In UIKit, there is another option called hidesBottomBarWhenPushed, which allows you to hide the tab bar when the UI is pushed to the detail view in a navigation interface. SwiftUI also has this feature built-in. You can modify the code like this to have a test:
NavigationView {
    TabView(selection: $selection) {
        List(1...10, id: \.self) { index in
            NavigationLink(
                destination: Text("Item #\(index) Details"),
                label: {
                    Text("Item #\(index)")
                        .font(.system(size: 20, weight: .bold, design: .rounded))
                })

        }
        .tabItem {
            Image(systemName: "house.fill")
            Text("Home")
        }
        .tag(0)

        Text("Bookmark Tab")
            .font(.system(size: 30, weight: .bold, design: .rounded))
            .tabItem {
                Image(systemName: "bookmark.circle.fill")
                Text("Bookmark")
            }
            .tag(1)

        Text("Video Tab")
            .font(.system(size: 30, weight: .bold, design: .rounded))
            .tabItem {
                Image(systemName: "video.circle.fill")
                Text("Video")
            }
            .tag(2)

        Text("Profile Tab")
            .font(.system(size: 30, weight: .bold, design: .rounded))
            .tabItem {
                Image(systemName: "person.crop.circle")
                Text("Profile")
            }
            .tag(3)
    }
    .accentColor(.red)
    .onAppear() {
        UITabBar.appearance().barTintColor = .white
    }

    .navigationTitle("TabView Demo")
}
We just altered the code of the Home tab to display a list of item. And, we wrap each list item with a NavigationLink, so that it will navigate to the detail view when the item is tapped. If you run the app using a simulator or in the preview canvas, you should see that the tab bar is hidden when it’s navigated to the detail view.
For some scenarios, you probably don’t want the tab bar to be hidden. In this case, you can create the navigation interface the other way round. Instead of wrapping the tab view in a navigation view, you embed the navigation view in a tab view like this:
TabView(selection: $selection) {
    NavigationView {
        List(1...10, id: \.self) { index in
            NavigationLink(
                destination: Text("Item #\(index) Details"),
                label: {
                    Text("Item #\(index)")
                        .font(.system(size: 20, weight: .bold, design: .rounded))
                })

        }

        .navigationTitle("TabView Demo")
    }
    .tabItem {
        Image(systemName: "house.fill")
        Text("Home")
    }
    .tag(0)

    .
    .
    .
}
Now when you navigate to the detail view of the item, the tab bar is still there.
Summary
In this tutorial, we have walked you through the basics of TabView, which is the UI component in SwiftUI for building a tab view interface. The framework doesn’t provide you with much options for customizing the tab bar. However, you may still rely on the APIs of UIKit to customizing the appearance. This tutorial only shows you how to work with the built-in tab bar. You can actually create your own tab bar if you need full customizations. We will discuss more about that in the future tutorials.
If you want to learn more about SwiftUI, please further check out our Mastering SwiftUI book. It has been fully updated for Xcode 12 and iOS 14.


