The first version of SwiftUI doesn’t come with a native UI component for multiline text field. For multiline input, you can wrap a UITextView from the UIKit framework and make it available to your SwiftUI project by adopting the UIViewRepresentable protocol. We have written a detailed tutorial on the implementationg, showing you how to create a multiline text field in SwiftUI.
In iOS 14, which is expected to be released in late Sep, Apple introduced a new component called TextEditor for the SwiftUI framework. This TextEditor enables developers to display and edit multiline text in your apps. In this tutorial, we will show you how to use TextEditor for handling multiline input.
To follow this tutorial, please make sure you download and install Xcode 12 beta.
Using TextEditor
It is very easy to use TextEditor. You just need to have a state variable to hold the input text. Then create a TextEditor instance in the body of your view like this:
struct TextView: View {
    @State private var inputText = ""

    var body: some View {
        TextEditor(text: $inputText)
    }
}
To instantiate the text editor, you pass the binding of inputText so that the state variable can store the user input.
You can customize the editor like any SwiftUI view. For example, the below code changes the font type and adjust the line spacing of the text editor:
TextEditor(text: $inputText)
    .font(.title)
    .lineSpacing(20)
    .autocapitalization(.words)
    .disableAutocorrection(true)
    .padding()
Optionally, you can enable/disable the auto-capitalization and auto-correction features.
Using the onChange() Modifier to Detect Text Input Change
For UITextView of the UIKit framework, it works with the UITextViewDelegate protocol to handle the editing changes. So, how about TextEditor? How can we detect the change of user input and perform further processing?
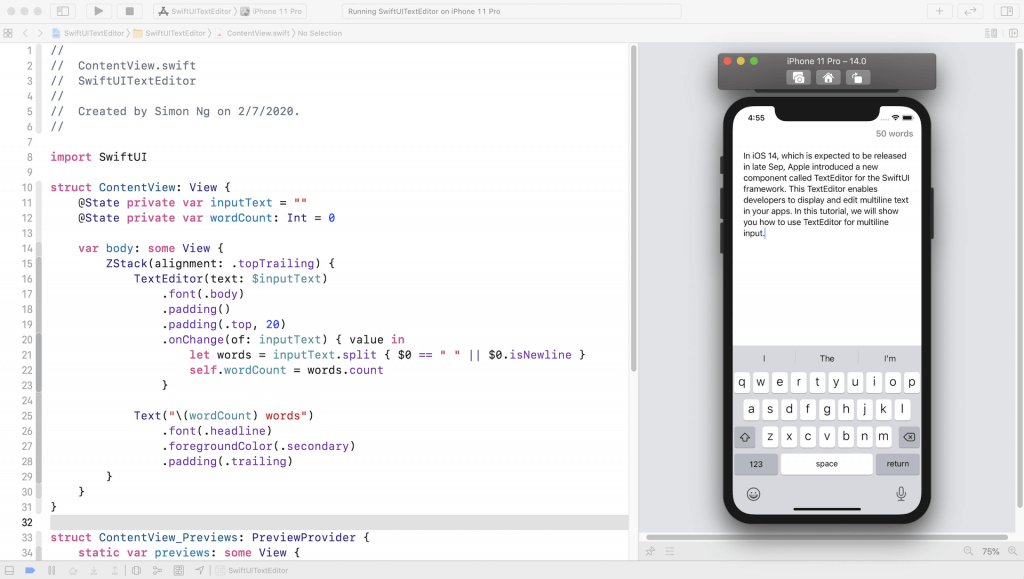
The new version of SwiftUI introduces an onChange() modifier which can be attached to TextEditor or any other view. Let’s say, if you are building a note application using TextEditor and need to display a word count in real time, you can attach the onChange() modifier to TextEditor like this:
struct ContentView: View {
    @State private var inputText = ""
    @State private var wordCount: Int = 0

    var body: some View {
        ZStack(alignment: .topTrailing) {
            TextEditor(text: $inputText)
                .font(.body)
                .padding()
                .padding(.top, 20)
                .onChange(of: inputText) { value in
                    let words = inputText.split { $0 == " " || $0.isNewline }
                    self.wordCount = words.count
                }

            Text("\(wordCount) words")
                .font(.headline)
                .foregroundColor(.secondary)
                .padding(.trailing)
        }
    }
}
In the code above, we declare a state property to store the word count. And, we specify in the onChange() modifier to monitor the change of inputText. So, whenever a user types a character, the code inside the onChange() modifier will be invoked. In the closure, we compute the total number of words in inputText and update the wordCount variable accordingly.
If you run the code in a simulator, you should see a plain text editor and it displays the word count in real time.

With the upcoming release of iOS 14, we will cover the new API of SwiftUI in our Mastering SwiftUI book. If you want to dive deeper into this UI framework, please check out the book here.


