At last month’s Apple Event in San Francisco, Apple announced the fourth generation Apple TV. This new update, however, is unlike any previous version of the set top box. Apple’s new TV will sport an App Store allowing users to download apps and games.
Naturally, such an announcement brings a lot of excitement to the developer community. With the new Apple TV, the Cupertino based giant has introduced a new operating system, based off iOS, called tvOS. tvOS is essentially iOS but modified. Using common frameworks and the your favorite programming language (Swift, of course!) we will explore tvOS by writing a few simple apps.
Understanding tvOS
tvOS is based on iOS. In fact, many frameworks you have likely used are available in tvOS. However, Apple has deleted several iOS frameworks, making tvOS unique (most notably WebKit).
Apple supports two types of tvOS apps. The first is a traditional app – such an app has bundled code, images, etc. This is essentially the same as an iOS or OS X app. tvOS adds support for a second type of app, which Apple calls client-server apps. Client server apps simply the process of making server requests and development for highly network focused apps. In other words, these are apps that interact with custom databases, servers, etc. For example, if you had written a backend in node.js (a popular javascript framework based on Chrome’s v8 engine), then you might consider using client-server technologies to make it easier to manage the app (also known as the client) and the backend (another word for server). Client-server apps interact directly with javascript. However, due to the nature of these apps, in this introductory tutorial we will not be discussing client-server apps but rather focusing on traditional apps.
With that in mind, let’s get started.
Prerequisites
For this tutorial I assume you have been and are familiar with common iOS frameworks, terminology, and networking. I will be using storyboards throughout the tutorial and expect you to have a working knowledge of how they are used. As such, I will not go into great detail on how to do common tasks in storyboards (i.e. changing background colors, modifying object sizes, etc). If you are not familiar with storyboards or just need a refresher on iOS, it might be a good idea to head over to the AppCoda course page and start there before returning.
You must have Xcode 7.1 (more on this in a bit). It will be best to test on the actual Apple TV, but the simulator will suffice.
Creating a New tvOS Project
In order to develop for tvOS, you must have Xcode 7.1 installed on your mac. Xcode 7.1 includes the tvOS SDK, along with the iOS 9.1 and Swift 2.1.
Fire up Xcode, create a new project, and select a new tvOS app. When prompted, click Single View Application and click next.
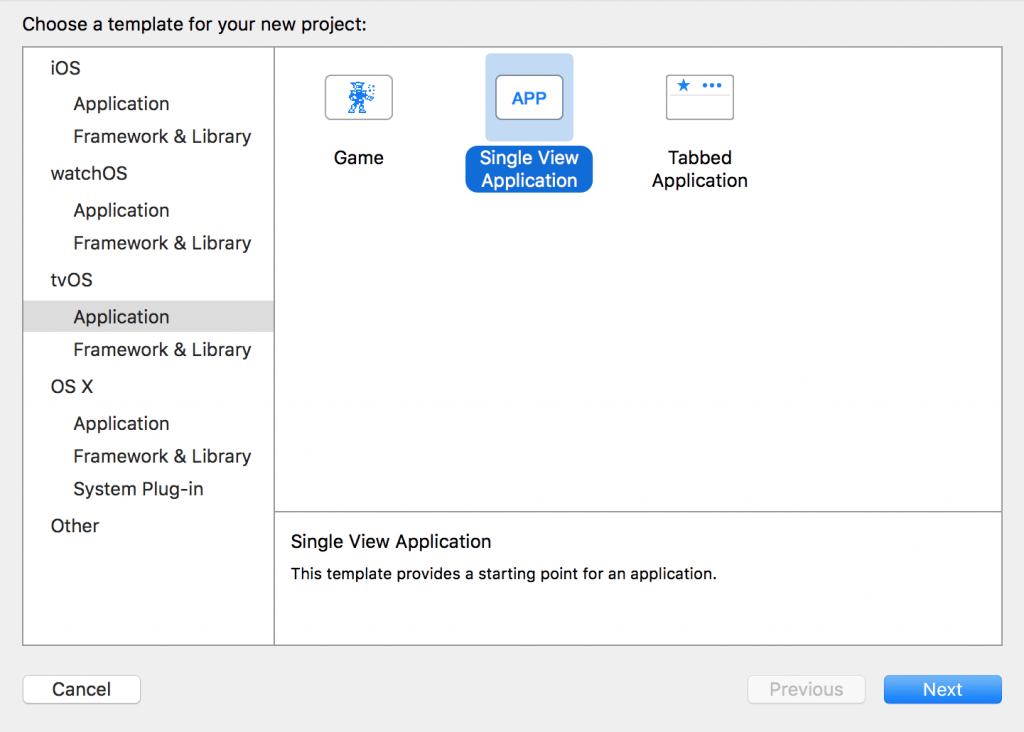
Create a name for the app. As is custom for first apps, we’ll begin this tutorial by creating a Hello World app. Name your project HelloWorld and click create when ready. Select a destination for the app.
Hello, tvOS!
Because tvOS inherits from iOS, many of the common concepts you’re familiar with from iOS development exist in tvOS.
In your Main.storyboard file, add a button, title it “Click Me!”, and add a label beneath it as seen in the screenshot below.
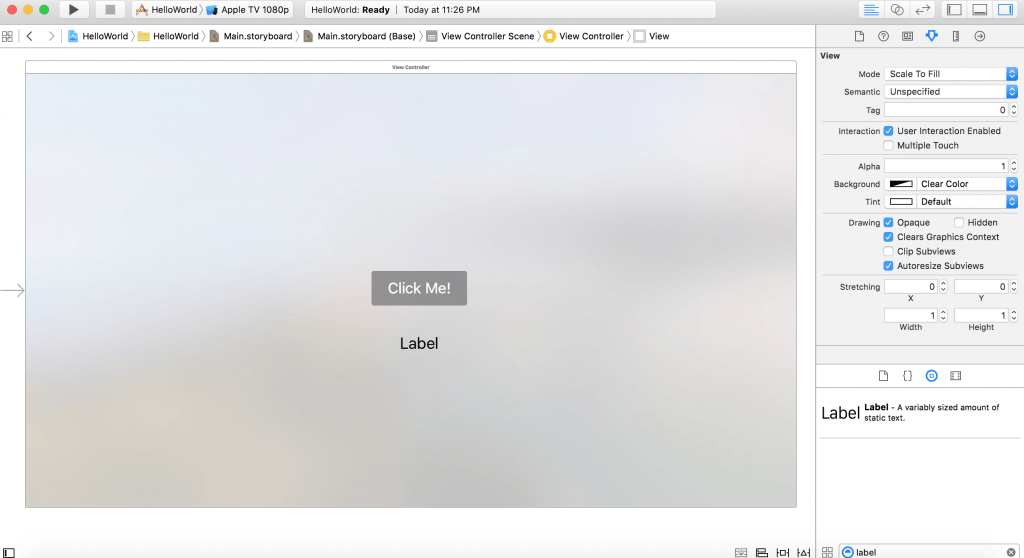
Notice that buttons look different in tvOS than they do in iOS. Further, when you add multiple buttons, Apple has enabled users to seamlessly switch between buttons when they swipe right, left, up, or down. Developers need only arrange their buttons in the storyboard to take advantage of this feature (more on this later).
As with iOS, let’s control-drag from the label and button to create an IBOutlet and IBAction. I’ll name the outlet myLabel and action buttonPressed.
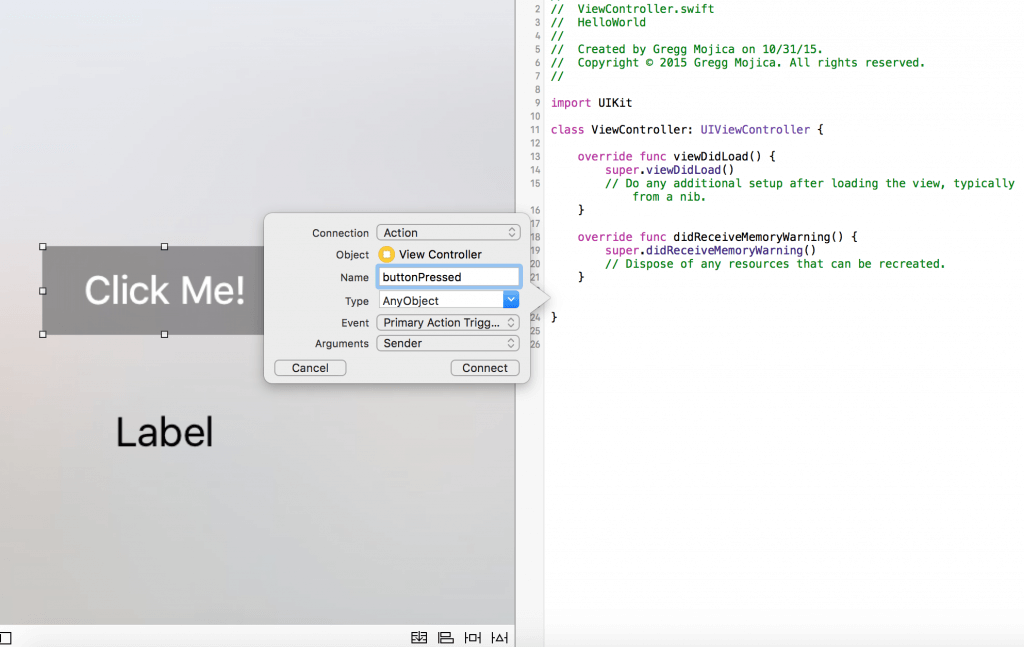
Under the buttonPressed action, let’s type the following lie of code:
self.myLabel.text = "Hello, World"
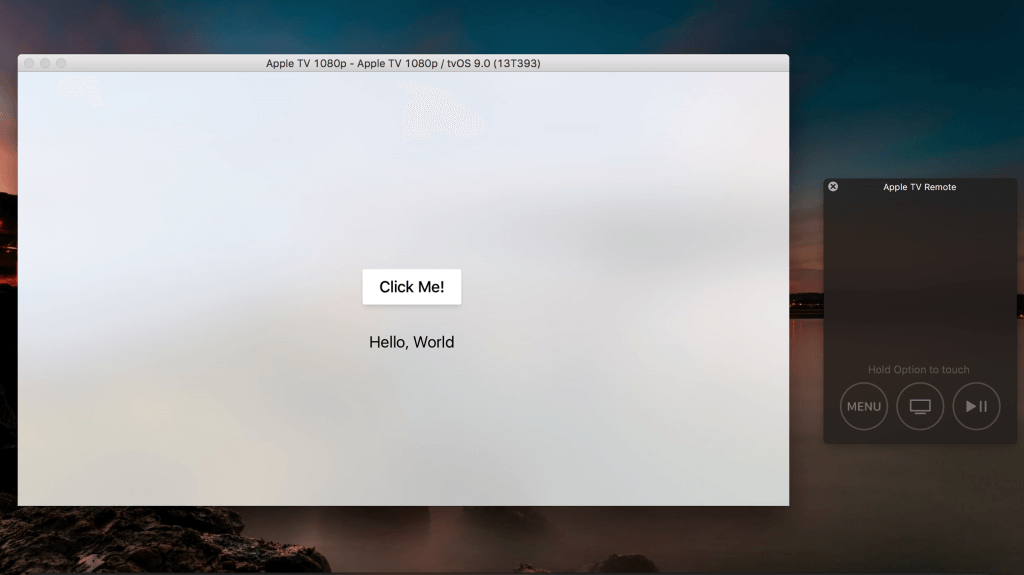
This should be self explanatory and very familiar to you. If not, the above line of code assigns the string Hello, World to the label’s text property when clicked.
Run the app on the simulator.
You’ll probably want to click the button with the mouse, but unlike an iOS app in the simulator, the Apple TV is not touch screen and relies on a remote. As such, Click Hardware > Show Apple TV Remote or Command Shift R to show the remote. Using the remote, click the button and behold – your first tvOS app is complete!
Quiz Game App
Next, let’s use our newfound tvOS knowledge to build a simple quiz app. This is going to be an extremely basic quiz app (with only one question); the goal of this mini project is to expose you to buttons and how they interact with the remote. In the next project we’ll explore more controls in tvOS.
Again fire up Xcode and go through the setup process detailed above. But this time choose a different project name.
Do some basic storyboarding to mimic the layout I have below.
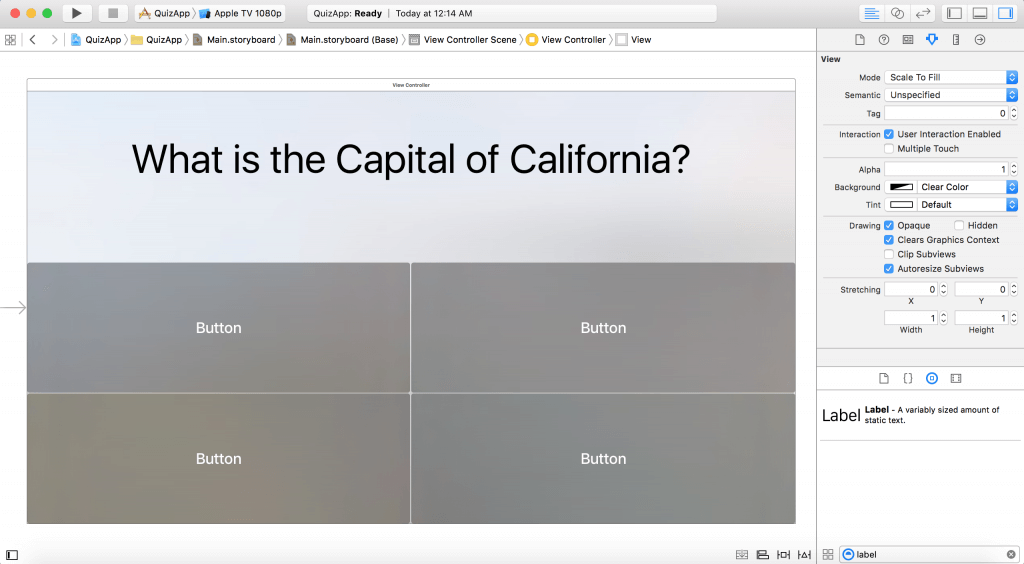
If you’re unsure how I did this, below is a list of the components I used:
- Four (4) UIButton objects, each 960 x 325 in dimensions
- One (1) UILabel, 1,400 x 120 in dimension
Next add text to the buttons and change their background colors using the storyboard (as you would for any iOS app).
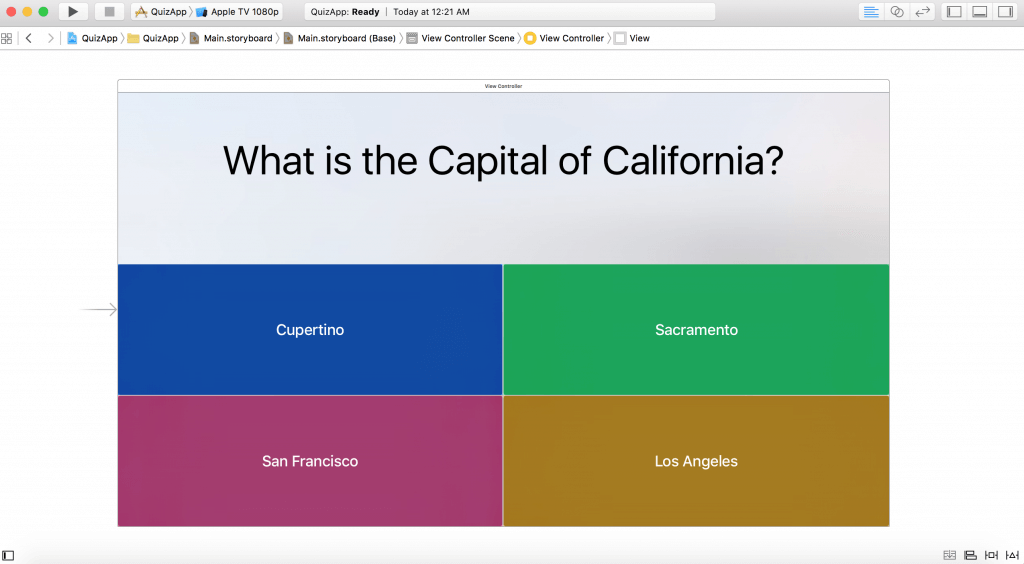
As before, let’s wire up these buttons to the code. For simplicity and ease of understanding, we will make four IBActions (although this is not necessarily the most elegant solution, it is the simplest).
Connect these buttons to the ViewController.swift file and name them uniquely. I named mine button0Tapped, button1Tapped, button2Tapped, and button3Tapped, but feel free to modify these names.
The label in the image above asks what is the capital of California. Given the choices (and the knowledge of California’s capital), Sacramento is the answer. The button for Sacramento corresponds to the button1Pressed action.
Depending on the button clicked, we want to show an alert message to the user, indicating if they selected the right or wrong button. Let’s create a function called showAlert to handle this and make our code DRY (DRY stands for Don’t Repeat Yourself and is a common practice in software engineering; making code dry ensures it is reusable and maintainable).
 func showAlert(status: String, title:String) { // 1
        let alertController = UIAlertController(title: status, message: title, preferredStyle: .Alert) // 2
        let cancelAction = UIAlertAction(title: "Cancel", style: .Cancel) { (action) in //3
        }
        alertController.addAction(cancelAction)

        let ok = UIAlertAction(title: "OK", style: .Default) { (action) in
        } // 4
        alertController.addAction(ok)

        self.presentViewController(alertController, animated: true) { // 5
        }
    }
The above function accepts two arguments, one being the status of the user’s input (if they got the question right or wrong) and the message, or title, to input in the alert.
The second line creates and initializes a new UIAlertController object. the third and fourth lines add cancel and ok buttons to the alert while the fifth line presents it.
If you’re unsure how this snippet works, I highly encourage you to check out our UIAlertController tutorial, which provides much more detailed information on this class.
Now, under the various IBActions, call this function.
    @IBAction func button0Tapped(sender: AnyObject) {
        showAlert("Wrong!", title: "Bummer, you got it wrong!")
    }
    @IBAction func button1Tapped(sender: AnyObject) {
        showAlert("Correct!", title: "Whoo! That is the correct response")
    }
    @IBAction func button2Tapped(sender: AnyObject) {
        showAlert("Wrong!", title: "Bummer, you got it wrong!")
    }
    @IBAction func button3Tapped(sender: AnyObject) {
        showAlert("Wrong!", title: "Bummer, you got it wrong!")
    }
As you can see, the correct title is passed only in the button1Tapped function while the rest say “wrong”.
For your complete reference, your code should look like mine below.
import UIKit

class ViewController: UIViewController {

    override func viewDidLoad() {
        super.viewDidLoad()
        // Do any additional setup after loading the view, typically from a nib.
    }

    override func didReceiveMemoryWarning() {
        super.didReceiveMemoryWarning()
        // Dispose of any resources that can be recreated.
    }

    @IBAction func button0Tapped(sender: AnyObject) {
        showAlert("Wrong!", title: "Bummer, you got it wrong!")
    }
    @IBAction func button1Tapped(sender: AnyObject) {
        showAlert("Correct!", title: "Whoo! That is the correct response")
    }
    @IBAction func button2Tapped(sender: AnyObject) {
        showAlert("Wrong!", title: "Bummer, you got it wrong!")
    }
    @IBAction func button3Tapped(sender: AnyObject) {
        showAlert("Wrong!", title: "Bummer, you got it wrong!")
    }

    func showAlert(status: String, title:String) {
        let alertController = UIAlertController(title: status, message: title, preferredStyle: .Alert)

        let cancelAction = UIAlertAction(title: "Cancel", style: .Cancel) { (action) in

        }
        alertController.addAction(cancelAction)

        let ok = UIAlertAction(title: "OK", style: .Default) { (action) in
        }
        alertController.addAction(ok)

        self.presentViewController(alertController, animated: true) {
        }
    }
}
Run your app in the simulator. If everything goes as planned, you should see something like the screenshot below.
Click the remote to select Cupertino.
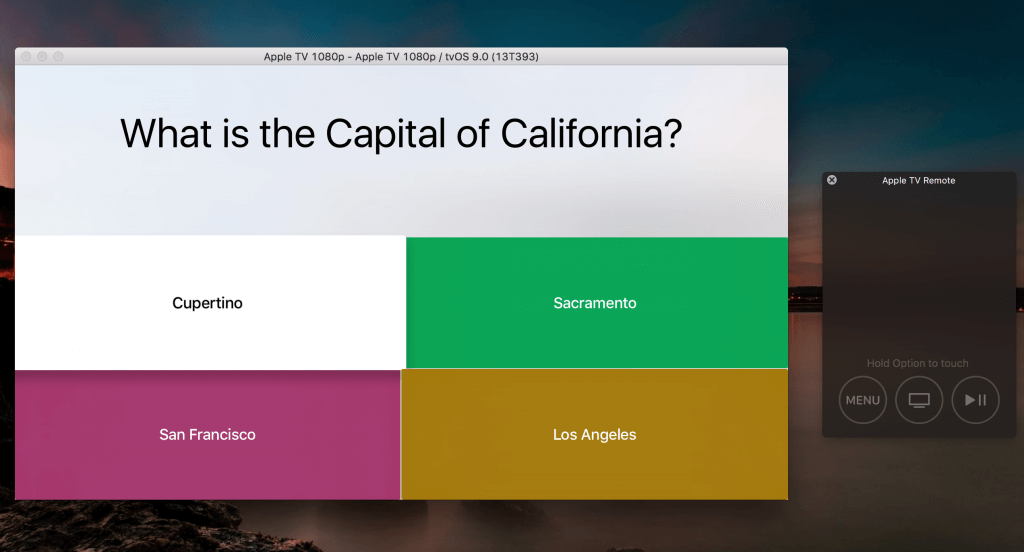
You should see the UIAlertController pop up.
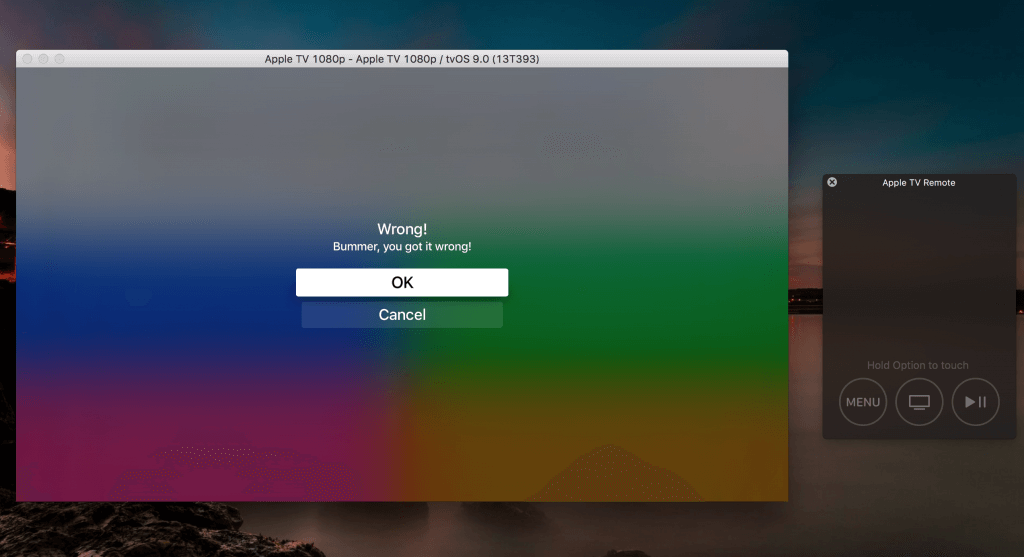
Unfortunately, the simulator does not support swiping well, so you’ll probably want to test out the actual device to see the success alert. However, you can swipe on the simulator (remote) by holding the option key. On the actual Apple TV, you’ll be able to swipe between all the buttons seamlessly.
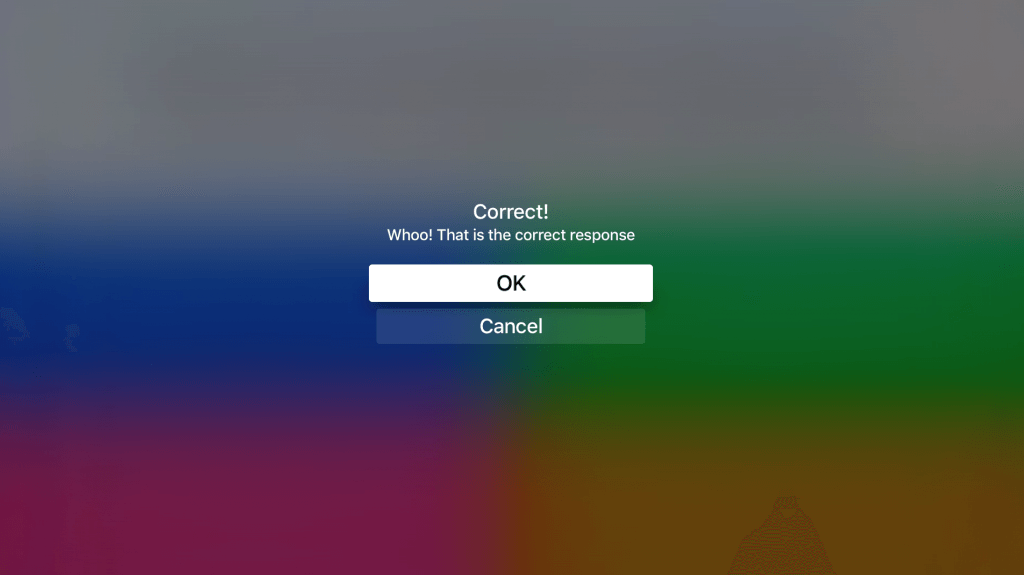
Congratulations! You’ve completed project 2.
Working with TableViews in tvOS
As you likely know from iOS, tableviews are a common occurrence across apple’s operating systems. In fact, apple uses them in many of its own apps (including messages, contacts, etc). With the release of the watchOS SDK, tableviews are available on the apple watch. Naturally, the new apple tv and tvOS includes support for this very popular API.
Let’s create yet another xcode project, go through the setup process, and name it TableViewPractice.
As with the previous projects we made, xcode automatically generates a ViewController.swift file. On line 11 of that file add the following code after the UIViewController but before the opening curly brace.
UITableViewDataSource, UITableViewDelegate
Line 11 should like mine below.
class ViewController: UIViewController, UITableViewDataSource, UITableViewDelegate {
Because swift is a safe language, you’ll get an error saying your app does not conform to the UITableView datasource and delegate. We will tackle this shortly.
Next add a tableview in your storyboard and control drag to the class. Name it tableView. Below the tableView IBOutlet, add the following array.
var dataArray = ["San Francisco", "San Diego", "Los Angeles", "San Jose", "Mountain View", "Sacramento"]
This array contain all the elements we will be displaying in our tableview.
Now add the following code below the viewDidLoad method.
func numberOfSectionsInTableView(tableView: UITableView) -> Int {
        return 1
    }

    func tableView(tableView: UITableView, numberOfRowsInSection section: Int) -> Int {
        return self.dataArray.count
    }

    func tableView(tableView: UITableView, cellForRowAtIndexPath indexPath: NSIndexPath) -> UITableViewCell {
        let cell = UITableViewCell(style: .Subtitle, reuseIdentifier: nil)

        cell.textLabel?.text = "\(self.dataArray[indexPath.row])"
        cell.detailTextLabel?.text = "Hello from sub title \(indexPath.row + 1)"

        return cell
    }
As you likely realize, tableviews in tvOS are very similar to their iOS counterparts. In the code snippet above, we tell the tableview how many number of rows, how many sections, and what to display for each cell.
In the viewDidLoad method, make sure you set the delegate and datasource to self.
self.tableView.dataSource = self
self.tableView.delegate = self
Run the app in the simulator.
You should see the tableview appear as intended.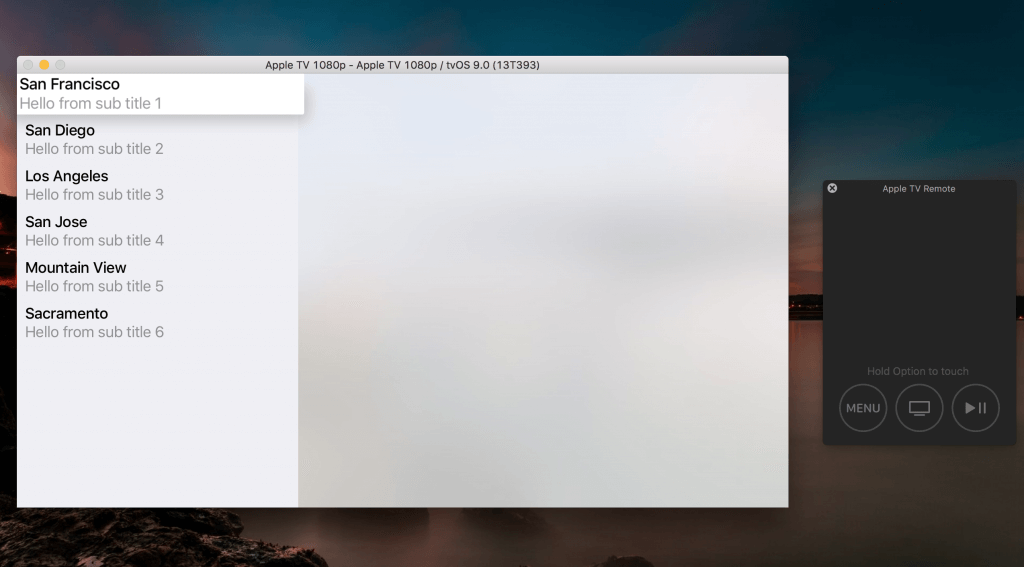
Now let’s add a UIButton to the right on the tableview. Build and run in the simulator or device. Whoo! we now have a button and tableview, which can both be swiped to.
Creating a Weather App
In this next mini project, we will develop a simple weather app that displays the current forecast. For this project we will use forecast.io, the rock sturdy weather API that powers many popular iOS apps including Dark Sky.
Sign up for a developer account at developer.forecast.io. As we’ll only be testing, the free API calls (up to 1,000 a day) should suffice.
Notice the below url:
https://api.forecast.io/forecast/d3250bf407f0579c8355cd39cdd4f9e1/37.7833,122.4167
After the forecast slash is the API Key (do not give this out to anyone in your own projects). Following the API Key is the latitude and longitude coordinates for the location you want to parse weather data from. I picked San Francisco but you can easily modify these coordinates to display weather from other places.
If you navigate to the above URL, you’ll notice it is JSON. This is considered a GET request. In the HTTP world, GET gathers and downloads data.
In order to make sense out of this and display it in an app, we’ll need to parse it. Parsing JSON has been a hotly debated topic in Swift. There are various JSON parsing libraries that exist an excellent job — SwiftyJSON, Alamofire, etc. Each of these are fantastic resources and I highly encourage you to look into then. However, for this tutorial, we will be using NSJSONSerialization, a class built into iOS. Let’s begin by opening up ViewController.swift. As there is no real reason in this project to include the didRecieveMemory warning function, let’s delete it.
Now, type this code under ViewDidLoad
if let url = NSURL(string: "https://api.forecast.io/forecast/d3250bf407f0579c8355cd39cdd4f9e1/37.7833,122.4167") { }
Here we use optionals to declare a url variable and set it to the forecast URL.
NSJSONSerialization requires NSData to be parsed.
if let data = NSData(contentsOfURL: url){ }
Next, input the following code within the data variable’s curly braces.
do {
      let parsed = try NSJSONSerialization.JSONObjectWithData(data, options: NSJSONReadingOptions.AllowFragments) // 1

     let newDict = parsed as? NSDictionary // 2
     print(newDict!["currently"]!["summary"])
   }
catch let error as NSError {
     print("A JSON parsing error occurred, here are the details:\n \(error)") // 3
}
We encapsulate the NSJSONSerialization object within a do catch statement. If you’re unfamiliar with do statement, it is a new feature to Swift 2. Do catch statements are a new and improved way of handling errors. The general pattern for do catch statements is as follows.
do {
    try expression // not always necessary
    statements
} catch pattern 1 {
    statements
} catch pattern 2 where condition {
    statements
}
In line 1 in the code above, we set a NSJSONSerialization object and pass the data object in. However, this object must be converted to a NSDictionary in order to properly parse it.
As such, in line 2, we assign a new variable called newDict and using the as keyword convert it to a NSDictionary.
Finally, in line 3 we catch any errors, printing the error to the console.
Your entire ViewController file should look like mine below.
import UIKit

class ViewController: UIViewController {

    override func viewDidLoad() {
        super.viewDidLoad()

        if let url = NSURL(string: "https://api.forecast.io/forecast/d3250bf407f0579c8355cd39cdd4f9e1/37.7833,122.4167") {
            if let data = NSData(contentsOfURL: url){
                do {
                    let parsed = try NSJSONSerialization.JSONObjectWithData(data, options: NSJSONReadingOptions.AllowFragments)

                    let newDict = parsed as? NSDictionary
                    print(newDict!["currently"]!["summary"])
                }
                catch let error as NSError {
                    print("A JSON parsithng error occurred, here are the details:\n \(error)")
                }
            }
        }
    }
}
Check the console. You should see a value inside an optional (your value will likely differ depending on the location and weather of that particular place).

Now let’s wire up the app with some UILabels. Make two UILabels, one called currentTemp and the other called currentSummary. Looking at the forecast API, you’ll notice it returns the current weather temperature as well as a summary of what the weather looks like (along with other data, of course).
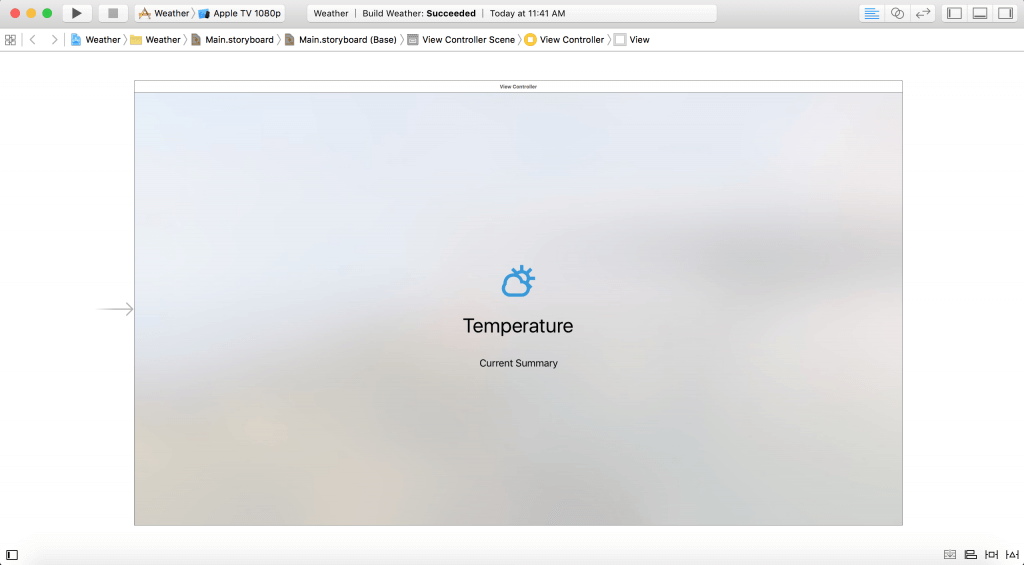
Under newDict, place the following code.
self.currentTemp.text = "\(newDict!["currently"]!["temperature"]!!)"
self.currentSummary.text = "\(newDict!["currently"]!["summary"]!!)"
This gathers the weather data and displays is appropriately. The double exclamation marks (!!) at the end of each line force unwraps the parsed JSON (otherwise it will be encapsulated in the word optional).
Build and run in the simulator (your values will likely differ from mine depending on the current weather).
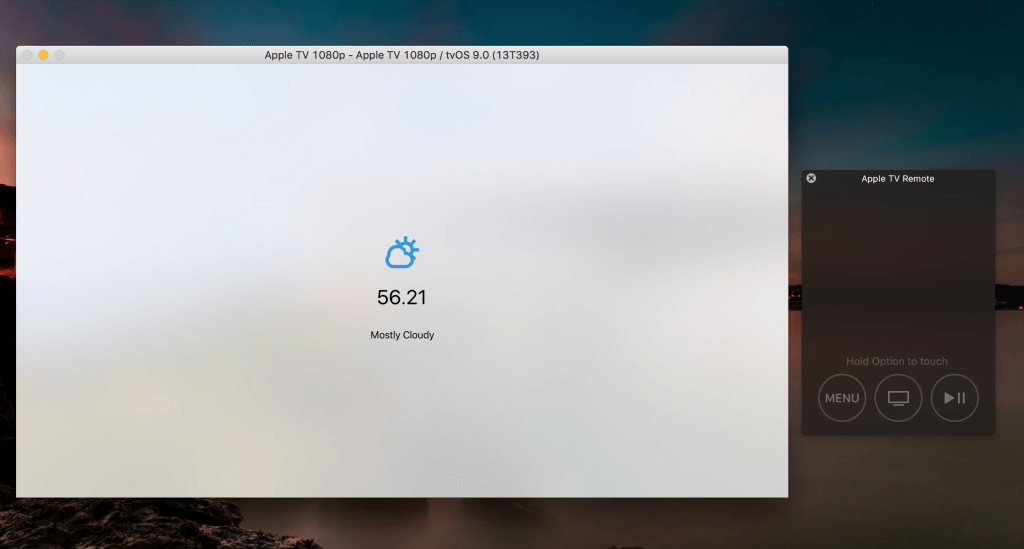
Great job! You’ve completed the weather project!
Other tvOS features
We hardly scratched the surface of tvOS. As you now know, tvOS builds upon the various iOS APIs. However, various frameworks have been removed from tvOS. For a complete list, see this article.
Additionally, tvOS is based upon focus events (what button, cell, label, etc is highlighted). Luckily, the system automatically handles most focus events. As long as you utilize storyboards, focus should be automatic. However, there are focus APIs which can be found on Google.
As mentioned at the beginning of this tutorial, Apple supports client-server apps. These apps use TVML, TVJS, and TVMLKit which are based on popular web technologies (HTML, JavaScript, etc).
One of the most important challenges to take into consideration when building a tvOS app is that the SDK does not support persistent storage. This is very different from that on iOS because you cannot have images, graphics, etc that are over 1MB in size. As such, you must utilize a backend service such as CloudKit, Parse, iCloud, etc. Further, it is suggested that you take a look at On Demand Resources in tvOS (covered in my previous App Thinning tutorial). Furthermore, apps are limited to 200MBs in size.
Clearly, there are very real limitations for tvOS apps that must be taken into consideration.
Summary
In this tutorial we took a look at tvOS and its various features. Through four example projects, we discovered the power of tvOS and its limitations. tvOS shares many similarities with iOS but several iOS frameworks have ben removed.
The complete project files are available for download here.
In project one, we wrote a hello world app and followed that up with a simple quiz app in project two, which exposed you to the focus engine. The third project detailed how to use tableviews in tvOS. Finally, we combined our knowledge and in the fourth project built a simple weather app that downloads weather data from the internet.
Apple’s tvOS app store launched last week, empowering developers from all around the world to share their creations with the world.
You’ll have to be the judge, but I feel tvOS and the new Apple TV has the potential to change the tv forever!


