

Editor’s note: This is a guest post by Gregory Tareyev, a co-founder and iOS developer of Chill (iamchill.co), the first wearable communication tool that lets you interact with your friends with a tap. In this tutorial, Gregory will share his experience on Apple Watch development and show you how to build a simple weather app using a third-party API and WatchKit. We have written a couple of tutorials about WatchKit. All of them are in Swift. Some readers mentioned if we can provide a tutorial in Objective-C. So here it is.
Enter Gregory’s tutorial.
Hello everybody! My name is Gregory Tareyev (tareyev.ru for any contacts). I am a co-founder and iOS developer of Chill (iamchill.co), the first wearable communication tool that finally makes sense. Recently we had a great experience on launching Chill on Product Hunt which gave us a lot of visibility in the community and attracted major tech blogs to cover the release. We are also discussing our involvement with a few accelerators and considering the best one. We worked really hard to build the app, but I assure you that everybody can do something like that.
Here, I want to share some experience on the app development for Apple Watch. It’ll be easy and fun.
To warm up your interest, I want to explain why it is so important to learn how to develop on wearable devices:
- The market is still small = you can get a bigger market share as a first-time mover
- The market is going to grow tremendously = the product will grow along with the market

In this tutorial, we will build a simple weather app for Apple Watch. We will go through a couple of things:
- How to parse JSON in WatchKit app
- How to use OpenWeatherMap API (once you understand it, you should be able to use any JSON-based APIs)
So, let’s get started!
The Demo App
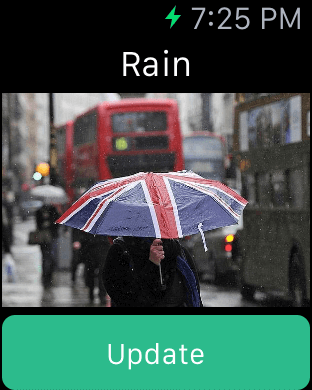
The demo app is a very simple weather app. We’re going to use OpenWeatherMap’s API to get the weather information for a particular city (e.g. London). Here is the sample screen of the final app:
Creating the Xcode Project
First, create a Single View Application and configure the project option like below. Yes, we’re going to write in Objective-C. I think it’s still important, so let’s not forget this wonderful language.

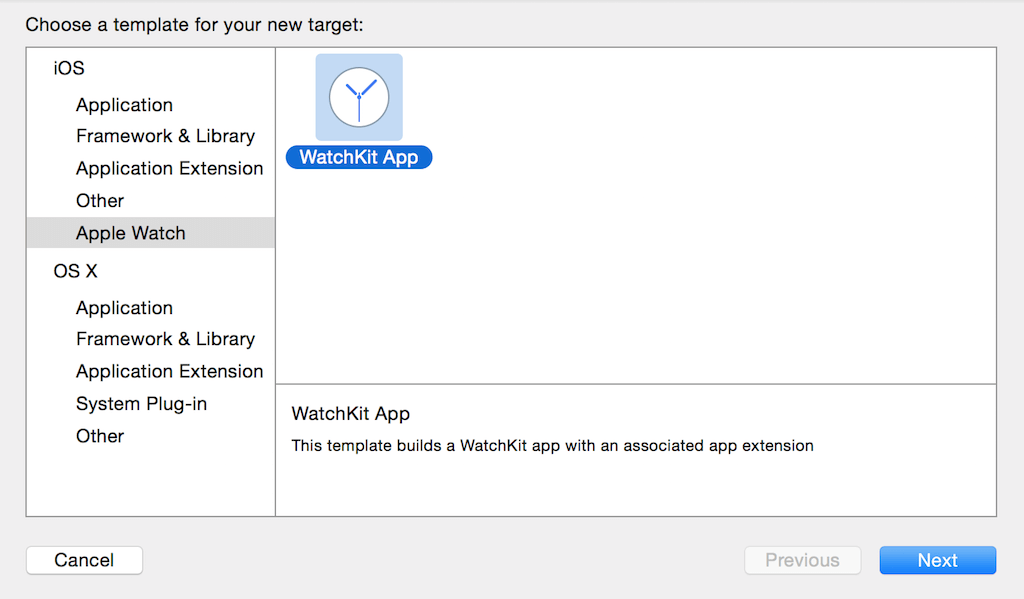
To create a Watch app, go up to the Xcode menu and select Editor > Add Target. Choose Apple Watch > WatchKit App. By using the WatchKit App template, it will generate everything you need to build a Watch app.
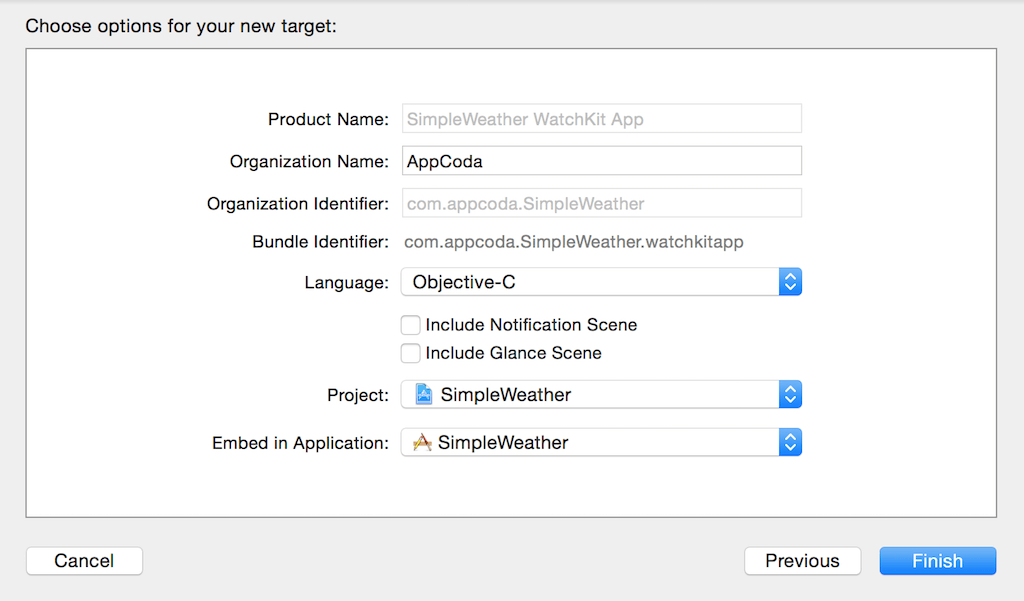
Deselect “Include Notification Scene” and leave other details as they are and then press finish.
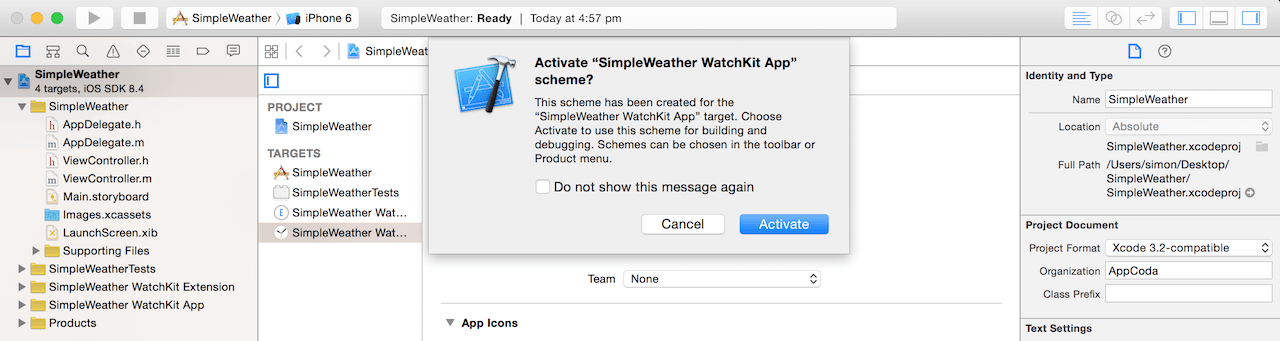
Now you will get a warning to ask if you want to activate the new scheme. Just accept it. You’ll then see two new folders: WatchKit Extension and WatchKit App.
Designing the UI
Next, we will start to design the user interface of the Watch app. To do that, you have to navigate to “SimpleWeather WatchKit App” and select the Interface.Storyboard File.
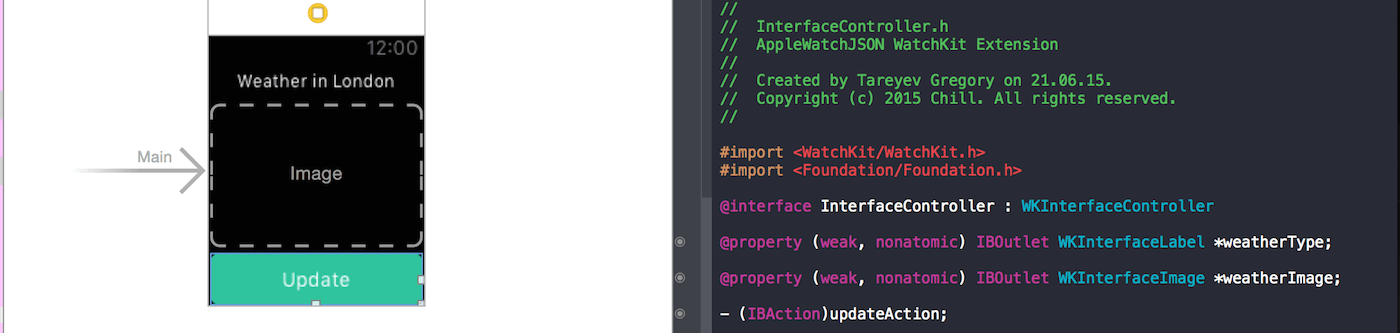
First, drag a label from the Object library into the Interface Controller. Name it “Weather in London”. You may need to decrease the font size. Then drag an image, followed by a button into the Interface Controller. You will see that the image and button are layout automatically and stacked vertically. Change the title of the button to “Update” and color to green. Resize the image so that it looks like the screen below:
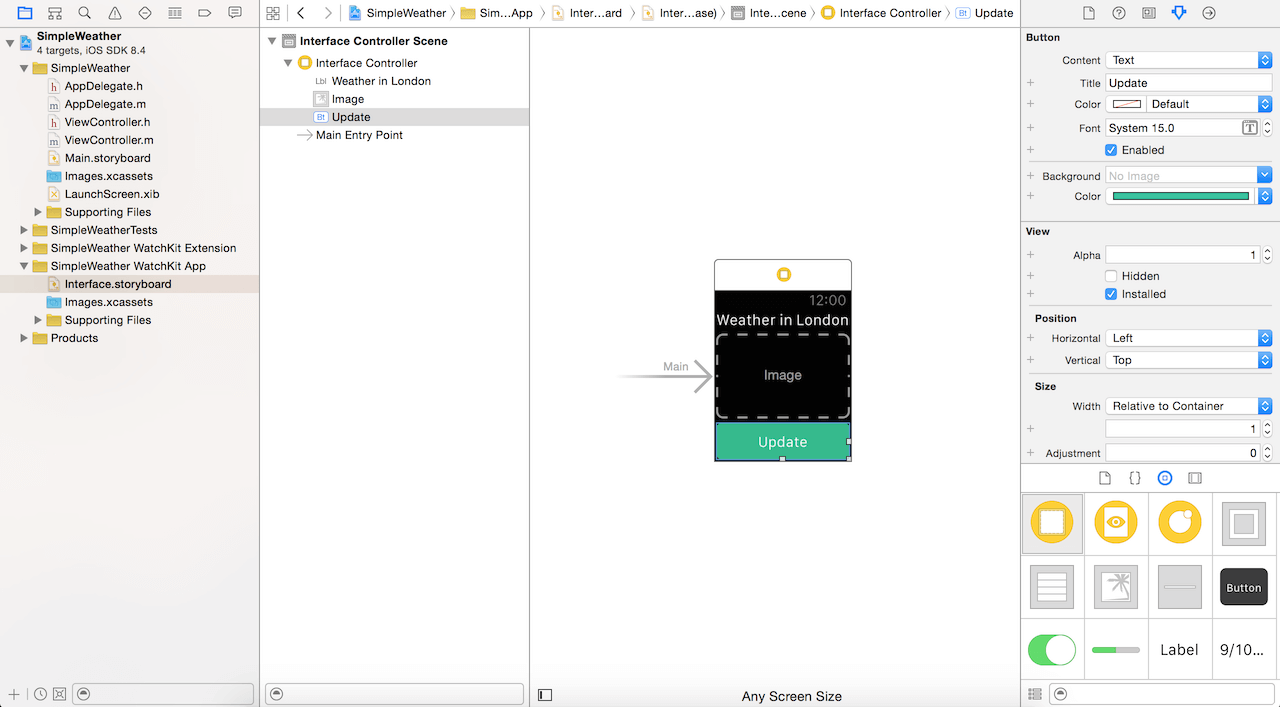
The label is used to show the weather type, while the image shows an illustration of the weather type. The Update button is the only element that interacts with the user, and is used for updating the weather information.
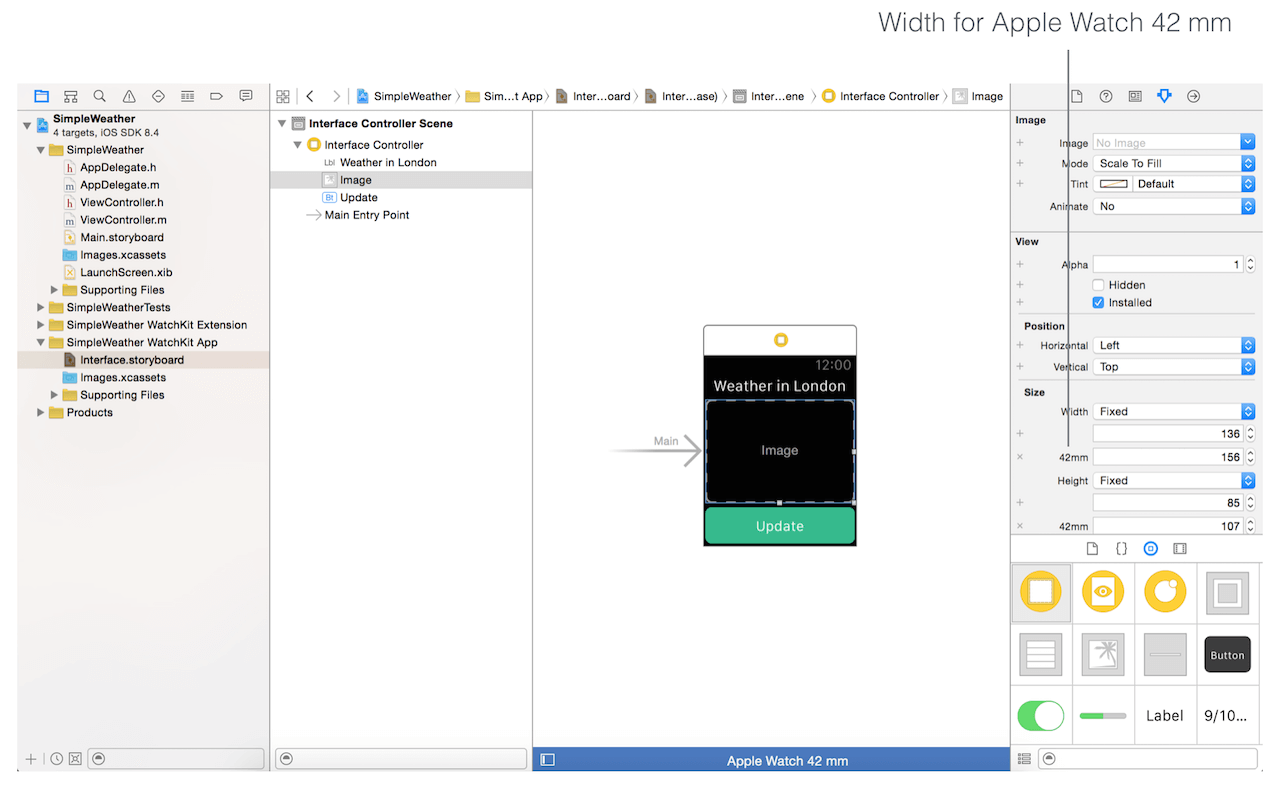
Interface Builder lets you view the design on different version of Apple Watch. By default, the Interface Controller is set to Any Screen Size. You can click the “Any Screen Size” button at the bottom of the Interface Builder and switch to Apple Watch 38/42mm. If you switch to Apple Watch 42mm, you will find that the image is not perfectly fit. Just resize the image and make sure everything is layout correctly. As you change the size of the image, Xcode automatically adds layout specialisation, just for Apple Watch 42mm.
Understanding JSON and OpenWeatherMap’s API
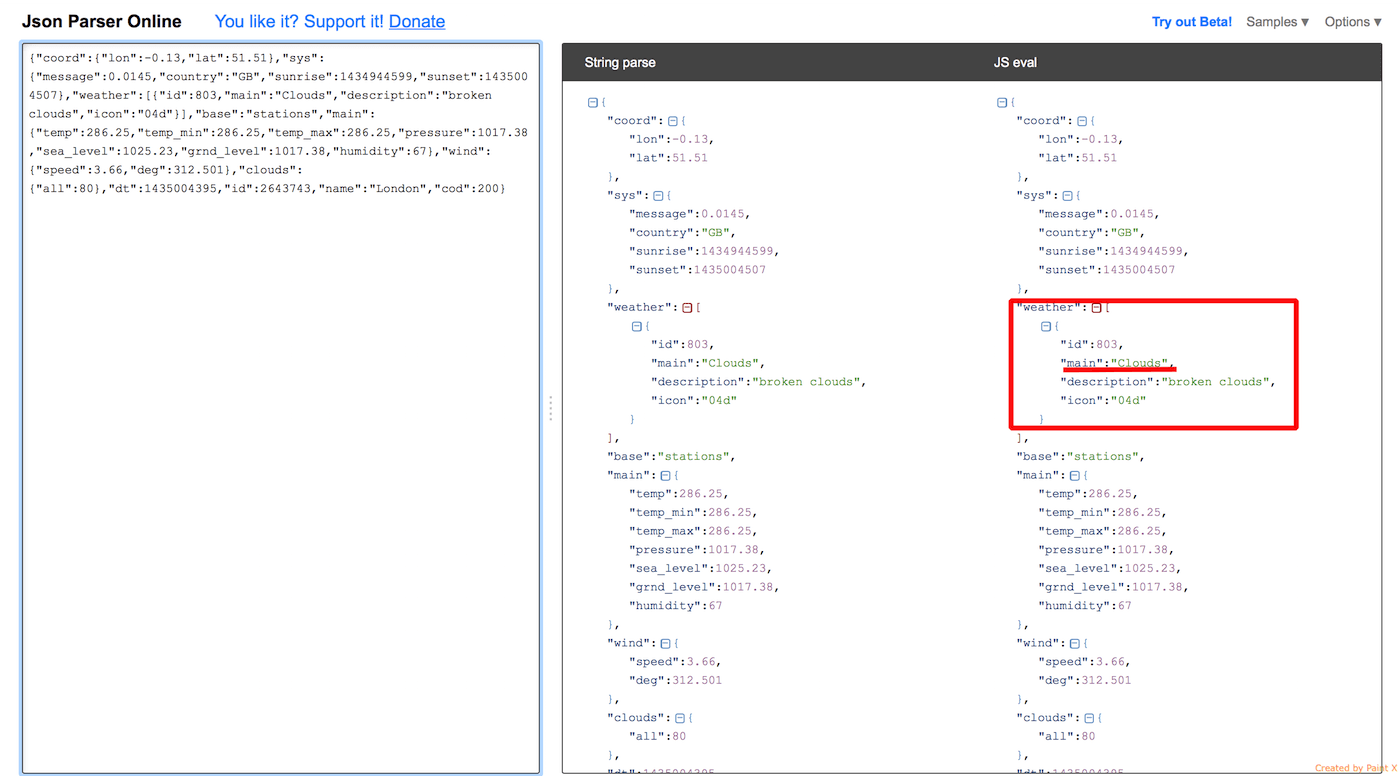
As mentioned, we use OpenWeatherMap’s API to get the weather data. To understand how it works, open this link: http://api.openweathermap.org/data/2.5/weather?q=London,uk. Copy the resulting text and paste it into http://json.parser.online.fr. You’ll see the JSON data, presented in a structured way. Here, what we are interested in is the weather type, i.e in the “main” key of the “weather” dictionary. This is the information we’ll display it on screen.
Now let’s see how we can parse the JSON data and present the weather information in the app.
To begin, open the Assistant editor. Control-drag from the label to your code in InterfaceController.h file. Name the outlet “weatherType” like this:
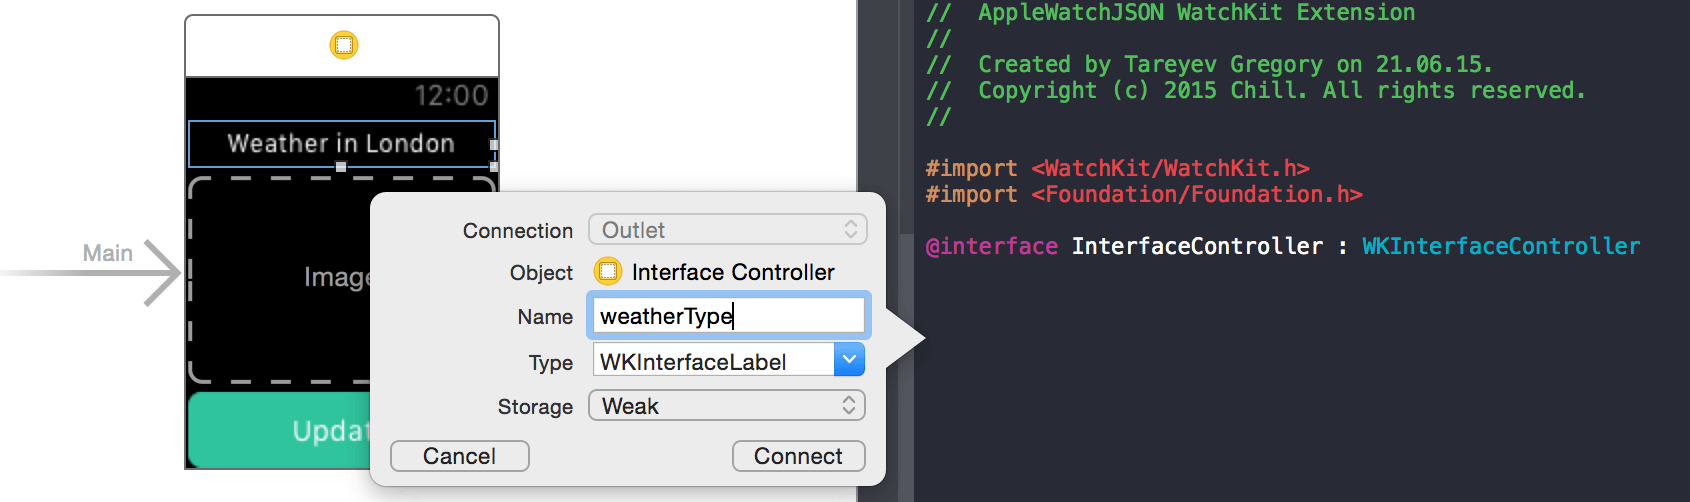
Repeat the same step for the image. Name the outlet “weatherImage” instead. When connecting the update button, instead of selecting Outlet, select Action and name it “updateAction”.
Let’s add logic in the updateAction method of the InterfaceController.m file:
- (IBAction)updateAction
{
    NSURLRequest* requestForWeatherData = [NSURLRequest requestWithURL:[NSURL URLWithString:@"http://api.openweathermap.org/data/2.5/weather?q=London,uk"]];
    NSURLResponse* response = nil;
    NSError* error = nil; //do it always

    NSData* data = [NSURLConnection sendSynchronousRequest:requestForWeatherData returningResponse:&response error:&error]; //for saving all of received data in non-serialized view

    NSMutableDictionary *allData = [ NSJSONSerialization JSONObjectWithData:data options:NSJSONReadingMutableContainers error:&error]; //data in serialized view
    NSString* currentWeather = nil;

    NSArray* weather = allData[@"weather"];

    for (NSDictionary* weatherDictionary in weather)
    {
        currentWeather = weatherDictionary[@"main"];
    }
}
In this method, we use NSURLConnection to make a synchronous request to the OpenWeatherMap API. You can use NSJSONSerialization to convert JSON to Foundation objects (e.g. NSDictionary). We parse the data and save the weather type in the “currentWeather” variable.
Next, we need to update the label and image. We can write something like this:
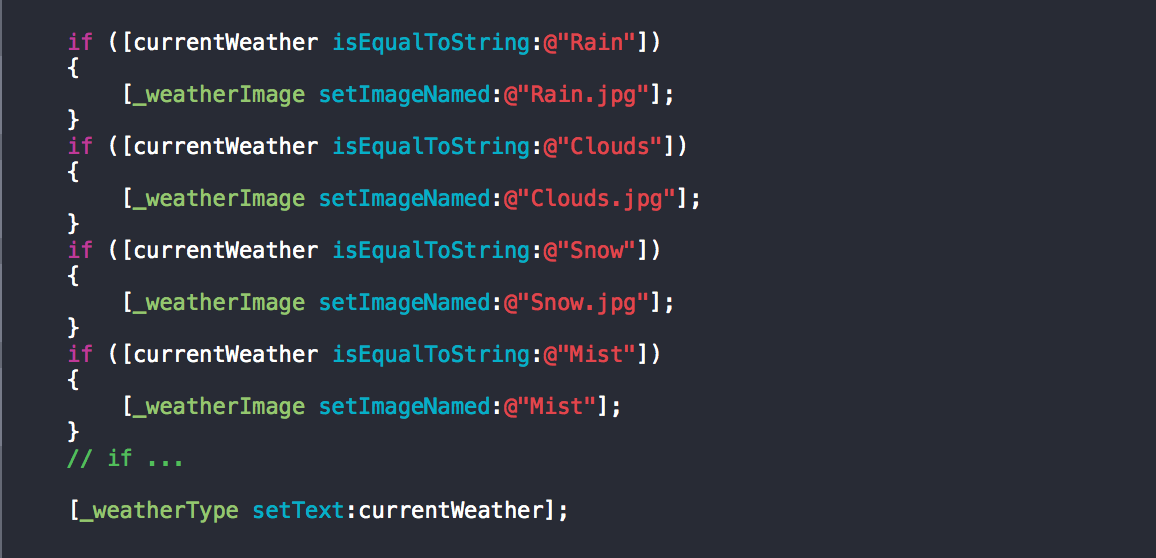
The code is not very pretty, isn’t it?
Instead of hardcoding the weather type, create a method like below, it’ll make your code more flexible.
-(void)setImageAndTextWithWeather:(NSString* ) weatherName
{
     // Use the weather type as the weather image name. For example, if the weather name is "Rainy", the image name is set to "rainy.jpg".

     // Set the weather type to the given weather name
}
Awesome! Now let’s turn the method into real code:
-(void)setImageAndTextWithWeather:(NSString* ) weatherName
{
        NSString* weatherNameWithoutSpaces = [weatherName stringByTrimmingCharactersInSet:[NSCharacterSet whitespaceAndNewlineCharacterSet]]; //delete potential spaces in JSON array
        [_weatherImage setImageNamed:[weatherNameWithoutSpaces stringByAppendingString:@".jpg"]];

    NSMutableAttributedString *customString = [[NSMutableAttributedString alloc] initWithString:weatherNameWithoutSpaces];
    [customString addAttribute:NSFontAttributeName
                         value:[UIFont systemFontOfSize:18]
                  range:NSMakeRange(0, [weatherNameWithoutSpaces length])]; //Making text more readable by creating a custom string

    [_weatherType setAttributedText:customString];
}
Finally, add this line to the end of the updateAction method:
[self setImageAndTextWithWeather:currentWeather];
Adding Images to the Asset Catalog
One last thing before running the app. Download this image pack, unzip it and add all the images to Images.xcassets under the SimpleWeather WatchKit App folder.
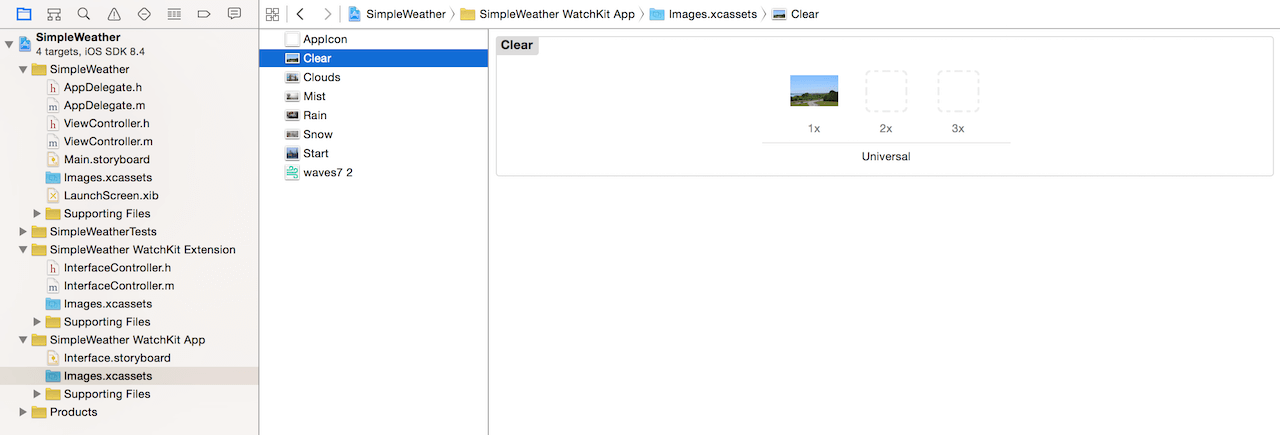
You are free to add more images with appropriate weather names. The app will work properly without any code changes.
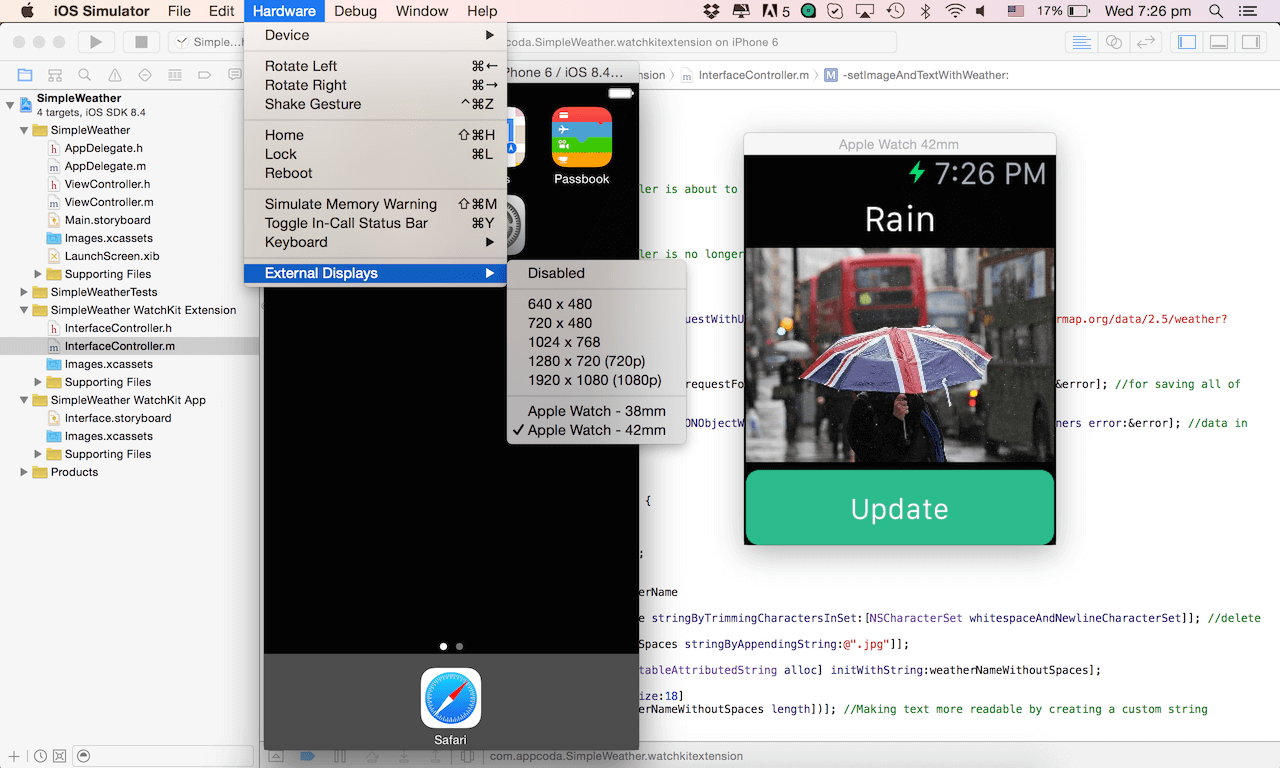
Test the App
That’s it! Now You can build and run the app in the Apple Watch simulator. To run the app, select the “WatchKitDemo WatchKit App” scheme and choose your preferable device. Then click the run button to test the Watch app. Optionally, you can change the display size of the watch simulator by selecting Hardware > External Displays > Apple Watch – 38mm.
Great! You’ve built a weather app for Apple Watch. What do you think about tutorial? Leave me comment and share your thought. I love to hear your feedback.
For your reference, you can download the final project here.
This is a guest post by Gregory Tareyev, a co-founder and iOS developer of Chill (iamchill.co).


