

As a developer, no matter whether your are a professional one, or you are just doing programming for fun, it’s definite that you are going to spend endless hours in front of your monitor until your project is ready. Feeling comfortable with the programming tools you use is more than important, as they consist of your virtual workplace and everything defines the working conditions. And when I say “everything”, I mean it: From the applications that you’ll choose to use as tools, down to the last possible setting you may apply to any of them. Undoubtably, a friendly environment can boost up your performance; a less friendly, non-customizable programming tool can have the exact opposite effects, as your productivity can be dramatically reduced. For example, you may feel that you are fed up working with the same “ice-looking” tool without being able to modify its display settings, or you feel eye strain because characters are too small, or because you have to use the mouse because setting your own key combinations isn’t possible.
So, hoping that I’ve made my point clear, let me make things more specific. As an iOS (and probably a Mac) developer, it’s quite possible that you use Xcode as your primary IDE (Integrated Development Environment) for developing your projects. I’m saying that is possible, because there are alternate applications you could use instead of Xcode. However, as most of developers use it, I’m going to stick to it. Anyway, Xcode is a powerful IDE, with numerous options and possibilities, and in its sixth version (in the time of writing) has nothing to be jealous of other IDEs. Each new version of it brings new features, making programmers’ lives easier. However, we all have to admit that Xcode is not perfect; It still has flaws, some of them quite annoying. But yet, it’s a great tool, and thankfully, Apple makes remarkable efforts to eliminate all flaws and bugs with every new update. In short, despite any flaws, Xcode is a great tool to work with.
Xcode, as any other programming tool, comes with some predefined settings. Its initial state serves the majority of the developers even from the first use, once it has been installed. With no doubts, Xcode has a great number of features, and for new developers or first-timers might look chaotic. Well, it’s a fact that not all options are for everybody. For example, if you don’t use versioning control, you’ll probably never going to use the respective feature. Or, unless you develop a really large project, you’ll probably never going to use bots for testing. But, no matter what you’re going to use or not, you must face one thing: Xcode is not made of stone, and it can be customized in many ways, so you can feel as comfortable as possible when working with it, and at the same time being extra-productive.
As you guess, this tutorial isn’t going to be like the ordinary ones, as there’s no new programming topic to discuss about today. We will deal with some more “lightweight” stuff, but trust me, I consider this as a really important topic that I’ve been wanted to write about a long time now. My goals in the next few parts include:
- How to change the look and feel of Xcode, so you never get bored working with it. Who said that colors are not for professionals?
- Practical tips that will increase your productivity and reduce the time you waste on implementing common programming stuff.
- A quick tour on some Xcode features that I personally consider as important ones; probably you’ll discover something new and helpful to keep for yourself.
In short, this tutorial deals with Xcode customization in aesthetic, programming and usage levels. Let me underline that there are definitely more than what I’ll show you next, but what we are about to cover here consist of the most usual tweaks (if I’m allowed to use the term) you’ll ever need to do. So, if you’re still interested in all the above, come onboard; we’re taking off!
Creating a Sample Project
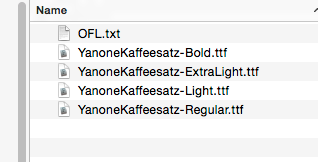
In this tutorial I’m not going to give you a starter project to work with, neither we’ll create a complex one from the beginning. We are just going to make a really simple project with two labels and an image view, so we can be able to apply what we’ll see next. However, you can download by clicking here a zipped file with some resources you’ll need as we move forward. When you download and uncompress that file here’s what you’ll find:
- Some fonts that you can optionally use. Alternatively, you can use or download your own, but we’ll talk more about that later.
- A file named FlatUI.clr that contains the colors of a custom palette.
- A PDF file with a vector graphic in it.
Now, let’s focus a bit to the simple demo project we must create here. As I said, nothing particularly difficult is going to be contained to our project, and besides that we’re not going to design a complex interface. We’ll see everything step by step, and let’s begin by creating it in Xcode.
In the first step, make sure to select the Single View Application option as the template of the project. Next, set the Swift as the preferred language and name the project whatever you like. I personally named it TipsTricks. Lastly, save it and get ready to do some setup.
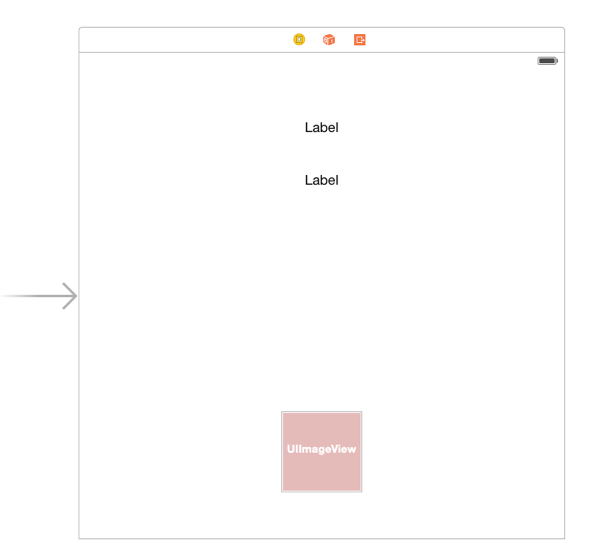
Now, in Xcode, go to the Project Navigator and click to the Main.storyboard. When the Interface Builder appears, grab two UILabel objects from the Object library and place them to the canvas. Set their frames as described here:
- First label: X = 16, Y = 70, Width = 568, Height = 40
- Second label: X = 16, Y = 140, Width = 568, Height = 40
After that, go and align the text to the center in both of them. Optionally, you can delete the default text if you want, but not necessarily.
Next, get a UIImageView object from the library and place it in the canvas. Set its frame as follows:
X = 250, Y = 440, Width = 100, Y = 100
Now, there are the constraints that must be set. As our subviews are pretty simple, we can allow Xcode to set the constraints it wants. So, go to the menu Editor > Resolve Auto Layout Issues > Add Missing Constrains in the All Views in View Controller section.

Eventually, the interface should now look like the next one:
Now, go to the ViewController.swift file, and declare the following IBOutlet properties at the beginning of the class:
@IBOutlet weak var label1: UILabel!

@IBOutlet weak var label2: UILabel!

@IBOutlet weak var imageView: UIImageView!
Back to the Interface Builder once again, just connect the IBOutlets to the proper subviews:
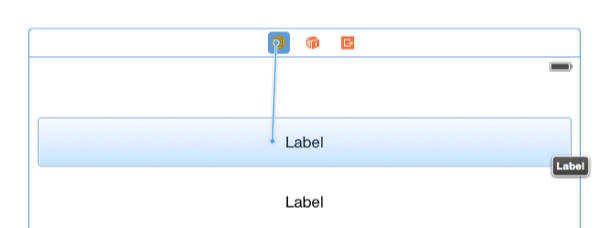
That’s all we need. This simple project is now at our disposal, so we can use it in the following parts.
Changing Themes
One of the most interesting things that might not look so important initially in Xcode, is the option to change the default theme, meaning the set of colors and fonts applied to the source editor. Even though it doesn’t sound like a big deal, actually it is a big deal. Using the same theme for a long period of time not only makes you get bored of it, so you eventually do not feel pleasant when working, but most importantly, if the font size has not been properly set, you will pretty soon experience negative impacts, such as eye strain or headaches. So, knowing how to change the font options, or how to apply new themes is something useful, but refreshing too. Personally, I like changing themes from time to time, and I find that really revitalizing when programming.
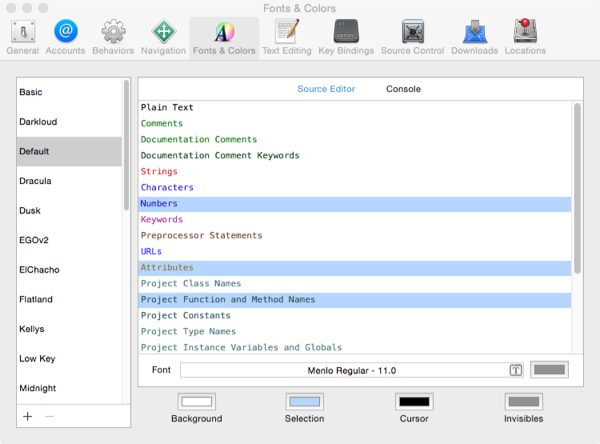
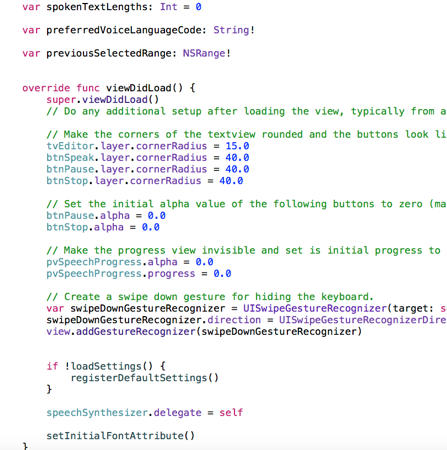
Let’s take things from the beginning. Initially, Xcode is installed with the following theme already set, which is the default one:
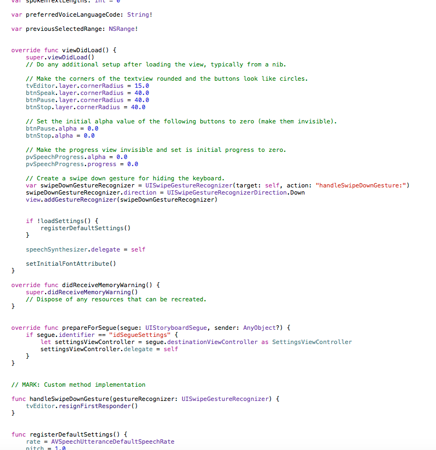
Note: The code presented above is part of my last tutorial’s demo project, regarding text to speech in iOS. Here I’m just using it as a sample, nothing more.
The above theme is good enough, without any disturbing colors. But, in my opinion, it has two problems: First, the white background can be really tiring if you work on low-light environment conditions, and second, the font size is too small that makes it really hard to work with in big monitors. So, let’s see how we can change some of its settings.
Initially, let’s open the Xcode Preferences, by going to the Xcode > Preferences… menu. In there exist various tabs with options and settings regarding almost every aspect of Xcode. What we care about now is the Fonts & Color tab. If you click it, here’s what you’ll see (well, you won’t see exactly the same, because I have some extra themes already added, but I’ll tell you about that in a while):
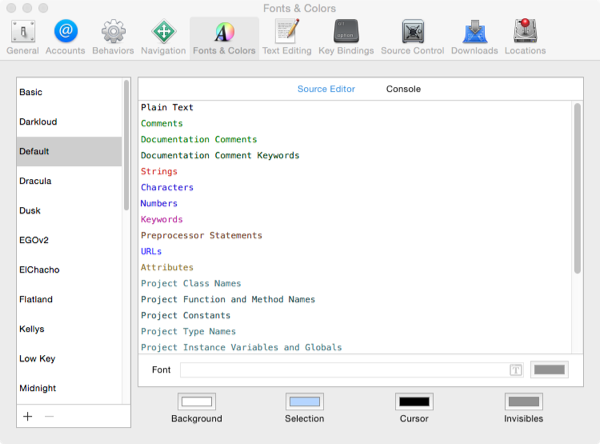
At the left pane you can find a list with the current themes, meaning combinations of text and background colors and fonts grouped as a single package. Don’t worry if your theme list is smaller than mine.
The right pane that occupies the most of the window’s area displays all kind of text variations (i.e., text for variables, commands, comments, string, keywords) and how they’re represented in the currently selected theme. In the above screenshot for example, you see that the keywords have a magenta color, while comments are represented with a light green color. Below that, you can find buttons for changing the editor’s background color (important!), as well as the colors of the selected text and cursor.
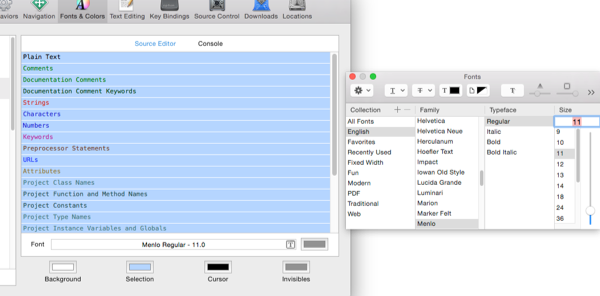
Obviously, you can modify any detail of the theme you desire. Besides the colors at the bottom, all you need to do is to select a text variation and then change its font or its foreground color. By pressing the Command key while clicking, you can select more than one type of text:
Usually, you are not going to want to change just a part of the source editor text settings. Most probably, you’ll need to change everything altogether and the easiest way to do that is first to click to any text type, and then press the Command + A keys on your keyboard. Once everything is selected, you can use the small T icon shown in the above image so you change the font attributes. Following this method for example, you can instantly make the font size bigger in the default theme:
Any new settings you perform are instantly applied to the source editor, so you don’t need to confirm or reject anything. However, you should be extra cautious when changing the editor’s settings, as you may end up with many changes that you don’t even remember how to revert back to normal. A safe way to do any changes you desire, is to first keep a copy of the theme you’re about to modify, and then proceed. Copying the current theme it just requires the effort of two clicks. At the left pane, click in the plus icon that exists at the bottom side, and then in the popover menu select the Duplicate ‘Theme_Name’ option (where Theme_Name is the theme’s name).
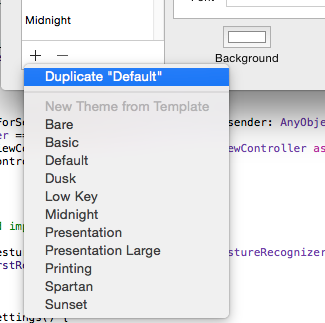
I advice you to always duplicate your themes before performing any changes. That way you don’t have to be afraid of changing something that can’t be recovered.
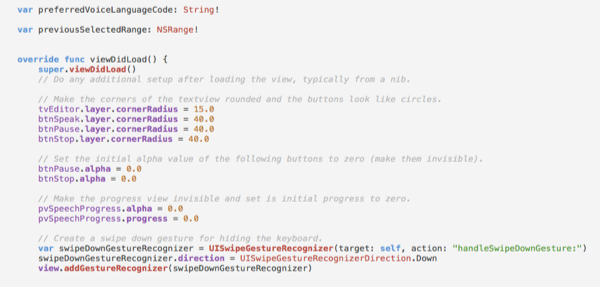
Xcode contains more than one theme, which you can try in turn and see their visual results simply by clicking to their names. Besides the default one, two other “popular” themes existing in Xcode are the Midnight and the Presentation. The first one that is shown below is good when working in low-light environment conditions, and the white background of the default theme can be really painful to eyes:
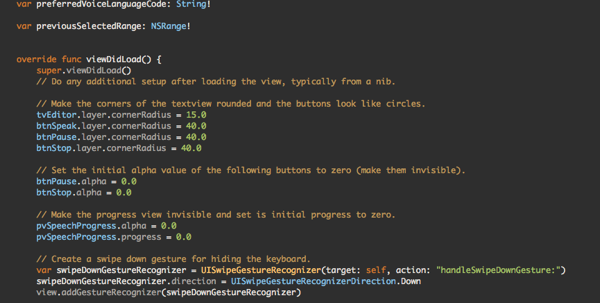
The Presentation theme is good to perform what its name suggests, to present code to other people that are not sitting right in front of your monitor, as it has a big font size:
Always remember that if you don’t like any setting to a theme, you can go and change it according to your personal taste.
Now, let me tell you how you can add extra themes to Xcode. The default themes are pretty nice, and if you have the time to play around with them you can end up with great results. However, there are people out there that have created collections of themes that you’d find pretty interesting. I won’t suggest you any specific website to download themes, I just prompt you to search for the “Xcode themes” term in the web. The first results you’ll get are more than enough.
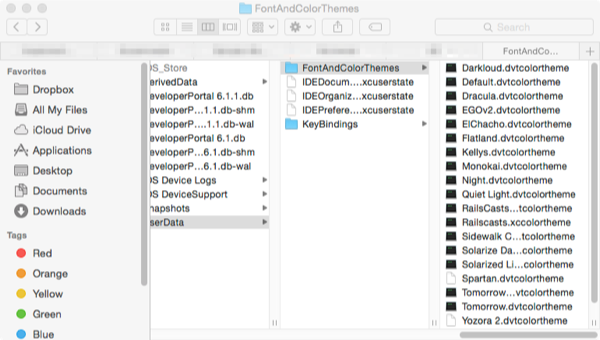
Once you download a themes package and you unzip it, here’s what you need to install them:
- First, in Finder navigate to the next path: USER_ACCOUNT/Library/Developer/Xcode/UserData/FontAndColorThemes.
- Copy – Paste the downloaded themes to that folder.
Two things to notice here: If the FontAndColorThemes directory doesn’t exist, you can create it with a simple trick; simply duplicate an existing theme in Xcode, and the directory will be created. Then you can proceed.
At second, make sure that you have the hidden files shown in your system. To do that, either search around the web for a solution, or type the next two lines in Terminal:
defaults write com.apple.finder AppleShowAllFiles -boolean true
killall Finder
After having finished with all the above, simply go to Xcode again, where you’ll find all the new themes there in your list. Go through them by selecting one by one, and see how they affect your source editor. Here are some samples:
Tell me, don’t you all feel happier developers now? The work is not anymore as boring as it used to be!
Adding Custom Fonts
A quite common scenario when developing applications is the requirement to add custom fonts to them. Using custom fonts can make you application distinguish among other, and give a more professional touch to your overall work. In case you have never happened to add a custom font to an app in the past, then the idea of doing such a thing might sound confusing and difficult. However, in this part you’ll witness how easy it really is to add a custom font to your project.
The first thing we need is a font to use (either a .ttf or a .otf), so visit Google Fonts or any other website you want to download one. Make sure that the font that you’ll pick has more than one style. For this example, I downloaded the Yanone_Kaffeesatz font (okay, I could find one with an easier name) which has four styles in total. These fonts can be found in the resources zip file you downloaded.
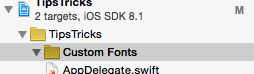
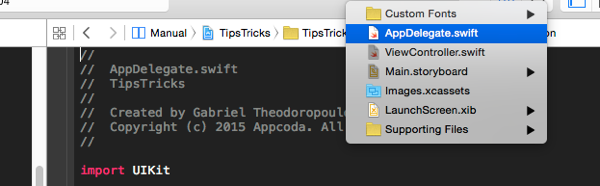
Now, let’s see the actual process. In Xcode, go to the demo project we created before, and in the Project Navigator create a new group named Custom Fonts (or whatever you desire). This way, you’ll manage to keep things more organized:
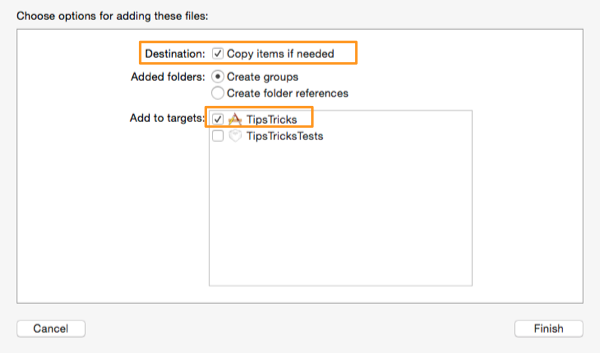
Now, you must add the fonts to the project, and you have two ways to do that: Either to open the menu File > Add Files to “TipsTricks”… and then select the font files, or to simply select all font files in Finder and drag-and-drop them under the Custom Fonts group in Xcode. I prefer the second way because is easier and faster. When the next window appears, make sure to select both the Copy items if needed checkbox, and the TipsTricks target, otherwise the fonts won’t be added to the project:
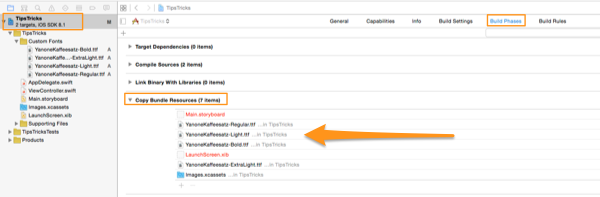
The fonts will be listed in the Project Navigator. At this point you should make sure that the fonts are included in the app bundle and you added them correctly, so go to the Build Phases tab of the target, and expand the Copy Bundle Resources section. In there, you should see the fonts’ names.
Once the fonts have been successfully added to the project, the next step is to let it know that it contains extra fonts, and that should provided them to us together with the system’s ones. This step will take place in the Info.plist file of the project. So, open it, and add a new item by going to the Editor > Add Item menu.
For the new item select the Fonts provided by the application key, which will turn the new item into an array. You must add the font file names as the items of that array, exactly as shown next. You’d better avoid typing the file names in case you make a typing error, unless they’re really simple. Here’s my .plist file with the new entries:

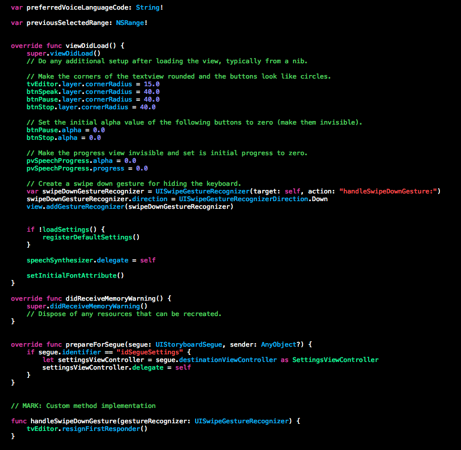
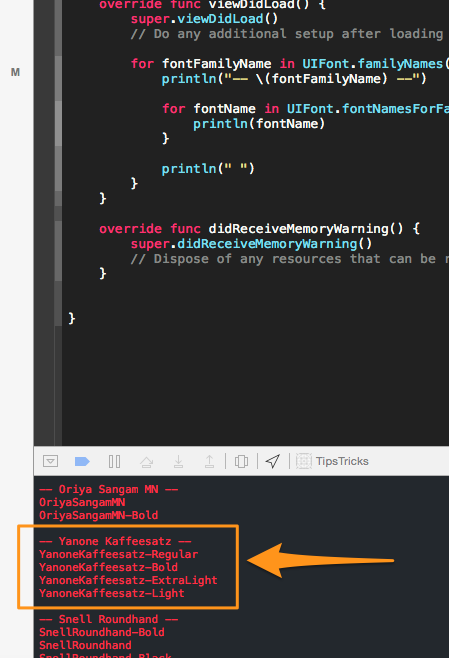
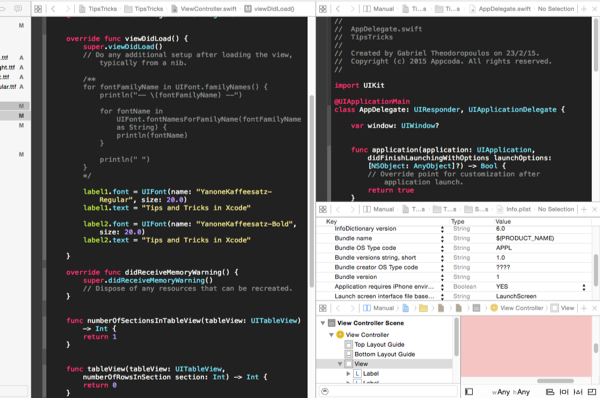
Now it’s time to find what the real font names are. And when I’m saying real, I mean the font names that we’ll use in code. Obviously, we can’t use the font file names, as these are just… file names. We need to determine the actual font names. We’ll manage this by writing a small part of code, and then we’ll see in the debugger all the supported font names. Open the ViewController.swift file, and go in the viewDidLoad method. In there, add the next lines:
override func viewDidLoad() {
    ...

    for fontFamilyName in UIFont.familyNames() {
        println("-- \(fontFamilyName) --")

        for fontName in UIFont.fontNamesForFamilyName(fontFamilyName as String) {
            println(fontName)
        }

        println(" ")
    }
}
In the above snippet at first we get each font family name and we display it to the console, surrounded by minus (-) symbols. Then, for each family name we get the supported font names, and we display them too. If you run the above the output will be similar to the next one, where you can find (and keep note of) the actual font names we are interested in.
Great!
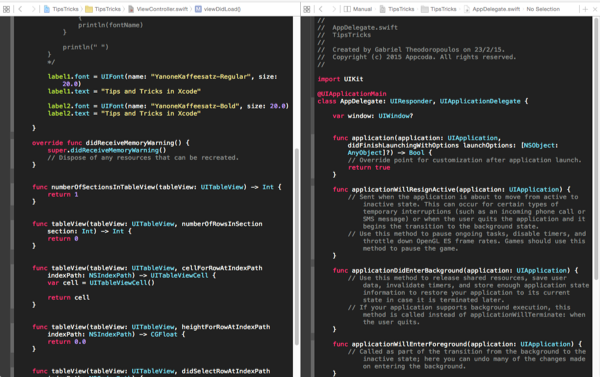
Now that we know of the real font names, let’s use them. In the viewDidLoad method of the ViewController.swift file, add the next snippet. Feel free to delete or comment out the previous part of code:
override func viewDidLoad() {
    ...

    label1.font = UIFont(name: "YanoneKaffeesatz-Regular", size: 20.0)
    label1.text = "Tips and Tricks in Xcode"

    label2.font = UIFont(name: "YanoneKaffeesatz-Bold", size: 20.0)
    label2.text = "Tips and Tricks in Xcode"
}
As you see, the names I used above match to those listed in the output shown in the previous image. Of course, if you’re using another font, then make sure to replace the above font names and set the proper ones.
We can immediately look at the result of all this effort if we simply run the app now. Here’s the text in the two labels using the custom fonts in my Simulator:

Code Snippets
One of the Xcode features that I am really fond of and I find extremely useful (and it probably consists of my favourite part in this tutorial), is the capability to create and re-use code snippets at no-time. With that feature an important amount of time can be saved, as being consumed to non-important tasks can be avoided significantly. Think, for example, how many times you have written the minimum required tableview delegate and datasource methods, and felt like wasting unnecessary time trying to remember the syntax of the methods or how they are defined. Or, how much time you’ve lost trying to find in the web how to access the documents directory of the app, every time you had to use that path in your projects. Both of these tasks are commonly used, and they consist of standard programming techniques. So, why not to have some re-usable code, ready to be applied whenever you need it, that you’ll keep and manage in Xcode?
Xcode by default contains many pre-defined code snippets that you can use in your project. All you have to do, is to open the Utilities pane while you’re in a source code file, and then to show the Code Snippets library.
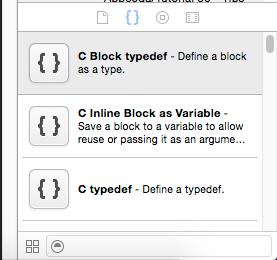
In the above list you can find a great number of standard snippets, such as class definitions, if-else statements, switch statements, loops, and a lot, lot more. To be honest at this point, the number of snippets that you’ll be using is by far less in comparison to those already existing in the library. Not all of them are for Swift, or Objective-C. You can also find snippets regarding C and C++. There’s just one thing to remember, and that is the proper context of each snippet. For example, a class definition snippet cannot be added to the body of a method, or a for loop cannot be added straight to the body of a class, outside a method. That’s the only thing you should keep in mind, but even if you don’t, compiler will be there to remind it to you.
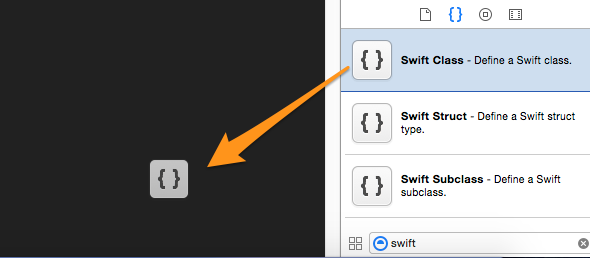
To use a pre-made snippet in your code, you only need to drag-and-drop it in the source editor, just like it’s shown in the next image:
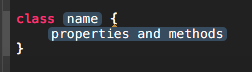
Instantly, the snippet is placed right exactly where you order it to, and it’s waiting for you to set the missing parts:
The interesting part though is when you create your own snippets. Let’s how this is done through an example, where we’ll set the code needed to get the path to the documents directory as a snippet. In the ViewController.swift file, create a new method as shown below:
func fakeMethod() {

}
In the above method add the following single line that does the job:
func fakeMethod() {
    let documentsDirectoryPath = NSSearchPathForDirectoriesInDomains(.DocumentDirectory, .UserDomainMask, true)[0] as NSString
}
Now, select that line (just the line, not the entire method), click it and drag-and-drop it in the snippets library. A popup window like the following one should appear:
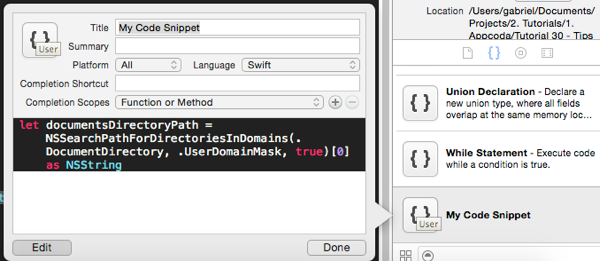
In here you can specify some details of it, and that’s all. Let’s see those details. First of all, at the bottom area of the window you can see the code itself, and you can make any changes if you want. In the upper area you can set the following:
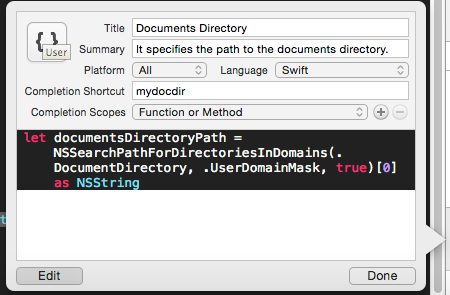
- Title: Here, you can set a proper title for the snippet. In this case, let’s name it Documents Directory.
- Summary: This is a short description regarding the snippet. Let’s set the It specifies the path to the documents directory. value.
- Platform: Choose the appropriate platform, either iOS or Mac OS. However, it doesn’t matter if you just leave the default value.
- Language: In this menu you specify the language of the snippet. By default, the current language is selected.
- Completion Shortcut: This is a very useful field, because you can specify a unique keyword that every time you type in the editor, it will be replaced by the snippet. Let’s set the mydocdir value.
- Completion Scopes: You actually define here the level of the snippet, meaning if it should be placed in a class body, in a method body, etc. You can see all available options if you click to the field, but in this case the default one is the proper one (Function or Method). By using the plus and minus buttons, you can add or remove scopes.
The next image shows all the above options for our brand new snippet:
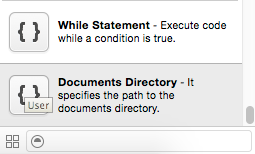
Once you’re finished, click on the Done button. The snippet now resides in the library, having an indication on it writing User, meaning that it’s a custom one.
If you double click on it, the popup window will be displayed again. By clicking on the Edit button you can change the above settings at any time.
Now, go to the fakeMethod() method and delete its content. Then, drag and drop the custom snippet in it. The code is there! Cool, right? But things can get even better. Delete once again the method content and start typing the mydocdir keyword, just as it’s shown next:
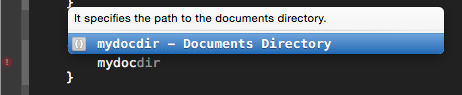
Once Xcode auto-suggest it to you, hit the Return key. The keyword gets replaced instantly by the custom code we added to the snippet. Amazing! Just think how much time you can save with that! What you only need is to create general snippets for the most common tasks you perform, and you’ll never have again to type anything.
Right next you’re given an animated graphic where the custom snippet is used in both ways:

Before we move to the next part, let’s create one more snippet; one that I appreciate a lot, because it really gets me out of the trouble to keep writing the tableview-related methods. If you want, you can delete the fakeMethod() method, and then add the next method definitions to the ViewController class:
func numberOfSectionsInTableView(tableView: UITableView) -> Int {
    return 1
}


func tableView(tableView: UITableView, numberOfRowsInSection section: Int) -> Int {
    return 0
}


func tableView(tableView: UITableView, cellForRowAtIndexPath indexPath: NSIndexPath) -> UITableViewCell {
    var cell = UITableViewCell()

    return cell
}


func tableView(tableView: UITableView, heightForRowAtIndexPath indexPath: NSIndexPath) -> CGFloat {
    return 0.0
}


func tableView(tableView: UITableView, didSelectRowAtIndexPath indexPath: NSIndexPath) {

}
Next, select all of them, and drag them to the snippets library. In the popup window, set the following options:
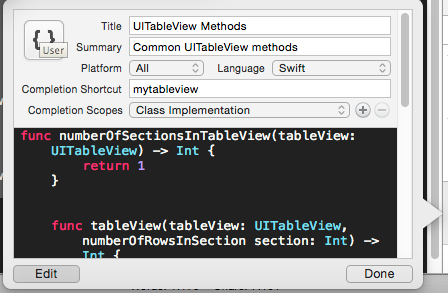
The keyword here (the shortcut) is called mytableview.
Delete all the above from your editor, and just type keyword. The methods are instantly back! How cool is that?
Of course, you can add more methods in the above collection, or split them one by one as standalone snippets. Also, feel free to change the shortcut names. Now you know the way, so take advantage of it!
Custom Color Palettes
Now that we have left something purely programming behind us, let’s keep going by focusing on an entirely designing aspect. In this part I’ll show you how to add and create new color palettes, so you have more options at your disposal when designing in Interface Builder. Of course, I must note that the new palettes that we’ll add do not affect just Xcode; they’re going to be available to any application installed in your system that provides options for changing text or background color. However you don’t have to worry if you don’t want to keep them. I’ll tell you how to remove them as well.
So, my goal here is to show you three ways of adding extra colors to your digital life, where in the first two cases we’ll download some stuff, while in the third method I’ll both show you the way of creating a new palette. The colors of that new palette exist in the FlatUI.clr file. Let’s get started.
The first one, is the Skala Color palette, which is provided for free to everybody. There’s an installer that must be downloaded, which you can find here. Just click to the Free Download button, and wait until the download is complete.
Unzip the downloaded file, and double click to the Skala Color Installer package to initiate the installation. In the window that appears, click on the Install button as shown next.
The installation won’t last more than a second. When it’s over, click on the Quit button to exit installer. At this point, you must quit Xcode and re-run it, so it’s able to see the new palette. When Xcode is open again, go to the Main.storyboard file and then click on any view or subview you want, as long as there’s an option for changing either a foreground or a background color. For example, just click to the main view of the View Controller scene, and then show the Attributes inspector in the Utilities pane.
Now, click on the background color so the color palettes to be displayed. Next to the default ones, you’ll find the Skala palette too!
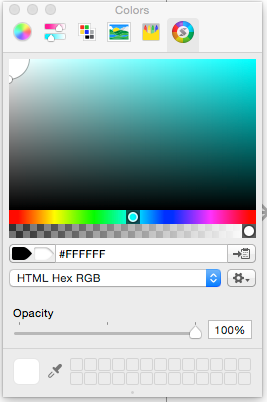
If you play a bit with it, you’ll find out that is a really powerful and handy palette. By dragging the slider in the middle, you can move through colors by changing the hue value. While sliding, another color bar appears on top of it for fine-tuning the current selection. Move the circle to the upper window area to so you can go through all possible variations of the currently selected color. If you don’t want to use the slider or the circle to pick a color, but you want to use a color value instead, you can do that too. Just select the proper color representation from the list in the center of the window (the one that initially has the HTML Hex RGB value selected), and type right above it the actual color value.
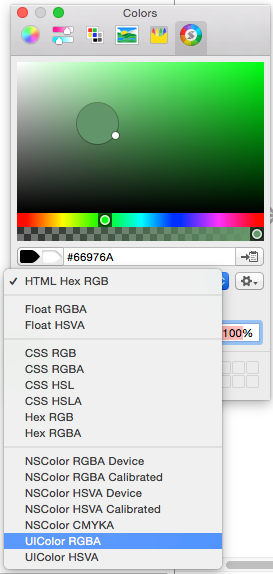
If you notice, you’ll see that you can even set the values of a UIColor directly!
So, now you have a new, powerful palette in your collection; use it to have even better results while designing your interface.
Let’s move forward now, and let’s meet a new palette. The one we’re about to see is simple, but in my opinion really useful if you deal with hex colors, or you find colors on the web expressed in hex format and you don’t want to do conversions all the time. The palette we’re talking about now is named Hex Color Picker, and you can find it here.
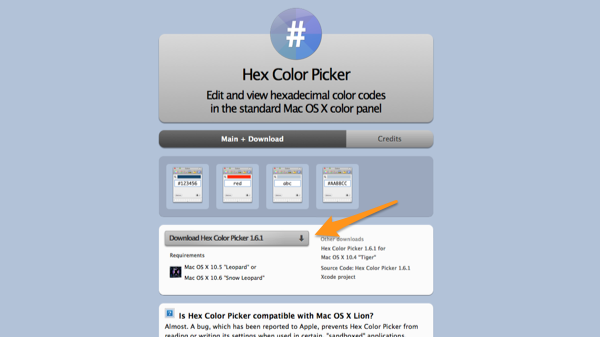
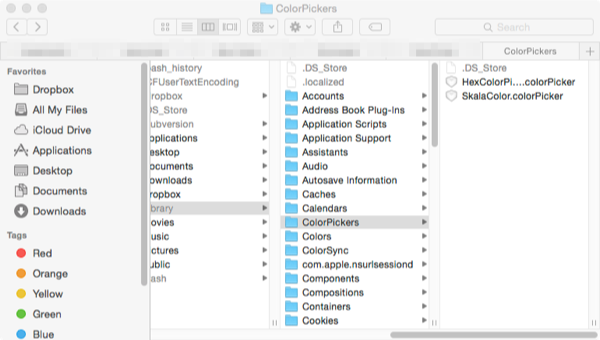
As you previously did, use the download button to get the color picker. Once you acquire the compressed file, unzip it and go to the newly created directory. There you’ll find Readme files in various languages, and a file named HexColorPicker.colorPicker. Select that file and copy it. Next, in Finder again, go to the following directory:
UserName/Library/ColorPickers
where UserName is your account’s name.
When you open this directory just paste the file. Normally, you should see the following two:
Now, before we proceed, let me say that if you want to remove either the Skala palette, or the current one (or both), you just have to remove the respective file (or files) from this directory. Also, if you can’t see the Library directory, then you have to make your hidden files visible as it was described in the Changing Themes part of this tutorial.
Quit and re-open Xcode once more. Go again to the Interface Builder, and click to the default view of the View Controller scene. Click on the background color so you open the palettes’ window, and there you’ll find the new color picker!
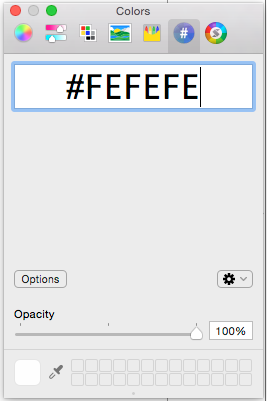
As you see here, the interface of the picker is much simple compared to the Skala’s one. However, as I previously said, if you find in the web colors in Hex format and you don’t want to do conversions, this is the tool you want. Just paste or type the hex value of a color, and it will be instantly applied. No need to convert to RGB or anything else!
In the last step of this part we’re not going to download any color picker at all. Instead, I’ll show you two things: First, how to have immediate access to some flat UI colors and copy their values with just a simple click, and second, how to create a new palette using these colors.
So, as we did before, let’s begin by visiting another website, this time the Flat UI Colors.

The first thing you have to do here is to click on the Choose Format dropdown, and select the color representation that best suits you:
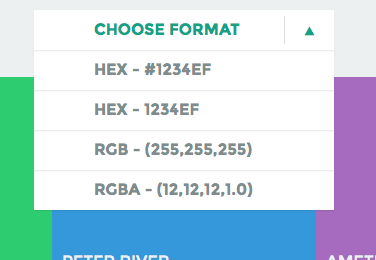
For example, here let’s select the first Hex option. Next, click on any color you want (and you’ll see a nice message telling that the color has been copied), and return to Xcode. Use any of the two new color palettes you have, and paste the color as a Hex value. Instantly it will be applied to the selected view! Of course, the you can copy color values and paste them to any other application you want, not only Xcode.
Note: In case you’re using Safari and no color value is copied when you click on it, then you have to use another browser.
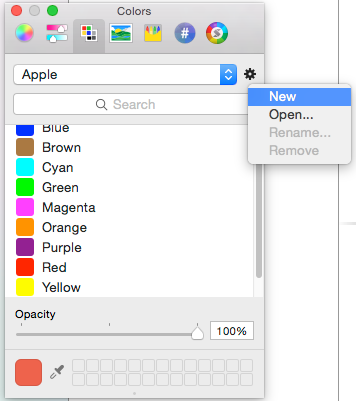
Now, let me present to you how to create your own color collection, either using the colors from the Flat UI Colors website, or using any other colors you want. In Xcode (or any other application that can display the color palettes, but preferably Xcode) make sure you have the color palettes window on. Click on the Color Palettes tab, and then click to the small gear icon next to the current palette’s name. In the small menu that appears, select the New option:
A new palette will be created, titled Unnamed. To rename it, use the gear icon again, and select the Rename… option. As you’ll notice, the currently selected color is set automatically in the new, custom palette. If you like it, keep it; if not, just use the minus button right above to delete it.
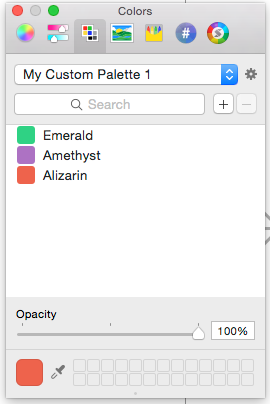
The next step is to add the colors you want in your collection. Use any other picker you want to do that, or copy a color from the web. What I did during the writing this tutorial, was to copy colors from the Flat UI Colors website, and paste them to the Hex picker (we added earlier). Assuming that you follow the same way, after having pasted a new color value to the Hex picker field, go back to your custom palette. Then, simply click to the plus (+) button, and the selected color will be added to the collection. Here’s a sample of my custom color palette:
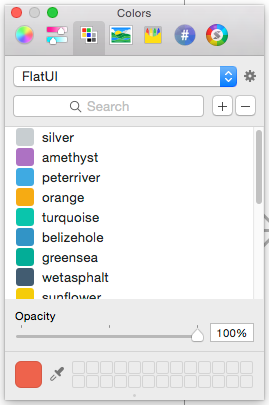
In the resources zip file that comes with this tutorial, there’s a file named FlatUI.clr. It contains all Flat UI colors as a color palette. To use it, you just have to go to the UserName/Library/Colors directory, and paste it there (once again, replace the UserName with the one of your account in your computer). Once you do that, you can find it in Xcode among the other color palettes:
Using Vector Graphics
Creating artwork for your application is part of the development process. With no doubt, graphics make apps more alive and attractive. Up to iOS 7, for every image asset used to an application they were required two copies of the graphic to exist in the project: One at normal size (@1x), and one at double size (@2x), so the same graphic to be properly displayed in retina and non-retina screens. With the iPhone 6 and 6 Plus coming, things became more demanding, as a copy at triple size (@3x) of the original image is required to be provided. Creating image assets at all three sizes, especially for applications that use many of them, can be really tiring and troubling job, but as it seems, there’s no other way. Or is it?
Since Xcode 6, it’s possible to use vector graphics instead of images scaled at all sizes, and that fact makes the artwork creation much easier. If you want to read what vector graphics are, visit this website, or search around the web. The great news here is that when using vector graphics for the artwork, there’s no need to provide three copies of the same image in three different sizes. One file is only required, and Xcode does the hard work of “exporting” the image in the proper sizes.
In general, using vectors instead of normal images involves two steps:
- To export the vector graphic as a PDF file using your favorite vector editing program (Sketch, Photoshop, Illustrator, Inkscape, something else).
- To apply a few settings in Xcode.
Let’s see the above in a bit more details. I won’t discuss how to export the vector graphic as a PDF, as this is an application-dependent task, and I’m not aiming to focus on that. If you don’t know how to do that, just do a quick search on the web, and you’ll find interesting results. In any case, if you’re about to create your own vector graphic, make sure to keep its size to the default scale (@1x), and don’t do any scale-up at @2x or @3x sizes.
In action now, I’m going to use the following image for the purposes of this tutorial:
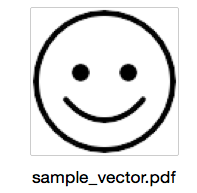
You can find the respective PDF file in the resources collection you downloaded in the beginning and use it as a sample.
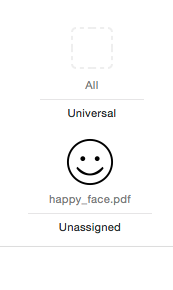
Now, turn to Xcode and click to the Images.xcassets group:
![]()
Then, select the PDF file in finder, and drag it and drop it in Xcode. As you see, Xcode creates a new image set and places the image in the @1x slot, while the other two remain empty:
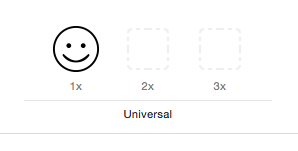
Select the image set by clicking to the image, and then open the Utilities pane and select the Attributes inspector. Various options will appear there, and the most important is the field titled Types. Click on the drop down menu, and select the Vectors option. The image set will change to this:
Drag and drop the image to the upper empty slot, and click it to select it again. Now check once again the options to the inspector, and make sure that they match to the following:
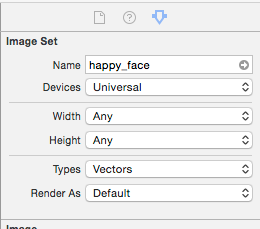
Of course, you could change the target device, but leaving it to Universal can keep you out of extra configuration.
So, that was all. Everything that was described above consist of the minimum setup you need to do, so let’s give it a try now. Go to the ViewController.swift file, and add the next line to the end of the viewDidLoad method:
override func viewDidLoad() {
    ...

    imageView.image = UIImage(named: "happy_face")
}
Run the app now either in real devices having different kind of screens (retina and non-retina), or do so using the Simulator. As you see, the image is being displayed perfectly at all screen types and sizes. Well done!
Managing the Source Code
So far we have seen various things that can improve your productivity, and how you can make your work in Xcode easier, more interesting and more pleasant. In this part I’m not going to show you something tricky or new, but I want to focus on the way you can manage the source code and your files in a project. Editing code in multiple files, especially in large projects, can lead to a great hassle, and going from one file to another can become a repeated and confusing process. Undoubtably, being able to have easier access to the source files you use the most not only would help in keeping your sanity, but would also save you time from trying to locate the proper file all time in the Project Navigator.
Fortunately Xcode is really assistive towards that direction, as it offers two major ways to have quick access to multiple files. Probably you already use them, but if not, the next lines definitely will give you some extra ideas for the future when writing code.
So, the first one is to use tabs. These are similar to tabs in Safari or any other browser. A tab can be added in Xcode super-fast, if you simply press the Command + T keys combination in your keyboard. By default, the currently edited file is reproduced in the new tab, so what you only have to do is to select that tab, and then select the file you want to be displayed in the Project Navigator. Obviously, you can have several tabs so you can move between the files you mostly use, but don’t exaggerate because you’ll end up trying to find what the tab you need is. The next image illustrate the use of tabs:
![]()
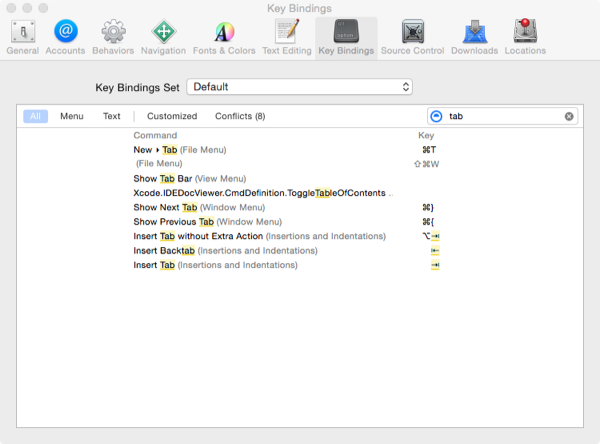
Moving from tab to tab can be achieved not only by using the mouse, but keys too. All you have to do is to press the Command + Shift + ] keys combination to move to the next one, and the Command + Shift + [ to move to the previous one. The key combinations I present here are the default options in Xcode. However, you can change them and set other combinations if they don’t fit you. This can be done in the Xcode Preferences window, under the Key Bindings tab. In the search field you’ll find there, write the “tab” word so you avoid scrolling up and down until you find the respective rows. Then, select the action you want, and set a new key combination. Just make sure that this new combination doesn’t conflict with another one.
Generally, tabs are great for computers with relatively small screens (for example, laptops). In this case you can have the files of interest easily accessible, while their content occupy the most of the screen area (or all if you want). However, in cases of bigger screen sizes, then the following approach might be better than tabs.
That approach relies to the use of the Assistant Editor. With it, you can have more than one source (or other) files open at any given time. The assistant editor can be turned on and off using the middle button in the following toolbar that you can find in Xcode.
Definitely, the assistant editor is not something new to you. On the contrary, I guess that it’s more than familiar, as it is usually used to display the respective class of a view controller scene that is being edited in the Interface Builder and to make various connections (IBOutlet properties and IBAction methods). However, assistant editor is also handy to display source code next to the normal editor, so you can have the contents of two files side by side. Additionally, if you turn off all side panes (Navigator and Utilities), the screen width is divided and given to both editors.
Okay, that’s great, and you already knew about that, but things get even better, as it’s possible to have many assistant editors open simultaneously. All it takes is to click to the plus button existing in the upper-right corner of the default assistant editor, and a new one will appear right below. Generally, to create a new assistant editor simply click to the plus button of an existing one, and to remove one, just use the X button next to the plus one.
Choosing the file that will be displayed to an assistant editor can be done using two different ways: The first one, is to use the dropdown options existing on top of each editor, as shown next:
The second, ultra-fast and great way is to hold down the Option (Alt) key in your keyboard, and then click to a file to the Project Navigator. The selected file contents will be instantly displayed to the assistant editor. However, and here’s one more important useful detail: If you have multiple assistant editors on, then the Option + Click combination won’t open directly the clicked file, instead will make Xcode show you a window similar to the next one:
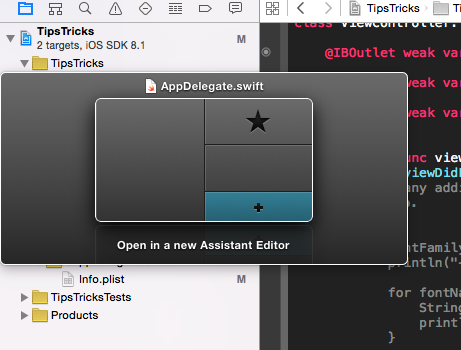
In that window you can select the editor to which the file contents will appear. If you click to the bottom-right part with the thick plus icon, a new assistant editor will be displayed containing the chosen file. Finally, if the file that you clicked on is already being displayed to an editor (or more), a star icon will be displayed to the respective area.
If you want to customize the process I just described, you can use the Navigation tab of the Xcode preferences so as to specify the behavior of Xcode when Option + Clicking to a file, or when you double click to one. By default, when you double click to a file, it is displayed to a new window.

Lastly, I’d like to say a few words about folding and unfolding your code. When the source code in a file becomes really big, then it’s useful to “hide” the implementation of methods that you don’t edit often, or those that you’ve already finished working with. By doing so, it will be easier to move up and down in code, and ultimately to locate the various code places you should edit. To fold a method, meaning to hide its contents, at first make sure that the cursor is somewhere in the method’s body and then either use the Option + Command + Left Arrow keys, or go to the Editor > Code Folding > Fold menu. To unfold it, press the Option + Command + Right Arrow keys, or go to the Editor > Code Folding > Unfold menu. Here’s how a folded method is shown in Xcode:
![]()
Of course, you can fold and unfold all methods of a class at once. All you have to do is to add the Shift key to the combinations I said about right above, or use the Editor > Code Folding > Fold Methods and Functions (or Unfold Methods and Functions) menu. Trust me, in large-scale projects and in source code files with thousands of lines, folding parts of code can make your life much simpler and your work much efficient.
Summary
By exceeding Xcode’s limits and using other than the default settings, programming for iOS and Mac OS can become a lot more interesting. No matter you’re developing applications for yourself or for others, no matter if you’re a part of a team or not, setting your own personal style in the programming environment that you spend many hours of the day into will allow you to work under better conditions, and definitely this fact will revitalize you. After all, customizing Xcode, as any other application on computer, is surely a pleasant occupation. Besides that, all guidelines, tips and tricks you found in this tutorial, from the smallest one up to the most important one, can help you in your everyday life with Xcode. There’s no doubt that there are more things than those I chose to present here, waiting for you over there to discover them. Closing, if any of the discussed topics makes your experience with Xcode better, feel free to share it with us. Happy customizing!
Credits: Special thanks to my good friend Mathieu Jeannot for creating and sharing the FlatUI.clr file with me, as well as for his valuable guidance upon design aspects! His contribution to the making of this tutorial has been truly vital!


